While configuring firewall rules at Profile and Edge level, you can select the existing object groups to match the source or destination. You can define the rules for a range of IP addresses or a range of TCP/UDP/ICMPv4/ICMPv6 ports, by including the object groups in the rule definitions.
At the Profile level, to configure Firewall Rule with Object Group, perform the following steps:
Procedure
In the SD-WAN service of the Enterprise portal, go to Configure > Profiles. The Profiles page displays the existing Profiles.
Select a Profile to configure a firewall rule, and click the Firewall tab.
From the
Profiles page, you can navigate to the
Firewall page directly by clicking the
View link in the
Firewall column of the Profile.
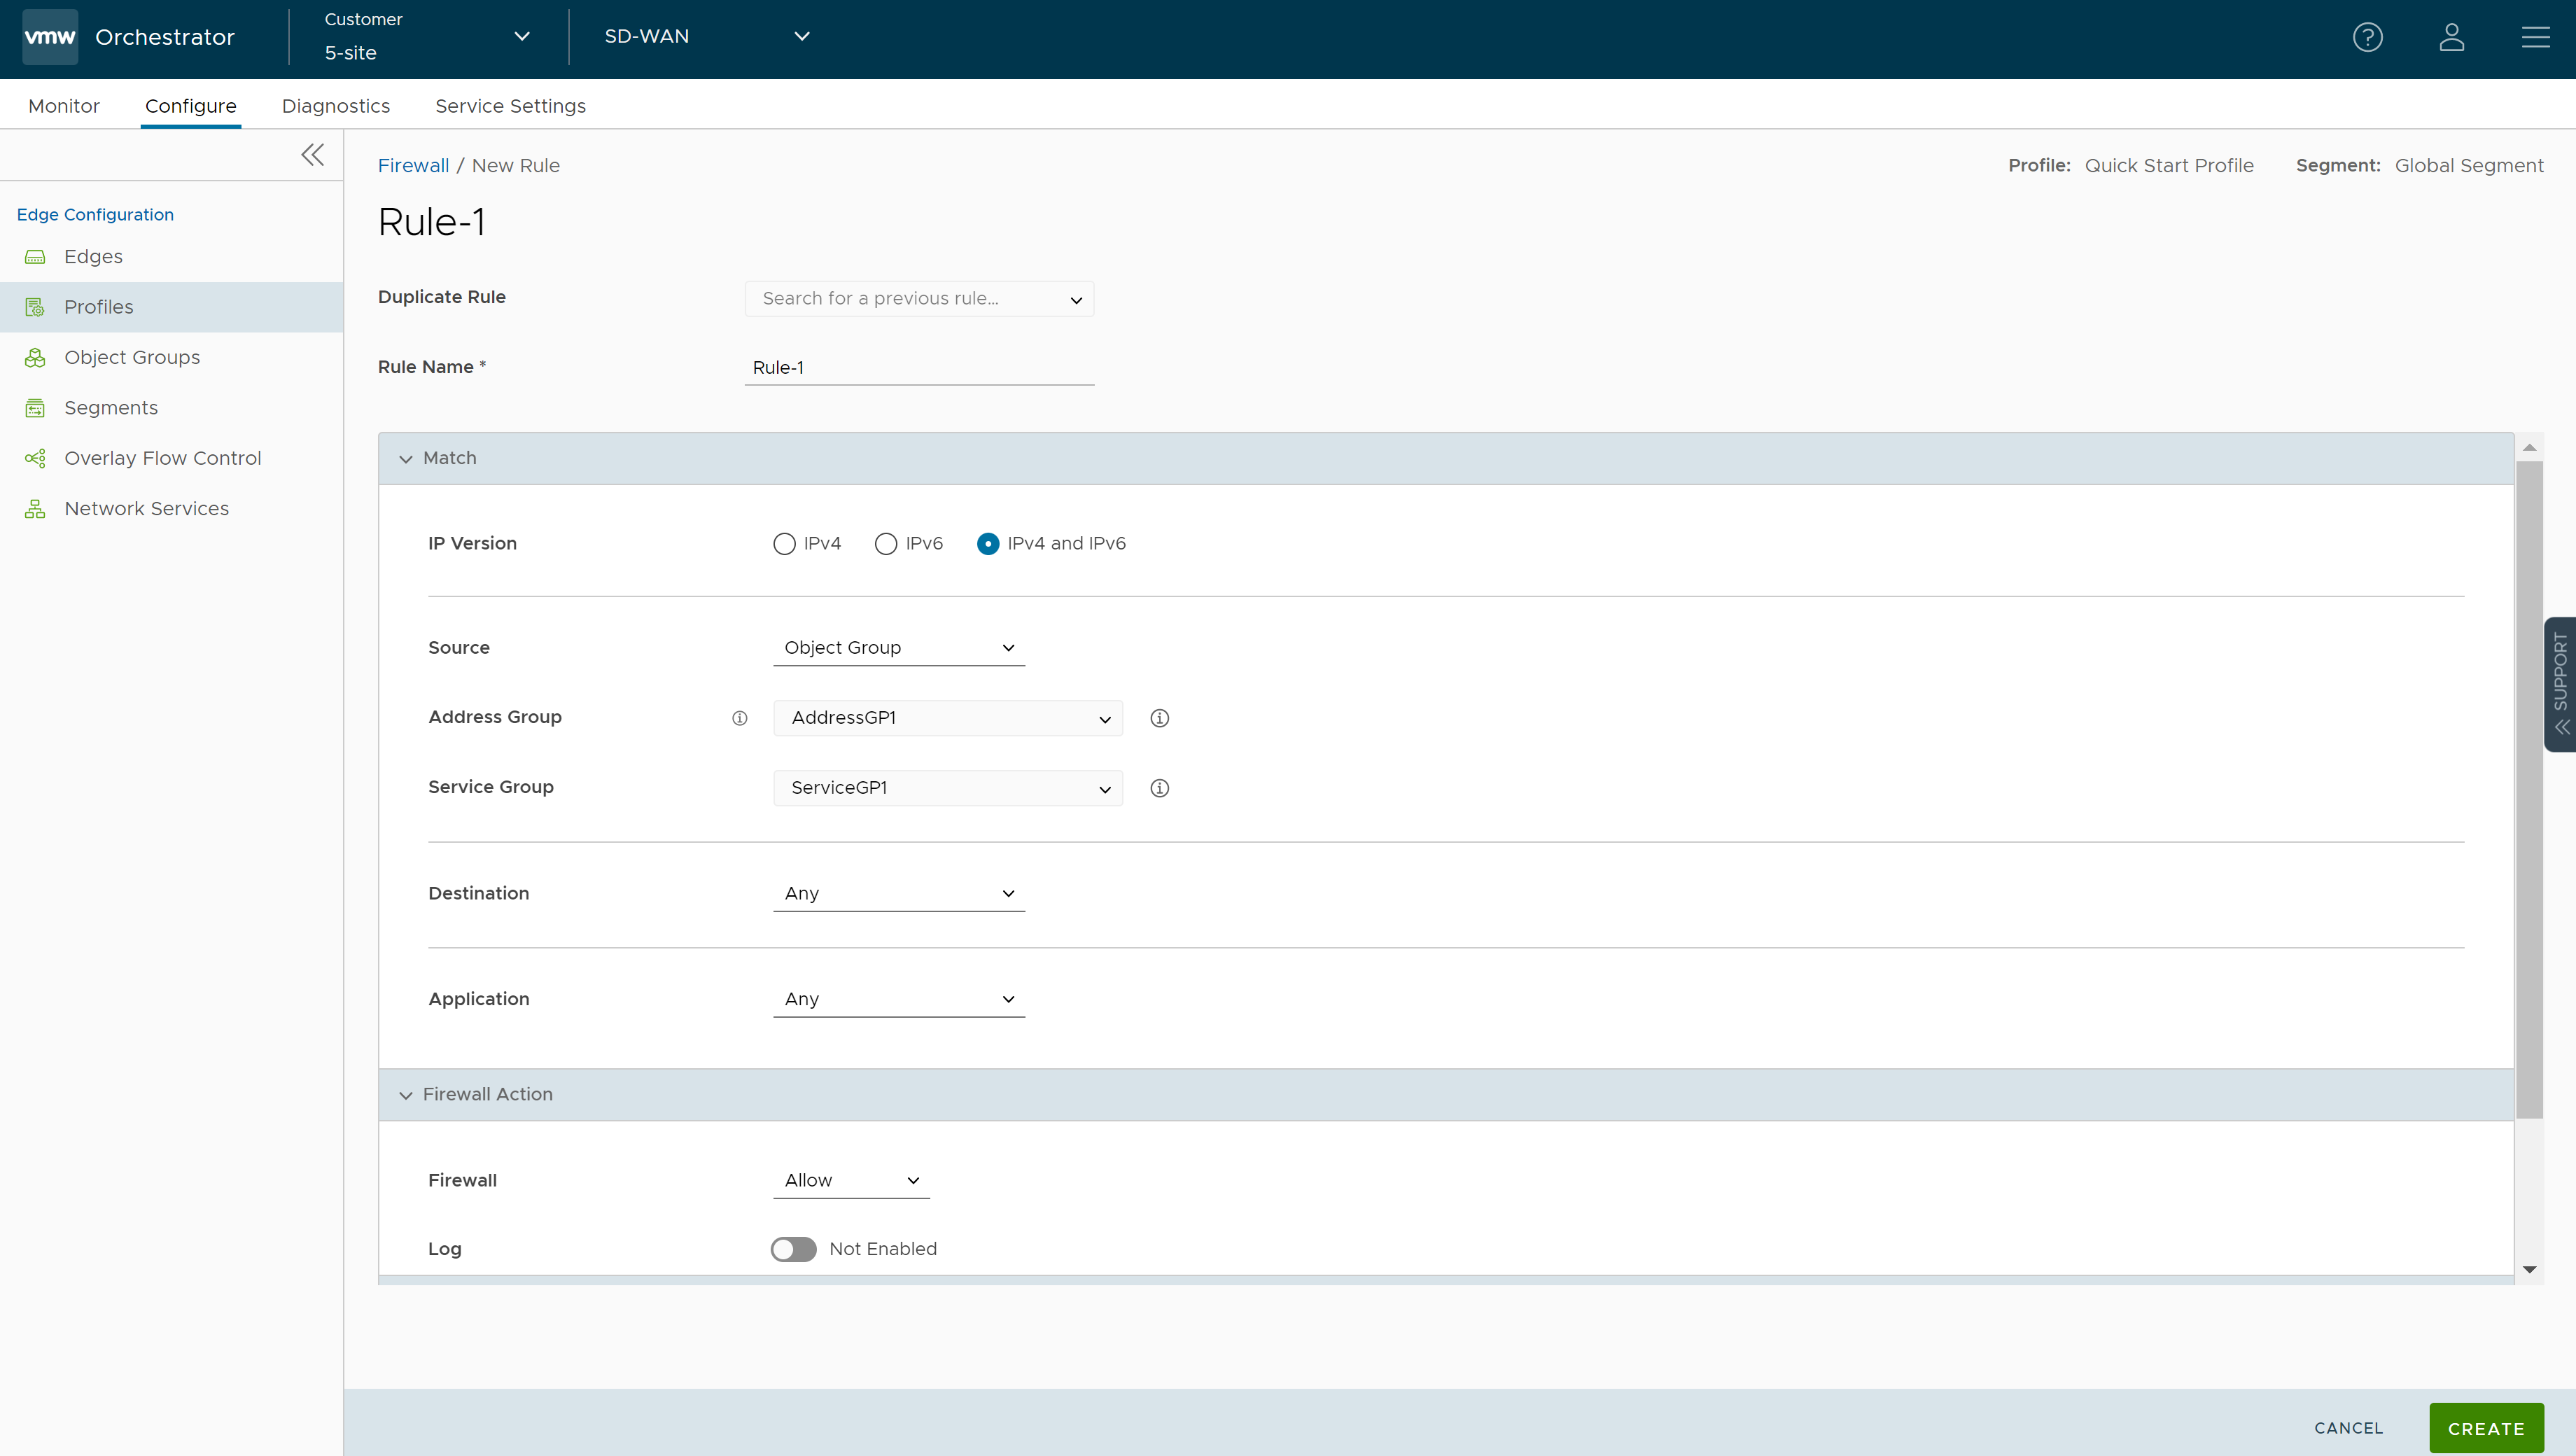
Go to the Configure Firewall section and under Firewall Rules, click + NEW RULE. The Configure Rule dialog box appears.
In the Rule Name text box, enter a unique name for the Rule. To create a firewall rule from an existing rule, select the rule to be duplicated from the Duplicate Rule drop-down menu.
In the Match area, configure the match conditions for the rule:
Choose the IP address type for the rule. By default, IPv4 and IPv6 address type is selected. You can configure the Source and Destination IP addresses according to the selected Address Type.
From the Source drop-down menu, select Object Groups.
Select the relevant Address Group and Service Group from the drop-down menu. If the selected address group contains any domain names, they would be ignored when matching for the source.
You can click the Info icon next to the Address Group and Service Group drop-down to view the configuration details of the respective Address Group and Service Group.
If required, you can select the Address and Service Groups for the destination as well.
Based on Address Type selected, the behavior will be as follows:
IPv4 Type Rule matches only the IPv4 addresses available in the selected Address Group.
IPv6 Type Rule matches only the IPv6 addresses available in the selected Address Group.
Mixed Type Rule matches both the IPv4 and IPv6 addresses in the selected Address Group.
Choose Firewall actions as required and click Create.
A firewall rule is created for the selected Profile, and it appears under the
Firewall Rules area of the
Profile Firewall page.
Note: The rules created at the Profile level cannot be updated at the Edge level. To override the rule, user needs to create the same rule at the Edge level with new parameters to override the Profile level rule.
In the
Firewall Rules area of the
Profile Firewall page, you can perform the following actions:
DELETE - To delete existing Firewall rules, select the checkboxes prior to the rules and click DELETE.
CLONE - To duplicate a Firewall rule, select the rule and click CLONE.
COMMENT HISTORY - To view all comments added while creating or updating a rule, select the rule and click COMMENT HISTORY.
Search for Rule - Allows to search the rule by Rule name, IP address, Port/Port range, and Address group and Service group names.
Results
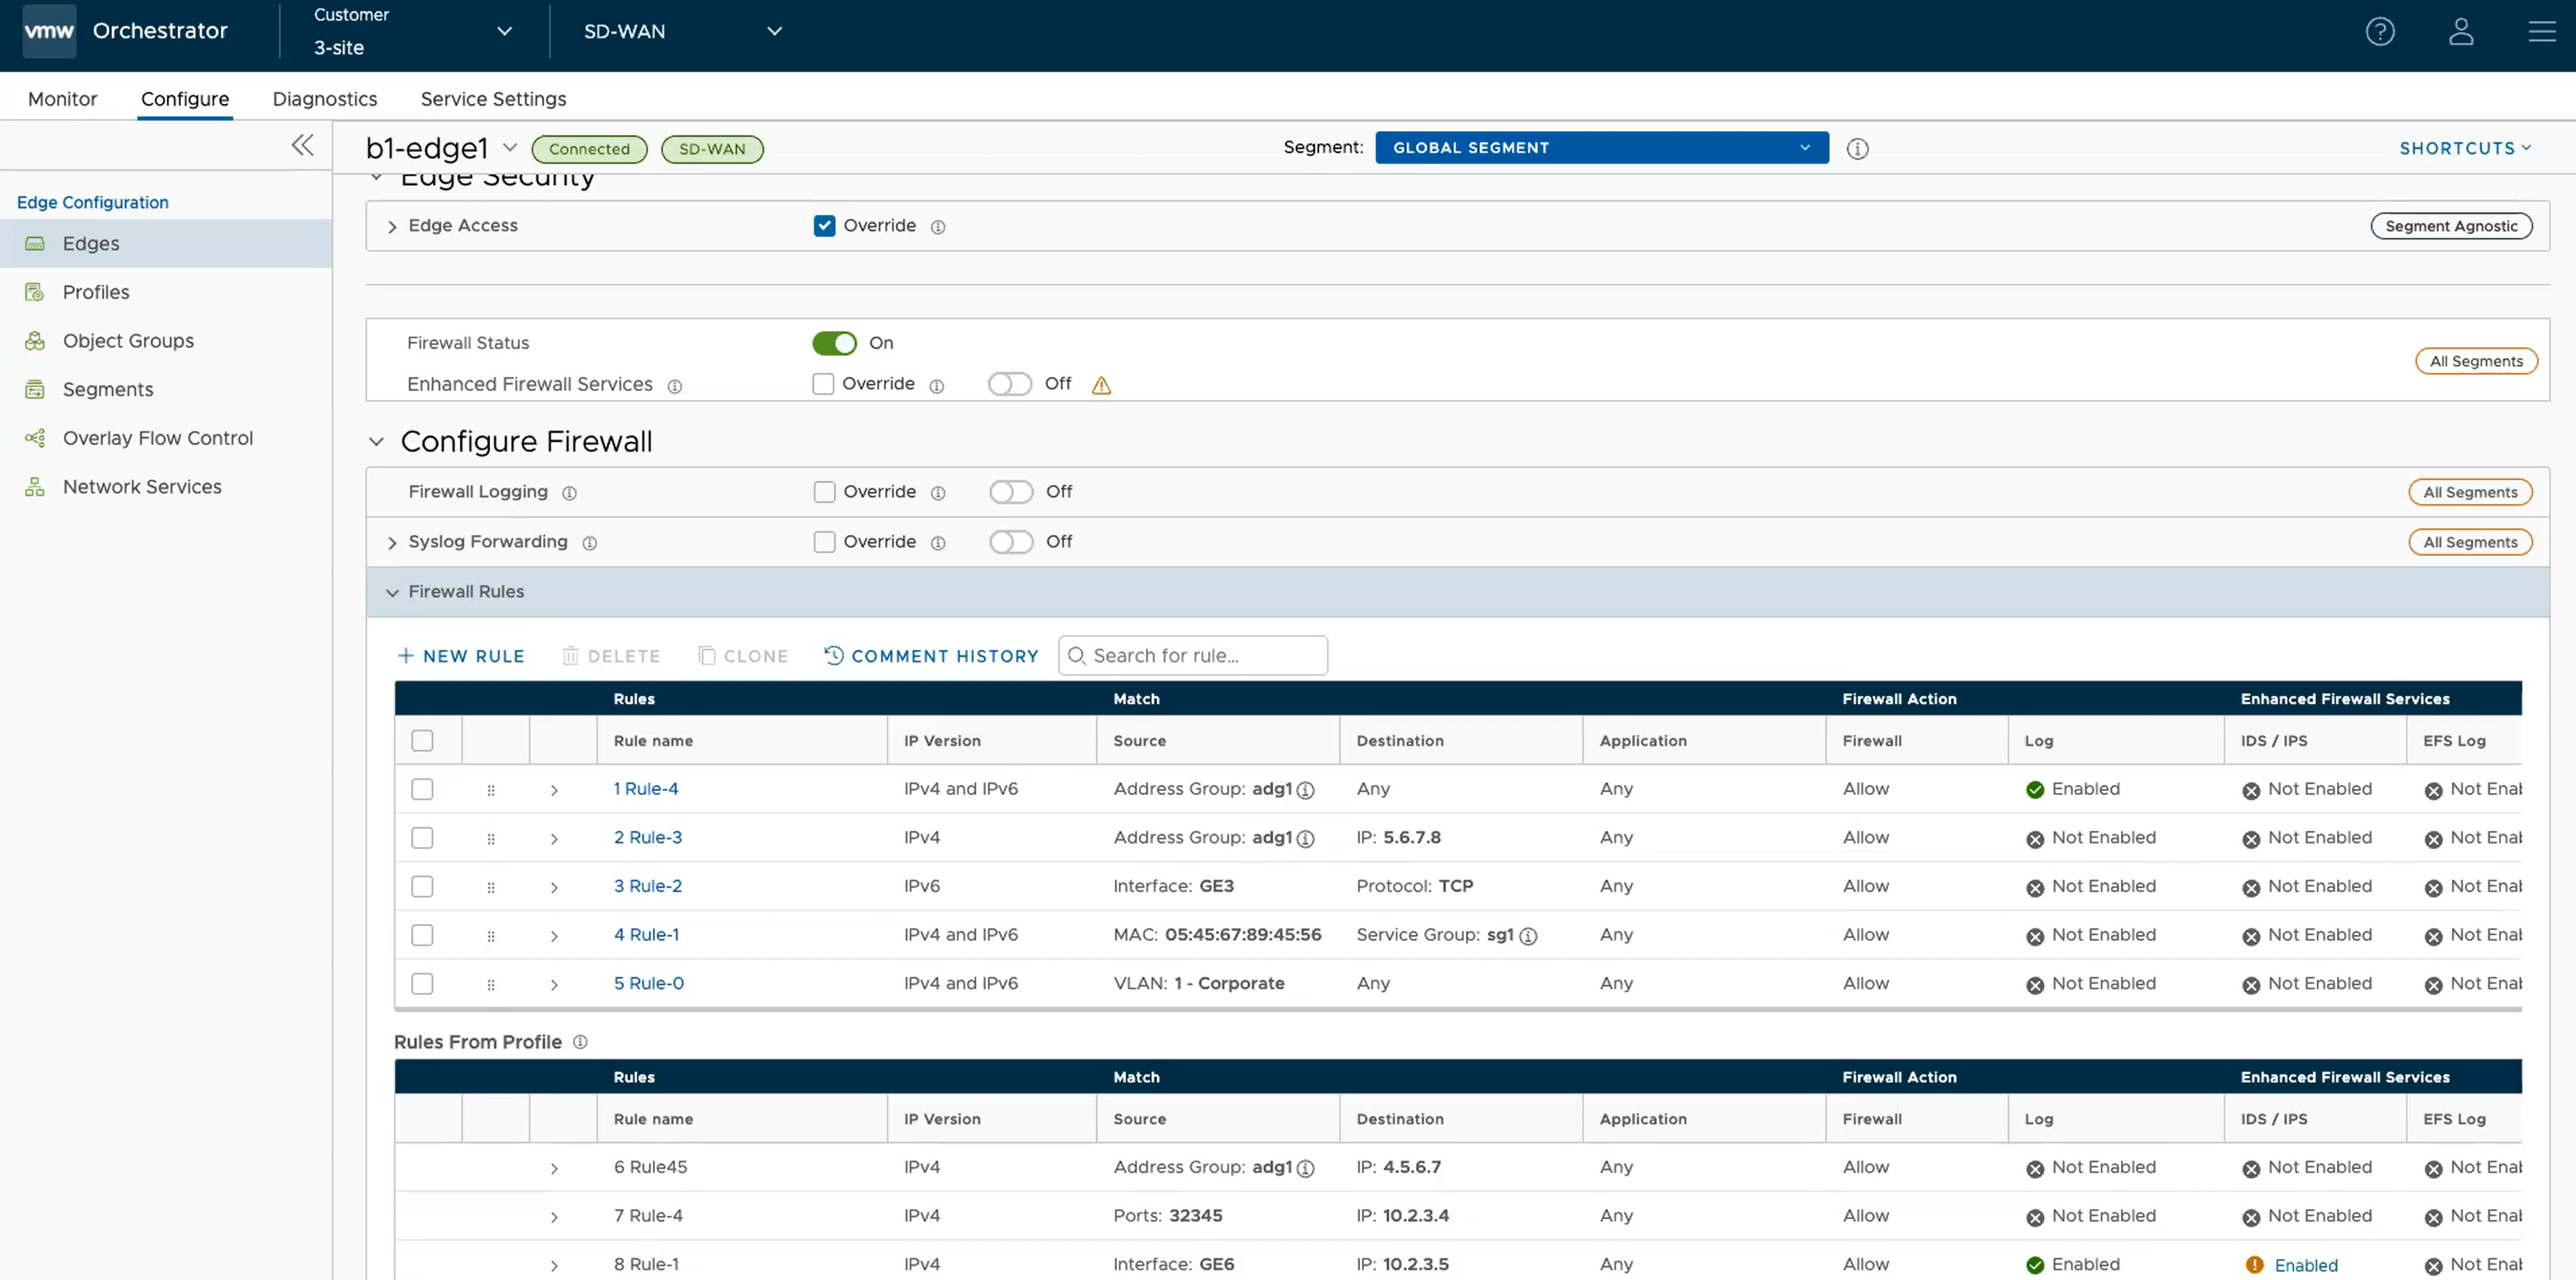
The Firewall rules that you create for a profile are automatically applied to all the Edges associated with the profile. If required, you can create additional rules specific to the Edges by navigating to
Configure >
Edges, select an Edge, and click the
Firewall tab.
The
Rules From Profile section displays the rules inherited from profile and they are read only. If you want to override any Profile-level rule, then add a new rule. The added rule appears in the table above the
Rules From Profile section and it can be manipulated by modifying or deleting, if needed.
Note: By default, the firewall rules are assigned to the global segment. If required, you can choose a segment from the
Segment drop-down and create firewall rules specific to the selected segment.
You can modify the object groups with additional IP addresses, port numbers, service types and codes. The changes are automatically included in the Firewall rules that use the object groups.
Note: Before modifying the object groups, you can view the configuration details of the Address Group and Service Group from the same UI screen by clicking the Info icon next to the Address Group and Service name. A pop-up appears displaying the configuration details of the respective Address Group and Service Group.