


Configure Branch to Branch VPN to establish a VPN connection between Branches.
- In the SD-WAN service of the Enterprise portal, go to .
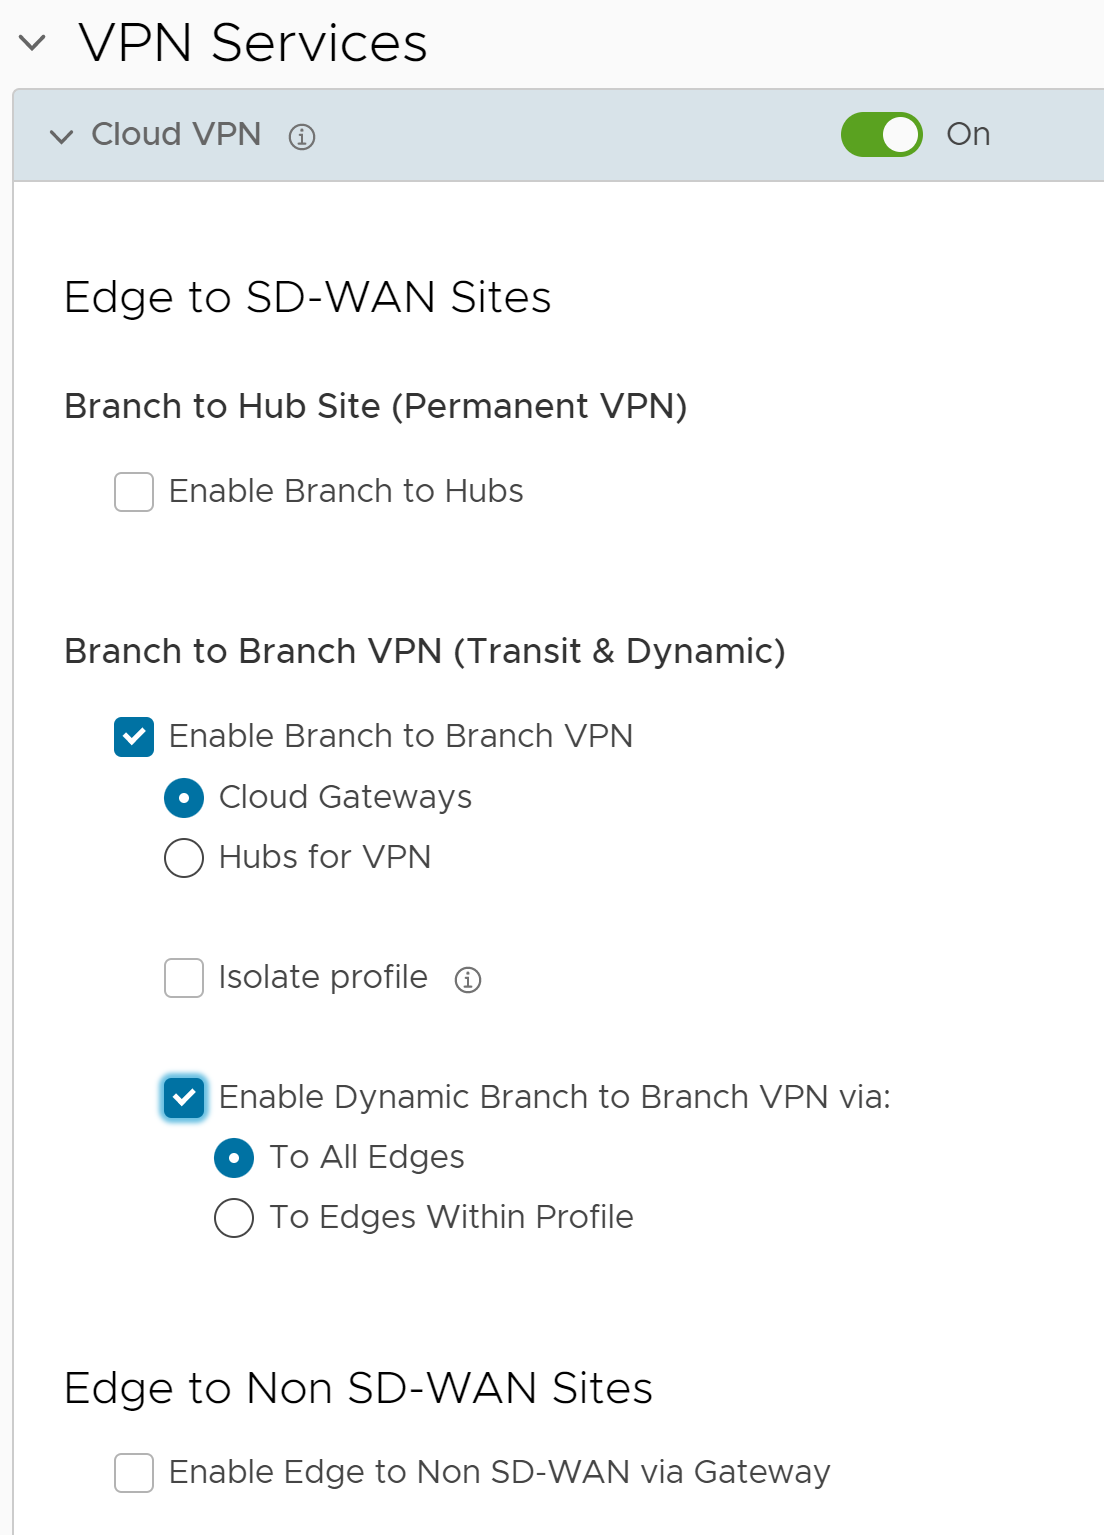
- Go to VPN Services area and activate Cloud VPN by turning the toggle button to On.
- To configure a Branch to Branch VPN, select the Enable Branch to Branch VPN check box under Branch to Branch VPN (Transit & Dynamic).
- Branch to Branch VPN supports following two configurations for establishing a VPN connection between branches:
Configuration Description Cloud Gateways In this option, Edges establish VPN tunnel with the closest Gateway and connections between Edges go through this Gateway. The SD-WAN Gateway may have traffic from other Customers. Hubs for VPN In this option, one or more Edges are selected to act as Hubs that can establish VPN connections with Branches. Connections between Branch Edges go through the Hub. The Hub is your only asset which has your corporate data on it, improving overall security. - To activate profile isolation, select the Isolate Profile check box. If selected, the Edges within the Profile do not learn routes from other Edges outside the Profile via the SD-WAN Overlay.
- You can activate Dynamic Branch To Branch VPN to all Edges or to Edges within a Profile. By default, it is configured for all Edges.
When you activate Dynamic Branch to Branch VPN, the first packet goes through the Cloud Gateway (or the Hub). If the initiating Edge determines that traffic can be routed through a secure overlay multi-path tunnel, and if Dynamic Branch to Branch VPN is activated, then a direct tunnel is created between the Branches.
Once the tunnel is established, traffic begins to flow over the secure overlay multi-path tunnel between the Branches. After 180 seconds of traffic silence (forward or reverse from either side of the Branches), the initiating Edge tears down the tunnel.
Note: To configure Dynamic Branch To Branch VPN by Profile, make sure the Isolate Profile check box is unselected. - Click Save Changes.
