


To configure DHCPv6 Prefix Delegation for a Profile, perform the following steps:
- In the SD-WAN service of the Enterprise portal, click . The Profiles page displays the existing profiles.
- Click the link to a Profile or click the View link in the Device column of the Profile. The configuration options for the selected Profile are displayed in the Device tab.
- DHCPv6 Prefix Delegation can be configured on WAN, LAN, and VLAN interfaces. See the following sections for more details.
DHCPv6 Prefix Delegation on a WAN interface
Note: For a WAN interface, the
Enable WAN Link option must be selected.
- On the Profile Device settings page, go to the Connectivity category, and then expand Interfaces.
- You can select an Edge model for which you wish to configure the Prefix Delegation settings.
- From the list of available Edge interfaces, click the link to a Routed WAN interface.
- On the Routed Interface settings screen, navigate to IPv6 Settings.
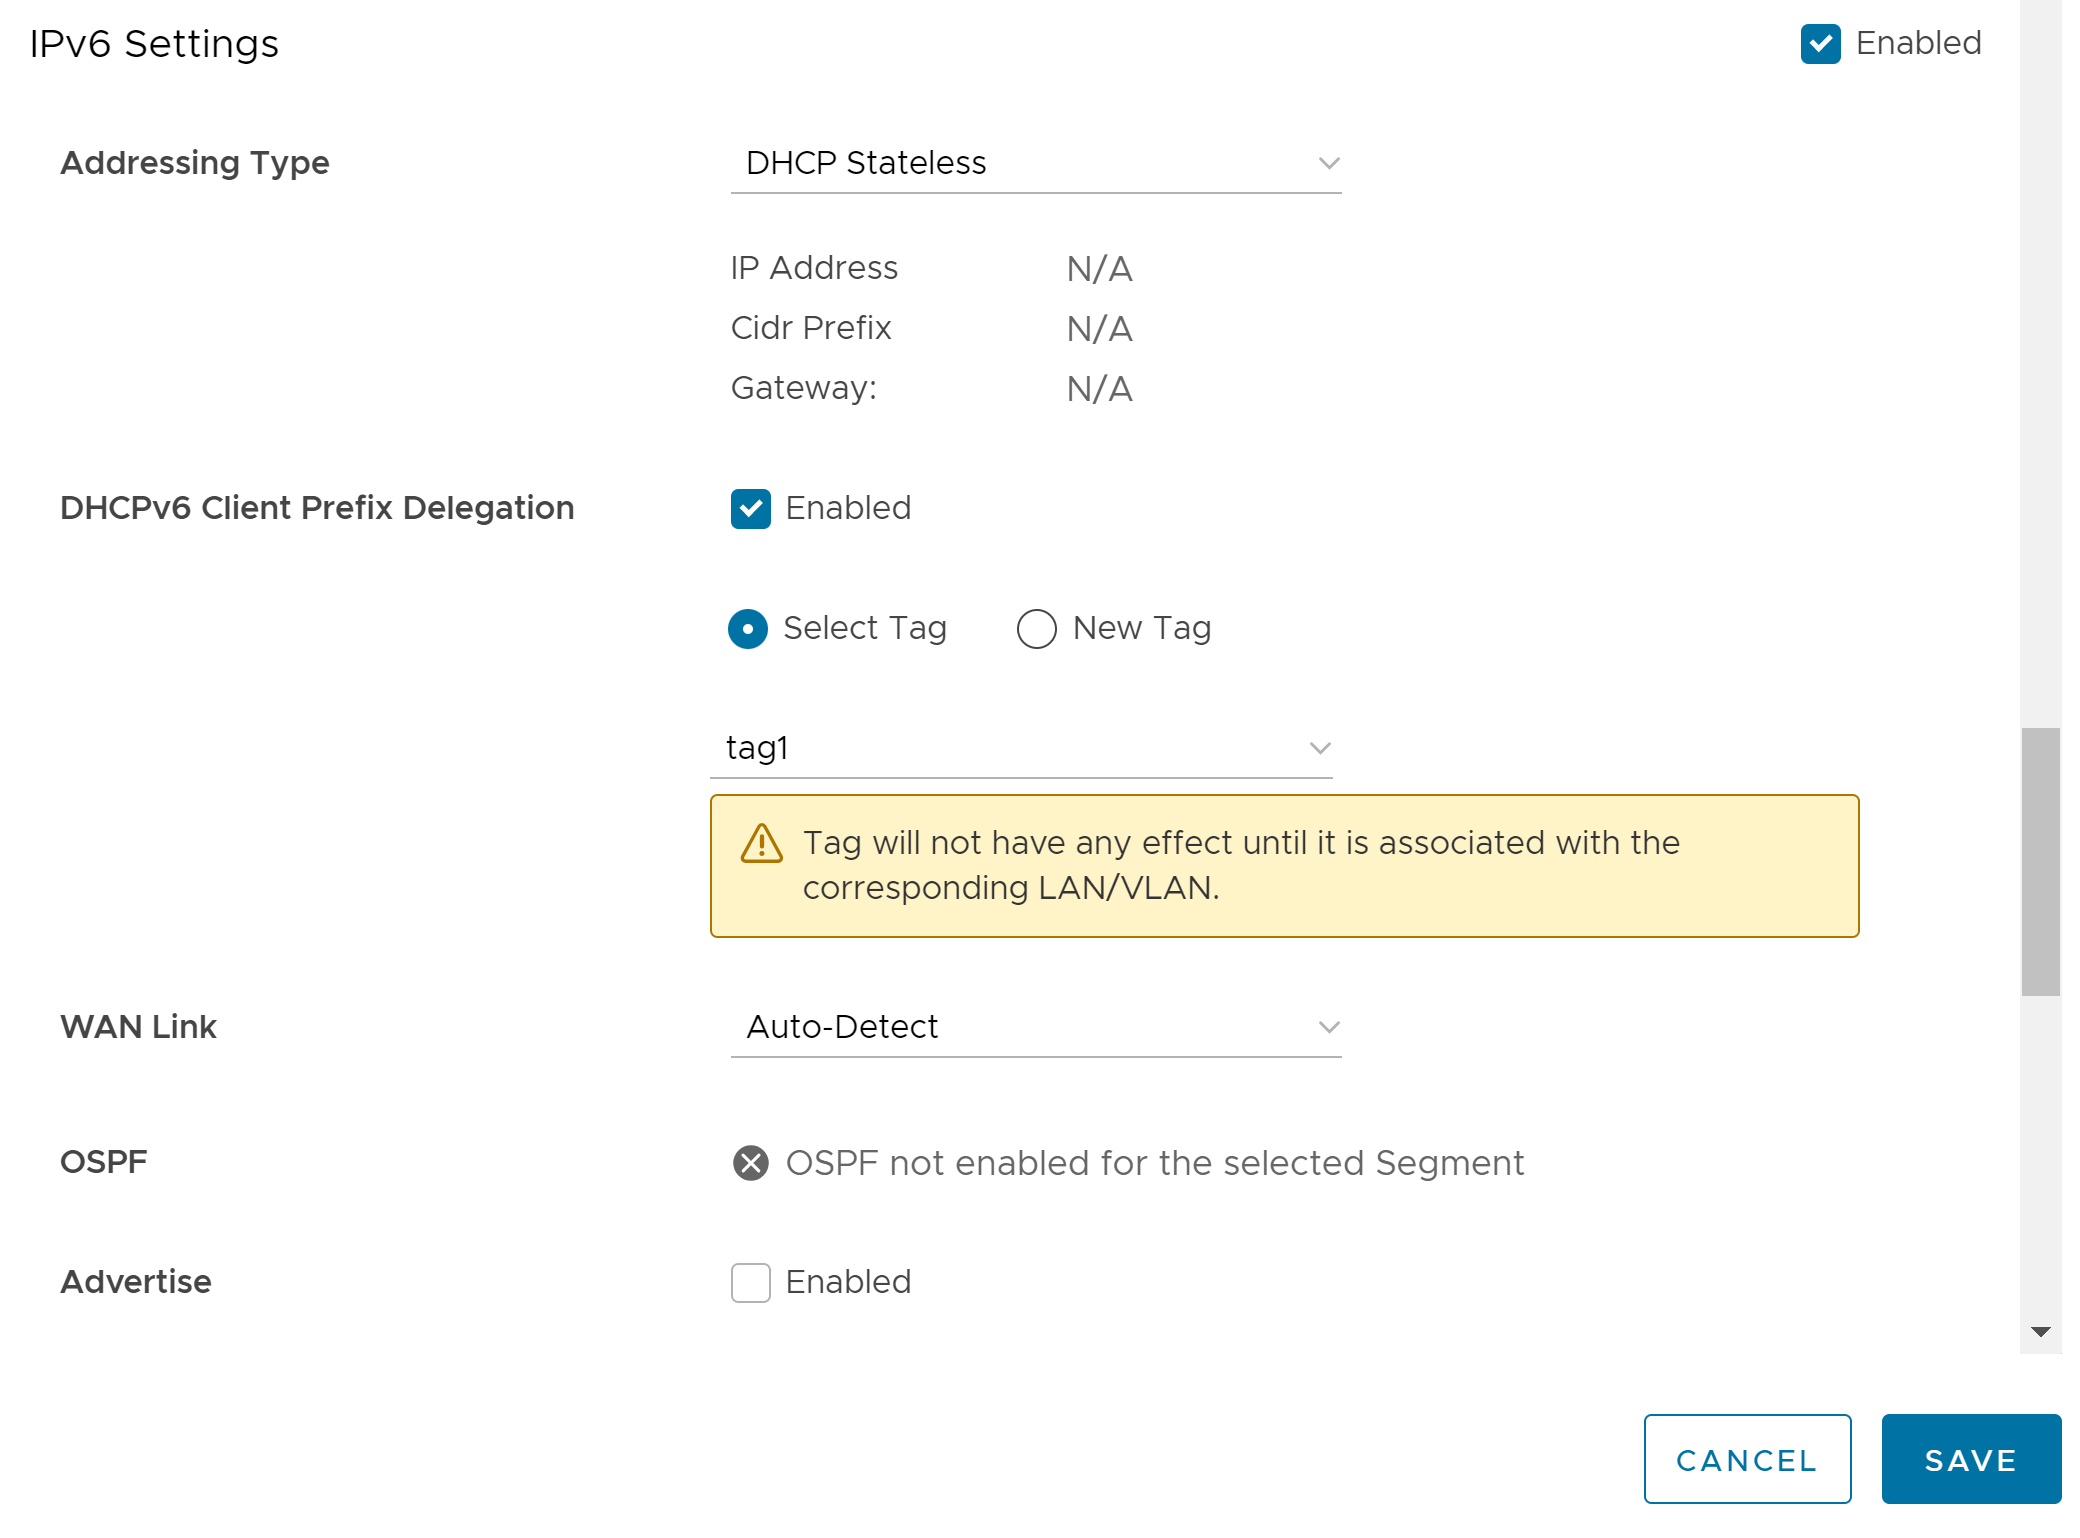
- Activate the DHCPv6 Client Prefix Delegation feature by selecting the Enabled check box.
- You can either select a pre-defined tag from the drop-down menu or create a new tag by selecting the New Tag option. You can also define tags on the Network Services screen. For more information, see Configure Prefix Delegation Tags.
Note: Each WAN interface must have a unique tag.
- Click Save.
DHCPv6 Prefix Delegation on a LAN interface
Note: For a LAN interface, ensure that the
Enable WAN Link option is not selected.
- On the Profile Device settings page, go to the Connectivity category, and then expand Interfaces.
- You can select an Edge model for which you wish to configure the Prefix Delegation settings.
- From the list of available Edge interfaces, click the link to a Routed LAN interface.
- On the Routed Interface settings screen, navigate to IPv6 Settings.
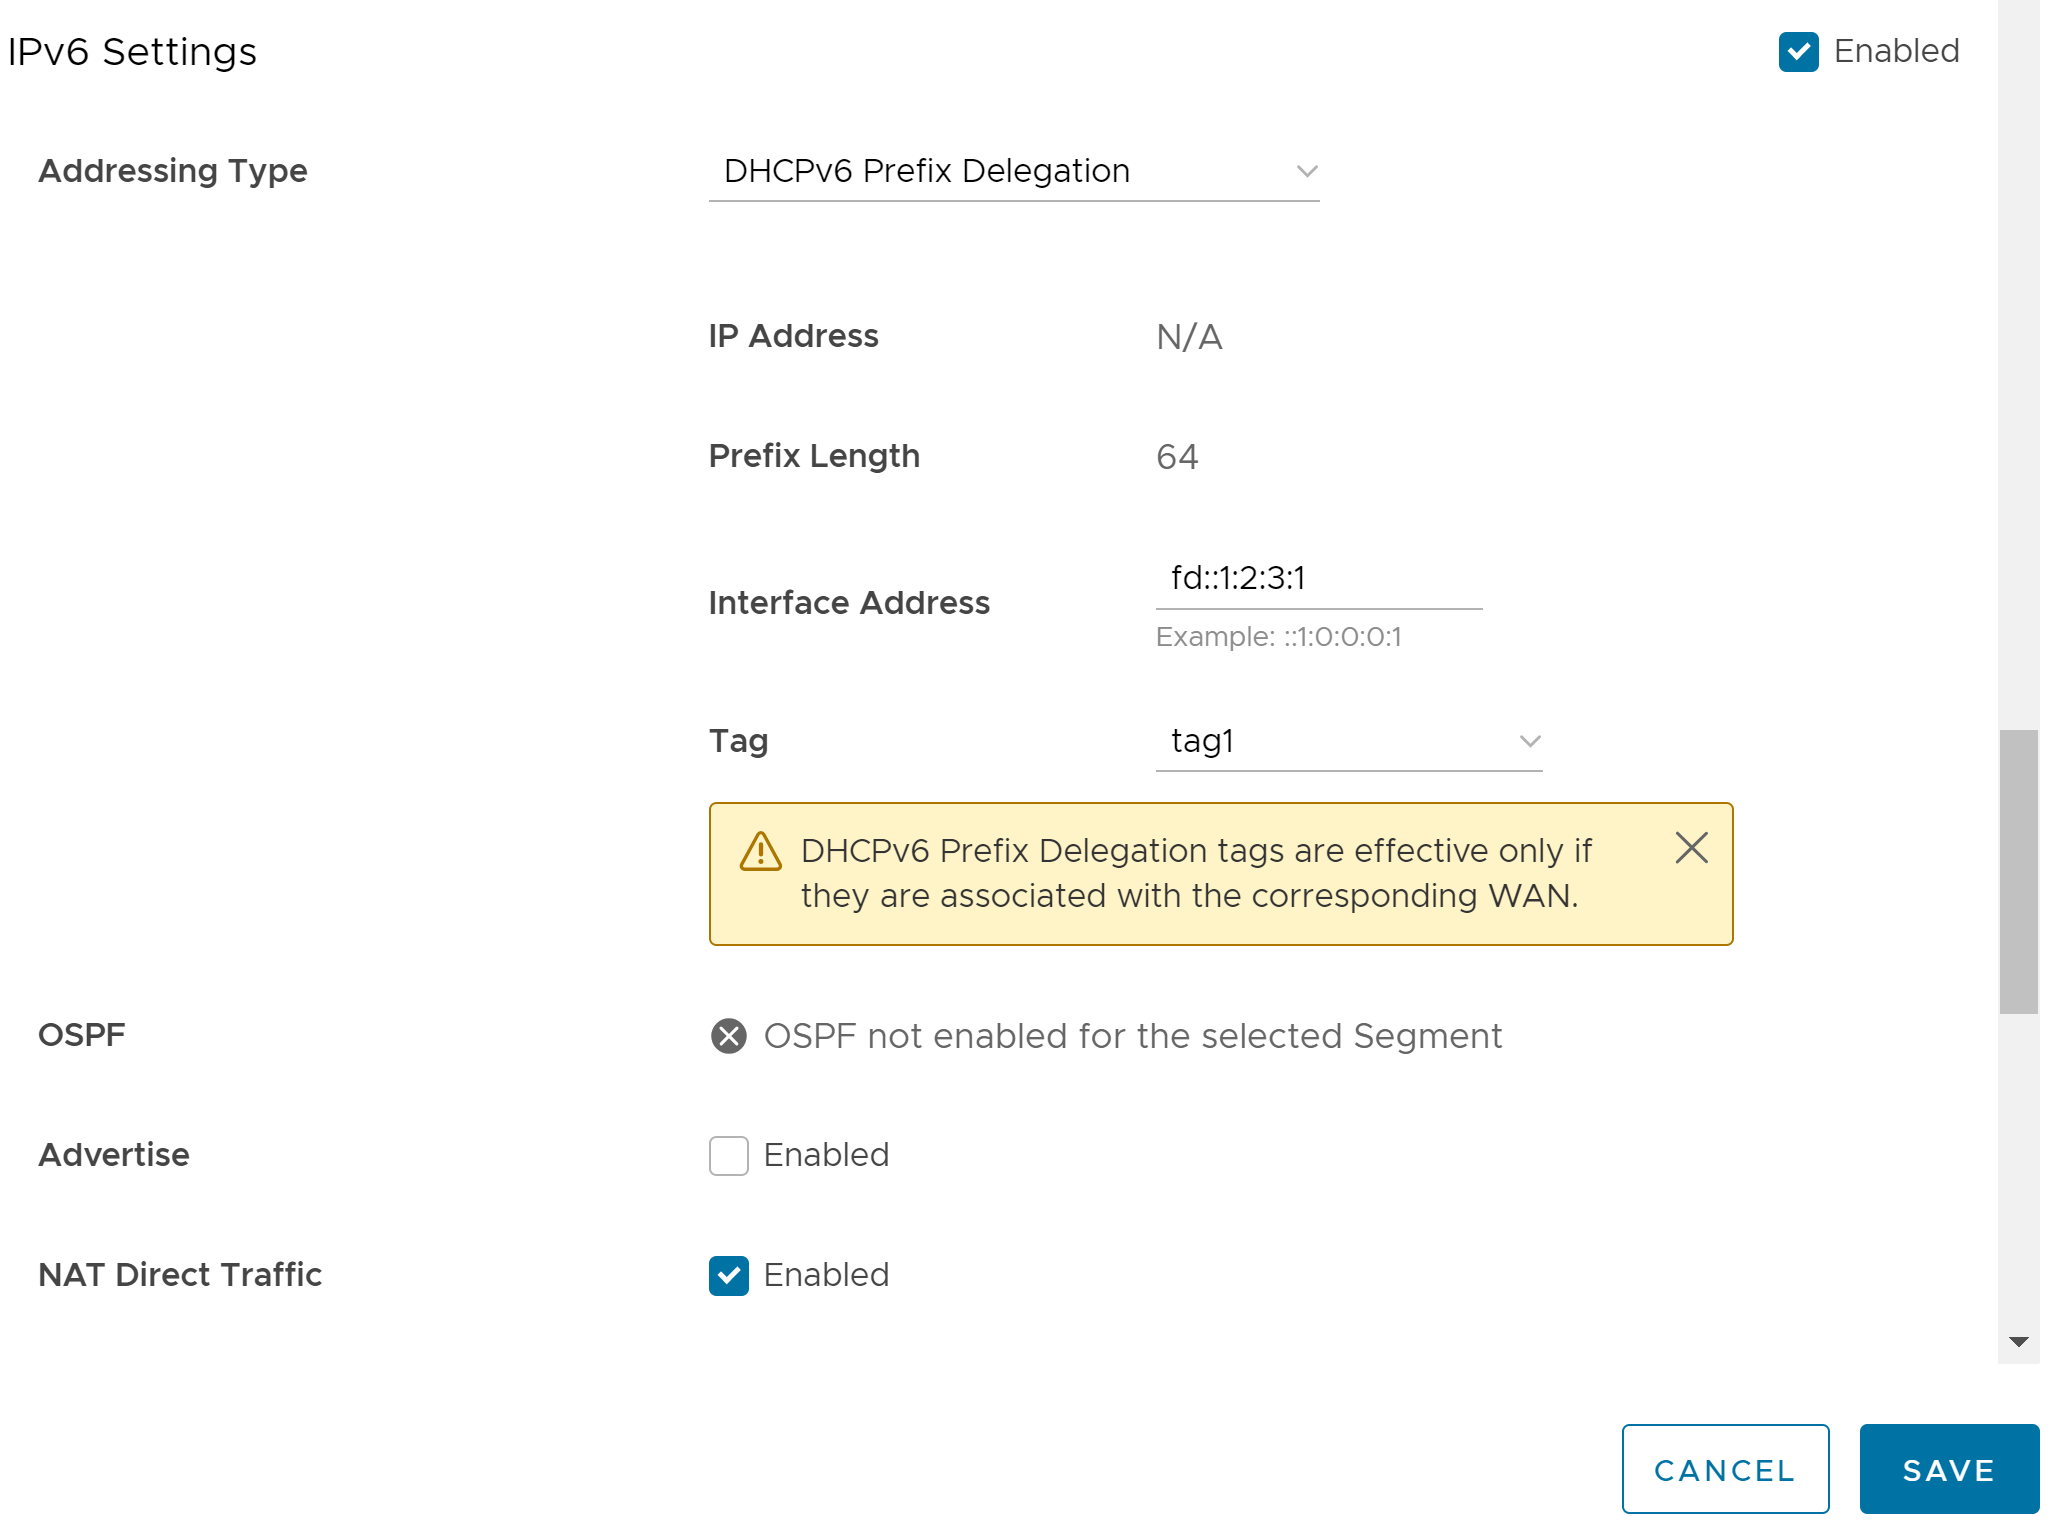
- To configure Prefix Delegation for a LAN interface, you must select the Addressing Type as DHCPv6 Prefix Delegation from the drop-down menu.
- The following additional options appear on the screen:
Option Description Prefix Length This field is auto-populated. The value displayed is 64. This indicates that a netmask of 64 bits is configured for this interface's address. Interface Address Enter a valid interface address. The new address is formed by combining the prefix provided by the server and the interface address that is configured. If 'n' bits prefix is received from the server, then the first 'n' bits of the interface address are overwitten to form a new address. Tag Select the tag from the drop-down menu to associate the configured interface address with the corresponding WAN interface. Note: Same tag can be used by multiple LAN interfaces. - Click Save.
Note: For information on the other settings on this screen, see
Configure Interface Settings for Profiles.
DHCPv6 Prefix Delegation on a VLAN interface
- On the Profile Device settings page, go to the Connectivity category, and then expand VLAN.
- Click on a VLAN interface.
- In the Edit VLAN dialog, navigate to the IPv6 Settings section.
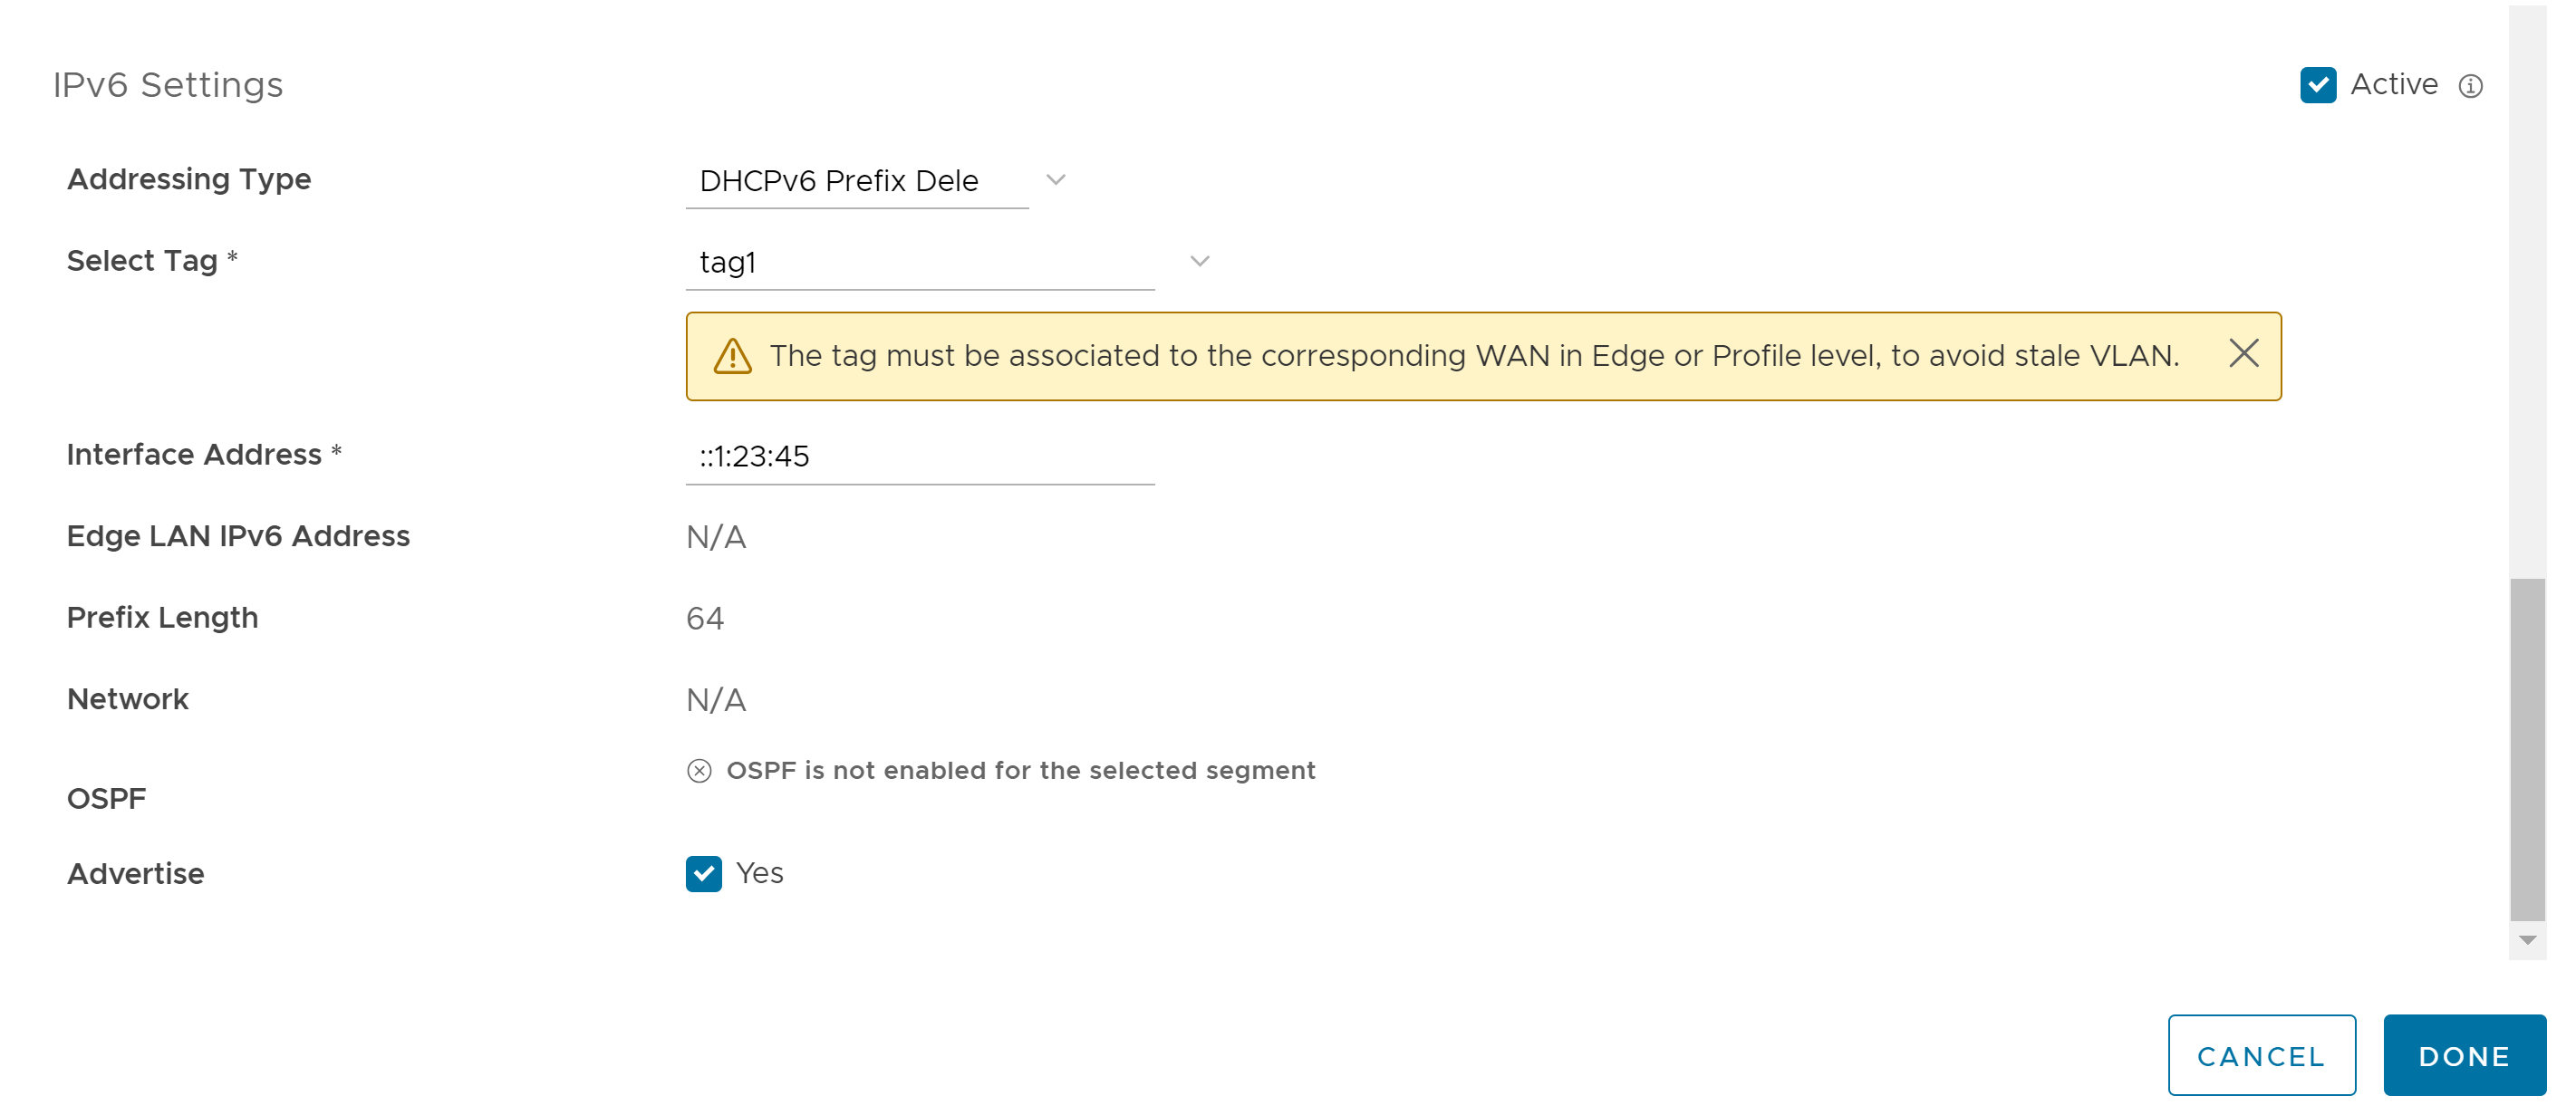
- To configure Prefix Delegation for a VLAN interface, you must select the Addressing Type as DHCPv6 Prefix Delegation from the drop-down menu.
- Select a tag from the drop-down menu.
- Enter a valid interface address.
- Click Done.
For more information on VLAN for Profiles, see Configure VLAN for Profiles.
