You can activate High Availability (HA) on a pair of Edges to ensure redundancy.
- In the SD-WAN Service of the Enterprise portal, click .
- Select the SD-WAN Edge from the list and click the Device tab.
- Scroll down to the High Availability section and click Active Standby Pair.
- Click Save Changes at the bottom of the Device window.
By default, the HA interface to connect the pair is selected as follows:
- For Edges 520, 520v, and 540: The LAN1 port is used as HA interface and DPDK is not enabled on these platforms.
- For Edges 510, 610, 620, 640, 680, 840, 2000, 3400, and 3800: The GE1 port is used as HA interface and DPDK is enabled on these platforms.
Configure a Non-Default High Availability Interface
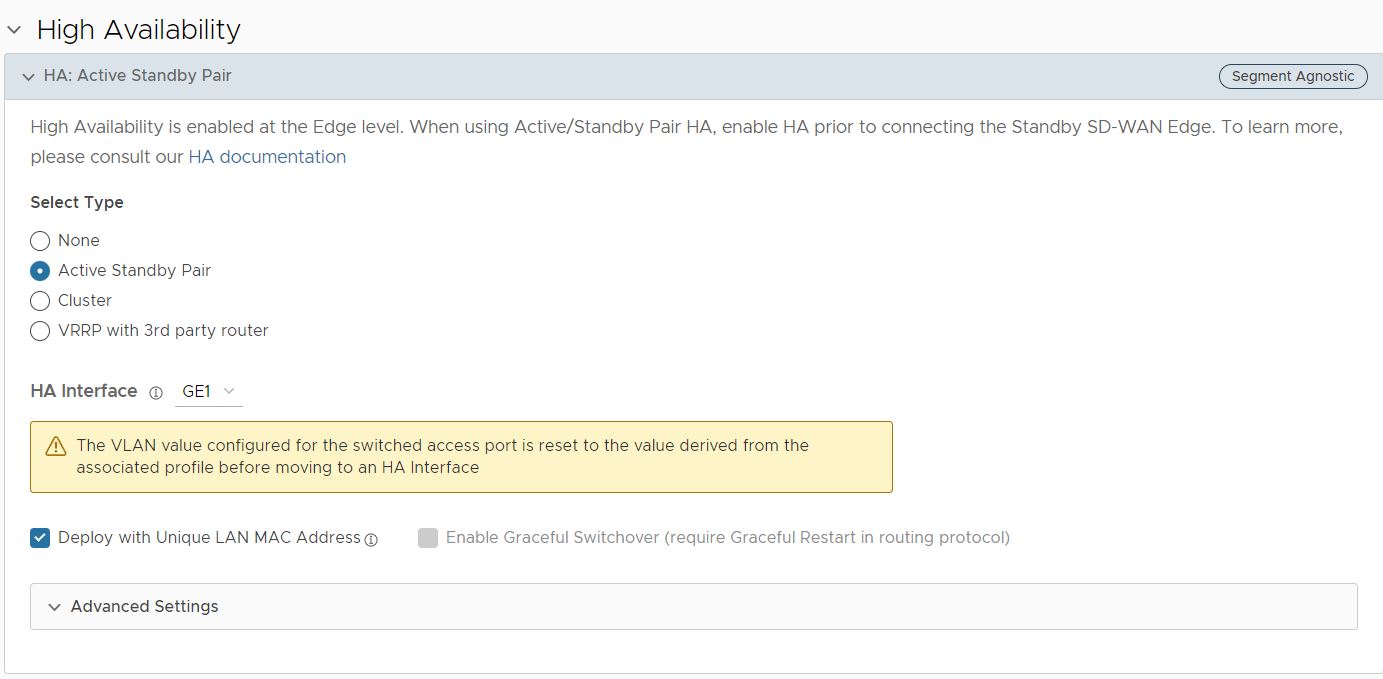
The above HA interfaces are the default interfaces for their respective platforms and are selected automatically. Beginning with Release 5.2.0 you can also configure any LAN interface to be the HA interface with the HA Interface option.
In addition to choosing any Ethernet port configured as a LAN interface for HA traffic, beginning with Release 5.2.0, a user can configure any Edge 1G/10G SFP port to be the HA interface with the HA Interface option. As with an Ethernet port, the SFP port must first be configured as a LAN interface. For a list of supported SFP modules for use on SD-WAN Edges see: VMware SD-WAN Supported SFP Module List (79270).
Both HA Edges must be upgraded to Release 5.2.0 or later prior to using a non-default interface for HA traffic. Until both HA Edges are using Release 5.2.0, they must be configured to use the default GE1 as their HA interface. Only after both HA Edges are upgraded to Release 5.2.0 can a user configure the HA Edges to use an interface other than GE1 as the HA interface.
Configuring a non-default HA Interface can only be performed when HA is not enabled for that site. This means you can configure it prior to enabling HA for a site. However, if you want to change the HA Interface on a site where HA is already enabled, you must first disable HA, then change the HA Interface, and then re-enable HA.
In the context of a High Availability (HA) site utilizing an alternative HA Interface, the replacement of the Standby Edge with a different Edge may result in activation issues if the new Edge has a factory image earlier than version 5.2.0. To ensure a successful activation in such a scenario, it is imperative to take the following sequential steps:
- Disable HA.
- Reconfigure the HA Interface to its default value (GE1 or LAN1) on the UI, and relocate the HA Interface cable to the default HA Edge interface.
- Integrate the replacement Edge into the HA topology of the site.
- Re-enable HA and allow the replacement Edge to complete the activation process, assuming the role of the Standby Edge.
- Disable HA.
- Reconfigure the HA Interface to its alternative value on the UI, and relocate the HA Interface cable back to the alternative location on the HA Edges.
- Re-enable HA to finalize the replacement process.
Configure a Unique LAN MAC Address
By default, High Availability uses a common virtual MAC address to support seamless failover between devices. If you need to use a unique MAC address in certain virtual environments, instead of generating a common or shared virtual MAC address, you can select the Deploy with Unique LAN MAC checkbox, which is deactivated by default. This option will use the physical MAC address for hardware Edges and the assigned MAC address for virtual Edges. The LAN and Routed LAN use physical MAC address, while the WAN links would still use virtual MAC address.
You can activate or deactivate the Deploy with Unique LAN MAC option only when you enable High Availability by choosing Active Standby Pair. Once High Availability is enabled, you cannot activate or deactivate Deploy with Unique LAN MAC at a later point of time.
If you need to activate or deactivate the option, follow these steps:
- Disconnect the Standby Edge's WAN and LAN links, leaving only the HA link connected to the Active Edge. If it is a Virtual Edge, disable the virtual NICs that correspond to the WAN and LAN links, leaving only the HA interface NIC connected.
- In the High Availability section, click None.
- Click Save Changes at the top of the Device window.
- Enable High Availability again and then click the Deploy with Unique LAN MAC checkbox to activate or deactivate the option.
- Once the HA status becomes High Availability Ready on the Orchestrator UI, reconnect the LAN and WAN cables of the Standby Edge. If using Virtual Edges, reenable the virtual NICs.
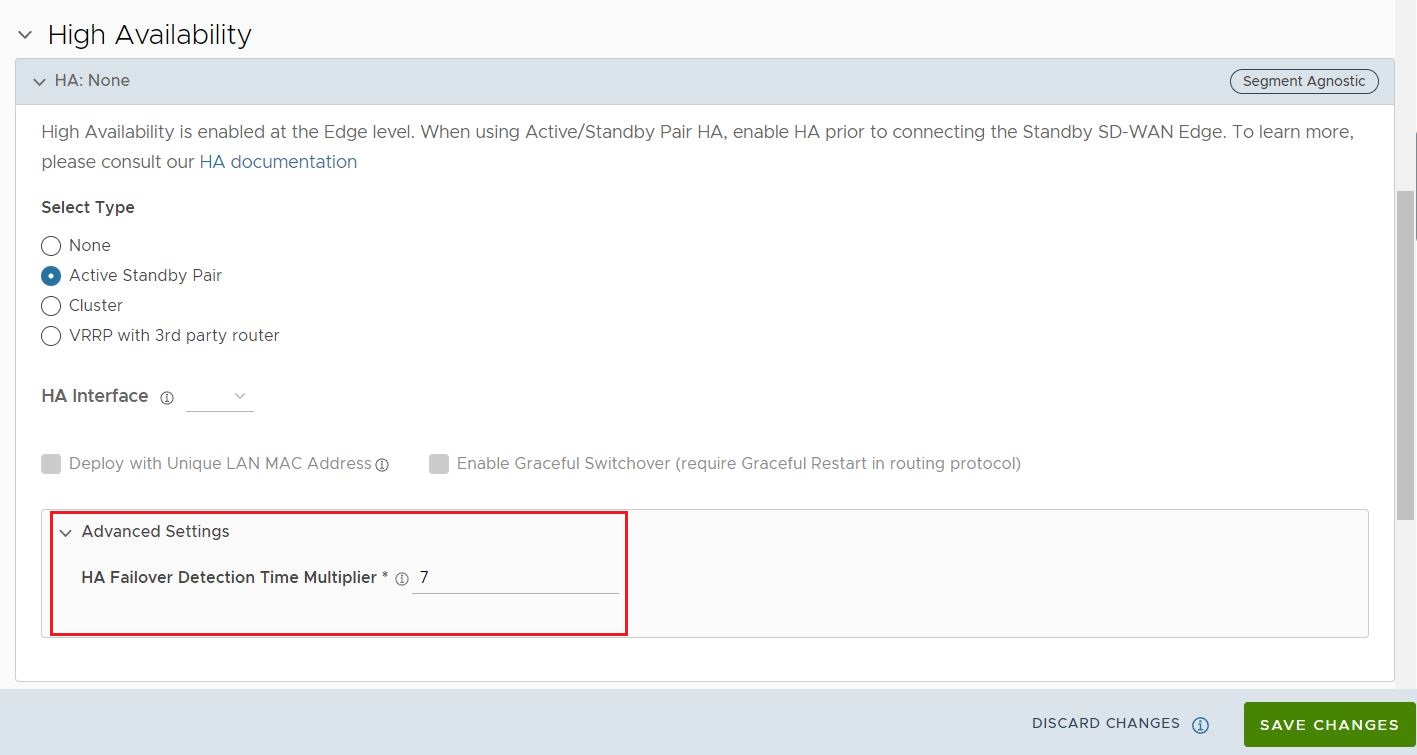
Advanced Options: HA Failover Detection Time Multiplier
Beginning in Release 5.2.0, a user can manually configure the time threshold before the Active Edge is marked as non-responsive which would trigger a failover to the Standby Edge. On some Edge platforms an Edge may experience a high amount of traffic sufficient to delay sending out a heartbeat response to the Standby Edge indicating that it is still functioning. This delay may exceed the default 700 millisecond threshold and trigger the Standby Edge to become active and results in an Active-Active (Split-Brain) state. With this feature, the user can increase the time threshold before the Active Edge is declared down and trigger a failover and prevent a potential split-brain state.
The value is changed under the Advanced Options section where a user configures the HA Failover Detection Time Multiplier. This multiplier is a number that is multiplied by 100 milliseconds (ms). The default value is 7 (700 ms) and be configured up to 70 (7000 ms).