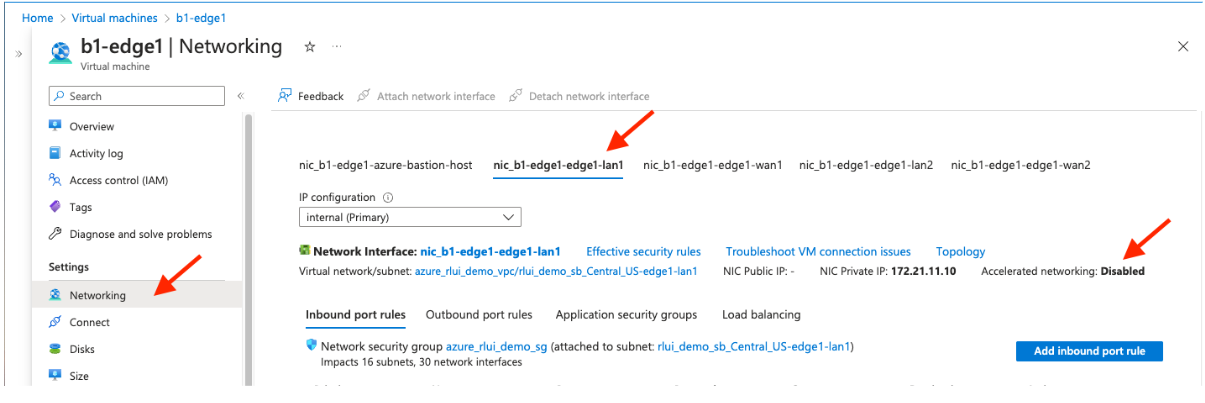
Accelerated Networking can be enabled via the Azure portal or via the Azure CLI. See this section for detailed instructions.
Enable Accelerated Networking
Azure requires that an existing Virtual Machine (VM) be stopped/deallocated before Accelerated Networking is enabled on any Network Interface Card (NIC). For more information, see:
https://learn.microsoft.com/en-us/azure/virtual-network/create-vm-accelerated-networking-cli
There are two ways to enable Accelerated Networking, via the Azure portal or via the Azure CLI. For detailed instructions for both, see the sections below.
Enable Accelerated Networking Via Azure Portal
- Stop/deallocate the VM.
- Change the setting of accelerated networking to Enabled.
- Restart the VM.

Enable Accelerated Networking via Azure CLI
Follow the steps below to enable Accelerated Networking via the Azure CLI. For more information, reference the following: https://learn.microsoft.com/en-us/azure/virtual-network/create-vm-accelerated-networking-cli?tabs=windows#enable-accelerated-networking-on-individual-vms-or-vms-in-availability-sets
- Deallocate resources of the VM.
az vm deallocate --resource-group <myResourceGroup> --name <myVm>
- Enable Accelerated Networking on the NIC.
az network nic update \
--name <myNic> \
--resource-group <myResourceGroup> \
--accelerated-networking true
- Restart the VM.
az vm start --resource-group <myResourceGroup> --name <myVm>