Simple Network Management Protocol (SNMP) is a commonly used protocol for network monitoring, and Management Information Base (MIB) is a database associated with SNMP to manage entities. In the SASE Orchestrator, you can activate SNMP by selecting the desired SNMP version. At the Edge Level, you can override the SNMP settings specified in the Profile.

Prerequisites

Note: SD-WAN Edges do not generate SNMP traps. If there is a failure at the Edge level, the Edge reports the failure in the form of events to SASE Orchestrator, which in turn generates traps based on the alerts configured for the received events.
Follow the below steps to download the SD-WAN Edge MIB:
  • In the SD-WAN service of the Enterprise portal, go to Diagnostics > Remote Diagnostics.
  • Click the link to the required Edge, and then go to the MIBs for Edge area. Select VELOCLOUD-EDGE-MIB from the drop-down menu, and then click Run.
  • Copy and paste the results onto your local machine.
  • Install all MIBs required by VELOCLOUD-EDGE-MIB on the SNMP manager, including SNMPv2-SMI, SNMPv2-CONF, SNMPv2-TC, INET-ADDRESS-MIB, IF-MIB, UUID-TC-MIB, and VELOCLOUD-MIB. All these MIBs are available on the Remote Diagnostics page.
Supported MIBs
  • SNMP MIB-2 System
  • SNMP MIB-2 Interfaces
  • VELOCLOUD-EDGE-MIB

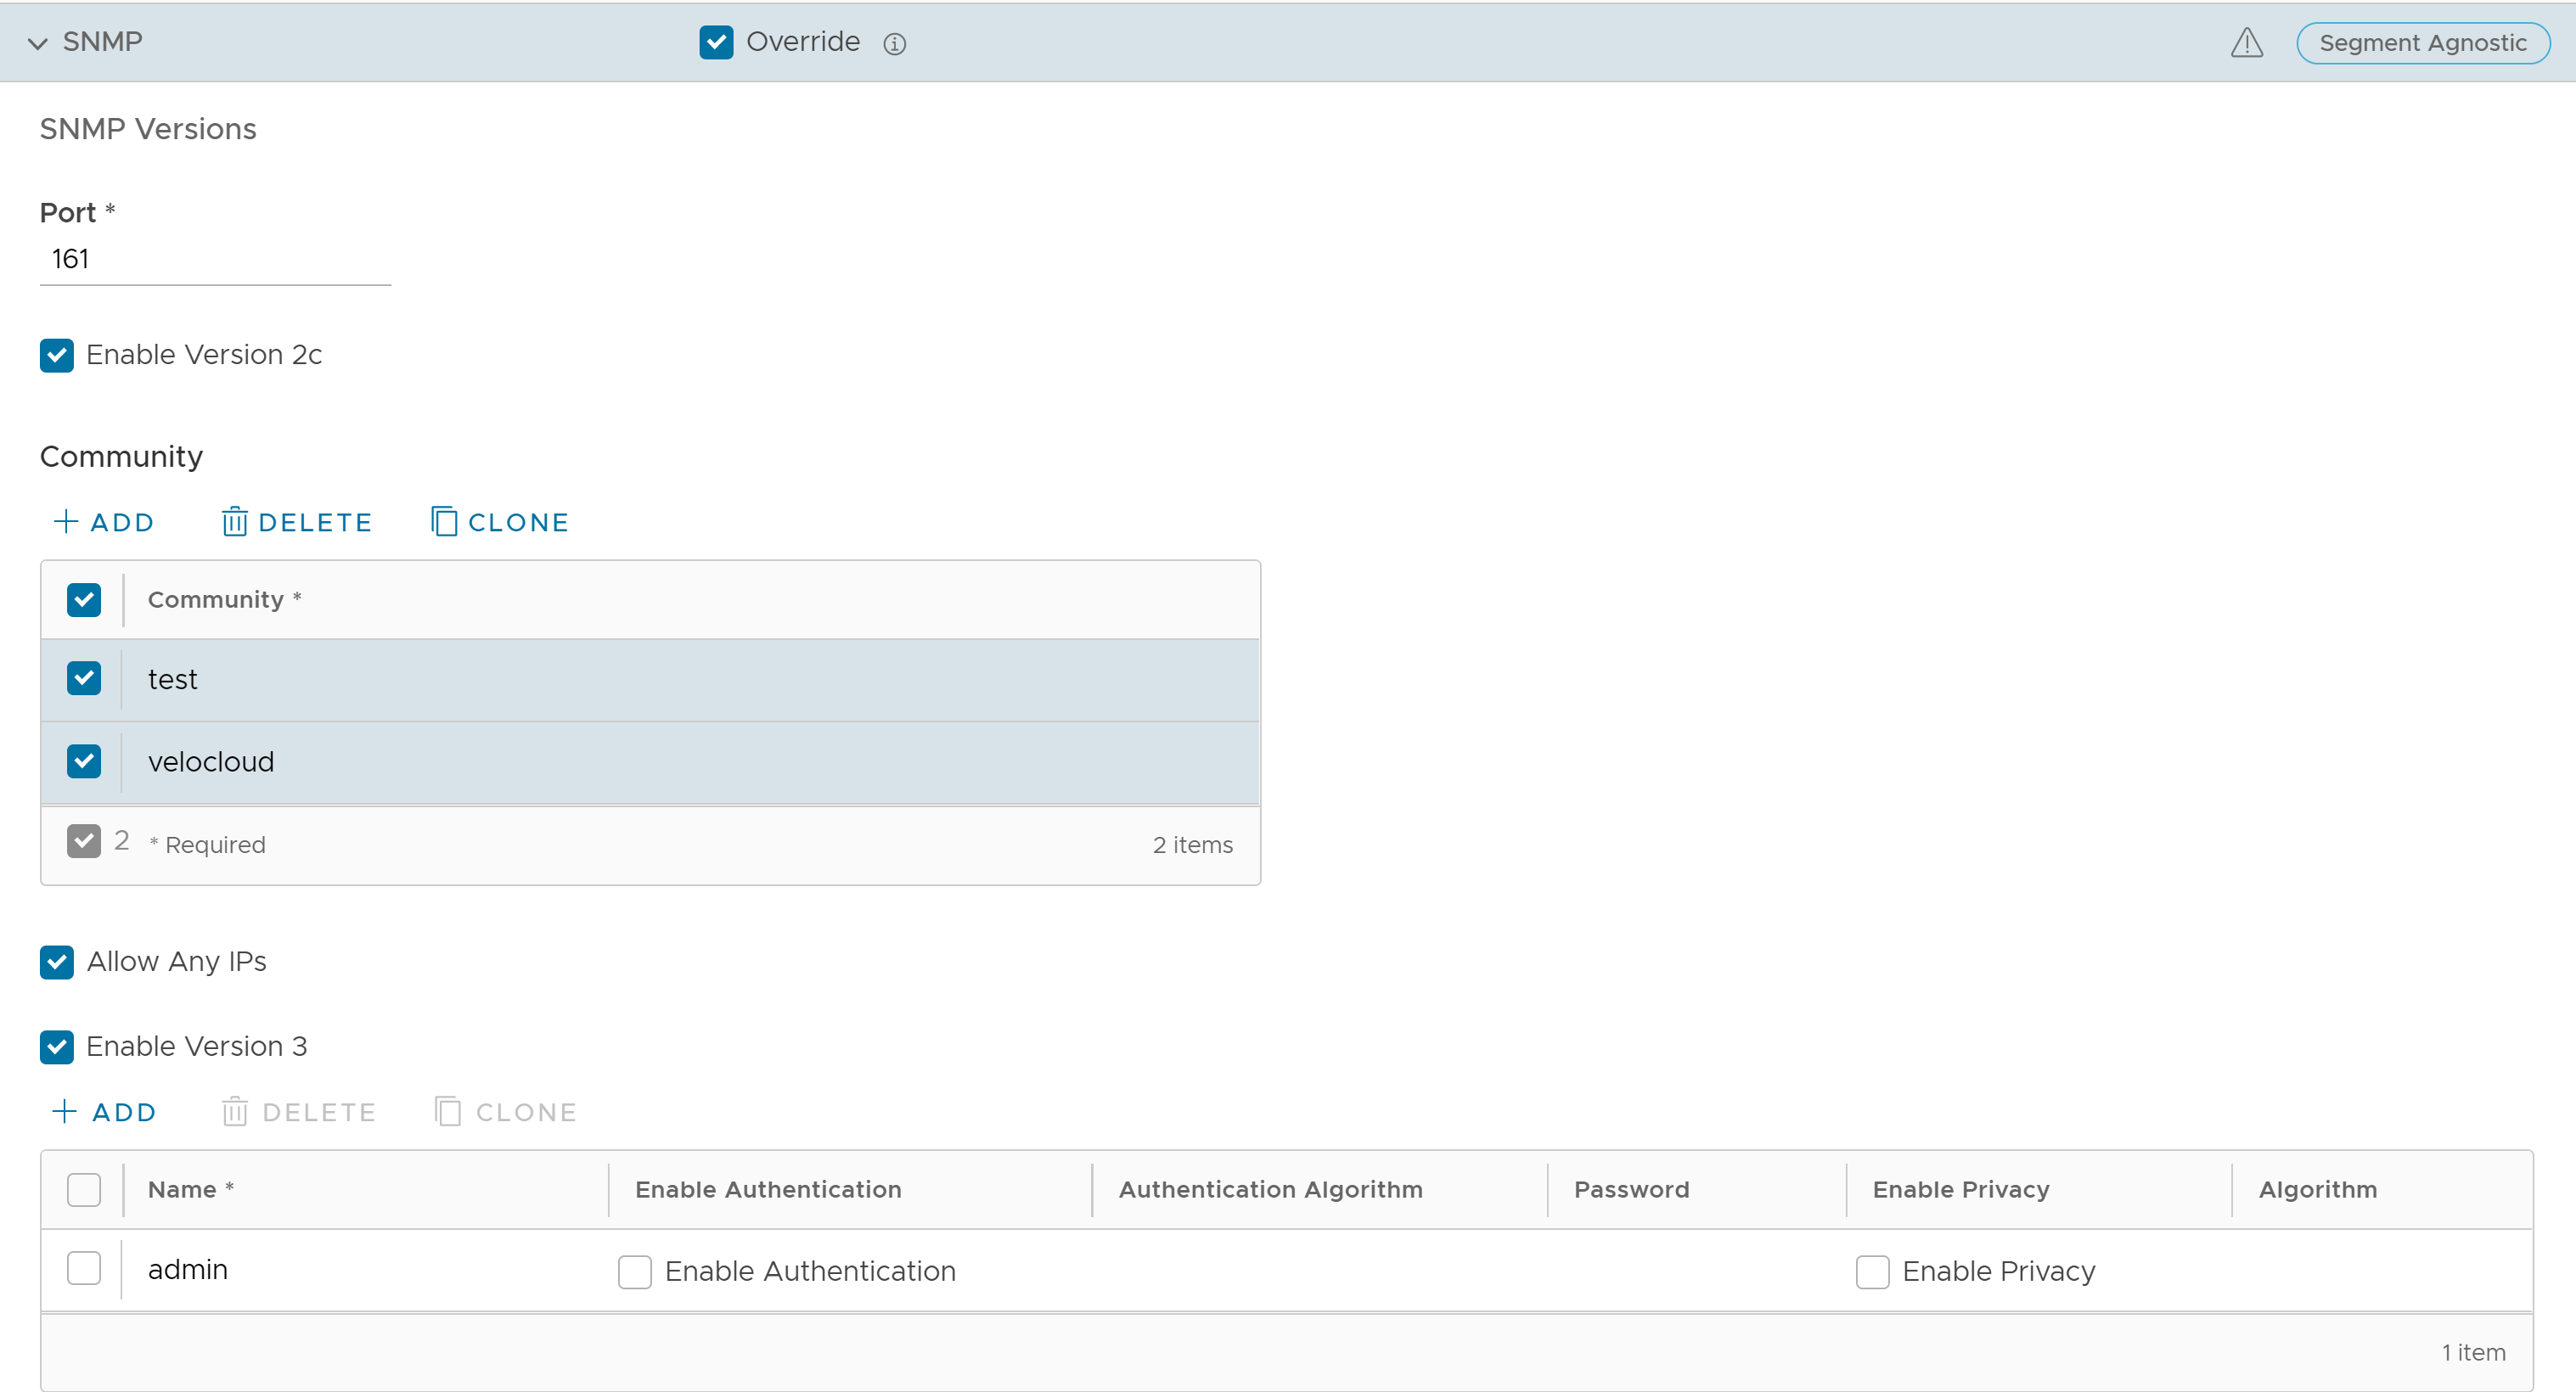
About this task: At the Edge level, you can override the SNMP settings specified in the Profile, by selecting the Override check box. The Edge Override option enables Edge specific edits to the displayed settings, and discontinues further automatic updates from the configuration Profile for this module. For ongoing consistency and ease of updates, it is recommended to set configurations at the Profile level rather than Edge level.

Procedure to Configure SNMP Settings at Edge Level:

Procedure

  1. In the SD-WAN service of the Enterprise portal, go to Configure > Edges.
  2. Select an Edge for which you want to configure the SNMP settings, and then click the View link under the Device column.
  3. Scroll down to the Telemetry area, and then expand SNMP.
  4. Select the Override check box to allow editing.
  5. You can select either Enable Version 2c or Enable Version 3, or both SNMP version check boxes.
  6. Select Enable Version 2c check box to configure the following fields:
    Option Description
    Port Type the port number in the textbox. The default value is 161.
    Community Click Add to add any number of communities. Type a word or sequence of numbers as a password, to allow you to access the SNMP agent. The password may include alphabet A-Z, a-z, numbers 0-9, and special characters (e.g. &, $, #, %).
    Note: Starting from the 4.5 release, the use of the special character "<" in the password is no longer supported. In cases where users have already used "<" in their passwords in previous releases, they must remove it to save any changes on the page.

    You can also delete or clone a selected community.

    Allow Any IPs Select this check box to allow any IP address to access the SNMP agent. To restrict access to the SNMP agent, deselect the check box, and then add the IP address(es) that must have access to the SNMP agent. You can delete or clone a selected IP address.
  7. Selecting the Enable Version 3 check box provides additional security. Click Add to configure the following fields:
    Option Description
    Name Type an appropriate username.
    Enable Authentication Select this check box to add extra security to the packet transfer.
    Authentication Algorithm Select an algorithm from the drop-down menu:
    • MD5
    • SHA1
    • SHA2
      Note: This option is available only for the SNMP version 5.8 or above.
    Note: This field is available only when the Enable Authentication check box is selected.
    Password Type an appropriate password. Ensure that the Privacy Password is same as the Authentication Password configured on the Edge.
    Note:
    • This field is available only when the Enable Authentication check box is selected.
    • Starting from the 4.5 release, the use of the special character "<" in the password is no longer supported. In cases where users have already used "<" in their passwords in previous releases, they must remove it to save any changes on the page.
    Enable Privacy Select this check box to encrypt the packet transfer.
    Algorithm Choose a privacy algorithm from the drop-down menu:
    • DES
    • AES
    • Note: Algorithm AES indicates AES-128.
    Note: This field is available only when the Enable Privacy check box is selected.
    Note: You can delete or clone the selected entry.

What to do next

Configure Firewall settings by following the below steps:
  1. Navigate to Configure > Profiles, and then select a Profile.
  2. Click the View link in the Firewall column.
  3. Go to Edge Access located under the Edge Security area.
  4. Configure SNMP Access and click Save Changes .
.
Note: SNMP interface monitoring is supported on DPDK enabled interfaces for 3.3.0 and later releases.