To assign Edges to Customers:
Prerequisites
Ensure that you have signed-up for Edge Auto-activation so that you can view the list of Edges in the Available Inventory page. For instructions, refer to Sign-Up for Edge Auto-activation.
Procedure
- Log in to SASE Orchestrator, and then go to . A list of Edge inventory with Serial number and Model appears.
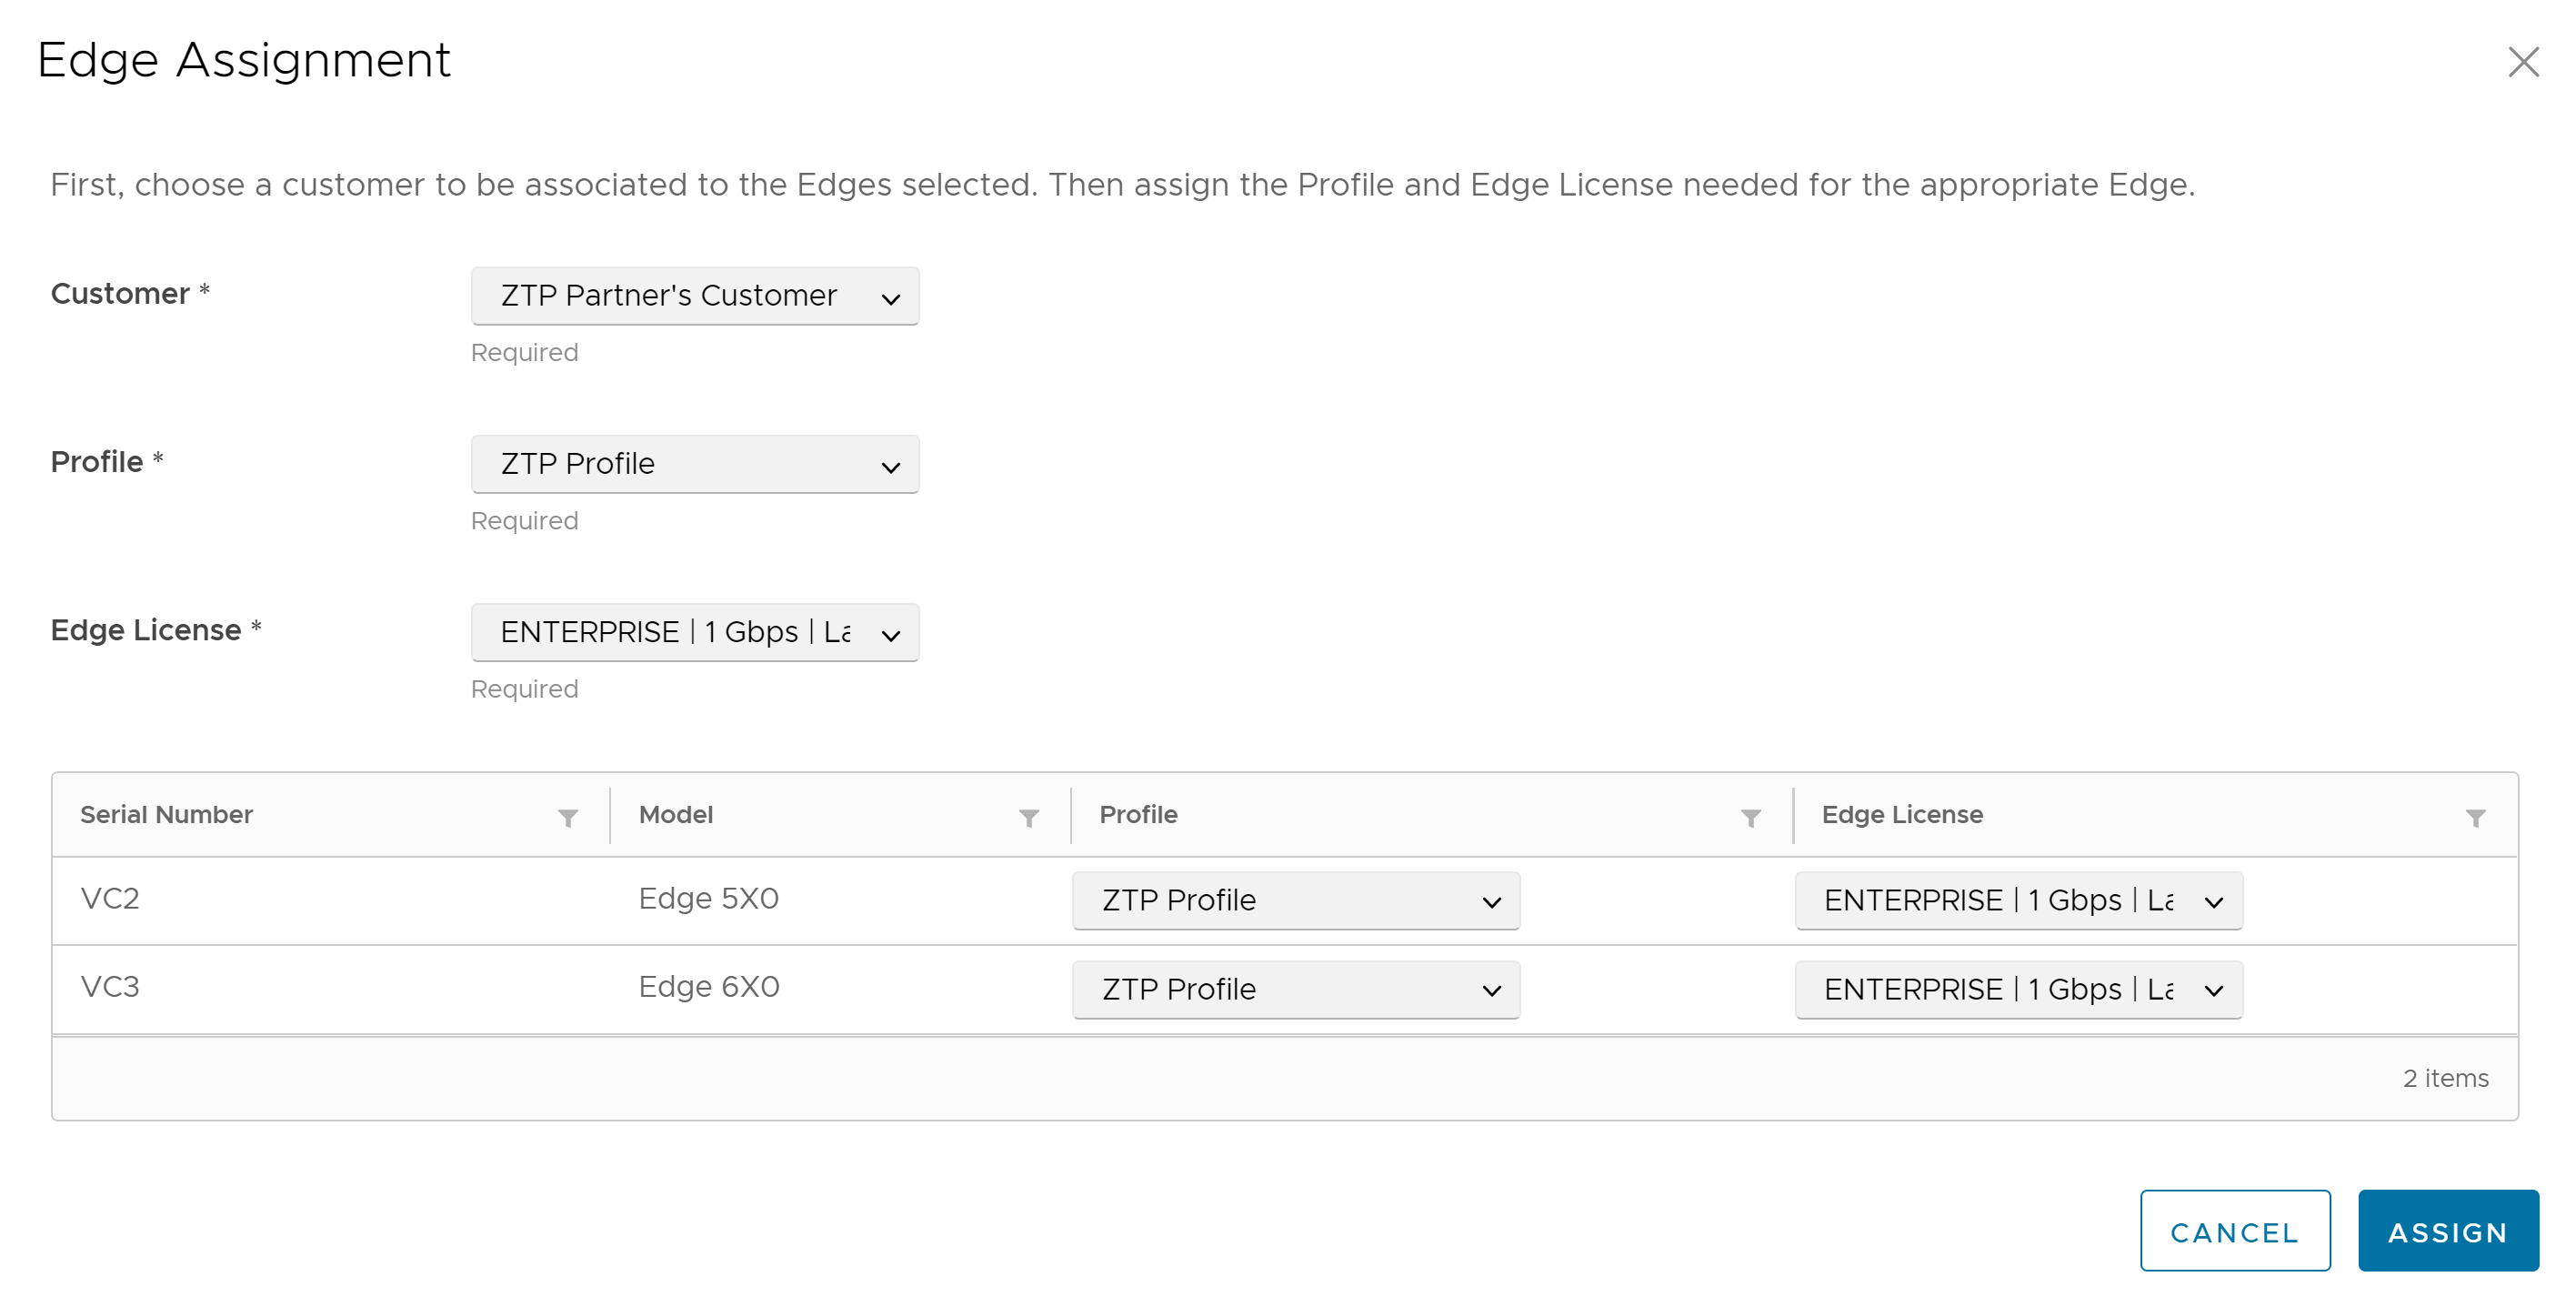
- Select all the Edges that you want to assign to Customers, and then click Assign To Customer. The Edge Assignment window appears.
- From the Customer drop-down list, select the Customer to whom you want to assign the Edges.
- From the Profile and Edge License drop-down lists, select the required profile and license that you want to assign to all Edges in the inventory.
Note: You can choose to override these settings for a specific Edge by selecting the appropriate profile and license in the table.
- Click Assign.
The Edges for which you have assigned a Customer, a profile and a license, appear in the
Assigned Inventory tab. The
Inventory State for the assigned Edges is displayed as
Assigned to Customer and the
Edge State is displayed as
Pending.
- Following are the additional options available on the Edge Auto-activation page:
| Option |
Description |
| Search |
Enter a search term to be searched across the items in the table. Use the advanced search option for more filters. |
| Download CSV |
Click to download the list of Edges in an excel format. |
| Columns |
Click this option and select the checkboxes to view the required columns. |
| Refresh |
Click this option to refresh the table properties. |
What to do next
When your Customer powers-on the assigned physical Edges and connects them to the internet, the Edges are redirected to the SASE Orchestrator, where they are automatically activated. After an Edge is activated, the Edge State in the Assigned Inventory tab changes from Pending to Activated.