To configure VMware Cloud Services Platform (CSP) for Single Sign On (SSO), perform the steps on this procedure.
Prerequisites
Sign in to VMware CSP console (staging or production environment) with your VMware account ID. If you are new to VMware Cloud and do not have a VMware account, you can create one as you sign up. For more information, see How do I Sign up for VMware CSP section in Using VMware Cloud documentation.
Procedure
Contact the VMware Support Provider for receiving a Service invitation URL link to register your SASE Orchestrator application to VMware CSP. For information on how to contact the Support Provider, see https://knowledge.broadcom.com/external/article?legacyId=53907.
The
VMware Support Provider will create and share:
a Service invitation URL that needs to be redeemed to your Customer organization
a Service definition uuid and Service role name to be used for Role mapping in Orchestrator
Redeem the Service invitation URL to your existing Customer Organization or create a new Customer Organization by following the steps in the UI screen.
You need to be an Organization Owner to redeem the Service invitation URL to your existing Customer Organization.
After redeeming the Service invitation, when you sign in to VMware CSP console, you can view your application tile under My Services area in the VMware Cloud Services page.
The Organization you are logged into is displayed under your username on the menu bar. Make a note of the Organization ID by clicking on your username, to be used during Orchestrator configuration. A shortened version of the ID is displayed under the Organization name. Click the ID to display the full Organization ID.
Log in to VMware CSP console and create an OAuth application. For steps, see Use OAuth 2.0 for Web Apps. Make sure to set Redirect URI to the URL displayed in Configure Authentication screen in Orchestrator.
Once OAuth application is created in VMware CSP console, make a note of IDP integration details such as Client ID and Client Secret. These details will be needed for SSO configuration in Orchestrator.
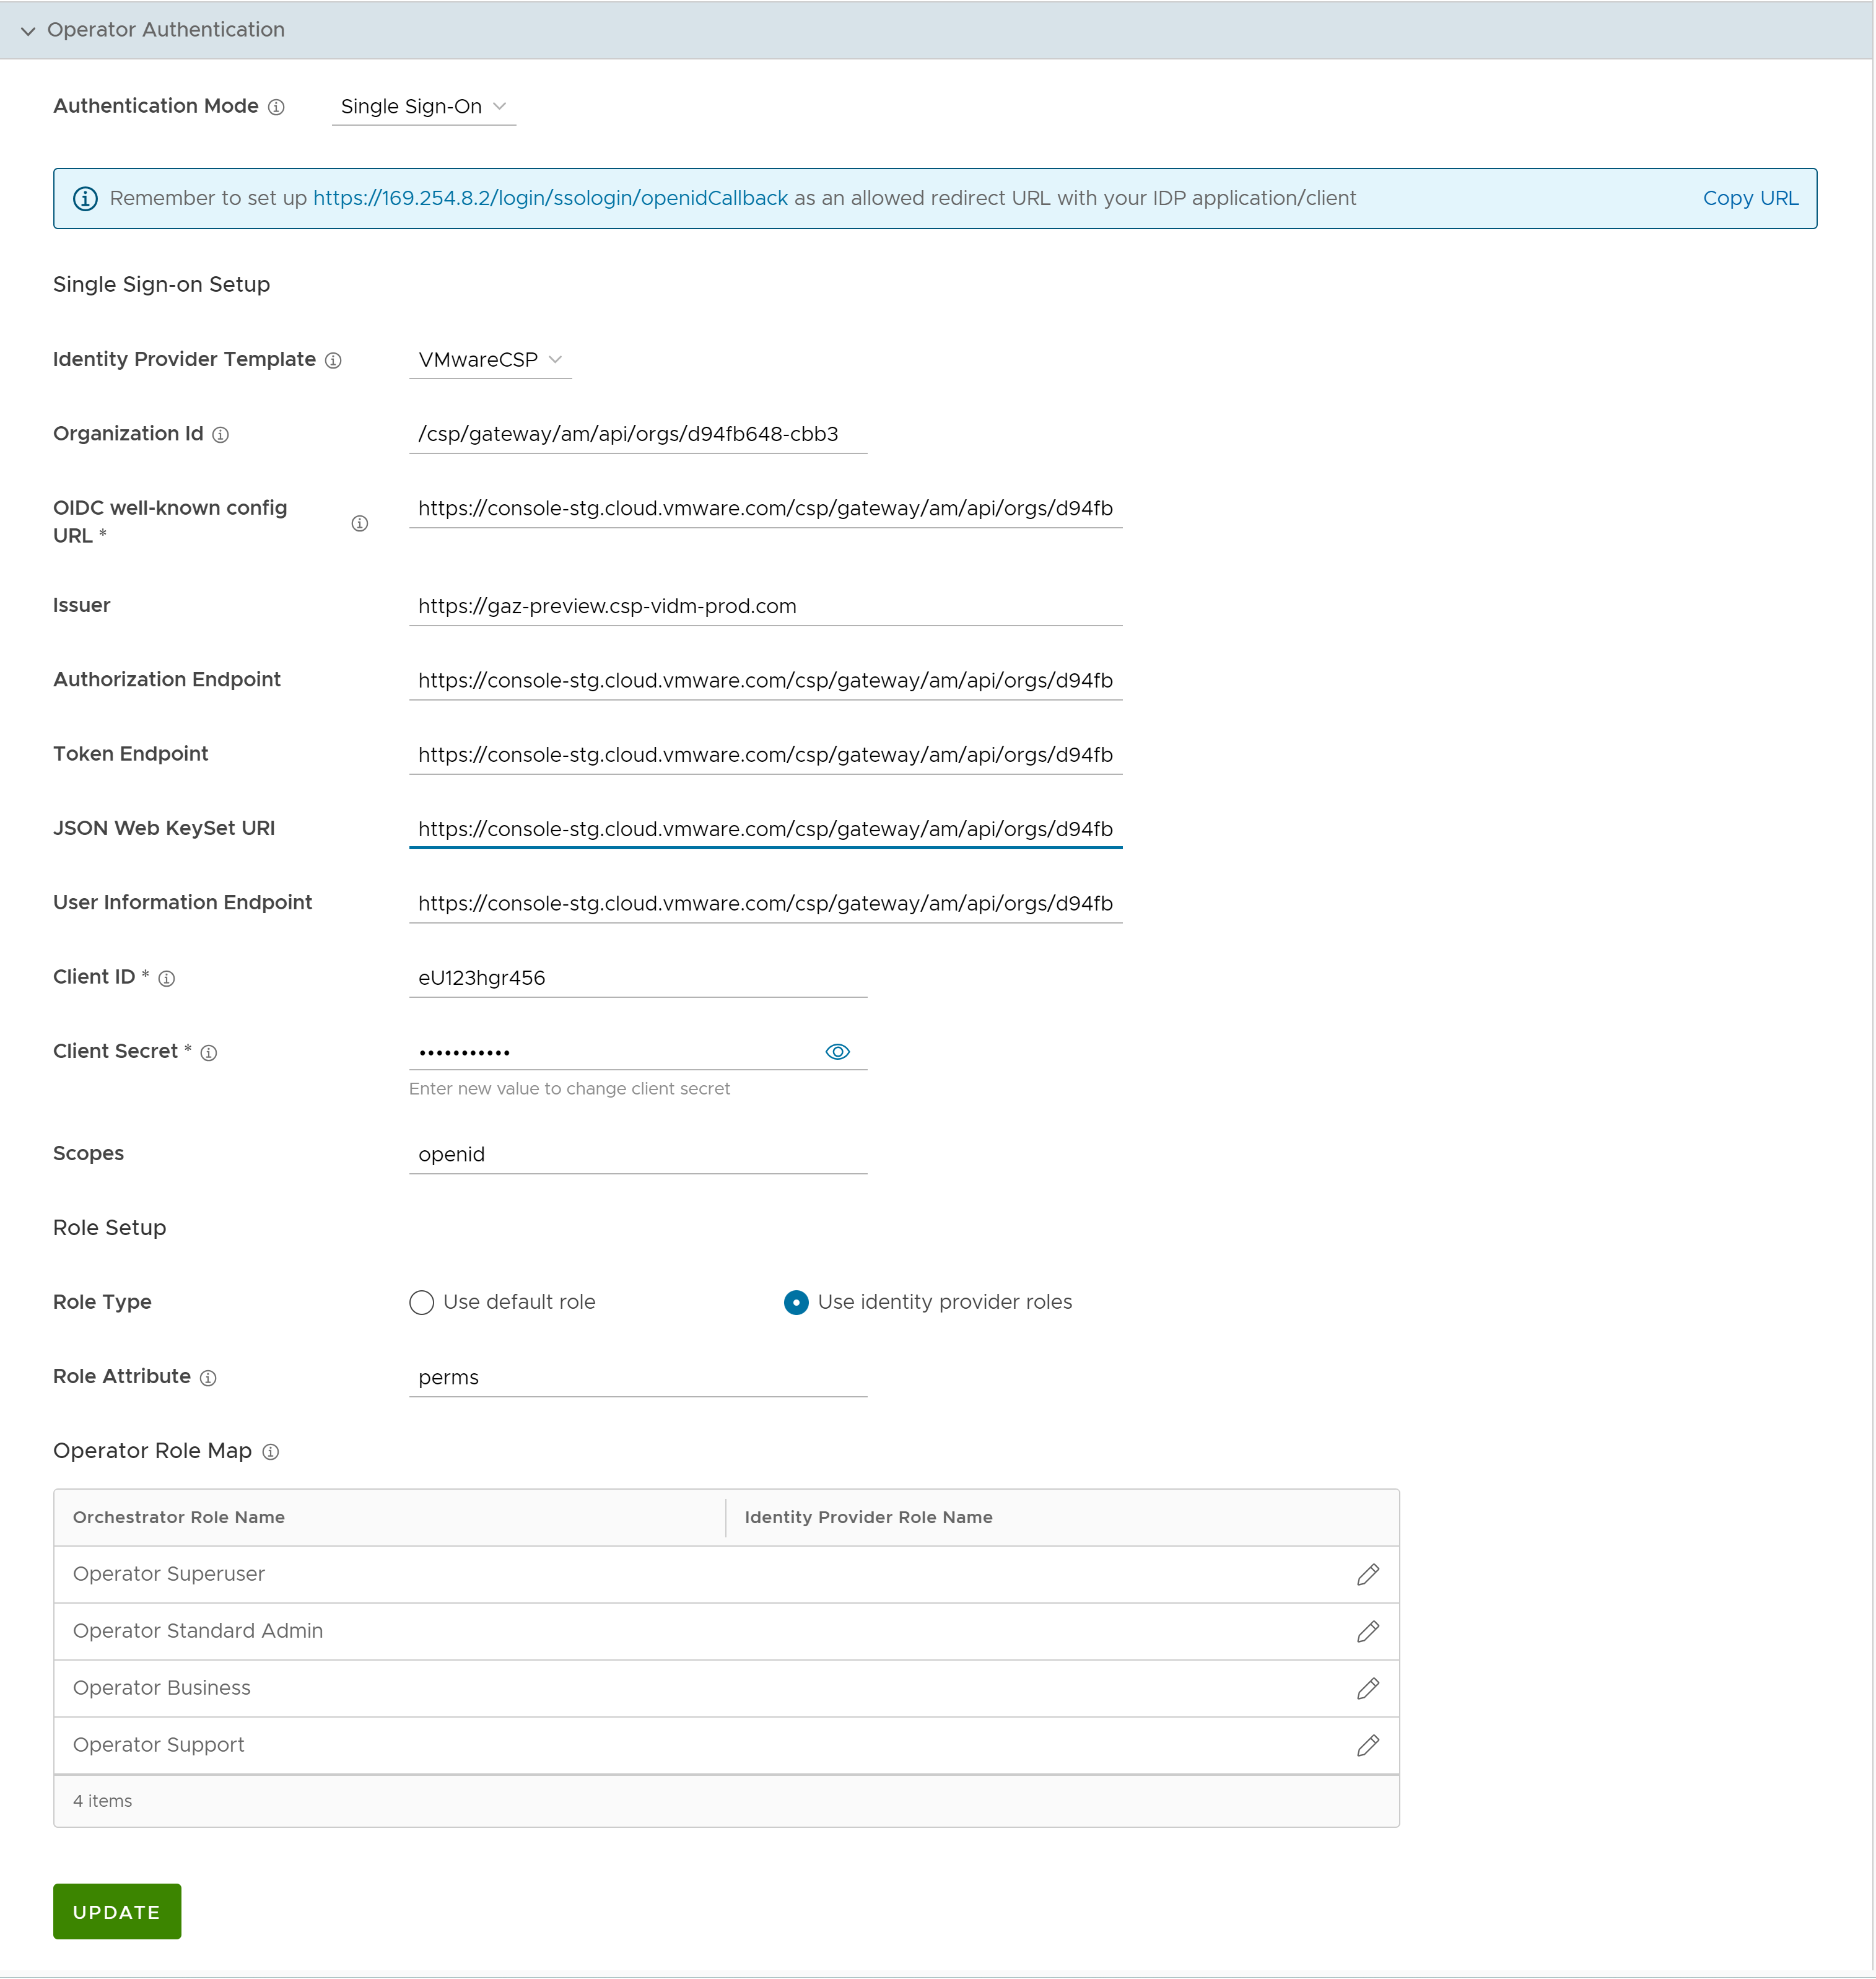
Log in to your SASE Orchestrator application as Super Admin user and configure SSO using the IDP integration details as follows:
Click Administration > User Management.
Note: To enable SSO authentication for the
SASE Orchestrator, you must set up the domain name for your Enterprise.
Click the Authentication tab and from the Authentication Mode drop-down menu, select SSO.
From the Identity Provider template drop-down menu, select VMwareCSP.
In the Organization Id text box, enter the Organization ID (that you have noted down in Step 3) in the following format: /csp/gateway/am/api/orgs/<full organization ID>.
The
SASE Orchestrator application auto-populates endpoint details such as Issuer, Authorization Endpoint, Token Endpoint, and User Information Endpoint for your IDP.
In the Client Id text box, enter the client ID that you have noted down from the OAuth application creation step.
In the Client Secret text box, enter the client secret code that you have noted down from the OAuth application creation step.
To determine user’s role in SASE Orchestrator, select either Use Default Role or Use Identity Provider Roles.
On selecting the Use Identity Provider Roles option, in the Role Attribute text box, enter the name of the attribute set in the VMware CSP to return roles.
In the Role Map area, map the VMwareCSP-provided roles to each of the SASE Orchestrator roles, separated by using commas.
Roles in VMware CSP will follow this format: external/<service definition uuid>/<service role name mentioned during service template creation>. Use the same Service definition uuid and Service role name that you have received from your Support Provider.
Click Save Changes to save the SSO configuration.
Click Test Configuration to validate the entered OpenID Connect (OIDC) configuration.
The user is navigated to the VMware CSP website and allowed to enter the credentials. On IDP verification and successful redirect to
SASE Orchestrator test call back, a successful validation message will be displayed.
Results
You have completed integrating SASE Orchestrator application in VMware CSP for SSO and can access the SASE Orchestrator application logging in to the VMware CSP console.
What to do next
Within the organization, manage users by adding new users and assigning appropriate role for the users. For more information, see the Identity & Access Management section in Using VMware Cloud documentation.