


Creating a Jump Host (JH) instance is an optional step for the Edge deployment. However, to locally manage the virtual Edge, you must deploy a JH and assign an Elastic IP to it. To SSH to an Edge over a private network using a JH, create a JH (Linux instance) in VPC with one interface in the Public subnet (for Internet connectivity with EIP), and the other interface in the management subnet.
To create a JH instance on the ECS console, perform the following steps.
Prerequisites
- Ensure you have an AliCloud account and login information.
Procedure
- Set up Basic Configurations by performing the following steps.
- Select a billing method. For example, Pay-As-You-Go.
- From the Region drop-down menu, select a region. The system randomly allocates a zone by default.
Note: After an instance is created, you cannot change its region or zone.
- In the Instance Type area, go to All Generations > x86-Architecture > General Purpose and select an instance type.
The available instance type family is determined by the region you selected.
- In the Image area, click Public Image and select an Ubuntu image, for example, 16.04.64.bit.
- Select a storage space. By default, a 40 GiB Ultra Cloud Disk is selected.
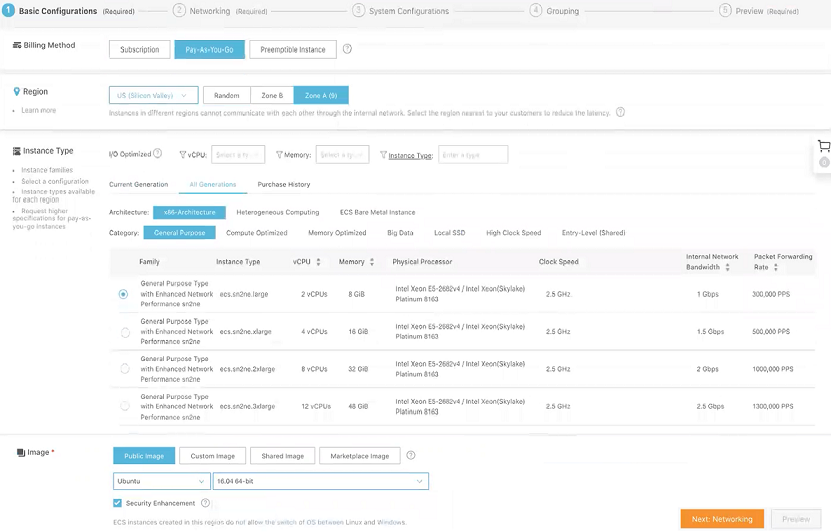
- Click Next: Networking to set up the networking and security group configuration.
- Select VPC as the network type and select the VPC where you are going to deploy your JH and attach the Console interface of your Edge to MGMT_SN.
- Set the network billing method.
- Select your VPC-type security group.
- Add an Elastic Network Interface (ENI). You can skip this step if the selected instance type does not support ENI.
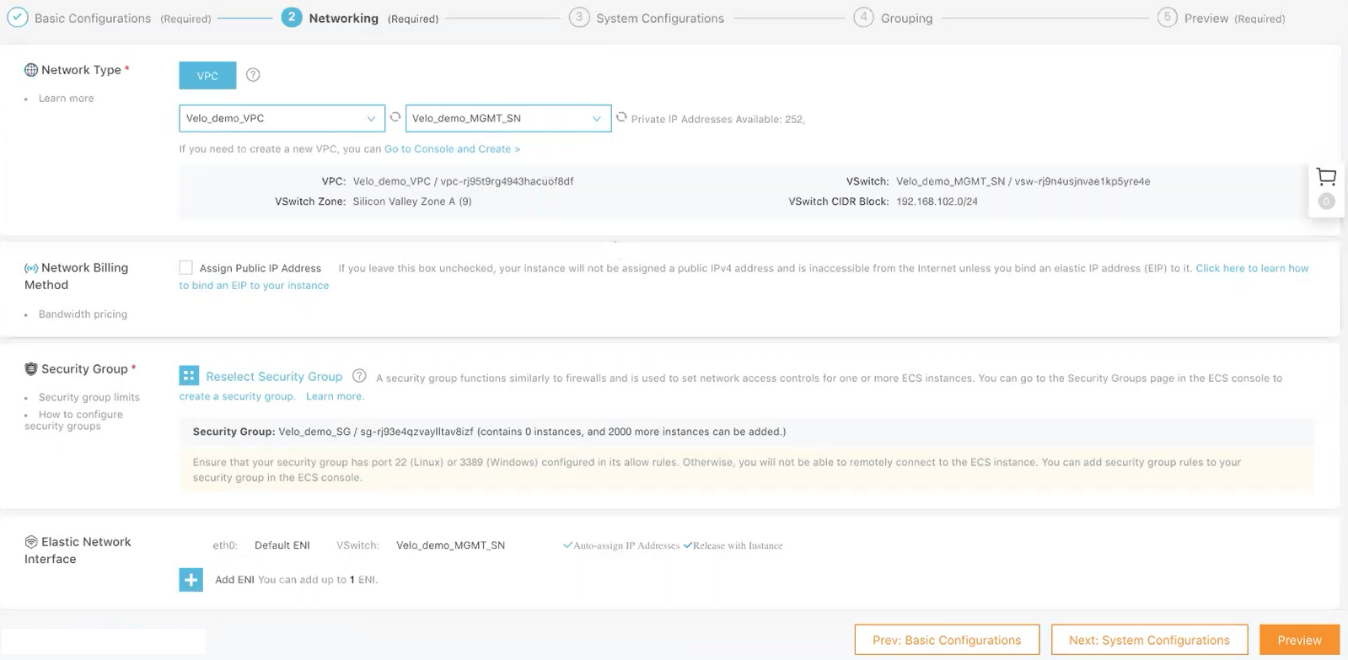
- Click Next: System Configurations.
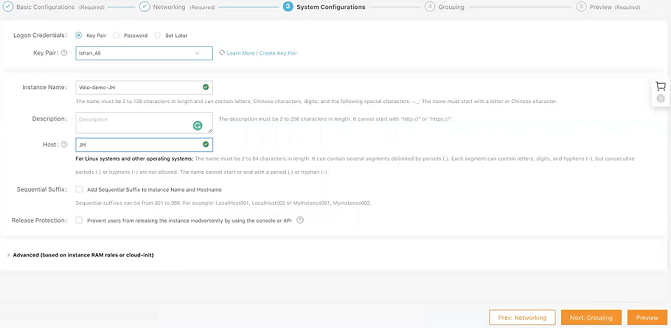
- Configure Logon Credentials by selecting one of the following options: Key Pair, Inherit Password From Image, and Password. By default, Set Later option is selected.
- In the Instance Name text box, enter a unique name for the JH instance.
Results
Click Console to return to the ECS console. Click the refresh button to check if the JH instance is created. If the newly created JH instance is in a Running status, then the instance is created successfully.
