


You can define and configure a Non SD-WAN Destination instance as Forcepoint Cloud Security Gateway and establish a secure IPSec tunnel to the Forcepoint Cloud Security Gateway through a VMware SD-WAN Gateway.
To configure a Non SD-WAN Destination via Gateway:
Prerequisites
Ensure that you have Administrator privileges to login to VMware SD-WAN Orchestrator.
Procedure
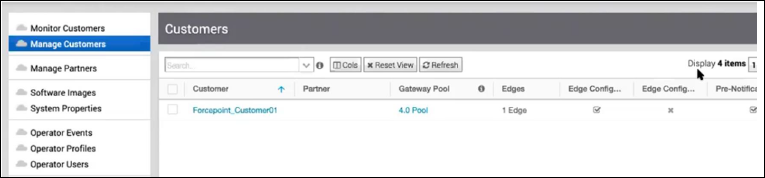
- Login to SD-WAN Orchestrator and navigate to Manage Customers.
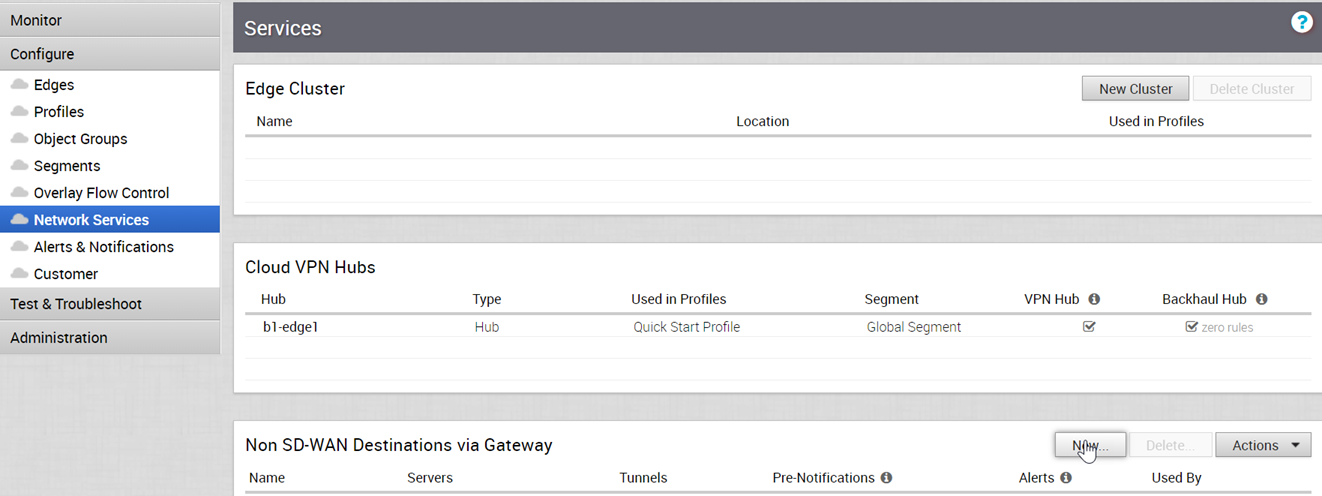
- In the Non SD-WAN Destinations via Gateway pane, click New to create a new Non SD-WAN Destination.
- In the New Non SD-WAN Destination via Gateway window, configure the following:
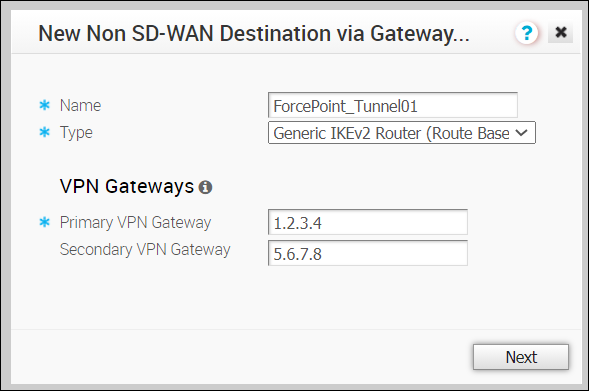
Option Description Name Enter a descriptive name for the Non SD-WAN Destination. Type Select the type as Generic IKEv2 Router (Route Based VPN). Primary VPN Gateway Enter the IP address of the first data center from the Forcepoint Cloud Security Gateway Edge Device configuration. Secondary VPN Gateway Enter the IP address of the second data center from the Forcepoint Cloud Security Gateway Edge Device configuration. Click Next. - In the next window, configure the following settings:
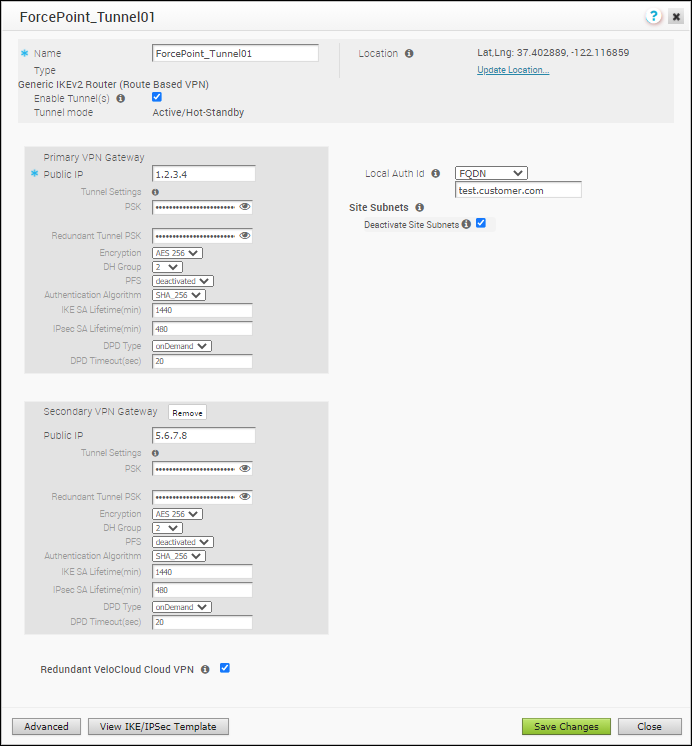 The Name and Type of the Non SD-WAN Destination are displayed. Select the Enable Tunnel(s) checkbox to enable the tunnel.Click Advanced to configure the other IPsec tunnel parameters for the Primary and Secondary VPN Gateways as follows:
Option Description PSK Enter the pre-shared key used in configuring the Edge Device in the Forcepoint Cloud Security Gateway. Redundant Tunnel PSK Repeat entering the pre-shared key. Encryption Select AES-256 as the AES algorithms key from the drop-down list, to encrypt data. DH Group Select the Diffie-Hellman (DH) Group algorithm to be used when exchanging the pre-shared key. The DH Group sets the strength of the algorithm in bits. PFS Select the Perfect Forward Secrecy (PFS) level as deactivated. Hash Select the authentication algorithm for the VPN header as SHA 256 from the drop-down list. IKE SA Lifetime(min) Enter the IKE SA lifetime in minutes. The rekeying should be initiated for Edges before the time expires. The range is from 10 to 1440 minutes. The default value is 1440 minutes. IPsec SA Lifetime(min) Enter the IPsec SA lifetime in minutes. The rekeying should be initiated for Edges before the time expires. The range is from 3 to 480 minutes. The default value is 480 minutes. DPD Timeout Timer(sec) Enter the DPD timeout value. The DPD timeout value will be added to the internal DPD timer, as described below. Wait for a response from the DPD message before considering the peer to be dead (Dead Peer Detection). Prior to the 5.1.0 release, the default value is 20 seconds. For the 5.1.0 release and later, see the list below for the default value.
- Library Name: Quicksec
- Probe Interval: Exponential (0.5 sec, 1 sec, 2 sec, 4 sec, 8 sec, 16 sec)
- Default Minimum DPD Interval: 47.5sec (Quicksec waits for 16 seconds after the last retry. Therefore, 0.5+1+2+4+8+16+16 = 47.5).
- Default Minimum DPD interval + DPD Timeout(sec): 67.5 sec
Note: Prior to the 5.1.0 release, you can deactivate DPD by configuring the DPD timeout timer to 0 seconds. However, for the 5.1.0 release and later, you cannot deactivate DPD by configuring the DPD timeout timer to 0 seconds. The DPD timeout value in seconds will get added onto the default minimum value of 47.5 seconds).Redundant VeloCloud Cloud VPN – Select the checkbox to establish the IPSEC tunnels from the Primary and Secondary Gateways.Site Subnets – Add subnets for the Non SD-WAN Destination using the Plus ( +) Icon. If you do not need subnets for the site, select the Deactivate Site Subnets checkbox.Local Auth Id – Select the Local authentication ID as FQDN from drop-down list and enter the DNS name used while configuring the Edge Device in the Forcepoint Cloud Security Gateway.
Click Save Changes and close the window.
Results
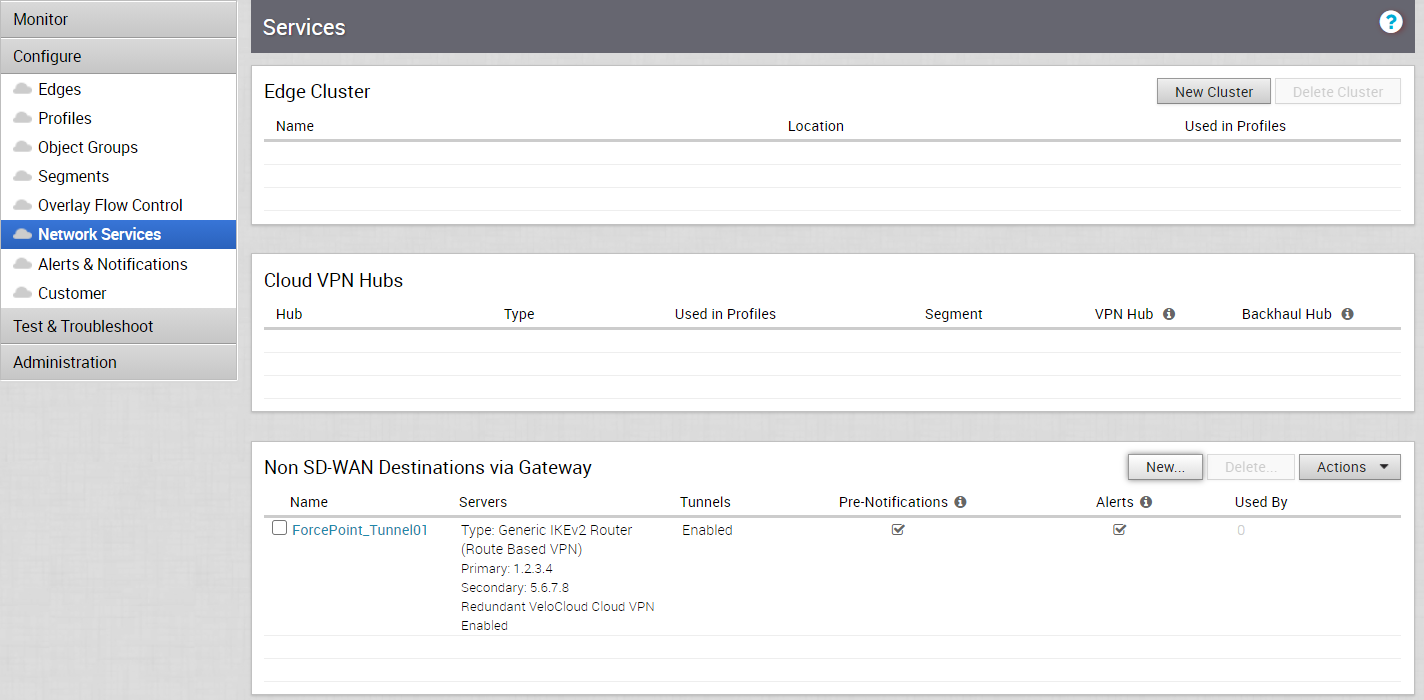
The new Non SD-WAN Destination via Gateway is displayed in the Network Services window:
What to do next
Configure Profile to use the new Non SD-WAN Destination via Gateway. See Configure Profile with Non SD-WAN Destination via Gateway.
