


To deploy VMware Secure Access service using SD-WAN Orchestrator:
Prerequisites
- Ensure that you have completed the required configuration on Workspace ONE UEM. For details, refer to Get Started with VMware Secure Access Deployment.
- Ensure that you have set the maximum number of PoPs for Secure Access in SD-WAN Orchestrator. The maximum number depends on the number of VMware SASE PoPs deployed on the SD-WAN Orchestrator. To set the maximum number of PoPs, go to Configure > Customer > Customer Configuration > Service Access.
Procedure
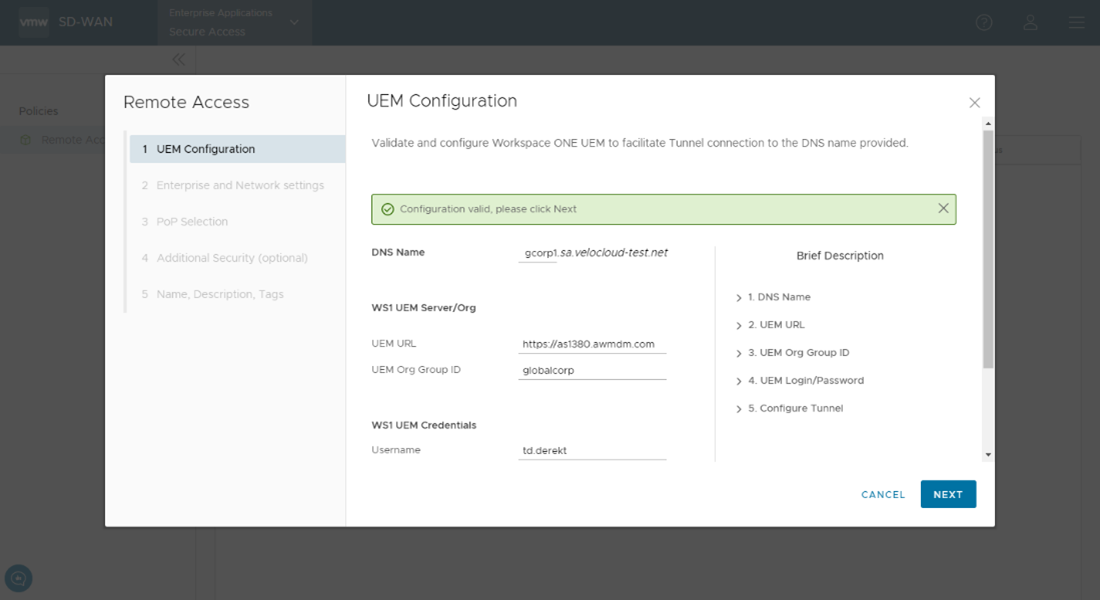
- In the UEM Configuration screen of the Remote Access Wizard, complete the following configurations:
- In the DNS Name field, enter the hostname that you provided when you configured the Workspace ONE UEM tunnel. Refer to step 4 in Get Started with VMware Secure Access Deployment.
- In the UEM URL field, enter the Workspace ONE UEM API URL related to your UEM environment.
- In the UEM Org Group ID field, enter the organization group identifier that you created during the Workspace ONE UEM configuration. Refer to step 1 in Get Started with VMware Secure Access Deployment.
- In the WS1 UEM Credentials section, enter the username and password that you had set up when you created the administrator account in the Workspace ONE UEM console. Refer to step 2 in Get Started with VMware Secure Access Deployment.
- Select the Yes check box to configure the UEM tunnel hostname within the organization group that you had created.
- Click Check.
An API call is made to the UEM server to validate the details that you have entered. Once the validation is successful, click Next.
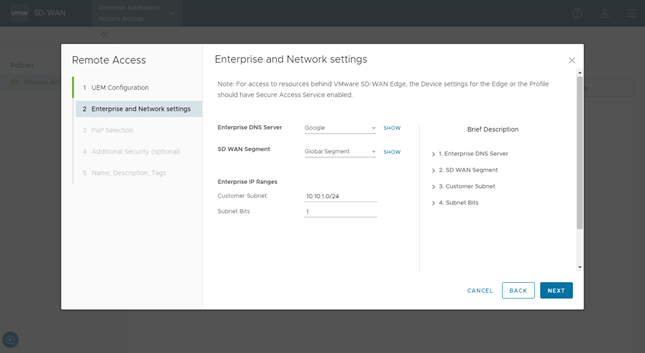
- In the Enterprise and Network settings screen of the Remote Access Wizard, complete the following configurations:
- From the Enterprise DNS Server drop-down list, select the required DNS server configured for the Enterprise. The default is Google or OpenDNS.
- From the SD WAN Segment drop-down list, select the required segment for which you want to enable the Secure Access service. The default is Global Segment.
- In the Enterprise IP Ranges section, enter the following details:
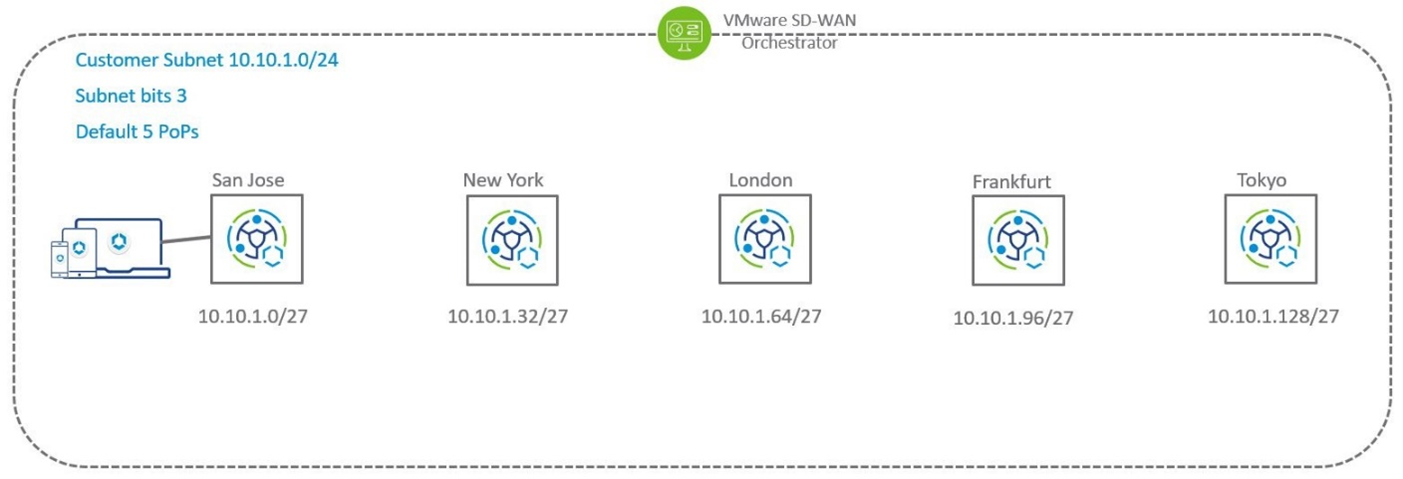
- Customer Subnet—This is a subnet owned by the customer that will be used by remote users when accessing the network. This Customer Subnet functions as a super net that will be divided and distributed among as many SASE PoPs as the user has configured for their deployment (up to five PoPs can be configured).
- Subnet Bits—Configure from 1 to 3 Subnet Bits to divide the Customer Subnet into individual subnets that can be allocated to the PoPs.
The following table illustrates the relation between the Customer Subnet and Subnet Bits:
The number of Subnet Bits chosen determines the number of subnets that will be created from the Customer Subnet. As noted in the above table if you configure:Customer Subnet Subnet Bits Number of Subnets Subnet per PoP 10.10.1.0/24 1 2 - 10.10.1.0/25
- 10.10.1.128/25
10.10.1.0/24 2 4 - 10.10.1.0/26
- 10.10.1.64/26
- 10.10.1.128/26
- 10.10.1.192/26
10.10.1.0/24 3 8 - 10.10.1.0/27
- 10.10.1.32/27
- 10.10.1.64/27
- 10.10.1.96/27
- 10.10.1.128/27
- 10.10.1.160/27
- 10.10.1.192/27
- 10.10.1.224/27
- One Subnet Bit, the Customer Subnet is divided into two subnets, which can be assigned to two PoPs.
- Two Subnet Bits, the Customer Subnet is divided into four subnets, which can be assigned to four PoPs.
- Three Subnet Bits, the Customer Subnet is divided into eight subnets, which can be assigned to a maximum of five PoPs and three subnets will remain unallocated.
Following diagram depicts the relation between Customer Subnet and Subnet Bits:
- Click Next.
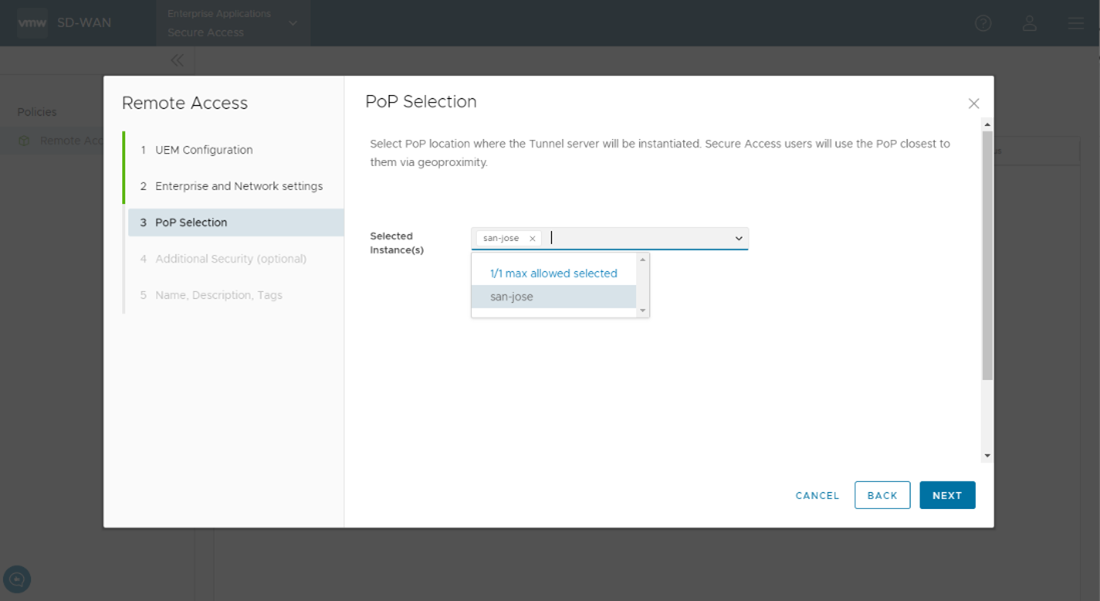
- In the PoP Selection screen of the Remote Access Wizard, from the Selected Instance(s) drop-down list, select the PoP location where the tunnel server will be instantiated. Click Next.
- In the Additional Security (optional) screen of the Remote Access Wizard, you can choose to enable Cloud Web Security on Secure Access.
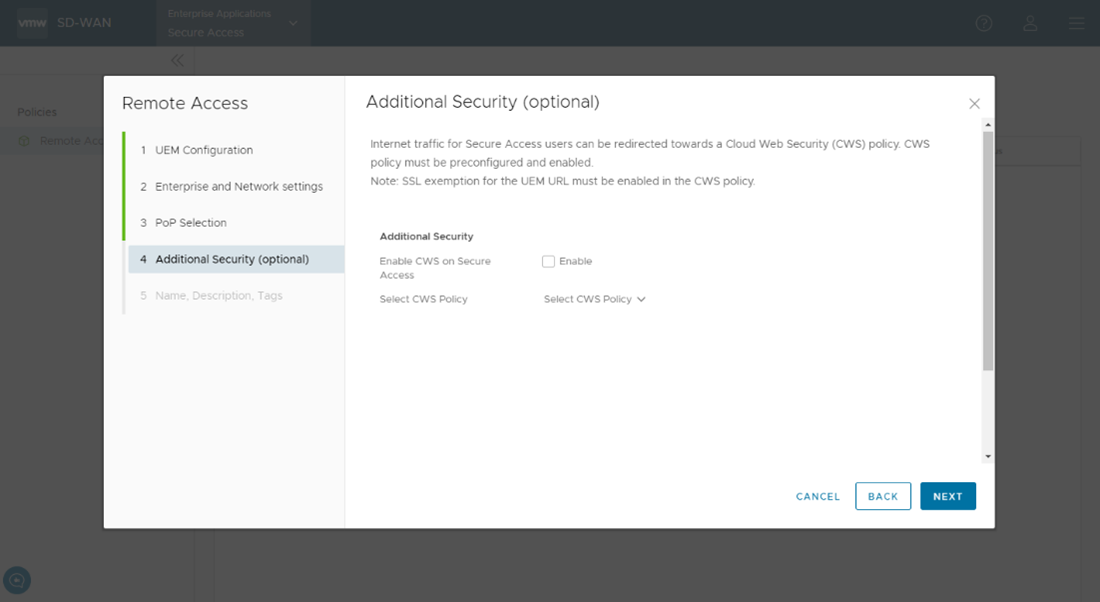 If Cloud Web Security is enabled, ensure that an SSL Inspection (Secure Socket Layer) Bypass/Exemption Rule is created in the CWS Policy under the SSL Inspection section. The default behavior of SSL Inspection is to decrypt all encrypted traffic. Creating SSL rules is covered in detail in the Cloud Web Security Configuration Guide. The rule will cover destination traffic sent to domain awmdm.com and will ensure that CWS does not decrypt this traffic. Click Next.
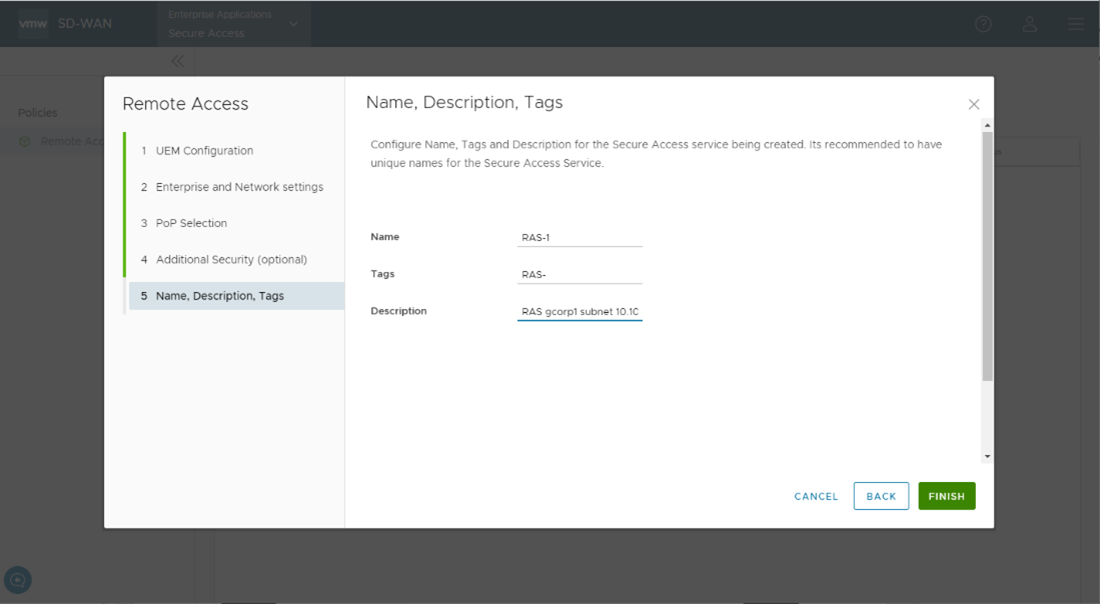
 - In the Name, Description, Tags screen of the Remote Access Wizard, enter the name of the Secure Access service, and add any tags or description, if required, and then click Finish.
Results
What to do next
You must enroll your devices with the Workspace ONE Intelligent Hub application. Refer to Enroll Devices with Workspace ONE Intelligent Hub.
