By default, the XML domain configuration file for VoIP-AM is loaded into the Global Manager, meaning that by default it is available to a Global Console attached to the Global Manager. If for some reason the XML domain configuration file for VoIP-AM is not available, perform the procedure in this section to load it.
Two server tools facilitate the loading of XML configuration files into the Global Manager. Both tools are launched from a Topology Browser Console (attached to the Global Manager) by right-clicking the local InChargeDomain object that represents the Global Manager (Access to Import XML Configuration server tools).
Both server tools are described in the VMware Smart Assurance Service Assurance Manager Configuration Guide. The server tool is used in the procedure that follows to load the XML domain configuration file for VoIP-AM.
After loading the file, VoIP-AM will appear in the Domains category on the Global Manager Administration Console. At that point, you should proceed with the procedures in “Specifying the underlying domains” on page 60.
To load the XML domain configuration file for VoIP-AM:
-
Attach the Global Manager Administration Console to the target Global Manager.
Note:Instructions for opening the Global Manager Administration Console are presented in Chapter 3, “Opening the Global Console.”
-
Select File > New > Topology Browser Console to launch a Topology Browser Console.
-
In the Topology Browser Console, expand the configuration tree to display the InChargeDomain objects.
-
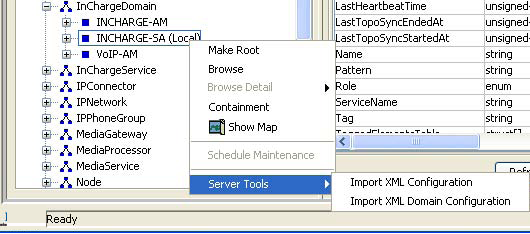
Right-click the local InChargeDomain object representing the Global Manager—for example, INCHARGE-SA (Local)—and select Server Tools > Import XML Domain Configuration from the pop-up menu.
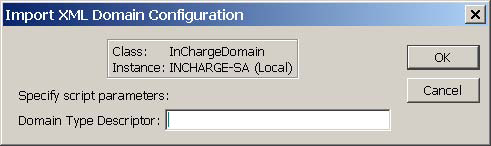
The Import XML Domain Configuration dialog box appears.
-
To load the XML domain configuration file for VoIP-AM, type voip in the Domain Type Descriptor field and click OK.
-
Switch back to the Global Manager Administration Console.
-
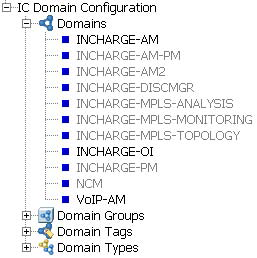
In the left panel of the Global Manager Administration Console, expand the configuration tree to display the Domains.
VoIP-AM appears in the Domains list. Since its name appears as black text, VoIP-AM is enabled.
-
Continue with the procedures in “Specifying the underlying domains” on page 60.