


A Standard allows you to set up filters and tests that are run against specific device classes. Filters for standards are optional, but you can have as many tests as needed.
Note: With Multi-Config, Compliance Policies now incorporate Standards and Tests targeted on specific configuration files.
- To create a new Standard, you must first select the Automation Library .
- When the Library Manager opens, right-click on System (or a folder name), then select New -> Standard .
- From the New Standard window, enter a name for the new Standard, then click Ok.
The Automation Library editor for the newly named Standard displays.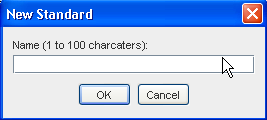
At the General tab,
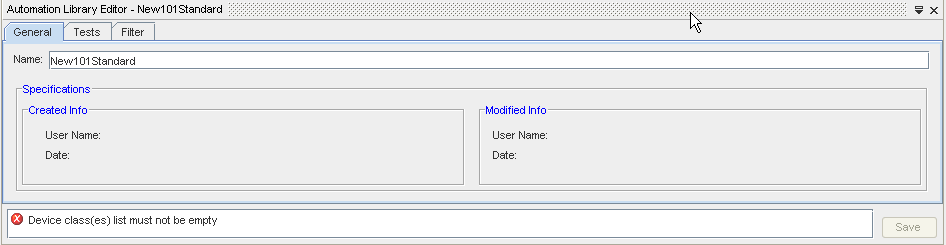
- Beginning with the General tab, make sure the name is correct. If not, make changes, then click Save.
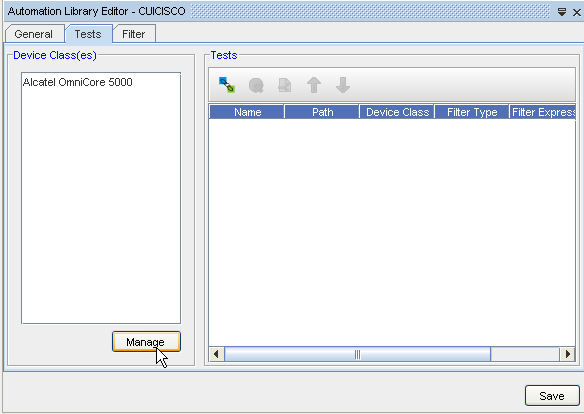
- Click the Tests tab.
At the Tests tab,
- At the Tests tab, click Manage to select the Device Classes from the list.
- Move the selected Device Classes from the Available items column into the Selected Items column, by first highlighting the item or items in the Available Items column, then clicking the Add or Add All button.
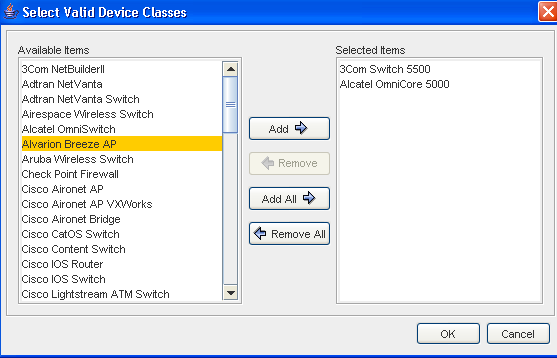
- Click Ok after moving the devices classes into the Selected Items column.
- To Link a Standard to a test, click the Add button, and then select a test. Once the test is selected, click Ok. See that test you selected is now linked into the Standard.
Test tool bar
When in the Test section of the Tests tab, the tool bar can be used.
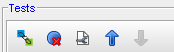
| Icon | Usage |
|---|---|
 |
Used to add a test. |
 |
Used to remove an existing test. |
 |
Displays the Add Audit Units window, allowing you to add any available Audit Units and Device Classes if applicable. |
 |
Moves any test you have to the top-most position. |
 |
Moves any test down on the list of tests. |
At the Filter tab,
- At the Filter tab, select to add filters by first clicking the Add Condition bar, then selecting the filter criteria from the Attribute and Operator drop-down arrow options.
- Add and Expression, then click Save.
Filter tool bar
When in the Test section of the Tests tab, the tool bar can be used.
Icon Usage 
Used to add a filter condition. 
Used to remove an existing filter condition. 
Displays the Add Attribute window, where you can add an attribute to the list of filters. 
When an attribute Name column is clicked, you can then use this icon to remove the clicked attribute name from thet listing of attributes (or columns). 
Moves any test you have to the top-most position. 
Clears any attribute from the list. - You can now Close the Automation Library Editor, and see your Standard is now in the folder you used to create your Standard in.
Note: Once a Standard has been created and then added to the Library Manager, you can then right-click on that Standard, and select Edit (to change any previously selected options), or you can select Delete to delete it from the list.
For a Test to be linked to a Standard, the Test must be defined before it is shown as available for linking to a Standard.
Standard Right-Click Options:
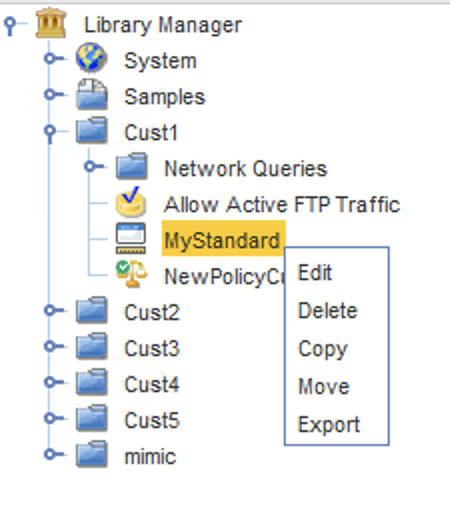
You can select:
- Edit - to open the Automation Library Standard Editor, and make any needed changes or edits
- Delete - to remove this Standard from the container
- Copy - to copy this Standard to use at another location, or to use as a template to create another Standard
- Move - to move this Standard to another location within your network
- Export - to export this Standard to a location outside from your system or network
Removing Standards
Standards can be deleted (removed) when they are no longer needed to validate config files.
