


-
To view more details concerning any job that has been scheduled, first select a job from the listing. In this example, Job ID 100083 has been selected from the list.
-
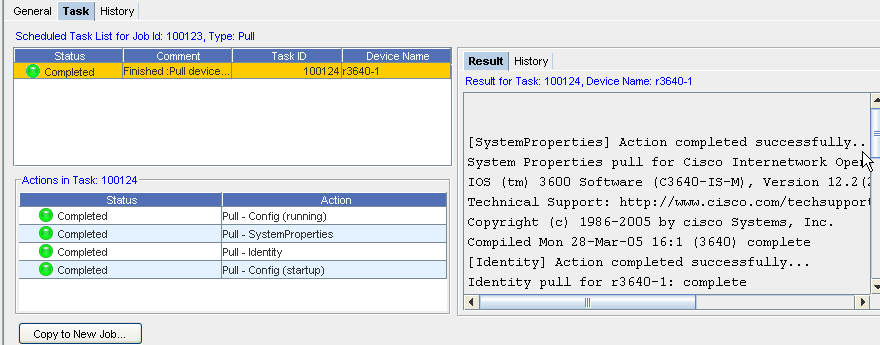
Within the Task tab, the Scheduled Task List for Job Id:100083, Type: Pull is displayed. This indicates that a Network push was requested. This push entails that all devices within that specific network are affected.
-
As you can now complete multi-config pushes, the Actions in Task: section details the results of each action associated to each task . View the Result tab to see the results for each action associated with the Network Push task.
Note: The Actions in Task number will always be one number higher than the Job ID number. -
The Result section details the results for the Task (shown here at 100057), and the Device as Router. Scroll through this section to view the actions results. The Results tab shows information associated to the Action.
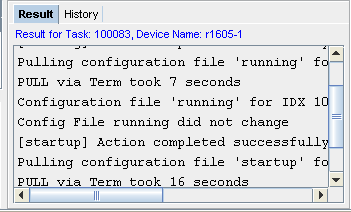 Note: E rrors and warning from Device Services (detailed in the Schedule Manager) are color coded. Errors are displayed in red, while warnings are in orange.
Within the contents of the Results tab, there may be symbols accompanying the contents.
The following symbols are used to help define the contents.
-
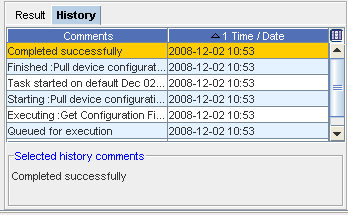
Next, click the History tab to view the history details of the task. The History tab displays information associated to the Task .
Result tab,
| Symbol |
Description |
| >>> |
Indicates information is included |
| !!! |
Indicates here is a warning |
| --- |
Indicates negative information |
| === |
Indicates information set on device |
History tab,
Selected task comments,
From this section, you can view the Selected History Comments on the each task. Scroll to view all comments.
