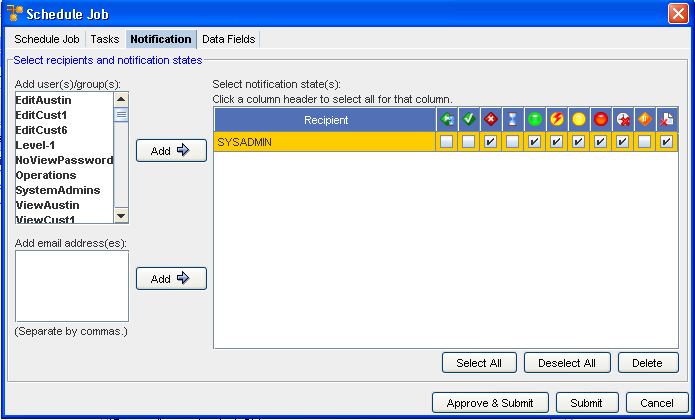
The Notification tab allows you to select users or groups within your network, and users that are external to the application. You can then send email's regarding the state (status) of the job as it is processed. By default, all users and groups that have access to the Network are listed here. They do not receive email unless they are added to the Notification State column.
Any external email addresses can be added by entering names in the Add Email Address field, and adding these names to the Notification list.
As jobs are being pushed to the network they have various states. Depending on the success of the push, the states (or status) the device goes through vary.

The Notification tab contains three sections.
-
Add users/groups
-
Add email Addresses
-
Select Notification States
Add users/groups
The Add user/group section allows you to select users or groups from all the available Network Configuration Manager users.
Add email addresses
The Add email addresses section allows you to enter a comma delimitated list of external user's email addresses.
Notification States
When users are added (using one of the methods listed above) each job state is available for selection for each user. Depending on the user or group, the check boxes allow you to select notification status, based on the user or group's needs.
To send an email notification to users and/or groups,
-
On the Notification tab, select the users from the Add user/group column. Or if you are adding external email addresses, enter the email addresses in the Add email addresses text field. A comma ( ,) must be used to separate each email address.
-
In the Notification State section, select the job states for each user/group, for which an email will be sent. At the bottom of the window is the option to Select All job states. This option checks all the check boxes, for all the listed users/groups. Or, to reset all users/groups, click Deselect All.
-
When finished with the job details, click Submit. for the job to be submitted to the Schedule Manager. Or, if you have been granted adequate permissions, click Approve & Submit. The job will be scheduled to run based on the settings that were defined in the Schedule Job tab.