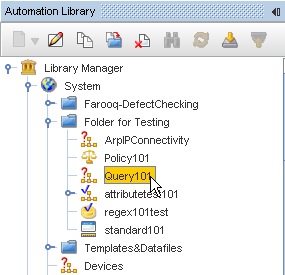
- To create a new Query, you must first select the Automation Library .
- When the Library Manager opens, right-click on System (or a folder name), then select New -> Attribute Query.
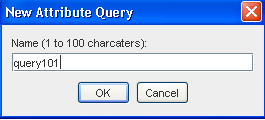
- From the New Attribute Query window, enter a name for the new test, then click Ok. The Automation Library Editor opens.
The Tables tab is now opened and active.
Tables Tab,
The error message (located at the bottom left) warns that you must have at least one table specified.
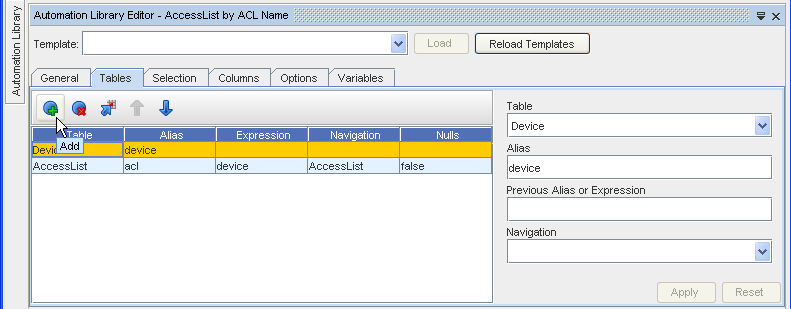
Table tool bar
Following are the icons available on the Tables tab
- Click Add
 to add a table. At the Table section, click the drop-down arrow to view the listing of tables.
 - Make a selection from the list of tables to be specified in the Query.
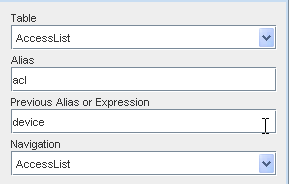
- Notice that when you select a table (in this case ArpEntry), the Alias is already created, and populates the Alias field. However, you can assign your own alias.
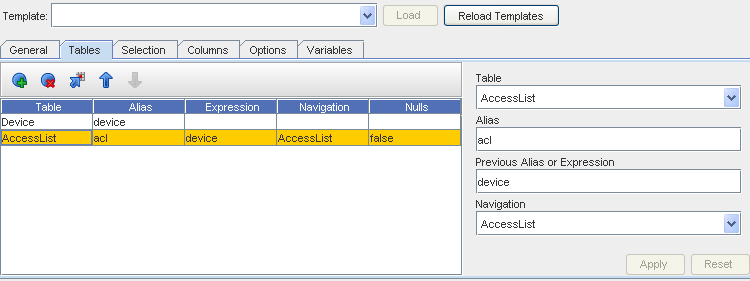
 Note: The Allow Nulls check box includes rows in the result set, even if there are no entries in the current table that correspond to entries in the previous table it was joined to. You cannot execute the query until one or more columns are specified to be in the result set. The red error message at the bottom of the editor is informing you of this.
 - Click Apply, and go on to the next tab.
Selection tab,
Items selected from this tab represent the information to be retrieved. If the Query is executed without adding a selection clause, it displays the Access List Extended Rules for every Device in the system.
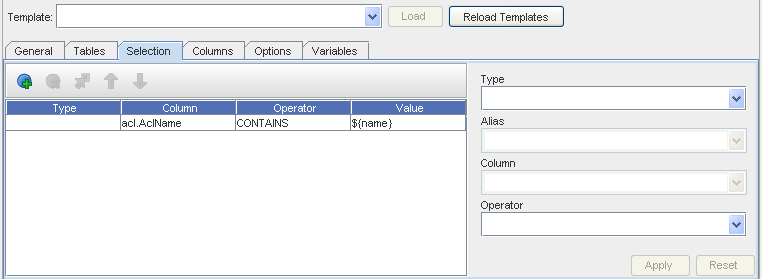
- Click Add , then go through the drop-down options for Type, Alias, Column, Operator and Value, and make your selections.
- Click Apply when you have made all your selections.
Selection tool bar
| Icon | Description |
|---|---|
| |
Used to Add a row in the left section of the window |
 |
Used to Remove a row in the listing |
 |
Used to Insert an additional line |
 |
Used to Move the selected item in the list up or down within the list |
Column tab,
Use the columns tab to specify which columns should appear in your Result View.
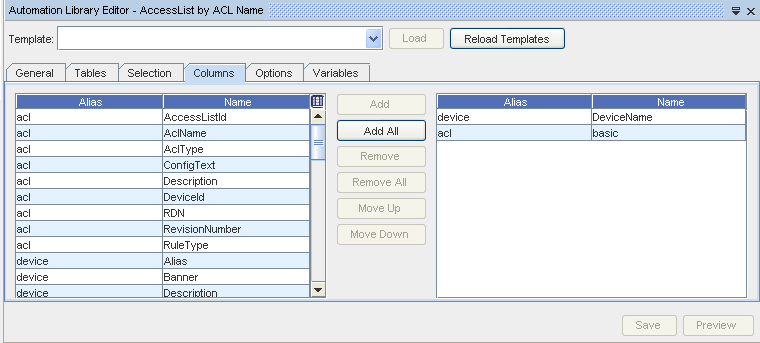
- At the Columns tab, you have a selection of columns that can be added to the Query. These columns represent what is returned in the query results, in other words, all the properties within a device. A quick way to include all the device properties is to select basic from the columns listing. Once selected, click Add or Add All to add your selections.
- Click Save, and then click Preview to preview your Query Results. Select the Preview button to look at the results of the query, which is displayed as a new Result View.
Options tab,
The options tab has some miscellaneous fields that control behavior of the query execution.
The Row Limit field sets an upper bound on the number of result set rows that the Network Configuration Manager server will return. The default value when a new query is created is 10,000, which means the server will return a maximum of 10,000 rows of data in a Query Result.
This limit is imposed to limit the maximum amount time and/or memory the Query can take. In exceptional cases, you may need to lower the Row Limit (if the Query can take large amounts of time), or increate the Row Limit (if you need to see more than 10,000 rows in the Result Set.) If a Query generates more than Row Limit rows, only the first Row Limit rows will be returned and a warning message appears indicating Row Limit was hit.
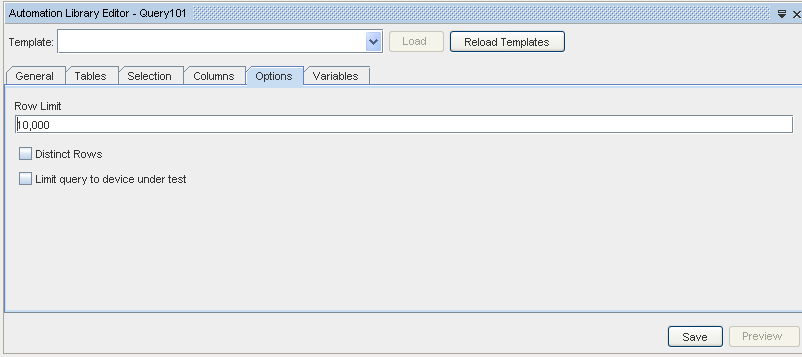
- This section contains Row Limit information. Generally, the default is acceptable. If not, you can make other changes.
- Click Save to keep the default, or to keep your changes.
Variables tab,
The Variables tab allows you to define Variables that are required as input to the query, or computed from the query's result set after it has executed. These Variables can be used in Attributed Compliance Test rules, or as part of a query's selection criteria. Any values supplied as input with the query are initialized before the query is executed. The remaining values are calculated just after the Query is processed, and the Result Set is generated.
Variables tool bar
| Icon | Description |
|---|---|
| |
Used to Add a row in the left section of the window |
 |
Used to Edit existing information |
| |
Used to Remove a row in the listing |
| |
Used to Move the selected item in the list up or down within the list |
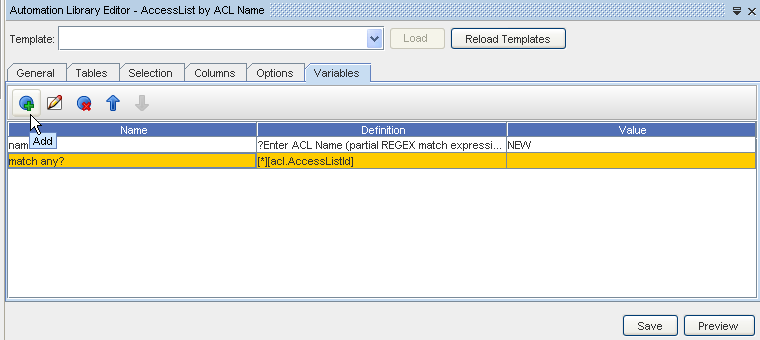
- Click Add to display the Variable Definition window.
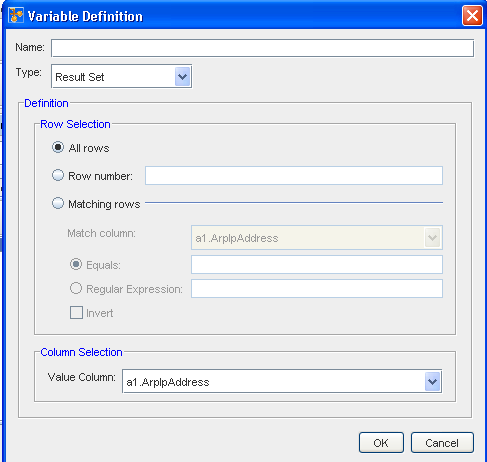
- Enter a Name for the definition.
- From the drop-down arrow, make a Type selection.
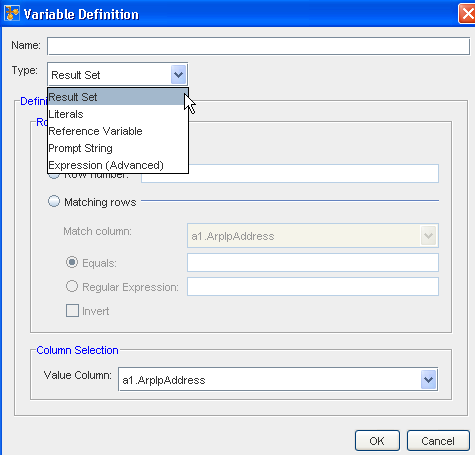
- Based on your Type selection, this window changes to accommodate the selection. Complete making your selections on this window, including the Column Selection, if appropriate.
- Click Ok when you have made all your Variable Definition selections.
- Click Preview to see the Results of the selections in this tab.
- Now, click Save to save all your selections for this Query, and then Close
 the Automation Library Query editor. Your Query is now in the folder in System.