


Regardless of how the Schedule Job window is accessed, the method of scheduling jobs is exactly the same. All required fields must be populated. Any required fields not populated will generate errors.
For more information on the various settings, see Using the Schedule Job Manager .
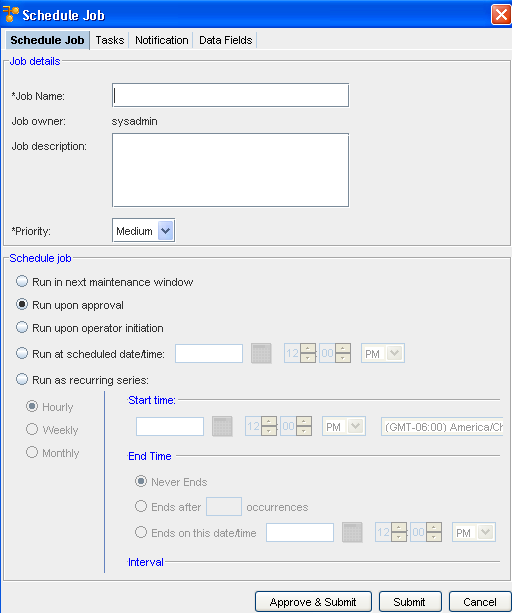
In the Job details section of the Schedule Job tab,
-
Enter the Job Name .
-
You can also enter a job Description.
-
From the *Priority drop-down list, select a Priority level .
This level determines the execution priority of your job in the Device Server. For most jobs, select the Medium priority. (This is the default.) This will run on a normal schedule. For jobs such as Cut-Through, you should select High as the priority as this task is completed in real time and needs the highest priority. A Low priority can also be selected if you have numerous jobs to run.
Scheduling a job,
-
At the Schedule job section, by default, all jobs are scheduled to Run upon approval . All selections in the following example are displayed as being active in the schedule for viewing purposes only. With adequate permission, you can click the Submit button located at the bottom of the window.
-
Note that you can select to have the job Run in the next maintenance window.
-
If you select the Run upon operator initiation option, and Submit the job for approval, this keeps the job in a pending state after approval . After this, any user with Schedule permissions can then execute this job.
-
To set a specific time, select Run at scheduled date/time . The related date and time fields activate.
-
Enter a date. For assistance, use the Calendar icon to open a monthly calendar.
-
Select the time. The hour, minute, and AM/PM settings must be designated.
-
If this option is okay, click Submit.
-
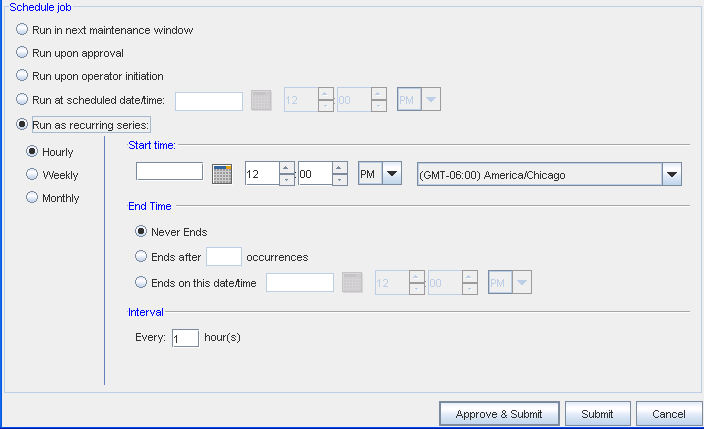
To set a recurring schedule, select Run as recurring series . The recurring setting options activate.
Important: When the recurring schedule is selected, the new time zone drop-down options are available. Make your selection from the drop-down options. The time zone you select must be the client's time zone. The new time zone field will be propagated with the client time zone automatically when creating a new Maintenance Window or recurring scheduled job.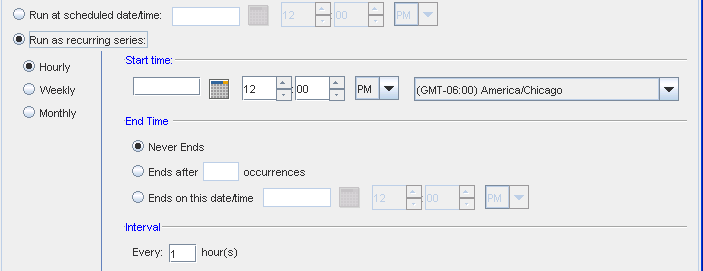
-
Set the recurring options: Frequency, Start and End Times, and Time Interval.
-
If this option is okay, click Submit. The job is sent to the Schedule Manager and the Schedule Job window closes.
The Cancel button takes you out of this window, and back to the previous window you opened.
To review the process of a job, see the Scheduler.
