


Network Configuration Manager supports two different privileged password credential modes: Single-Level and Multi-Level.
The Multi-Level mode allows multiple levels of privileged passwords to be associated with a device in the Network Configuration Manager application. If Multi-Level was selected during post installation, use this section to work with Privilege Password tasks.
To Setup discovery of different levels of Privilege Passwords,
- To view, Add, or Remove managed levels manually by the device server, login as the root user on the Device Server box, or on the Combo box.
- Change directory ( cd) to $VOYENCE_HOME/package/privilegelevels/pkgxml.
- Edit the privlevels.xml file to add, remove, or modify the managed levels.
- Add, Remove, or Modify user configuration levels.
For more information, see Managing Privilege Password Levels.
To discover multiple Privilege Passwords for a device,
- At System Administration (in Tools on the Network Configuration Manager launch window), select Global -> Credentials Manager , then select Credentials.
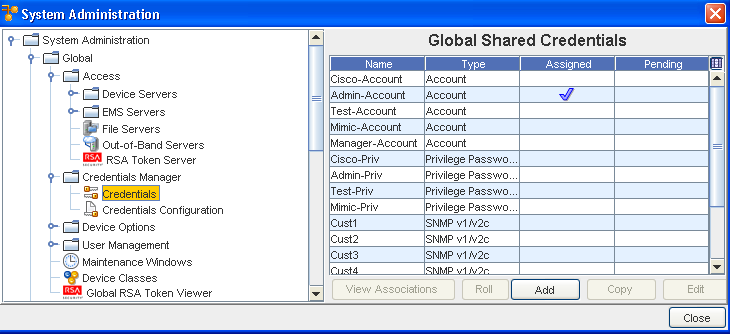
- Create Credentials (Add) for all Privilege Passwords to be discovered and associated to levels.
- Setup the Auto Discovery profile (through Networks -> Auto Discovery ), and select New to either create a New profile, or to edit an Existing profile , then click Edit to discover multiple Privilege Passwords.
- At the Credentials tab, add all the Privilege Passwords to be discovered.
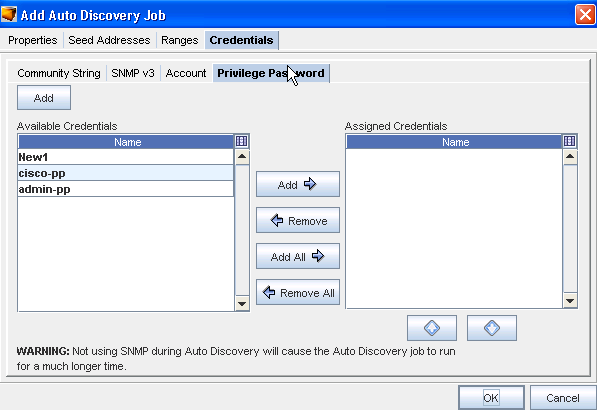
- Next, click the Privilege Password tab within the Communications tab. From here you can add or remove any Available Credentials using the arrows. Select, then move the Available Credentials into the Assigned Credentials pane. You can use the up and down arrows in the Assigned Credentials pane to determine the order of the Credentials.
- To add a new Credential, click Add. Enter the information needed to add this credential, then click OK.
Network Configuration Manager then discovers all the valid Privilege Passwords for the device. For example,
Device 1 - for password levels 2, 8, 9, 10, 15
2 - Level 2
8 - Level 8
15 - Cisco Privilege Password
Device 2 - for password levels 2, 8, 15
During Auto Discovery, all the devices are discovered, and the different level-based Privilege Passwords that are configured with the Privilege Password are also discovered. During this discovery, the application attempts to login using the password levels.
- Select the Auto Discovery Profile, then Update or Schedule.
- Click Ok when you have added the Credential information.
