


Once a Config file is edited, it can be scheduled to be Pushed to the network immediately, or scheduled to run at another time. Completing this action saves the Config to the device. You can have more than one device listed under the config editor.
To schedule a config,
- From the Config Editor window, click the Schedule button located at the bottom of the window.
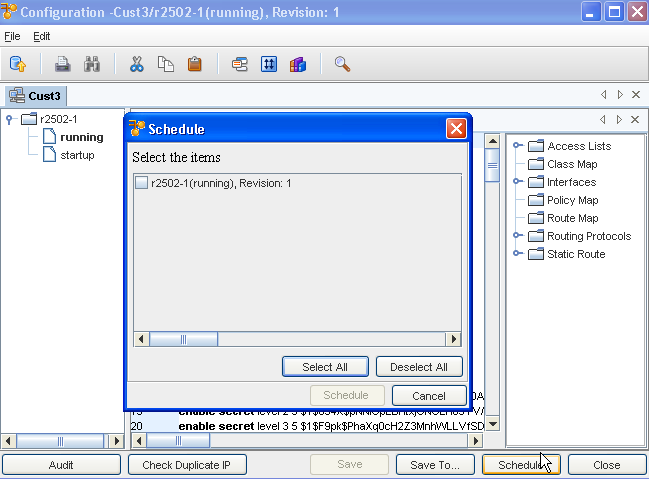
At the Schedule window, you can quickly see which configurations have had changes made to them. Those with changes are now designated with a check mark. Those configs that have not been changed, do not have check marks.
You can:
- Use the Select All button to select all configs
- Use the Deselect All button to remove the check marks from all checked configs
- Click Schedule to schedule those configs that have been checked
- Click Cancel to leave this window
- Click Schedule. The Schedule Job window opens.
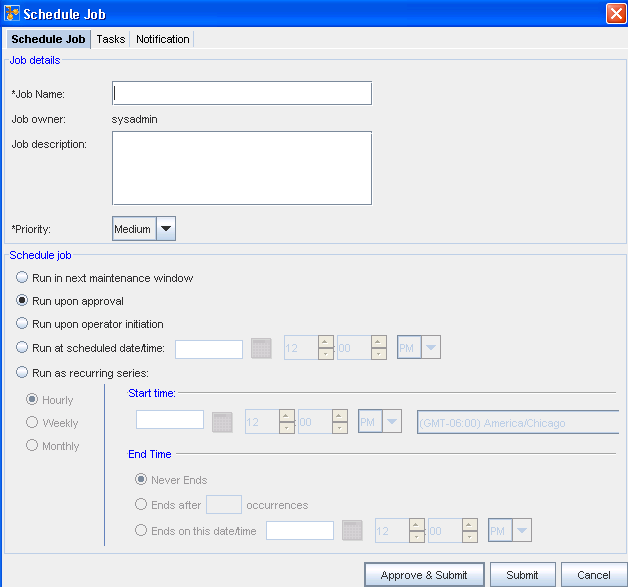
- In the Job Details portion of the window, enter the following:
- Job Name .
- Job Owner. The Job Owner should reflect the name of the logged in user.
- Description in the field, if needed.
-
Priority level. Select from Low, Medium, or High priority.
- In the Schedule Job portion:
- At the Schedule job section, by default, all jobs are scheduled to Run upon approval . All selections in the following example are displayed as being active in the schedule for viewing purposes only. With adequate permission, you can click the Submit button located at the bottom of the window.
- Note that you can select to have the job Run in the next maintenance window.
- If you select the Run upon operator initiation option, and Submit for approval, this keeps the job in a pending state after approval. After this, any user, with Schedule permissions, can then execute this job.
- To set a specific time, select Run at scheduled date/time. The related date and time fields activate.
- Enter a Date. For assistance, use the Calendar icon to open a monthly calendar.
- Select the time. The hour, minute, and AM/PM settings must be designated.
- To set a recurring schedule, select Run as recurring series. The recurring setting options activate.
- Set the recurring options: Frequency, Start and End Times, and Time Interval.
Important: When the recurring schedule is selected, the new time zone drop-down options are available. Make your selection from the drop-down options. The time zone you select must be the client's time zone . The new time zone field will be propagated with the client time zone automatically when creating a new Maintenance Window or recurring scheduled job. - After making your schedule selections, click Submit.
After selecting Submit, the job is sent to the Schedule Manager. The Schedule Job window closes.
For more details on the components of the scheduling jobs window, and using the scheduling jobs options see Schedule Manager.
