


LDAP is a set of protocols for accessing information directories. LDAP is based on the standards contained within the X.500 standard, but is more simple. LDAP supports TCP/IP, which is necessary for any type of Internet access.
All user/password details are stored on your LDAP server. Network Configuration Manager is then mapped to the server to retrieve this information for validation.
To setup Network Configuration Manager access using LDAP,
-
From the menu bar, access Tools -> System Administration. The System Administration window opens.
-
In the navigation pane, expand Global -> User Management.
-
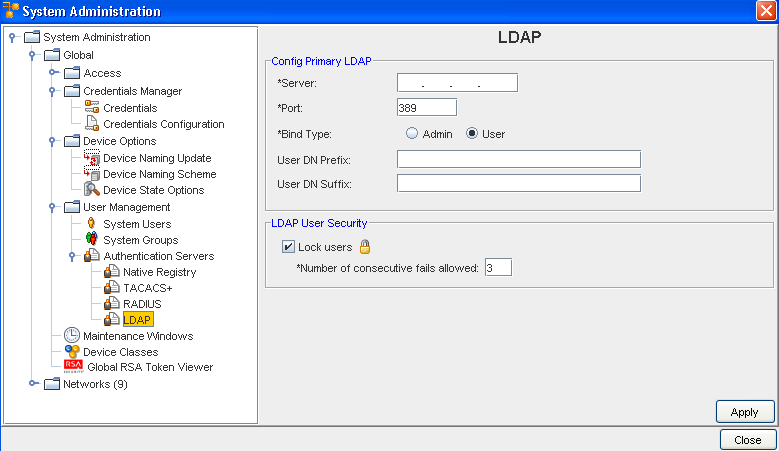
Expand Authentication Servers , then select LDAP. The right pane appears similar to the following.
-
Enter the Server address.
-
Enter a Port.
-
Select a Bind Type. You can select Admin (if you have Admin Privileges) or you can select User.
-
If User is selected, complete the remainder of this window by entering the needed information. Go to Step 7 to continue.
-
If Admin is selected, more information is needed, and an additional section for this information is displayed within the LDAP window (shown in the following graphic).

-
Enter the Admin DN (Distinguished Name)
-
Enter the Admin Password , and then enter and confirm the Admin Password .
-
Enter the Search Base DN (Distinguished Name)
-
Enter the Search User Attribute
-
Go to Step 8 to continue.
-
Enter a User DN Prefix , then enter the User DN Suffix.
-
The DN Prefix is a prefix added to the username to form the user Distinguished Name (DN).
-
The User DN Suffix is a suffix added to the username to form the User Distinguished Name (UDN).
-
This is useful if you prompt a user for a username and you do not want the user to have to enter the fully distinguished name. Using this property and prefix, the user DN is formed as String userDN = prefix + username + suffix.
-
If you are not setting User Lock Out Security, click Apply. All entries are accepted.
-
If you are setting the lock users information, enter the number of consecutive fails allowed then click Apply.
-
To exit the window, click Close.
