


When a network is created by the System Administrator, users and groups must be assigned permissions to the network before they can complete any network tasks.
If network permissions are not set by the user/group, then the general permissions assigned to the user/group is used by default.
Setting network permissions for users/groups is a two step process:
-
Select the user/group who is to have access to the network
-
Select the network permissions for the user
To designate users and groups to have Network permissions,
-
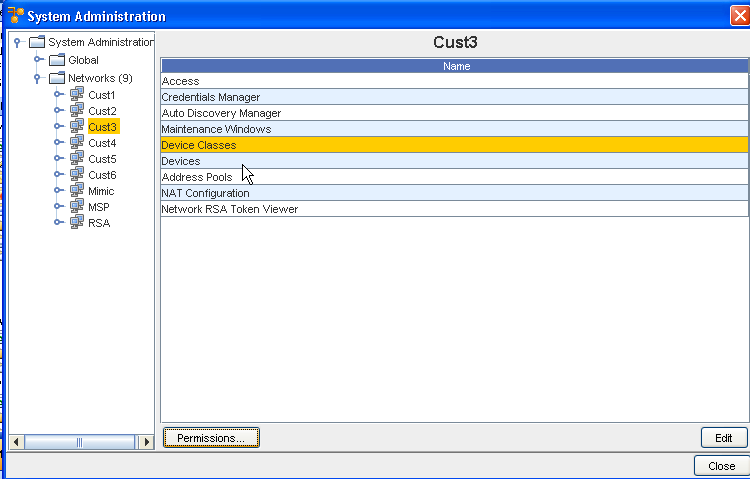
From the menu bar, access Tools -> System Administration. The System Administration window opens.
-
In the navigation pane, expand Networks. The right pane contains all available networks. Select the network from this list. Or... In the navigation pane, select the Network. The right pane contains the Network sub-menus.
-
In the lower left portion of the window, click Permissions. The Access Control Administration - [Network Name] window opens.
There are two groups:
-
Users
-
Groups
All users and groups that are available in Network Configuration Manager are in the tree menu. Depending the network selection, the right pane contains a list of all Users or Groups currently associated to the network.
-
-
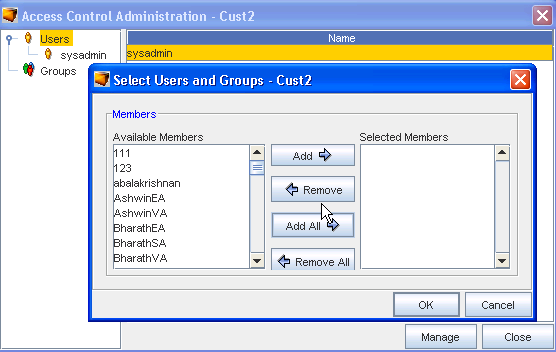
After selecting Users or Groups, click Manage. The Select Users and Groups [Network Name] window opens.
-
Users and groups that do not have permissions are listed in the Available Members column.
-
All users and groups with permissions are listed in the Selected Members column.
By default, your own user name is listed as a user. All others that have been given permissions are categorized, and listed in one of the two groups.
-
-
To give users or groups permissions to the workspace, click the name of the user or group in the Available Members column.
Note: A string of users/groups can be selected by holding down the Shift-key while selecting users/groups. Or, select multiple, non-sequential users/groups can be selected by holding the Ctrl key while selecting users/groups. -
Click Add. The selected users and groups are moved to the Selected Members column, and now have permissions to the workspace. Or... To remove a user or groups permissions, in the Selected Members column, select the name or group.
-
Click Remove. The selected users and groups are moved to the Available Members column and no longer have permissions to the workspace.
-
Clicking Add All moves all users and groups listed in the Available Members column to the Selected Members column.
-
Clicking Remove All moves all users and groups back to the Available Members. If you complete this action, remember to put your own user name back into the Selected Members column.
-
-
Once you have assigned the users and groups that are to have access to the workspace, click OK. The Select Users and Groups window closes, and your selection is added to the list of Users (or Groups).
The Access Control Administration window refreshes. All users and groups are re-categorized to reflect the changes that were made. You are now able to set the individual permissions to the users and groups.
