This example describes the screenshots for creating a device driver for Cisco IOS Router.
-
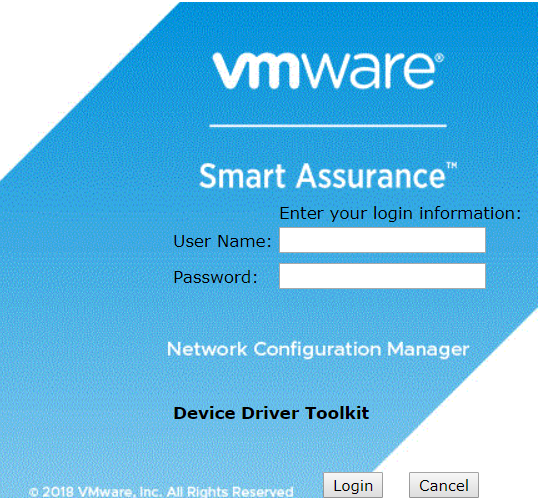
Log into Device Driver Toolkit
-
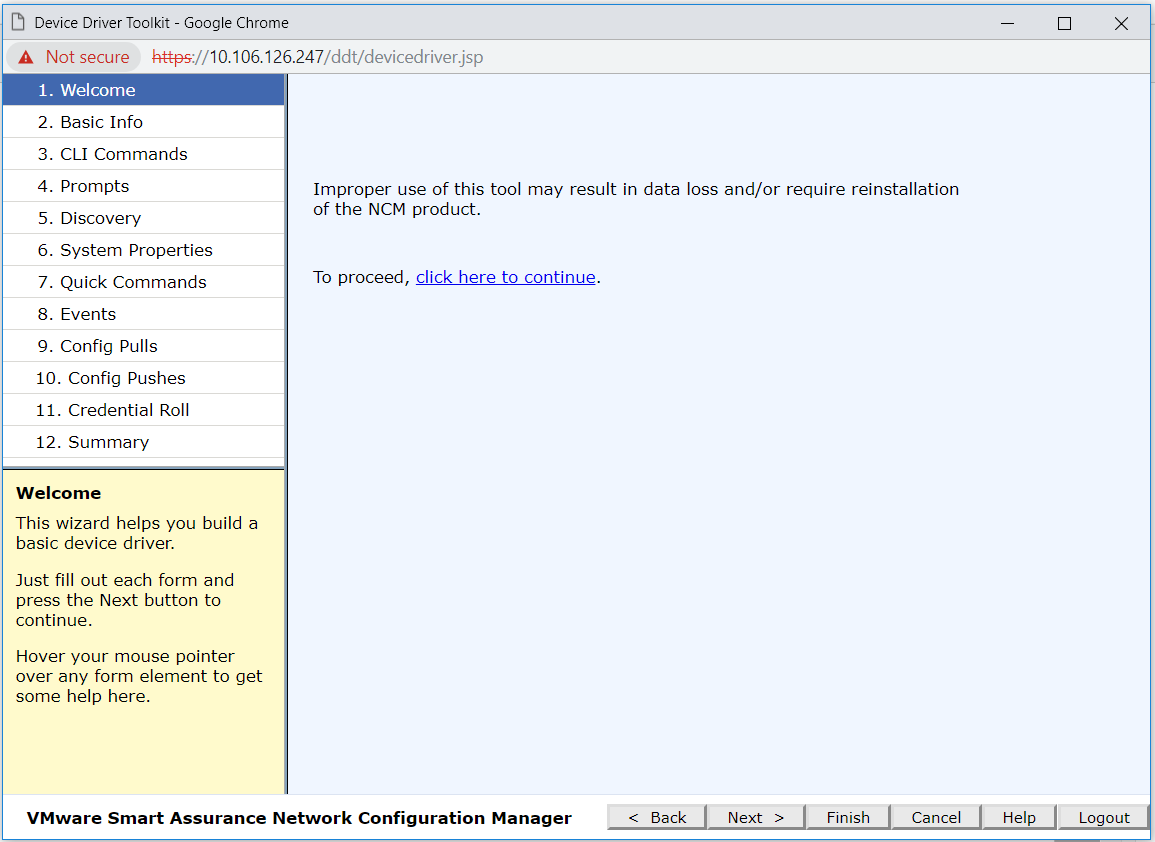
Read the notice in the screen and click the link click here to continue.
-
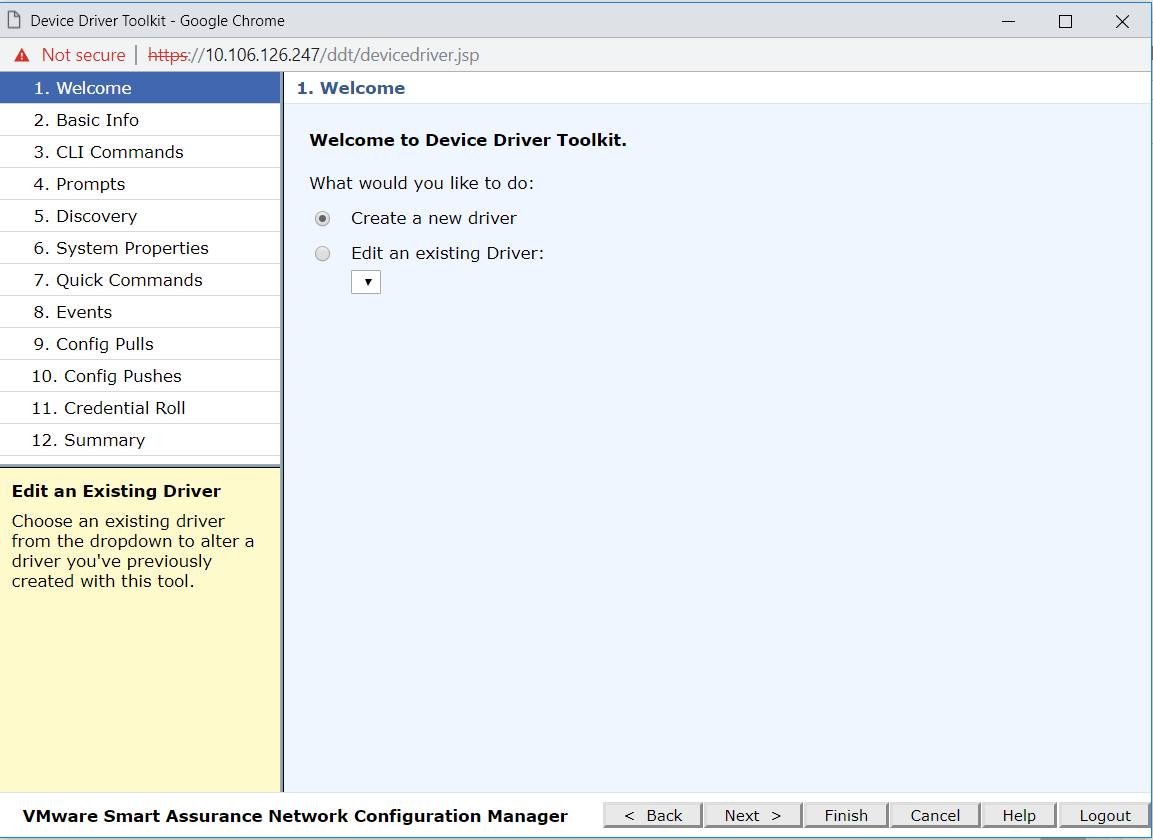
The Welcome screen appears. Select the desired option. If you select Edit an existing driver, select the driver that you wish to edit from the drop down list.
Note:The drop down list will have drivers that are created using the Device Driver Toolkit only.
-
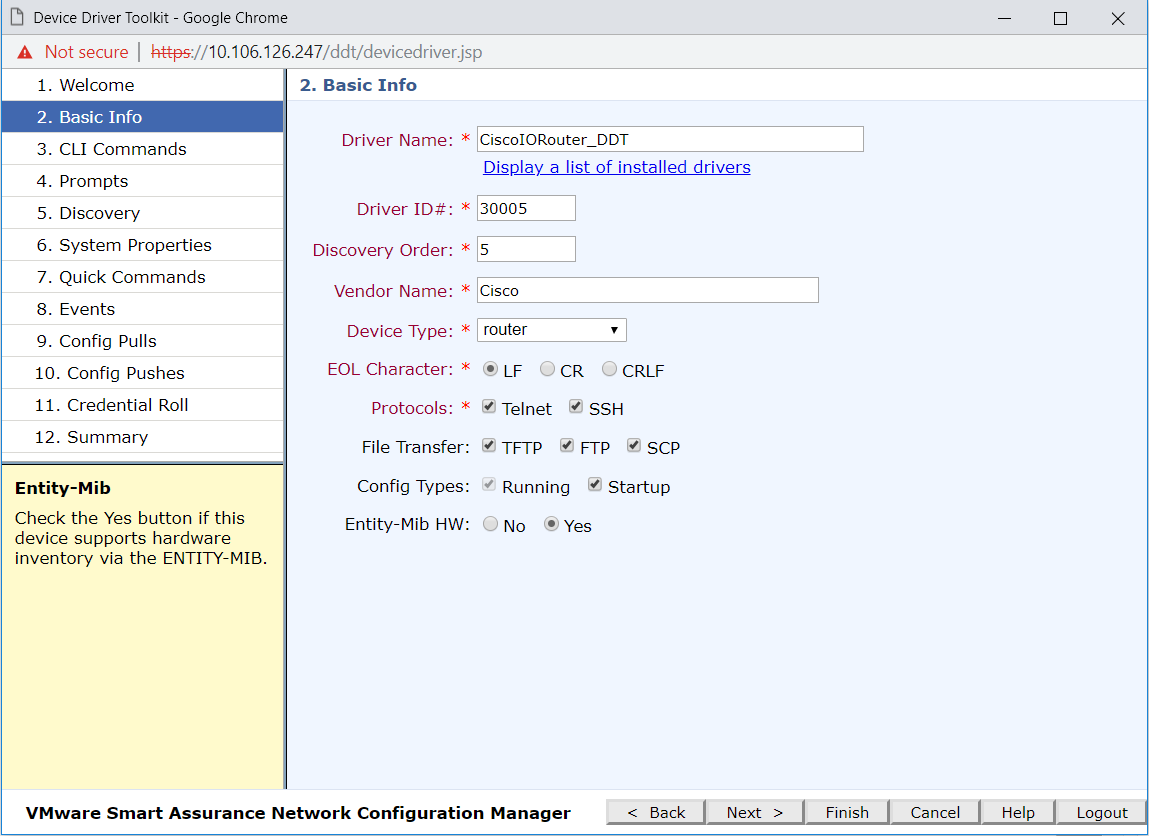
The Basic information screen appears. Enter the basic information like Driver name, Driver ID, Discovery Order, Vendor Name, Device Type and so on as shown in the figure below.
 To maintain uniqueness of Driver ID, ranges of integers are assigned for use by specific groups. The following ranges are defined:
Table 1. Range Assigner Current Use 0-18999, 30000-30034, 32000 and above Device Communications, Development Team Main allocation for devices added to the product. 19000-19999 QA Internal use only. 20000-29999 Sales/Support Developing scripts used for a single customer or group of customers. 30035-31999 Customers Used by individual customers for their own drivers (not shared with other customers, and as such, not guaranteed to be unique). -
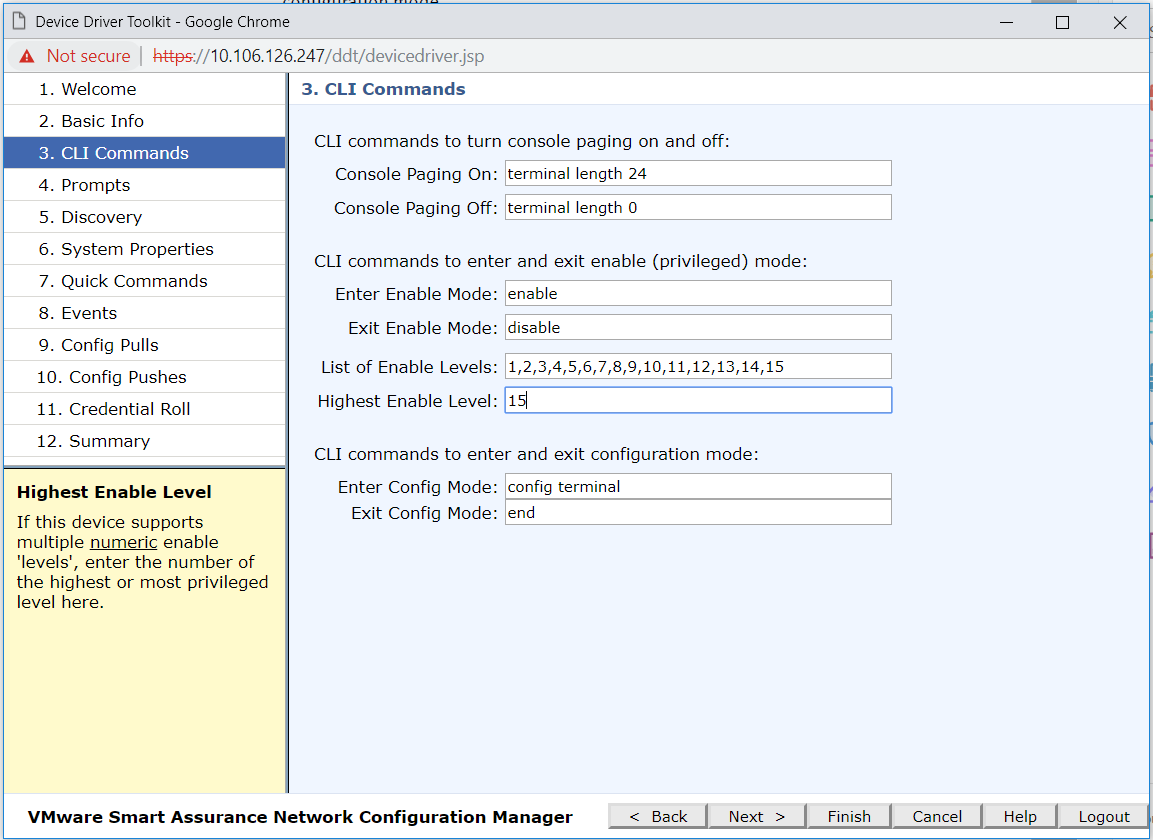
The CLI Commands screen appears. In this screen, you can enter CLI commands for Console paging, Enable mode, and Configuration mode.
-
Console paging—When displaying large data, many devices pause after filling the console screen and wait for your input to continue. This is called Console paging. Network Configuration Manager does not need Console paging and recommends that the Console paging is disabled.
-
Enable mode—Many devices support both privileged and non-privileged levels of user authorization. Devices that support this mode refer to the privileged permission level as ‘Enable’ mode.
-
Configuration mode—This mode is only for devices that support separate configuration mode.
-
-
-
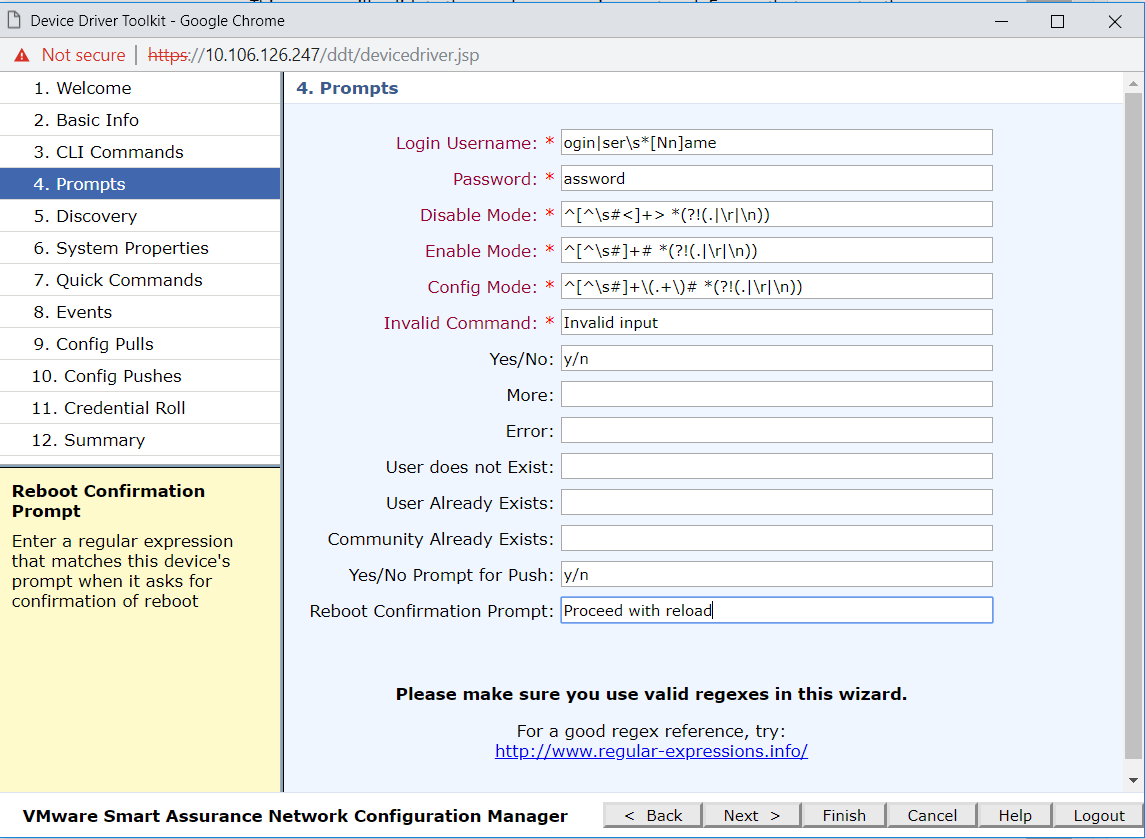
The Prompts screen appears. Many fields in this screen require a regular expression. This screen will validate the regular expressions entered. Ensure that you enter the right regular expression.
-
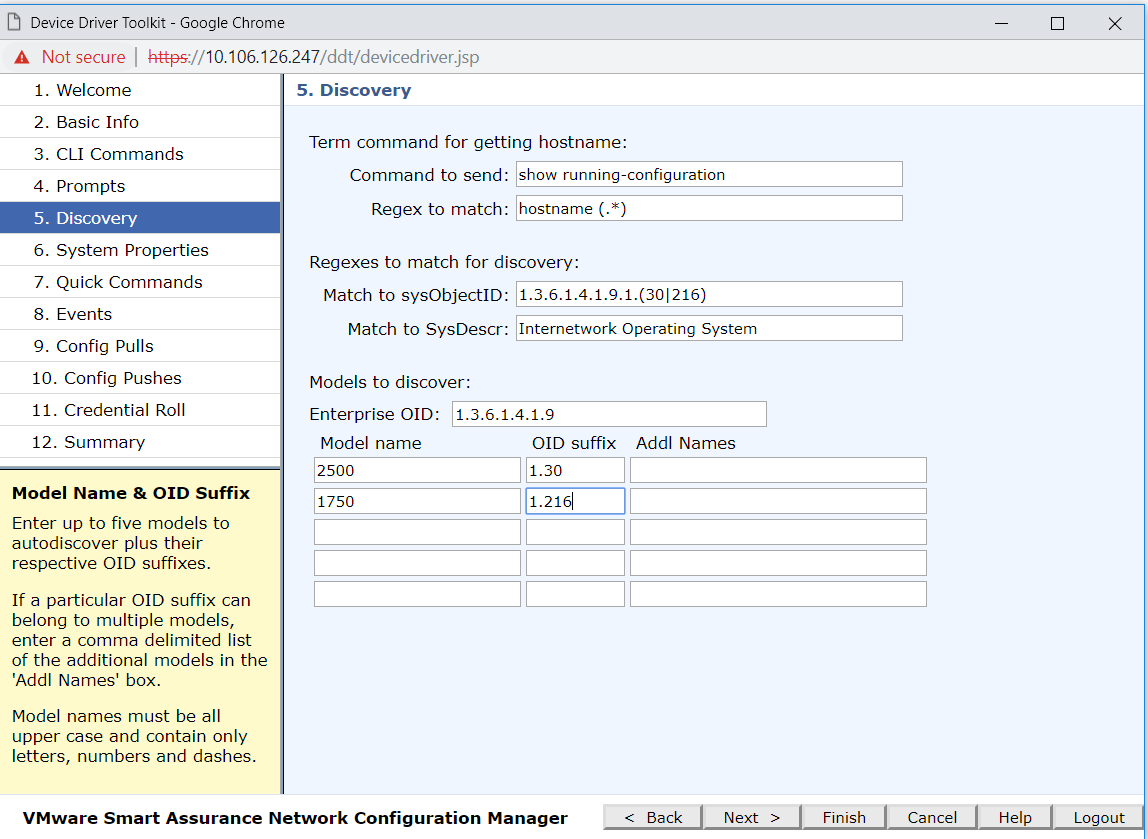
The Discovery screen appears. During autodiscovery, the driver examines the device to determine whether the device is manageable by the driver. So, it is important to enter most accurate and precise information possible in the screen.
You can also use this screen to add models to an existing device driver that is created by Device Driver Toolkit only. To add a model, type the model name in the Model name field with its OID and click Next.
Note:You can add only five models to a device driver using Device Driver Toolkit.
-
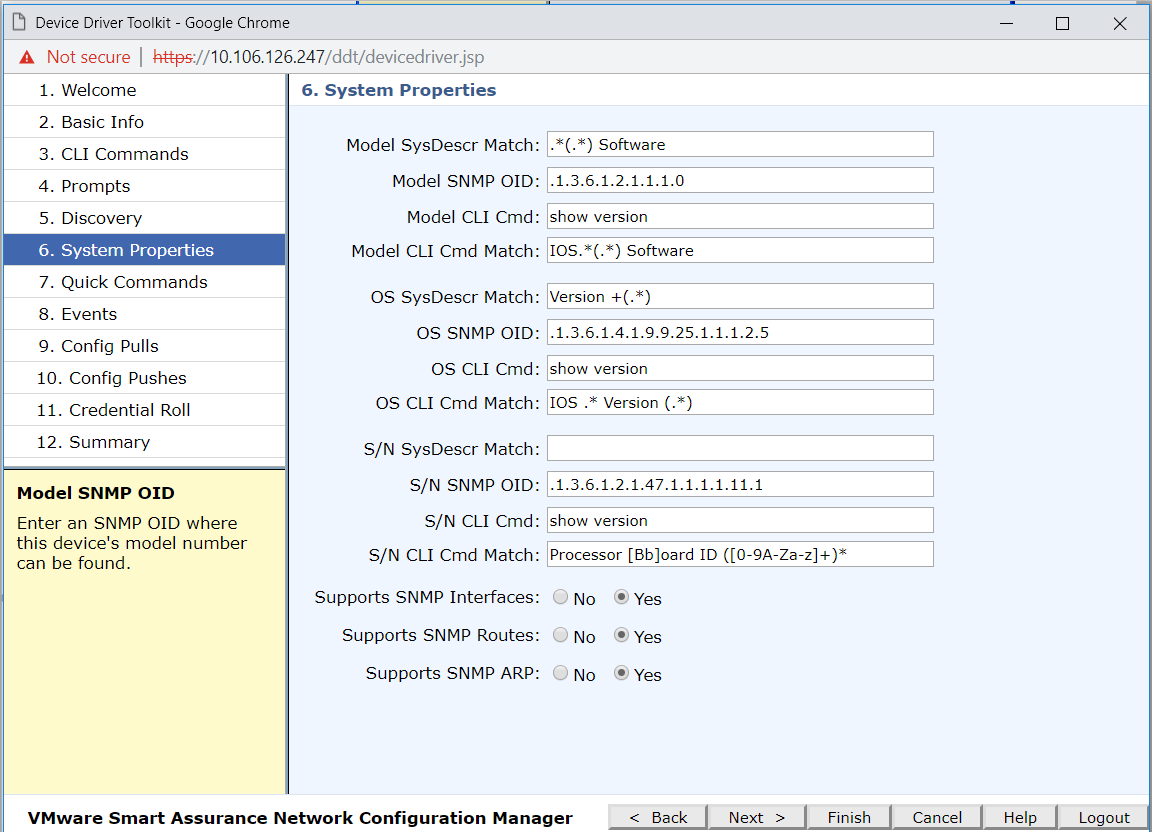
The System properties screen appears. For every device managed by NCM, the user interface displays model name, the operating system version, and the serial number. To gather this information, the driver looks for:
-
The SNMP sysDescr
-
An arbitrary SNMP OID
-
The device's CLI
The driver looks for the data in the listed order until it finds a value.
-
-
-
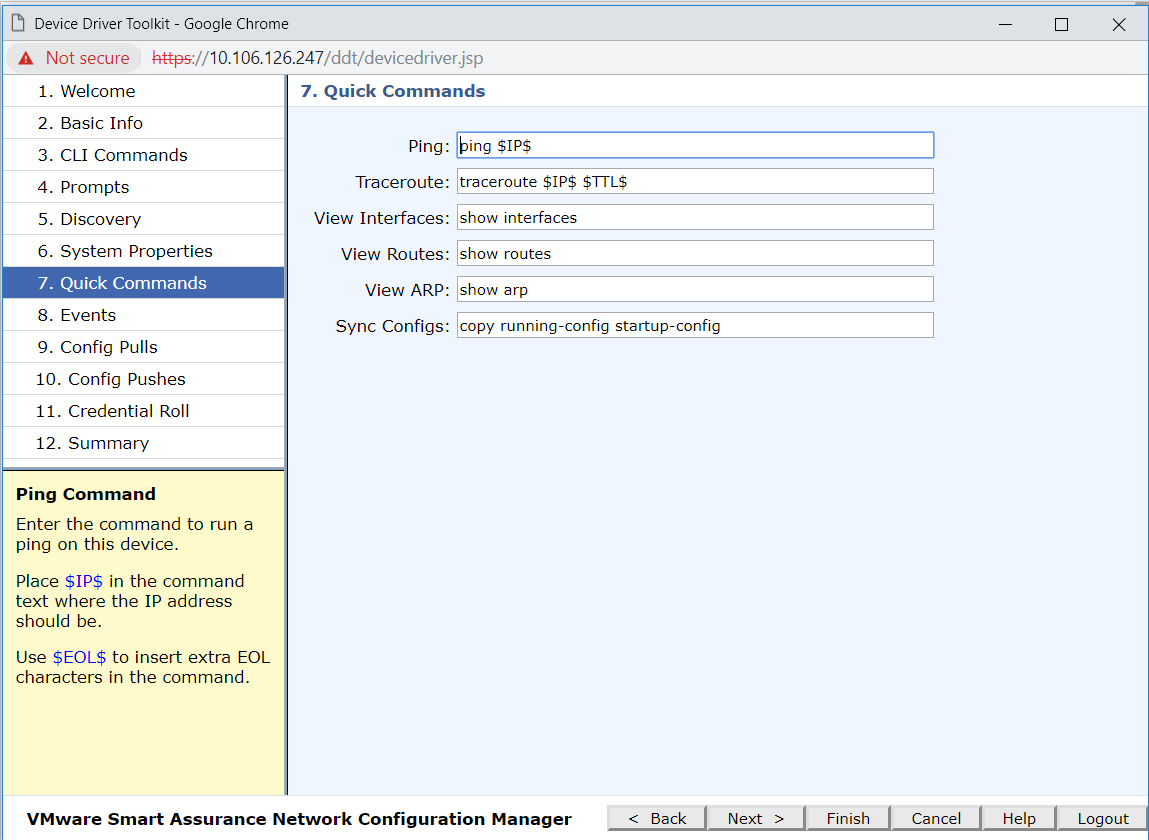
The Quick commands screen appears. For each QuickCommand that the device supports, enter the CLI command.
-
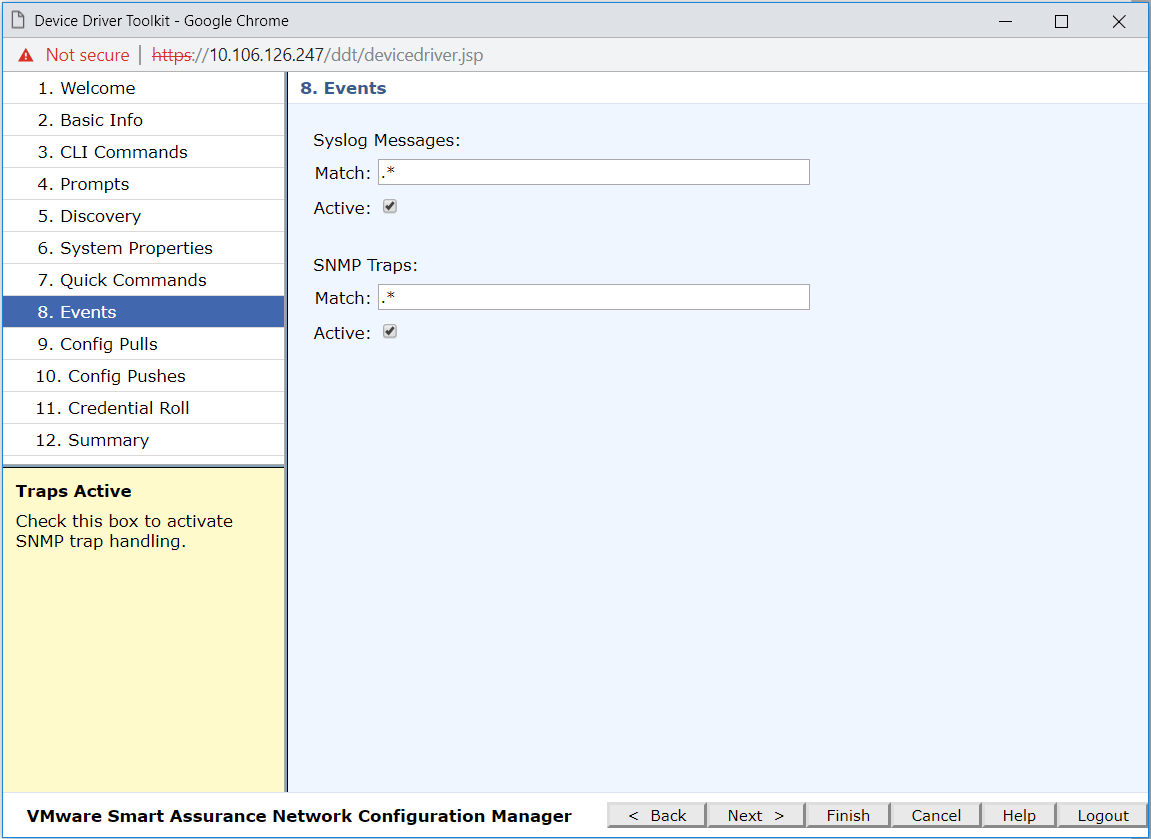
The Events screen appears. Network Configuration Manager can schedule a device pull when it receives a syslog message or an SNMP trap from a device.
-
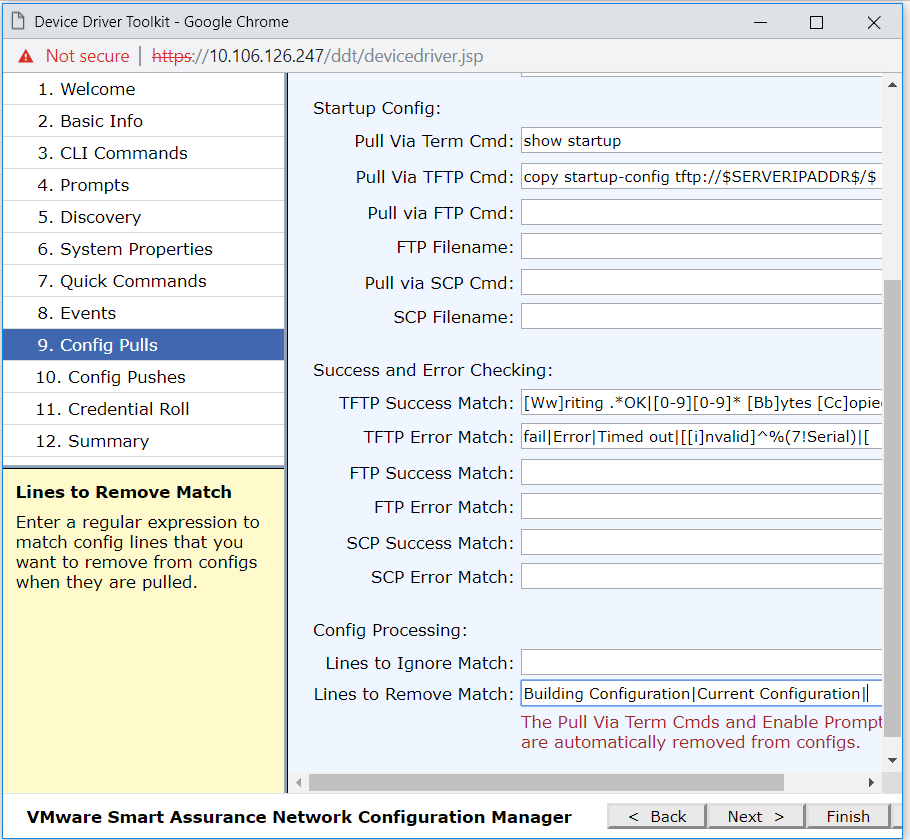
The Configuration pull screen appears. The content in this screen depends on the completed fields in the earlier screens. For example, if you have not selected Startup configuration type in the Basic information screen, then you will not see Startup configuration input in this screen.
-
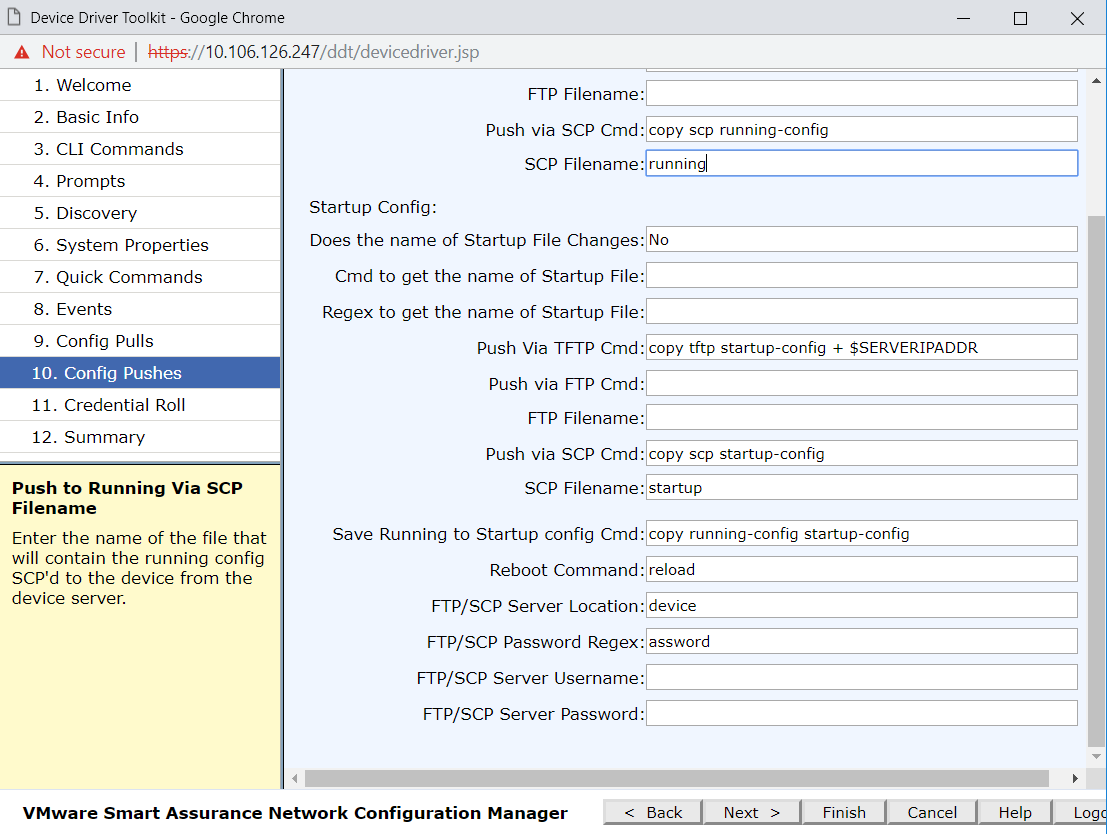
The Configuration push screen appears. The content in this screen depends on the completed fields in the earlier screens. For example, if you have not selected Startup configuration type in the Basic information screen, then you will not see Startup configuration input in this screen.
-
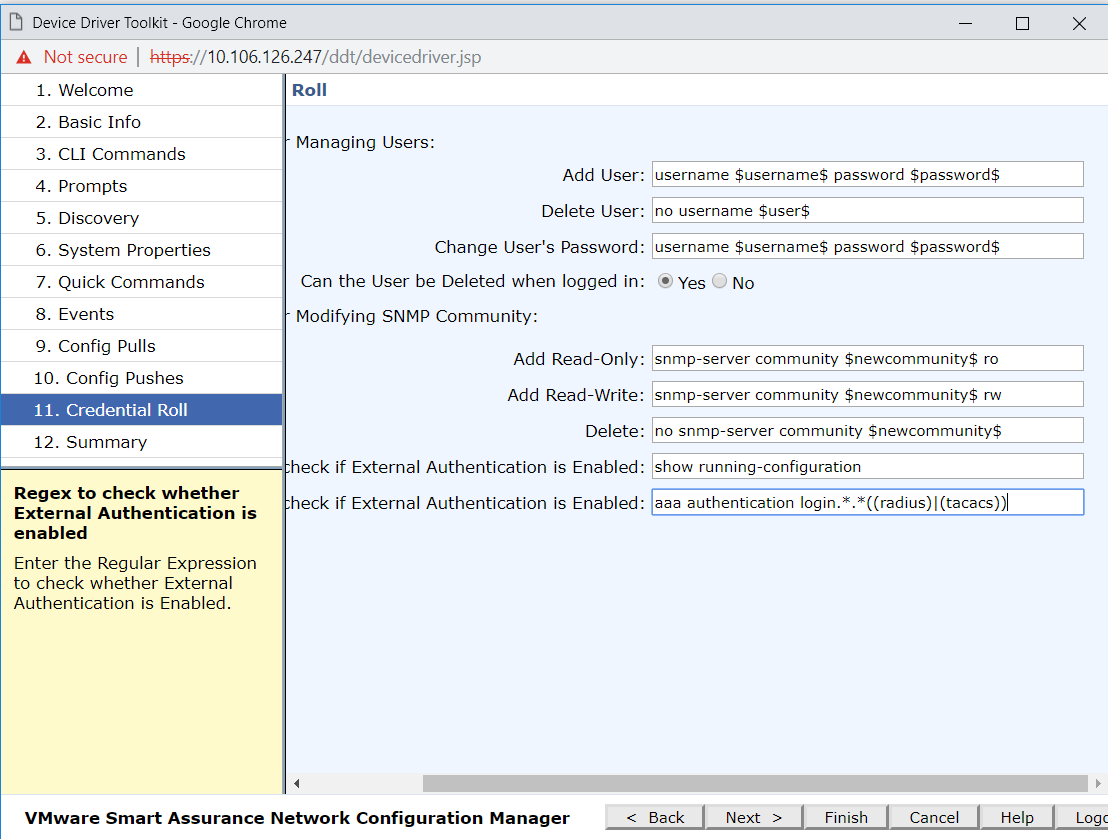
The Credential roll screen appears. In this you can enter commands for managing users and modifying SNMP community.
-
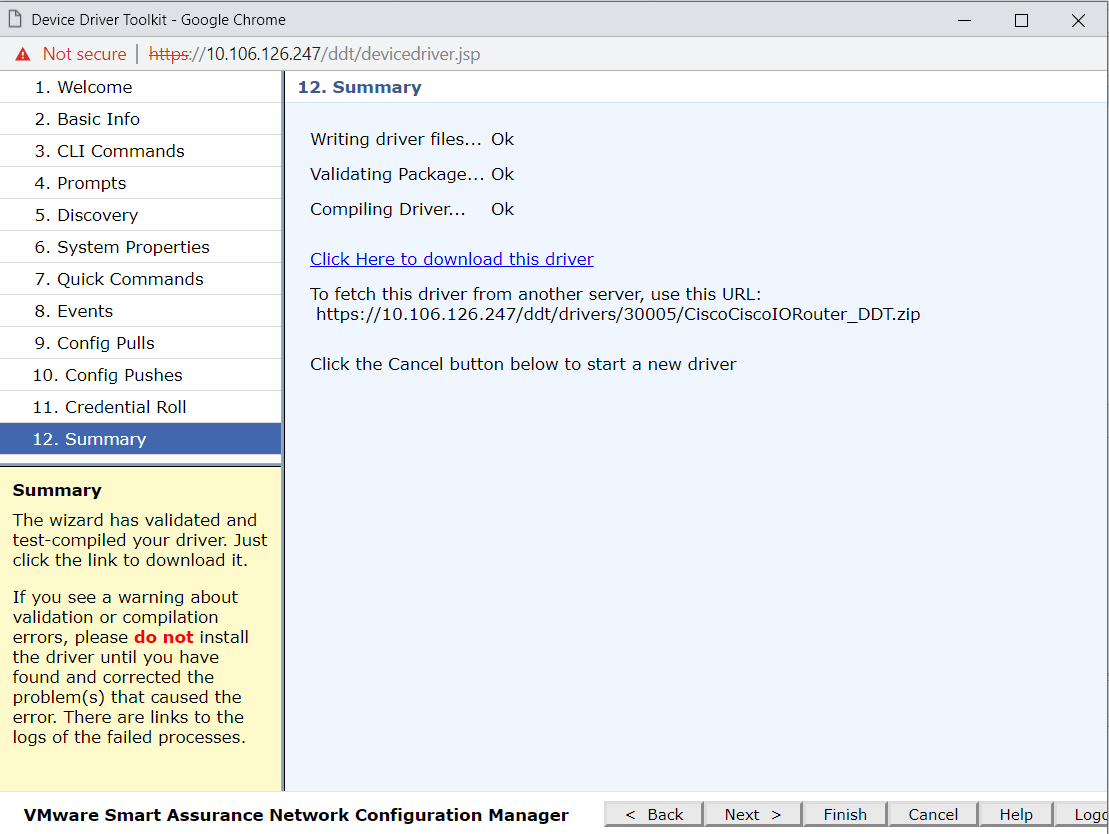
The Summary screen appears. At this screen, the Device Driver Toolkit will automatically perform the following:
-
Save all your input for future editing
-
Validate the new driver's package file
-
Test compile the new driver
-
Create a zip file of the new driver files
You can download your driver by clicking the link Click here to download this driver. The screen also provides an URL to the driver if you want to download the driver from another server.
-
-