


Unlike users, groups are just containers for creating relationships between users and other groups, and do not offer authentication or have passwords. Groups, like users, can have permission relationships with networks and devices.
For ease of security management, Network Configuration Manager recommends that you create permission groups for your users, assigning your users to the appropriate permission group.
A System Group is a defined group of users that have the same permission levels in the networks. System groups can be nested within other system groups. Nesting allows one group to "inherit" the permissions of the group in which it is nested. The nesting helps ensure that access permissions remain consistent, and decreases the time required to manually assign each user individual permissions.
To create a new group,
- From the menu bar, access Tools -> System Administration. The System Administration window opens.
- In the navigation pane, expand Global -> User Management.
- Select System Groups . The right pane contains all available groups.
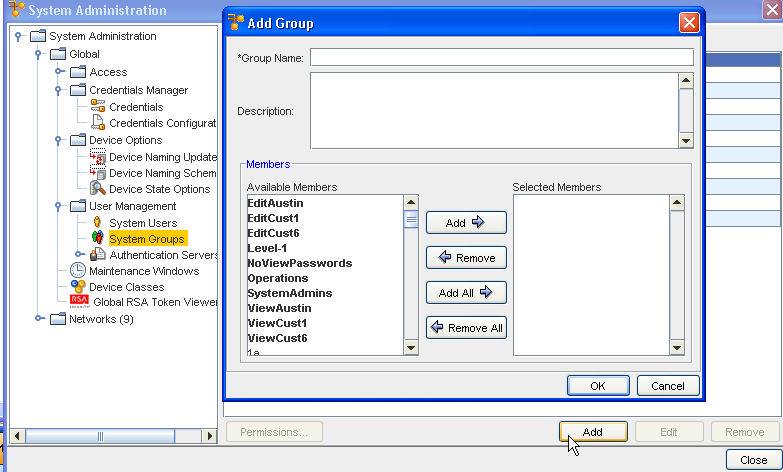
- At the bottom of the window, click Add. The Add Group window opens.
Note: You can now add a Description to the Group information. Once entered, this description information is displayed in the System Groups window.
- If needed, enter a Description.
- In the Available Members column, select the groups and users to be included in the new group.
Note: A sequence of groups or users can be selected by holding down the Shift key while clicking groups. Or, multiple, non-sequential groups or users can be selected by holding the Ctrl key while clicking groups.Important: If the users have not yet been created, continue to the next step. You can manage users to groups later.
- When finished, click OK. The Add Group window closes.
Once a group is created, permissions for the group must be set. See Set Group Permissions.
