


Table columns (and the information they contain) can be added or removed to customize your display.
-
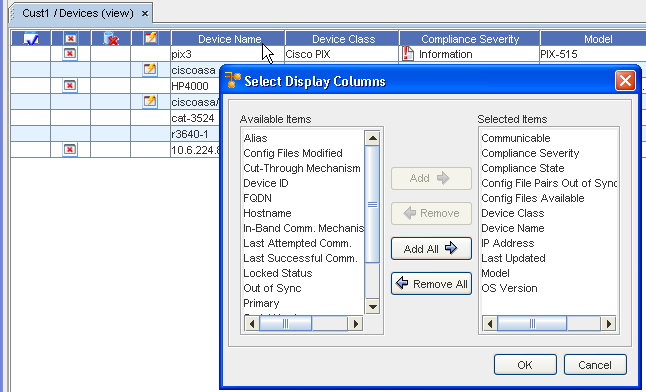
With the Devices View displayed (shown here as Network Cust1/Devices (view) , right-click within any column heading to view the Select Display Columns window.
-
From here, determine which of the column headings you want displayed.
-
Make your selections by highlighting the columns you want displayed from the Available Columns pane, then use the Add or Add All arrows to move the headings you chose into the Selected Columns pane.
-
To hide column headings (and the information within that column) highlight the column heading in the Selected Columns pane, and using the Remove or Remove All arrows, move the headings you select back into the Available Columns pane.
-
Click Ok to keep your final selections.
Only those column headings within the Selected Columns pane display on the Devices View in a table layout.
Once you have determined the column headings you want to display, you can then change the size of each column to view all the information that column holds by dragging the column table lines to the right or left to enlarge any specific column.
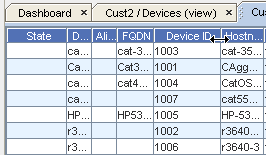
Using the right and left arrows  you can increase or decrease the size of each column to view more or less column information. Within Network Configuration Manager, you can change the size or location of any column that is displayed within a table in the application. You can also move the columns horizontally (by dragging and dropping) to place a column anywhere within the table.
Following are the various states the devices can currently be classified in. Run your cursor over each icon to view the status.

