


A graphical user interface is provided to guide you through the configuration steps. Go to the URL:
https://[SERVER-IP]:11843/NCMSmartsAdapter-10.1.8.0/
where [ SERVER-IP]is the server where the adapter was installed, usually the Network Configuration Managerserver.
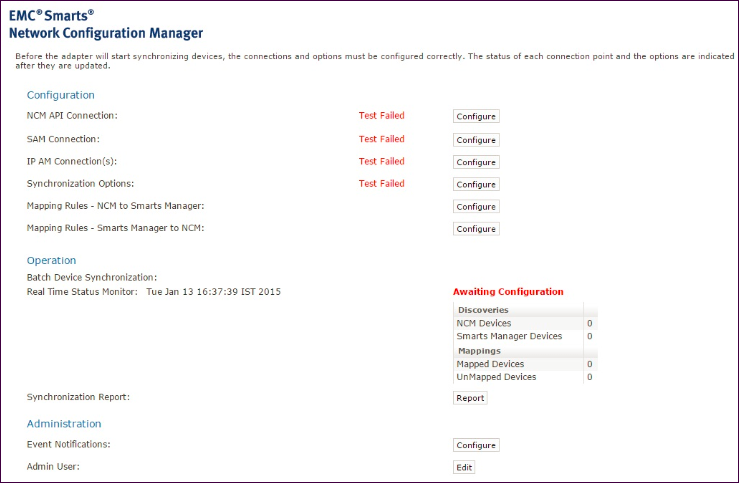
The main window appears, showing the status of all connections. The status is Failed until the connections are configured, as the following figure shows.
An overview of the configuration process follows:
-
The top four rows indicate the status of each connection.
-
To the right of the status is a Configure button used to configure each connection.
-
Below this, the synchronization options and mapping rules are shown. These are also configured by using the Configurebutton to the right.
-
Clicking any Configurebutton produces the login window. Default credentials are:
-
Login ID: admin
-
Password: admin
-
-
When the configuration is valid (indicated by all the Tests Passing), components are enabled, and event notifications begin flowing. However, synchronization does not begin until the Start button is selected.
