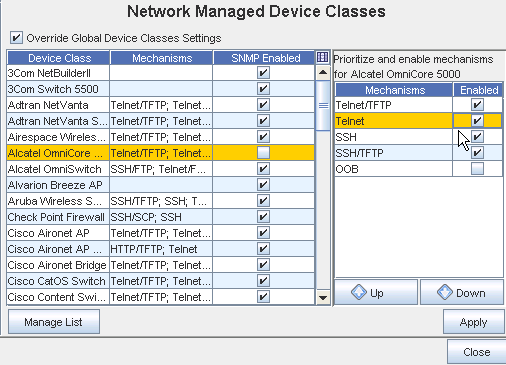
To adjust the device class protocols,
-
From the menu bar, select Tools.
-
From the menu options, select System Administration. The System Administration window opens.
-
On the tree menu, expand the Networks -> Access folders.
-
Select Device Classes . The Network Managed Device Classes configuration window populates the right pane.
-
Select a row (listing the Device Class and the Primary Protocol) . When highlighted, the Enable or Disable fields show any protocols that are active/deactivated for the device class.
 Note: By default the Use SNMP check box is selected. If you choose not to use SNMP, un-check this check box.
 -
To make changes to the Protocols section, disable the device class by un-checking the check box, then select another Mechanism from the listing to the right.

-
Adjust the priority of the protocols
-
Enable or Disable protocols
-
-
Click Apply when you have select a Mechanism from the list.
-
This window allows you to:
To change the priority of the listed protocols,
-
Select a protocol from the list. Based on its location in the list, the Up and Down arrows activate.
-
Using the Up/Down arrows move the selected protocol to the new location. The top-most protocol is used as the default.
-
If you are enabling or disabling protocols, proceed to the next step. Or, if no other changes are required, click OK. The Manage Devices - [Device Class Name] window closes.
To enable and disable device protocols,
-
If you are enabling a protocol, in the Enable column, check the boxes of the approved protocols .
-
If you are disabling a protocol, in the Enable column, de-select the check box.
-
If no other changes are required, click OK. The Manage Devices - [Device Class Name] window closes.
-
When all changes have been completed on the Network Managed Device Classes window, click Apply.