Adding a new Registry and obtaining the credentials
Adding a new registry and obtaining credentials for VMware Tanzu Application Catalog is essential for integrating and managing enterprise-grade applications within your infrastructure. This process involves configuring a registry, which acts as a repository for curated, secure, and customizable applications. Obtaining the necessary credentials ensures authenticated access to the catalog, allowing you to seamlessly pull and deploy applications. The purpose of this setup is to enhance security, compliance, and operational efficiency by leveraging a trusted source of pre-packaged applications tailored to meet enterprise standards.
To add a new registry:
- In the left navigation pane, click “Registries”. The “Registries” page appears.
- Click “Add Registry” tile.The “Add Registry” dialog box appears.
-
Provide the following information and click “ADD”:
- Provider
- Name
- Description
- Registry URL
- Username
- Egress IP(s)
The Tanzu Application Catalog validates the registry you are trying configure. After successful validation, a message appears confirming that your request to add a new registry has been successfully submitted.
Note
The Egress IP(s) field appears only if your registry that trying to configure is either GCR or Harbor.
- Click “OK”. The newly added registry appears in the “My Registries” section.
The supported Registries in VMware Tanzu Application Catalog and the instructions to add them are as follows:
Harbor
To add a Harbor registry:
Ensure that you have created a project in Harbor.
-
For more information on how to create a project, see Create Projects.
-
Enter the following configuration details:
Field Description Provider Select the “Harbor” option. Name Enter a name. Description Enter a description. Registry URL Enter the path to the Harbor project appended with https://. For example,https:\\MY_REGISTRY\goharbor.io\myproject. This corresponds to the base URL where the Harbor project instance resides. VAC pushes all the requested assets to this Harbor project. The registry URL contains the path to the repository. In Harbor, the repositories are created on the fly while pushing the subscribed assets for the first time.Access Key Enter the username that corresponds to the username generated on the Harbor portal. It is recommended to provide registry access by generating a robot account with read and write access. For more information on robot accounts, see Create Project Robot Accounts. Password Enter the password that corresponds to the password generated on the Harbor portal. It is recommended to provide registry access by generating a robot account with read and write access. For more information on robot accounts, see Create Project Robot Accounts. 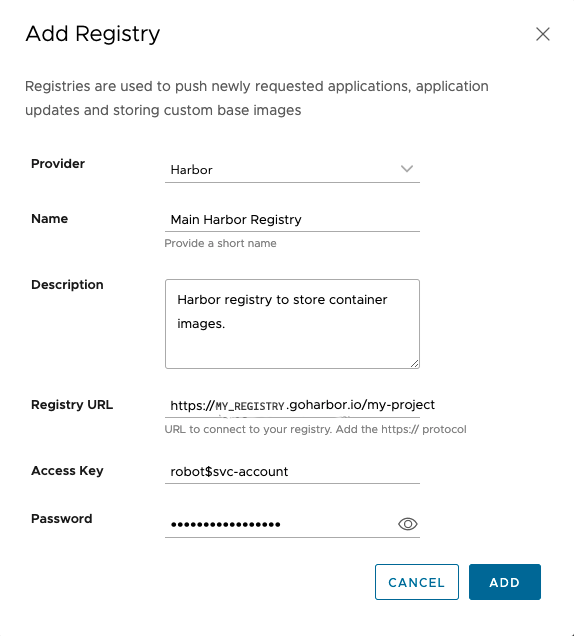
Azure Container Registry
To add Azure Container Registry:
-
Ensure that you have created an Azure container registry. For more information on how to create a registry, see Create an Azure container registry using the Azure portal.
-
Enter the following configuration details:
Field Description Provider Select the “Azure Container Registry” option. Name Enter a name. Description Enter a description. Registry URL Enter the Azure login server path appended with https://. For example,https://myvacregistry.azurecr.io. This corresponds to the base URL where the Azure Container Registry instance resides. VAC pushes all the requested assets to this Azure container registry. The registry URL contains the path to the repository. In the Azure Container Registry, the repositories are created on the fly while pushing the subscribed assets for the first time.Access Key Enter the username that corresponds to the username generated on the Azure portal. It is recommended to provide the registry access by generating a service principal with read and write access. For more information on how to generate service principal object, see Azure Container Registry authentication with service principals. Password Enter the password that corresponds to the password generated on the Azure portal. It is recommended to provide registry access by generating a service principal with read and write access. For more information on how to generate service principal object, see Azure Container Registry authentication with service principals. 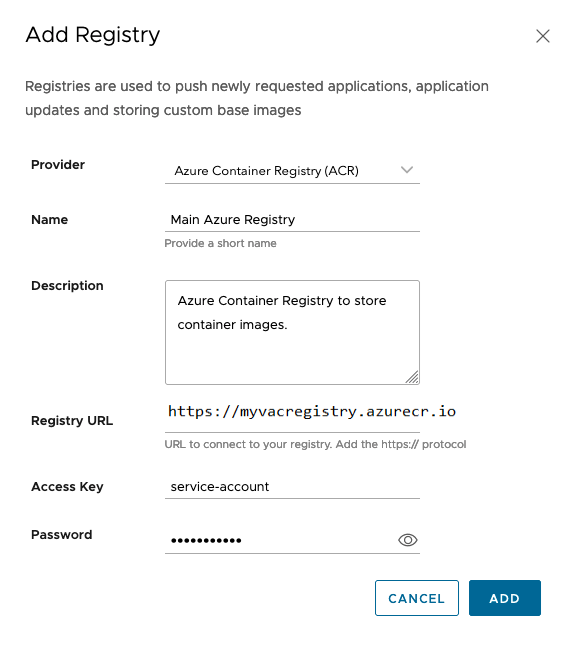
Amazon Elastic Container Registry
To add Amazon Elastic Container Registry, do the following:
-
Ensure that you have created an IAM user with enough permissions to push and pull artifacts to the registry.
-
Enter the following configuration details:
Field Description Provider Select the “Amazon Elastic Container Registry” option. Name Enter a name. Description Enter a description. Registry URL Enter the Amazon ECR login server path appended with https://. For example,https://456981234946.dkr.ecr.us-east-1.amazonaws.com. This corresponds to the base URL where the Amazon Elastic Container Registry instance resides. VAC pushes all the requested assets to this Amazon container registry. The registry URL contains the path to the repository. In the Amazon Elastic Container Registry, the repositories are created on the fly while pushing the subscribed assets for the first time.Access Key ID Enter the Access Key ID created on the AWS portal. It is recommended to provide the registry access by generating an IAM user with read and write access. For more information on how to configure ECR access , see Identity and Access Management for Amazon Elastic Container Registry. Secret Access Key Enter the Secret Access Key on the AWS portal. It is recommended to provide registry access by generating an IAM user with read and write access. For more information on how to configure ECR access, see Identity and Access Management for Amazon Elastic Container Registry. 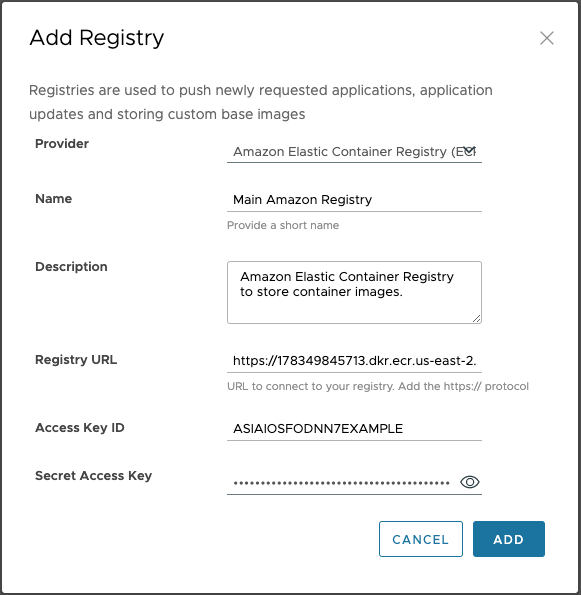
JFrog Container Registry (JCR)
To add a JFrog Container Registry, do the following:
-
Ensure that you have created an JFrog Container Registry. For more information on how to create a registry, see Getting Started With Artifactory as a Docker Registry.
-
Ensure that users in JFrog Artifactory have specific permissions: READ, WRITE/CREATE/EDIT for pushing container images and Helm charts, and DELETE/OVERWRITE to support rolling tags such as ‘latest,’ ensuring that the most recent version is always accessible.
-
Enter the following configuration details:
Field Description Provider Select the “JFrog Container Registry (JCR)” option. Name Enter a name. Description Enter a description. Registry URL Enter the path to the JCR registry appended with https://. For example,https://myvacregistry-docker-local.artifactory.acme.com(the URL may vary depending on if the artifactory instance is on cloud or on-self-hosted). This corresponds to the base URL where the JCR instance resides. VAC pushes all the requested assets to this JCR instance. The registry URL contains path to the repository. In JCR, repositories are created on the fly while pushing the subscribed assets for the first time.Username Enter the username that corresponds to the username generated on the JCR portal. Password Enter the password that corresponds to the password generated on the JCR portal. 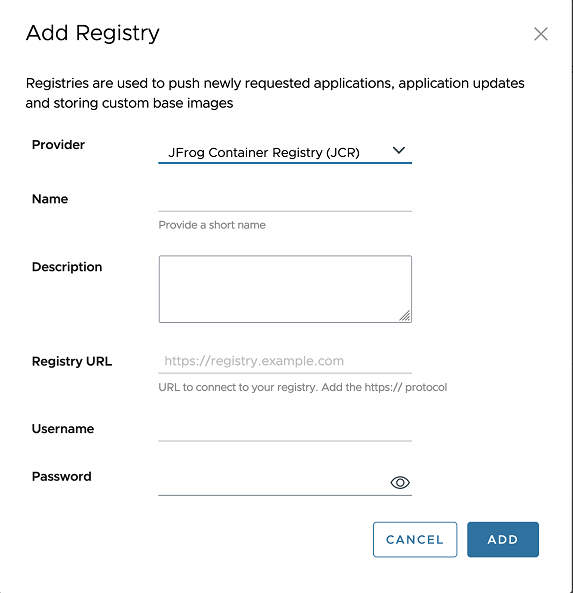
Google Artifact Registry (GAR)
To add GAR, do the following:
-
Ensure that you have enabled the container registry in GAR. For more information, see Enabling and disabling the service.
-
Enter the following configuration details:
Field Description Provider Select the “Google Artifact Registry (GAR)” option. Name Enter a name. Description Enter a description. Registry URL Enter the path to the GAR registry appended with https://. For example,https://us-east4-docker.pkg.dev/my-registry. This corresponds to the base URL where the GAR instance resides. VAC pushes all the requested assets to this GAR instance. The registry URL contains the path to the repository. In GAR, repositories are created on the fly while pushing the subscribed assets for the first time.Credentials (JSON) Copy and paste the contents of the Credentials.JSONfile generated by GAR in the service account as shown in the image below. For more information on how to generate credentials in GAR, see JSON key file.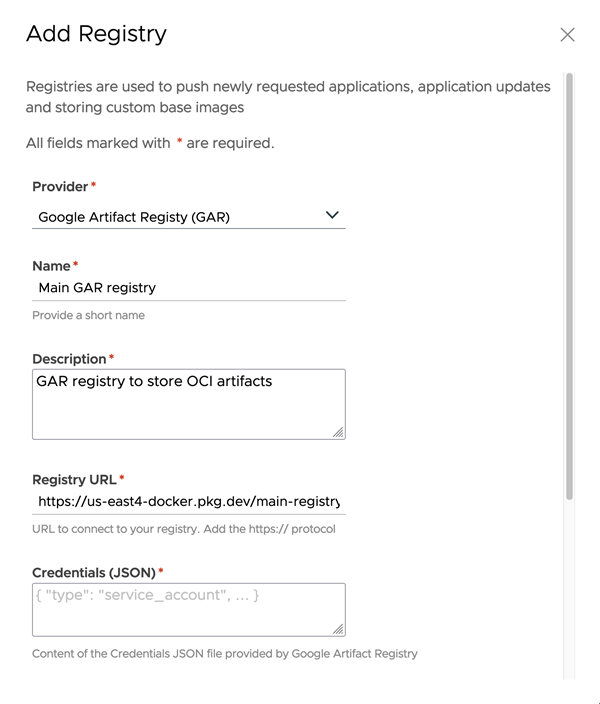
GitHub Container Registry (GHCR)
To add a GitHub Container Registry, do the following:
-
Ensure that you have enabled the container registry in GHCR. For more information, see Working with the Container Registry.
-
Enter the following configuration details:
Field Description Provider Select the “GitHub Container Registry” option. Name Enter a name. Description Enter a description. Registry URL Enter the GHCR login server path appended with https://. For example,https://ghcr.io/mygithubaccount. This corresponds to the base URL where the GitHub Container Registry instance resides. VAC pushes all the requested assets to this GitHub Container registry. The registry URL contains the path to the repository.Username Enter the username of your GitHub account. (It could be an org, an enterprise or a user). Password Provide the Personal Access Token with write packages permission. For more information on how to generate Personal Access Token, see Authenticating with a personal access token (classic). 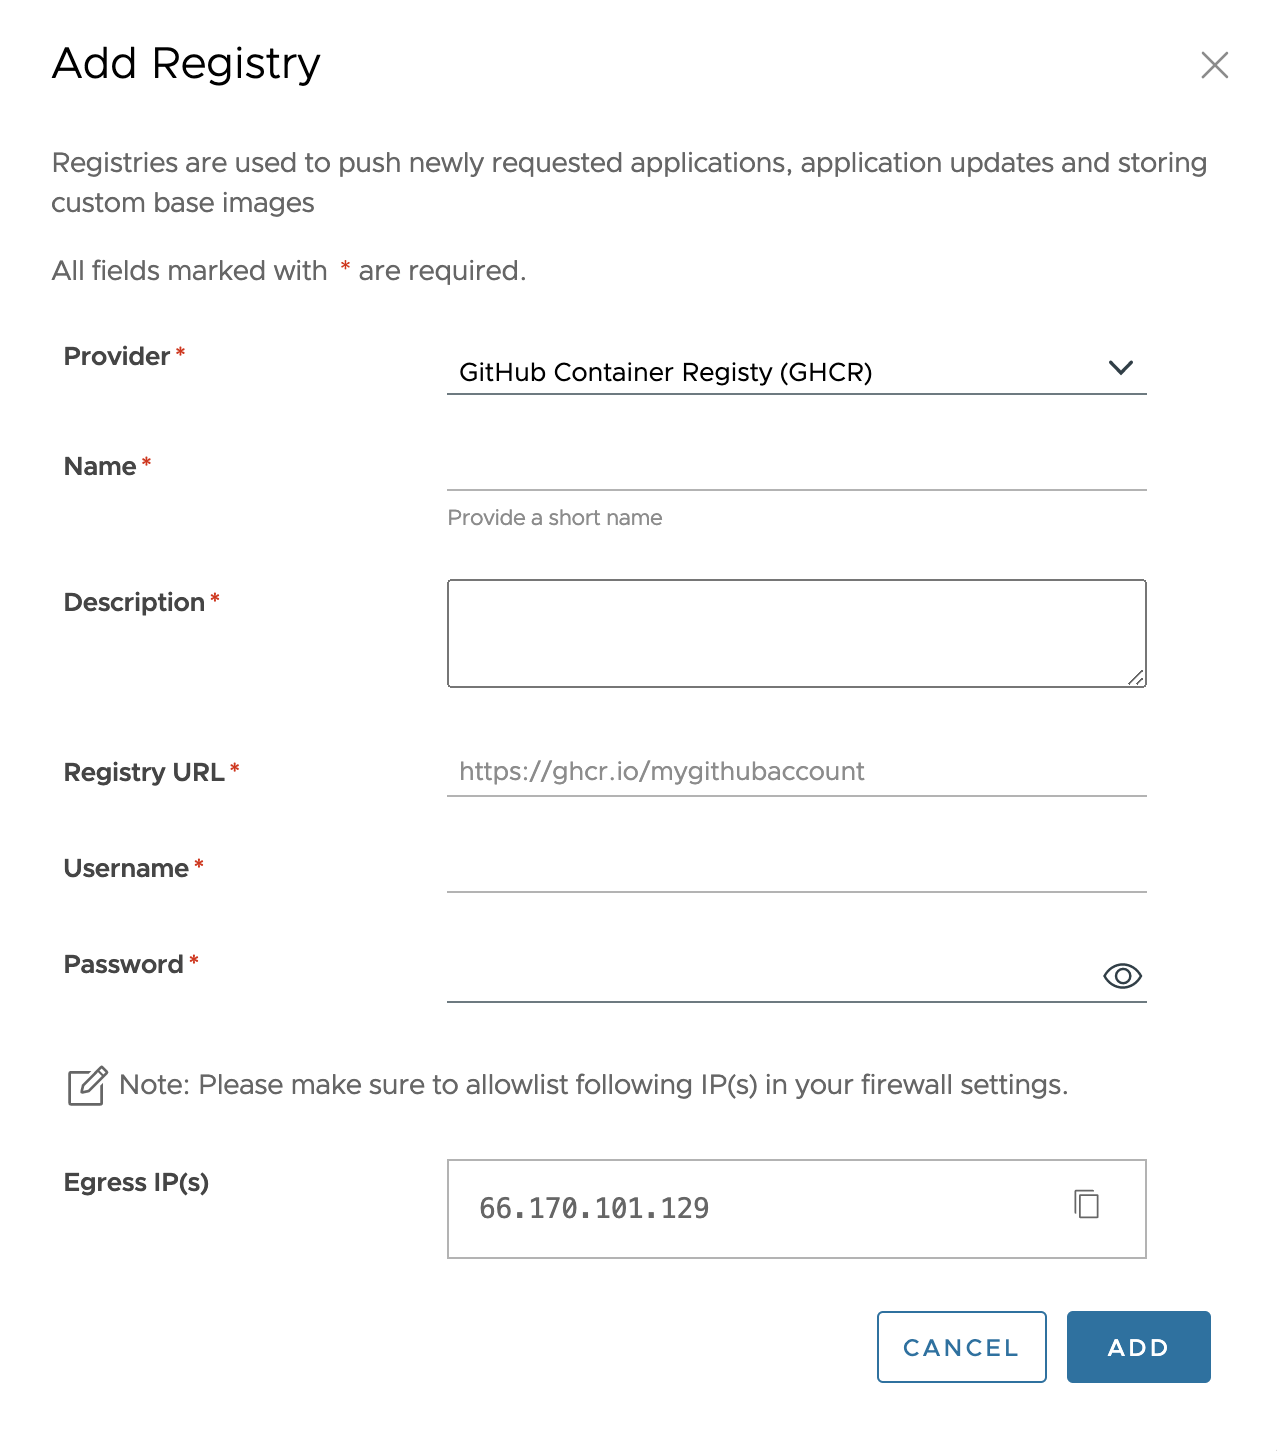
Google Container Registry (GCR)
To add GCR, do the following:
-
Ensure that you have enabled the container registry in GCR. For more information, see Enabling and disabling the service.
-
Enter the following configuration details:
Field Description Provider Select the “Google Container Registry (GCR)” option. Name Enter a name. Description Enter a description. Registry URL Enter the path to the GCR registry appended with https://. For example,https://gcr.io/myvacregistry. This corresponds to the base URL where the GCR instance resides. VAC pushes all the requested assets to this GCR instance. The registry URL contains the path to the repository. In GCR, repositories are created on the fly while pushing the subscribed assets for the first time.Credentials (JSON) Copy and paste the contents of the Credentials.JSONfile generated by GCR in the service account as shown in the image below. For more information on how to generate credentials in GCR, see JSON key file.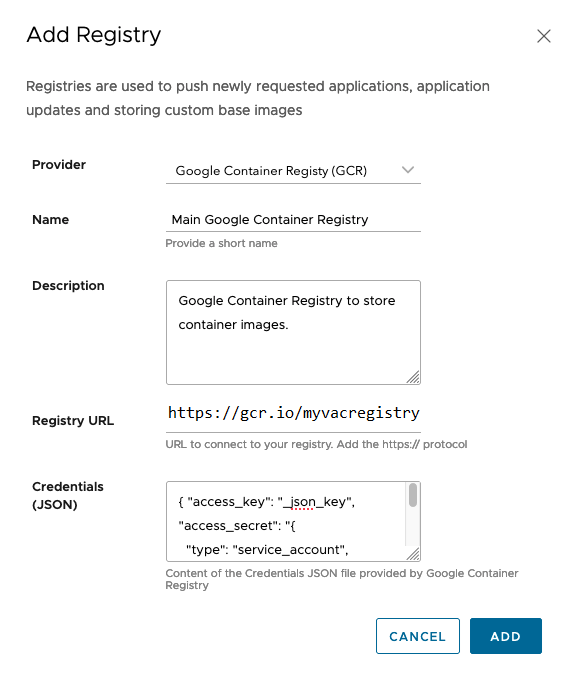
Nexus Container Registry
To add Nexus Registry, do the following:
-
Ensure that you have created a Nexus container registry with “Strict Content Type Validation” disabled. For more information on how to create a registry, see Adding Hosted Repository for Docker
-
Enter the following configuration details:
Field Description Provider Select the “Nexus Repository Manager” option. Name Enter a name. Description Enter a description. Registry URL Enter the Nexus Docker Repository path appended with https://. For example,https://mynexus.repository.example.com/repository/myrepository. This corresponds to the base URL where the Nexus registry resides. Tanzu Application Catalog pushes all the requested assets to this registry.Username Enter the username that corresponds to the username generated on the Nexus portal. It is recommended to provide registry access by generating a robot account with read and write access. For more information on how to generate robot account, see Managing users. Password Enter the Personal Access Token with write packages permission. For more information on how to create tokens based on a user, see Security Setup with User Tokens. 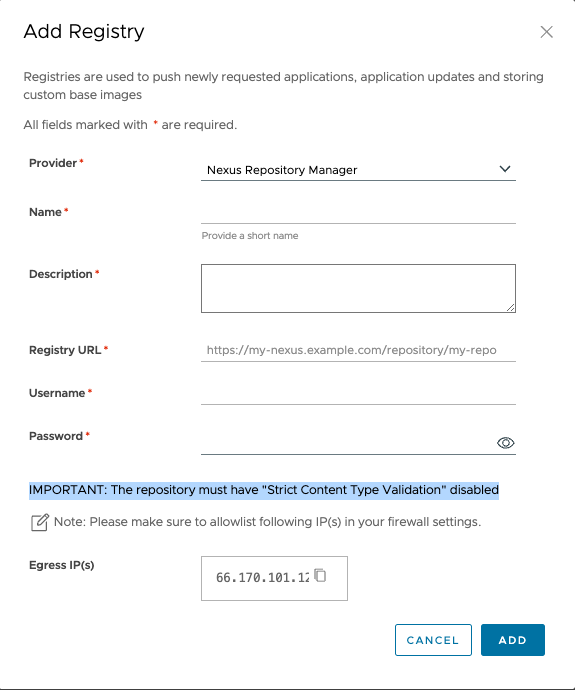
Obtain registry credentials
Before using the Tanzu Application Catalog, it is necessary to obtain credentials for the Tanzu Application Catalog registry. These credentials allow you to access the registry, and pull the container images and Helm charts. Follow these steps:
- On the left navigation pane, click “Registries”.
- Under My Registry tab, click on “DETAILS” of the newly added registry.
- In the “Registry Credentials” tab, click “GENERATE NEW CREDENTIALS”.
- In the resulting dialog box, enter a description for the new credentials. Click “GENERATE THE NEW CREDENTIALS”. The credentials are generated and displayed.
NoteEnter the username and token, or click “Download as JSON file” to download them as a JSON file. The default name of the file that is downloaded is called ‘_json_key.json’.
For a cluster to use the registry, it must have a secret that contains the registry key that was created: For example, to create a secret called ‘mydockercfg’ run the following commands:
```
kubectl create secret docker-registry mydockercfg
n ----docker-server "HOSTED_REGISTRY_URL"
n --docker-username "_json_key"
n --docker-password="$(cat _json_key.json)"
```
When deploying deploying a helm chart, it’s necessary to instruct the pods to pull images using the registry secret. This is done by setting the imagePullSecrets value in the helm command. For example, if you want to deploy Apache from your VMware registry using a secret named mydockercfg, use the following commands:
helm install oci://HOSTED_REGISTRY/charts/photon-4/apache --version 11.0.10 --generate-name --set "global.imagePullSecrets[0]=mydockercfg"
NoteThese credentials will not be displayed again, so ensure that you download or copy them to a secure location, as you will need them in subsequent steps.