


Deploy a Go Application on Kubernetes with Helm
Introduction
This guide walks you through the process of running an example Go application on a Kubernetes cluster. It uses a simple API for a "to-do list" application. The first step is to create the Go program binary, insert the binary into a minimal Dockerfile and use it as a starting point for creating a custom Helm chart to automate the application deployment in a Kubernetes cluster. Once the application is deployed and working, it also explores how to modify the source code for publishing a new application release and how to perform rolling updates in Kubernetes using the Helm CLI.
Go features
Go applications are generally suitable for running in containers because they can be compiled as a single binary that contains all the dependencies they need to run. The compiled binary can run without the Go runtime, so container images are smaller.
Assumptions and prerequisites
This guide will show you how to deploy an example Go application in a Kubernetes cluster running on Minikube. The example application is a typical "to-do list" application.
This guide makes the following assumptions:
- You have basic knowledge of the Go programming language and have run Go applications before.
- You have a Go development environment.
- You have basic knowledge of Helm charts and how to create them.
- You have a Docker environment running.
- You have an account in a container registry (this tutorial assumes that you are using Docker Hub).
- You have Minikube installed on your local computer.
- You have a Kubernetes cluster running.
- You have the kubectl command line (kubectl CLI) installed.
- You have Helm v3.x installed.
To create your own application in Go and deploy it on Kubernetes using Helm you will typically follow these steps:
- Step 1: Obtain the application source code
- Step 2: Build the Docker image
- Step 3: Publish the Docker image
- Step 4: Create the Helm Chart
- Step 5: Deploy the example application in Kubernetes
- Step 6: Update the source code and the Helm chart
Step 1: Obtain the application source code
To begin the process, clone the tutorials repository, as shown below for the sample application:
git clone https://github.com/bitnami/tutorials
cd tutorials/go-k8s
This will clone the entire tutorials repository. In this repository you will find the following:
- Dockerfile: a text file that contains instructions on how to build a Docker image. Each line indicates an instruction and a command for assembling all the pieces that comprise the image.
- app-code directory: a folder that contains the application source code and a pre-built binary.
- helm-chart directory: a folder that contains the ready-made Helm chart used in this tutorial.
This tutorial skips the step of creating a Go binary, as it is out of the scope of the current guide. It uses the existing Go binary that is in the app-code directory in the project code repository. Check the official Go documentation for further information on how to build a Go binary.
NoteThe following steps only apply if you already have a Go binary. If you don't, skip them and build the Docker image as shown in Step 2.
If you have Go already installed, you can simply build it with the following command:
GOOS=linux GOARCH=amd64 go build -tags netgo -o http-sample
There are different ways to build a binary with Go. Using the -tags netgo option prevents the net package from linking to the host resolver, ensuring that the binary is not linked to any system library. This is good for containers because we can deploy a very minimal image without any required libraries (for example, the Docker "scratch" image.
Some of the cons of this approach would be that you have to include other files for Web applications, like CA certificates, or if you want to use a shell. For these reasons, this tutorial deploys the Go web application on top of Bitnami's minideb image, which is a minimal version of Debian designed for use in containers.
Copy the binary to the tutorials/go-k8s/app-code/ folder:
cp http-sample tutorials/go-k8s/app-code/
Once you have completed the steps above, running a Go application is very easy. You only need to add the binary to a Docker image. Check the Dockerfile you will find in the next step to see how simple this is.
Step 2: Build the Docker image
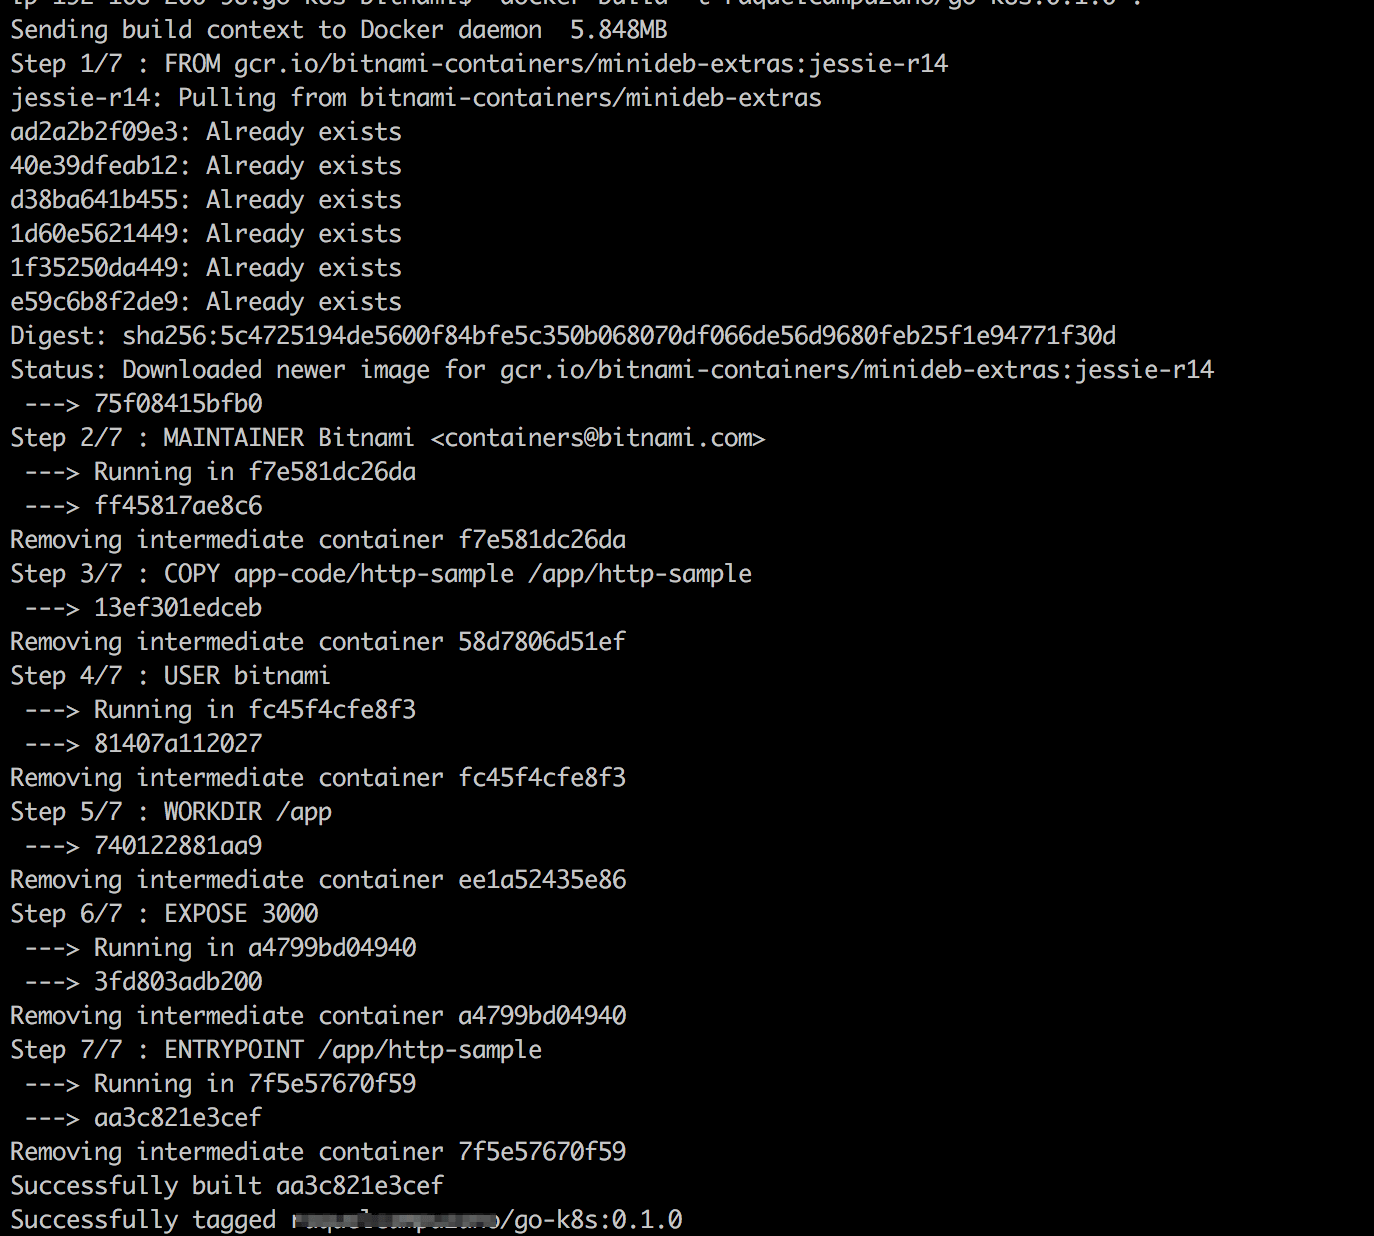
To build the Docker image,run the docker build command in the directory containing the Dockerfile. Add a tag to identify the current version of the application: 0.1.0. Remember to replace the USERNAME placeholder with your Docker ID.
docker build -t USERNAME/go-k8s:0.1.0 .
You will see output like this during the build process:
Step 3: Publish the Docker image
Now that your Docker image is built and contains your application code, you can upload it into a public registry. This tutorial uses Docker Hub, but you can select one of your own choice such as:
To upload the image to Docker Hub, follow the steps below:
Log in to Docker Hub:
docker loginPush the image to your Docker Hub account. Replace the DOCKER_USERNAME placeholder with the username of your Docker Hub account and my-custom-app:latest with the name and the version of your Docker image:
docker push DOCKER_USERNAME/my-custom-app:latestConfirm that you see the image in your Docker Hub repositories dashboard.
Step 4: Create the Helm chart
To create a brand new chart, you just need to run the helm create command. This creates a scaffold with sample files that you can modify to build your custom chart. For this tutorial, we'll provide you with a ready-made Helm chart.
If you examine the repository you just downloaded, there is a directory named helm-chart that already contains the files you need. Check out the chart's file structure:
go-k8s
|-- Chart.yaml
|-- charts
|-- templates
|   |-- NOTES.txt
|   |-- _helpers.tpl
|   |-- deployment.yaml
|   |-- ingress.yaml
|   `-- service.yaml
`-- values.yaml
With the scaffolding in place, we'll perform the following steps:
- Edit the values.yaml file
- Edit the templates/deployment.yaml file
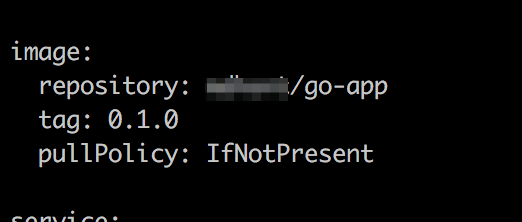
Edit the values.yaml file
This file declares variables to be passed into the templates. We have modified the file to include our Docker image, tag, and service name, ports, type, and database values. USERNAME is a placeholder. Remember to replace it with your Docker ID.
Edit the templates/deployment.yaml file
This file contains the instructions to launch the application container.
Step 5: Deploy the example application in Kubernetes
NoteBefore performing the following steps, make sure you have a Kubernetes cluster running with Helm v3.x installed. For detailed instructions, refer to our starter tutorial.
At this point, you have built a Docker image, published it in a container registry and created your custom Helm chart. It's now time to deploy the example Go application to the Kubernetes cluster. To deploy the example application using the current Helm chart, follow these steps:
Make sure that you can connect to your Kubernetes cluster by executing the command below:
kubectl cluster-infoDeploy the Helm chart by executing the following. RELEASE-NAME is a placeholder, so please replace it with the right value:
helm install RELEASE-NAME ./helm-chart/go-k8s/This will create a single pod within the cluster.
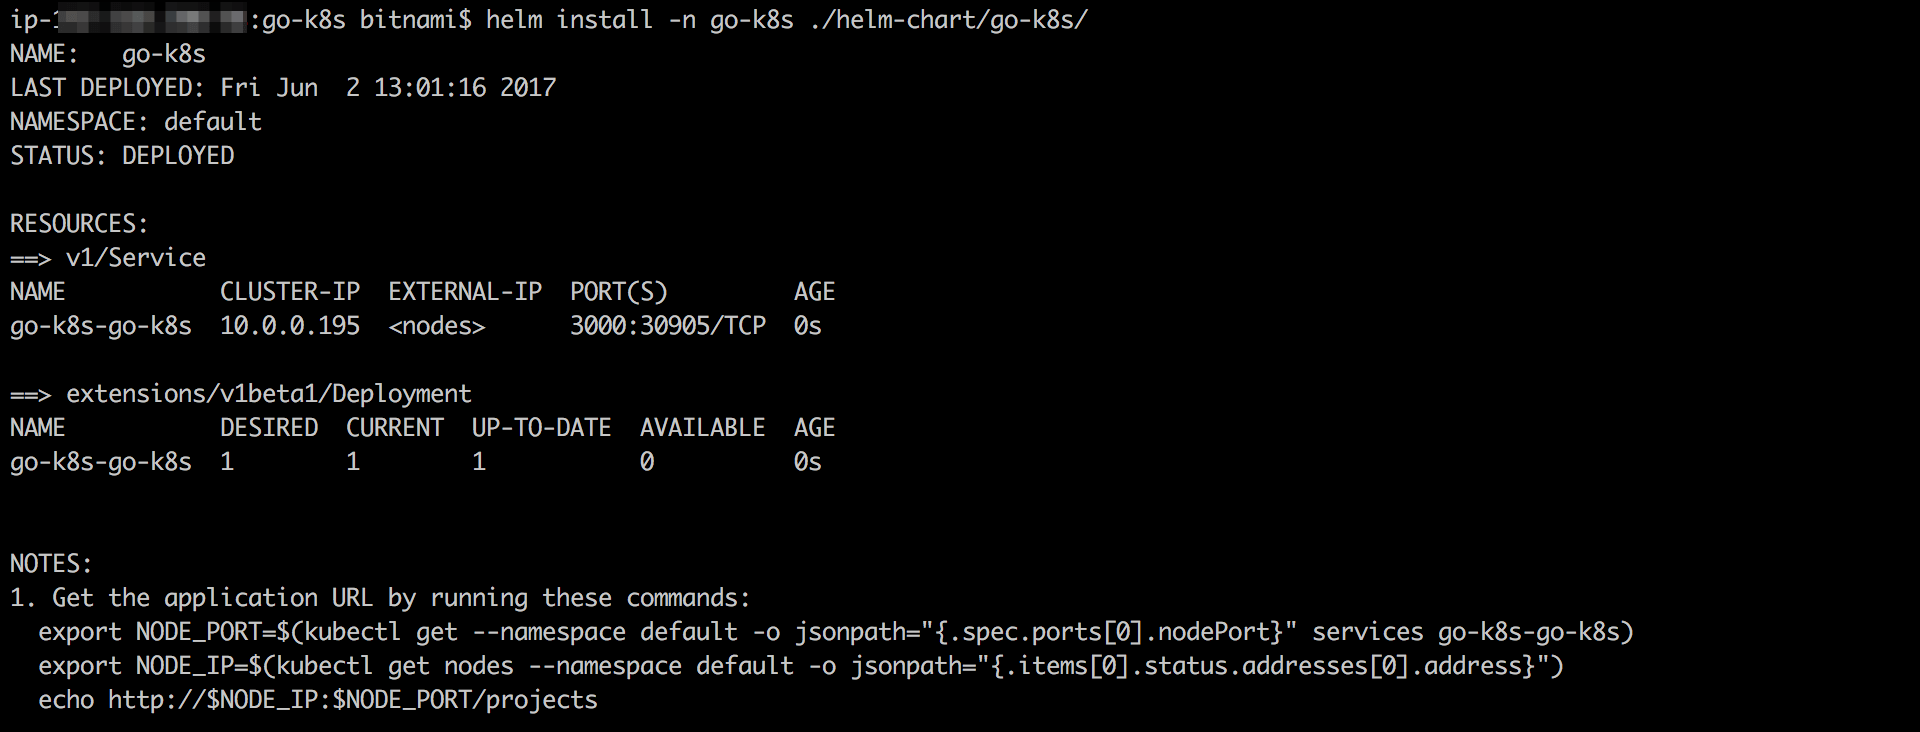
Once the chart has been installed, you will see a lot of useful information about the deployment. The application won't be available until database configuration is complete. Follow these instructions to check the database status:
Run the kubectl get pods command to get a list of running pods:
kubectl get pods
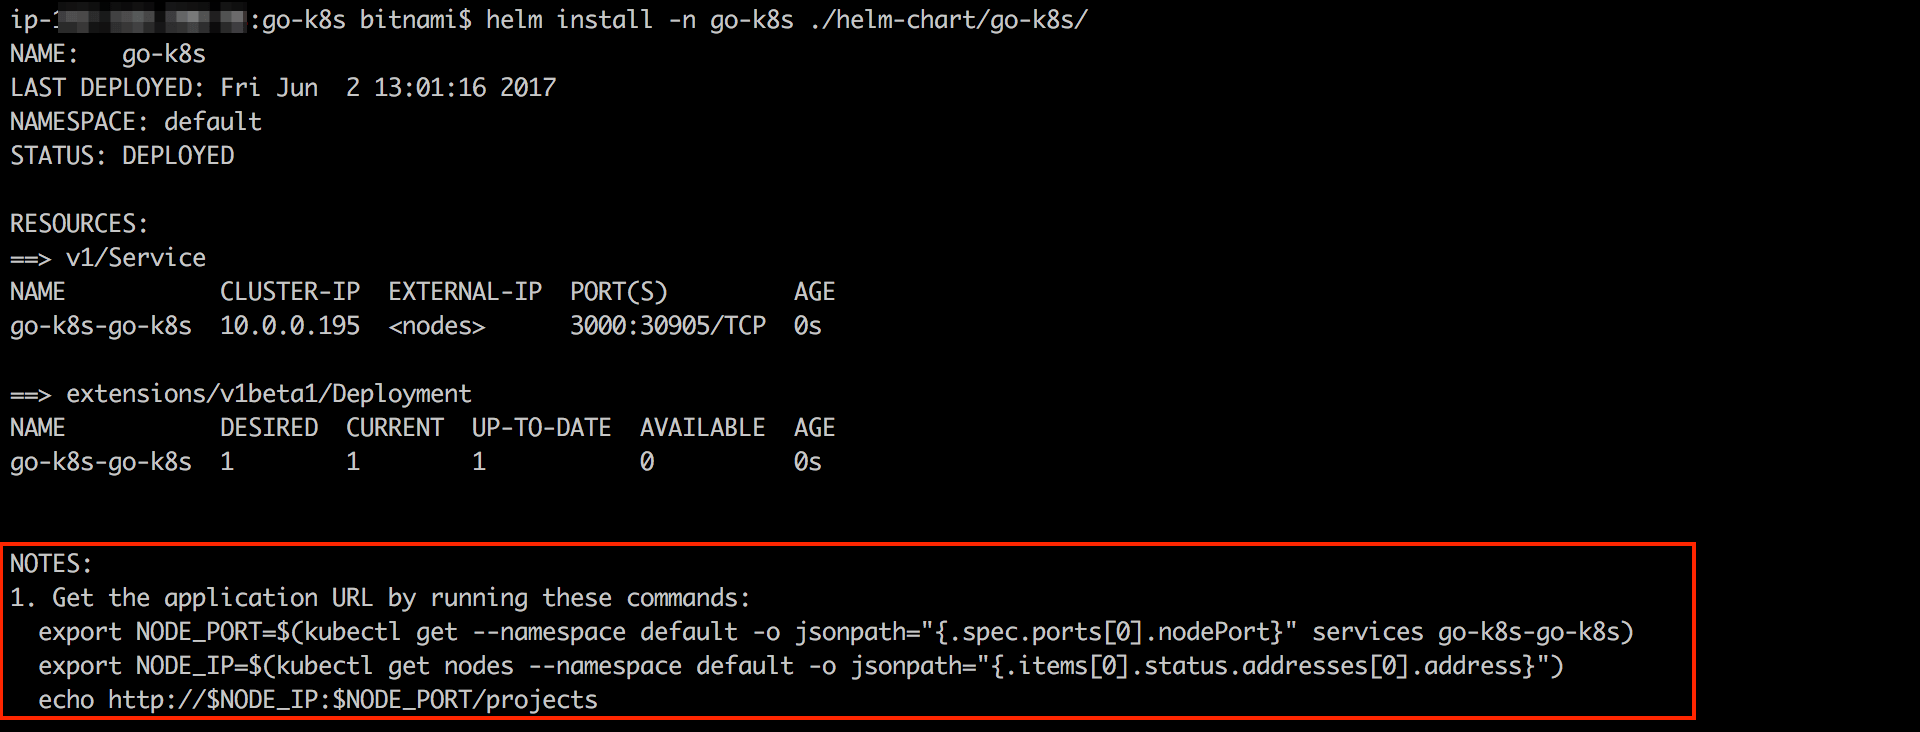
Once you've configured the database, you can access the application. To obtain the application URL, run the commands shown in the "Notes" section below.
If you're using Minikube, you can also check the application service to get the application's URL. You have two ways to do this:
Option 1: List the services by executing the minikube service list command. You'll notice two service names:
minikube service list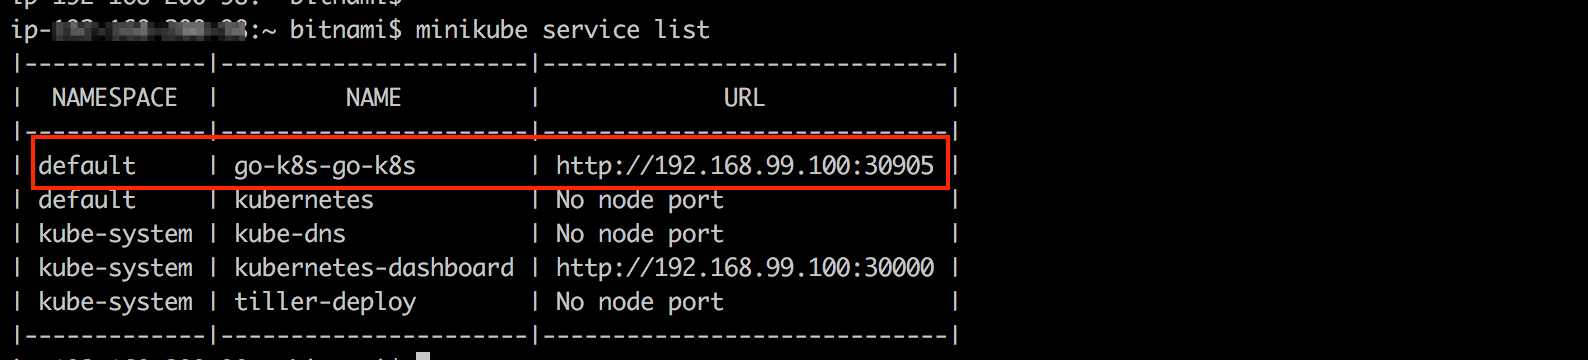
Option 2: Check the application service using the minikube service SERVICE command (SERVICE is a placeholder. Remember to replace it with the name of the service you want to check):
minikube service SERVICE --url
Congratulations! Your Go application has been successfully deployed on Kubernetes.

Step 6: Update the source code and the Helm chart
As a developer, you'll understand that your application may need new features or bug fixes in the future. To release a new Docker image, you only have to perform a few basic steps: change your application source code, rebuild and republish the image in your selected container registry. Once the new image release has been pushed to the registry, you need to update the Helm chart.
Follow these instructions to complete the application update process:
Compile the new binary and copy it to tutorials/go-k8s/app-code/ folder.
Build the new image and tag it as 0.2.0. Remember to replace the USERNAME placeholder with your Docker ID in the following steps.
docker build -t USERNAME/go-k8s:0.2.0 .Note
Before performing the next step, make sure that you are logged into Docker Hub. Run the docker login command to access your account (if applicable).
Publish the newimage following the same steps as in Step 3 but using the new version number.
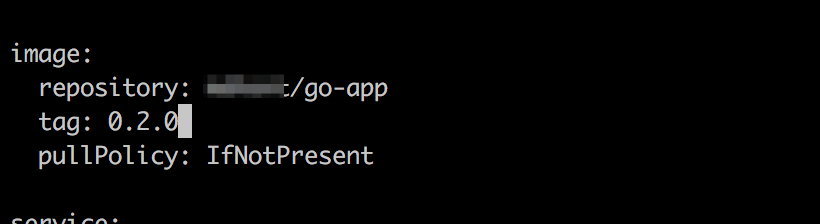
docker push USERNAME/go-k8s:0.2.0Change to the helm-chart/go-k8s/ directory, where you have the Helm chart files. Edit the values.yaml file to replace the current image tag with the new one:
Run the helm upgrade command followed by the name of the chart. After that, you will see the information about the new deployment. RELEASE-NAME is a placeholder, replace it with the right value:
helm upgrade RELEASE-NAME helm-chart/go-k8s/In your default browser, refresh the page to see the changes:

See what revisions have been made to the chart by executing the helm history command:
helm history RELEASE-NAME
Follow these steps every time you want to update your Docker image and Helm chart.
Useful links
To learn more about the topics discussed in this guide, use the links below:
