Develop a REST API with VMware Tanzu Application Catalog's Node.js and MongoDB Containers
Introduction
For developers building cloud-native applications and APIs for Kubernetes, VMware Tanzu Application Catalog (Tanzu Application Catalog) offers a variety of containers and Helm charts to ease the process. These ready-to-use assets make it easier to develop and deploy applications consistently, follow best practices and focus on code rather than infrastructure configuration. Tanzu Application Catalog containers and charts are also always secure, optimized and up-to-date, so you can rest assured that your applications always have access to the latest language features and security fixes.
To illustrate these benefits, this tutorial will walk you through the process of developing and deploying a sample Node.js REST API locally using Tanzu Application Catalog containers. You will create and run a sample REST API locally on your development system using the Sails framework. You will also create a local MongoDB service for API data storage, and integrate and test your REST API with this MongoDB service. To perform these tasks, you can either use your existing Node.js development environment or, if you don't have one, you can use the following Tanzu Application Catalog container images:
- Tanzu Application Catalog's Node.js container image contains the Node.js runtime together with all required dependencies and development tools.
- Tanzu Application Catalog's MongoDB container image contains the official MongoDB Community binaries together with support for persistence, SSL and replica sets.
Assumptions and prerequisites
This guide assumes that:
- You have Docker installed and configured. Learn more about installing Docker.
- You have a basic understanding of Node.js and REST API concepts. Learn more about Node.js and REST.
Step 1: Create a skeleton Node.js application
The first step is to create a skeleton Node.js application. This article will use the Tanzu Application Catalog Node.js container image and the popular Sails MVC framework; however, there are multiple tools and methods to do this and you should feel free to use a different approach or a different framework. For example, if you already have a Node.js development environment, you can use that instead and skip the Docker commands below.
Begin by creating a directory for your application and making it the current working directory:
mkdir myapp
cd myapp
Use the following Docker commands to create and start a Tanzu Application Catalog Node.js container on your host (replace the REGISTRY placeholder with your Tanzu Application Catalog container registry):
docker create -v $(pwd):/app -t --net="host" --name node REGISTRY/node:13
docker start node
The
-vargument to the first command tells Docker to mount the host's current directory into the container's/apppath, so that the effects of commands run in the container are seen on the host. The--net="host"parameter tells Docker to use the host's network stack for the container. The container is namednode.Once the container is running, connect to the container console with the command below. This will give you a command shell and allow you to use the Node.js tools available in the image for subsequent tasks.
docker exec -it node /bin/bashInstall Sails and then use the Sails CLI to create the scaffolding for a skeleton application. When prompted for the application type, choose an "Empty" application.
npm install -g sails
sails new .
Once the application scaffolding has been generated, start the application:
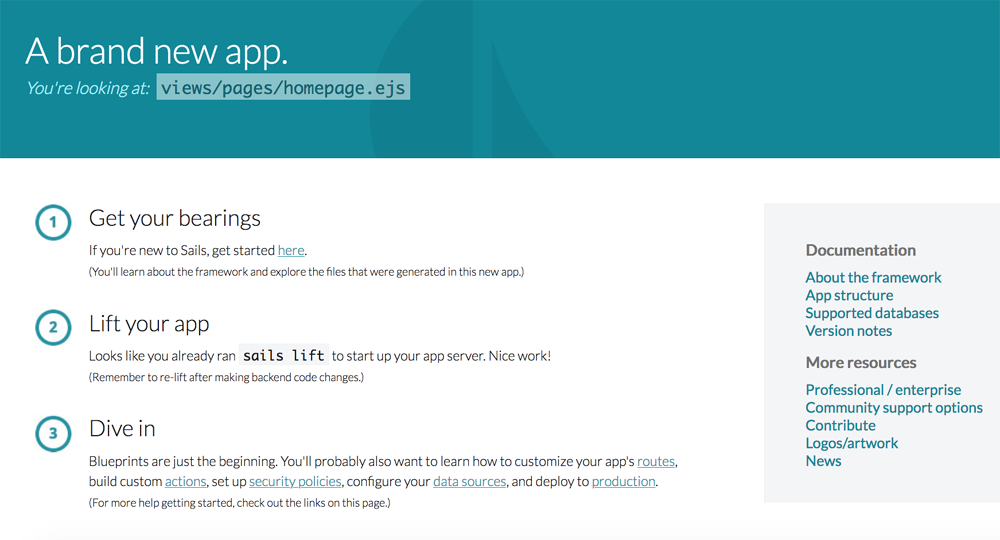
sails liftBy default, a Sails application starts in development mode and runs at port 1337. Browse to http://
:1337, where DOCKER-HOST-ADDRESS is the IP address of your host, and confirm that you see the Sails welcome page shown below: 
Exit the container console. This will terminate the Sails application process, although the container will continue to run in the background.
Step 2: Create and start a local MongoDB service
MongoDB is a scalable and popular data storage accompaniment for Node.js applications. Tanzu Application Catalog's MongoDB image makes it easy to create a local MongoDB service which can be used to store, retrieve and modify data related to your REST API. Alternatively, if you already have the MongoDB server and a MongoDB database on your host, you can use that instead and skip the Docker commands below.
Create and start a MongoDB database service using the Tanzu Application Catalog MongoDB container on your host. If you wish, you can replace the database credentials and other variables shown below with your own values, but make a note of them as you will need them in the next step. Replace the REGISTRY placeholder with a reference to your Tanzu Application Catalog container registry.
docker create -e MONGODB_USERNAME=myapp -e MONGODB_PASSWORD=myapp -e MONGODB_DATABASE=mydb -e MONGODB_ROOT_PASSWORD=root --net="host" --name mongodb REGISTRY/mongodb
docker start mongodb
The environment variables passed to the first command set the administrator password for the MongoDB instance and also create a new database named mydb with corresponding user credentials. This database will be used to store data for the REST API. As before, the --net="host" parameter tells Docker to use the host's network stack for this container as well. The container is named mongodb and, once started, the MongoDB service will be available on the Docker host at port 27017.
Step 3: Create and configure a REST API endpoint
At this point, you have a skeleton Node.js application and a MongoDB database service. You can now start creating your REST API. As before, if you're using an existing Node.js development environment, skip the Docker commands below.
Connect to the container console again with the command below:
docker exec -it node /bin/bashSails comes with a built-in generator for API endpoints. Use this to generate the scaffolding for a new sample REST API endpoint for Item objects. By default, this endpoint will be exposed at the
/itemURI.sails generate api itemInstall the MongoDB adapter for Sails:
npm install sails-mongo --saveExit the Docker container once the installation is complete.
Follow the steps outlined in the Sails documentation to configure the generated application to use MongoDB for data storage. First, edit the
myapp/config/datastores.jsfile and modify the default datastore entry as shown below.default: { adapter: 'sails-mongo', url: 'mongodb://myapp:myapp@localhost/mydb' }If you used different values when creating the MongoDB container, or if you're using a different MongoDB installation, remember to replace the values shown above as needed.
Then, update the
idandmigrateattributes in themyapp/config/models.jsfile:migrate: 'alter', id: { type: 'string', columnName: '_id' },Create a data model for the REST API Item object. For this article, use a simple model with just two attributes: a
nameand aquantity. Edit themyapp/api/models/Item.jsand update it to look like this:module.exports = { attributes: { name: 'string', quantity: 'number' } };Connect to the container console again. Start the application and put it in the background:
docker exec -it node /bin/bash
sails lift &
Exit the Docker container once the application starts.
As before, the application will start in development mode and become available at port 1337 of the host.
Step 4: Test the REST API
Your REST API is now active and configured to use MongoDB. You can now proceed to test it from your host, by sending it various types of HTTP requests and inspecting the responses. If you're using the Tanzu Application Catalog containers, remember that they are using the host's network stack and so will be available at ports 1337 (Node.js) and 27017 (MongoDB) respectively.
At the host console, send a POST request to the API using
curlto create a new item record:curl -H "Content-Type: application/json" -X POST -d '{"name":"milk","quantity":"10"}' http://localhost:1337/itemYou should see output similar to that shown below:

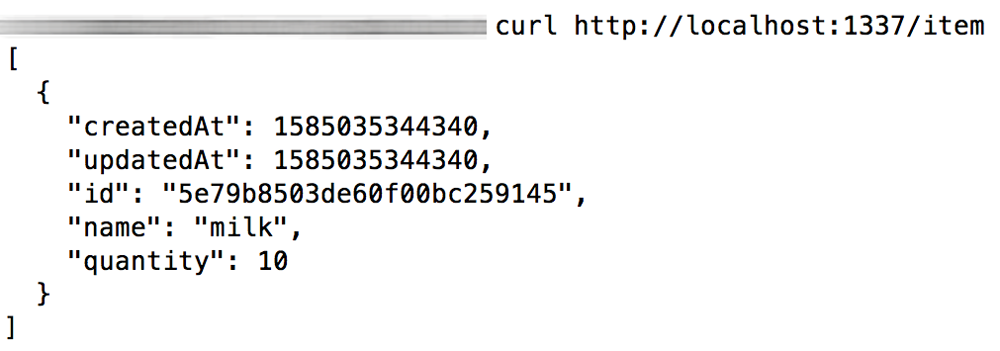
Check if the item record was created with a GET request:
curl http://localhost:1337/itemYou should see output similar to that shown below:

You can also connect to the running MongoDB container and use the
mongoCLI to see the data in the MongoDB database.docker exec -it mongodb /bin/bash mongo --authenticationDatabase mydb -u myapp -p myapp mydb --eval "db.item.find()"You should see output similar to that shown below:

Modify the item record with a PUT request. Replace the ID placeholder in the command below with the document's unique identifier from the previous commands.
curl -H "Content-Type: application/json" -X PUT -d '{"name":"milk","quantity":"5"}' http://localhost:1337/item/IDYou should see output similar to that shown below:

Delete the item record with a DELETE request:
curl -H "Content-Type: application/json" -X DELETE http://localhost:1337/item/IDYou should see output similar to that shown below:

You can also connect to the running MongoDB container and use the
mongoCLI to confirm that the data has been deleted from the MongoDB database:docker exec -it mongodb /bin/bash mongo --authenticationDatabase mydb -u myapp -p myapp mydb --eval "db.item.count()"You should see output similar to that shown below:

At this point, you have a working Node.js REST API integrated with a MongoDB database.
Useful links
To learn more about the topics discussed in this article, use the links below: