


Running non-root containers on Openshift
Introduction
Over the past few months, Bitnami have been working with non-root containers. We realized that non-root images adds an extra layer of security to the containers. Therefore, we decided to release a selected subset of our containers as non-root images so that our users could benefit from them.
In this blog post we see how a Bitnami non-root Dockerfile looks like by checking the Bitnami Nginx Docker image. As an example of how the non-root containers can be used, we go through how to deploy Ghost on Openshift. Finally, we will cover some of the issues we faced while moving all of these containers to non-root containers
What are non-root containers?
By default, Docker containers are run as root users. This means that you can do whatever you want in your container, such as install system packages, edit configuration files, bind privilege ports, adjust permissions, create system users and groups, access networking information.
With a non-root container you can't do any of this . A non-root container should be configured for its main purpose, for example, run the Nginx server.
Why use a non-root container?
Mainly because it is a best practise for security. If there is a container engine security issue, running the container as an unprivileged user will prevent the malicious code from scaling permissions on the host node. To learn more about Docker's security features, see Bitnami Nginx Docker image. As an example of how the non-root containers can be used, we go through how to deploy Ghost on this guide.
Another reason for using non-root containers is because some Kubernetes distributions force you to use them. For example Openshift, a Red Hat Kubernetes distribution. This platform runs whichever container you want with a random UUID, so unless the Docker image is prepared to work as a non-root user, it probably won't work due to permissions issues. The Bitnami Docker images that have been migrated to non-root containers works out-of-the-box on Openshift.
How to create a non-root container?
To explain how to build a non-root container image, we will use our Nginx non-root container and its Bitnami Nginx Docker image. As an example of how the non-root containers can be used, we go through how to deploy Ghost on Dockerfile.
FROM bitnami/minideb-extras:jessie-r22
LABEL maintainer "Bitnami <[email protected]>"

ENV BITNAMI_PKG_CHMOD="-R g+rwX"
...
RUN bitnami-pkg unpack nginx-1.12.2-0 --checksum cb54ea083954cddbd3d9a93eeae0b81247176235c966a7b5e70abc3c944d4339
...
USER 1001
ENTRYPOINT ["/app-entrypoint.sh"]
CMD ["nginx","-g","daemon off;"]
- The BITNAMI_PKG_CHMOD env var is used to define file permissions for the folders where we want to write, read or execute. The
bitnami-pkgscript reads this env var and performs the changes. - The
bitnami-pkg unpack nginxunpacks the Nginx files and changes the permissions as stated by the BITNAMI_PKG_CHMOD env var.
Up until this point, everything is running as the root user.
- Later, the
USER 1001directive switches the user from the defaultrootto1001. Although we specify the user1001, keep in mind that this is not a special user. It might just be whatever UUID that doesn't match an existing user in the image. Moreover, Openshift ignores the USER directive of the Dockerfile and launches the container with a random UUID.
Because of this, the non-root images cannot have configuration specific to the user running the container. From this point to the end of the Dockerfile, everything is run by the 1001 user.
- Finally, the entrypoint is in charge of configure Nginx. It is worth mentioning that no
nginx,www-dataor similar user is created as the Nginx process will be running as the1001user. Also, because we are running the Nginx service as an unprivileged user we cannot bind the port 80, therefore we must configure the port 8080.
How to deploy Ghost in OpenShift
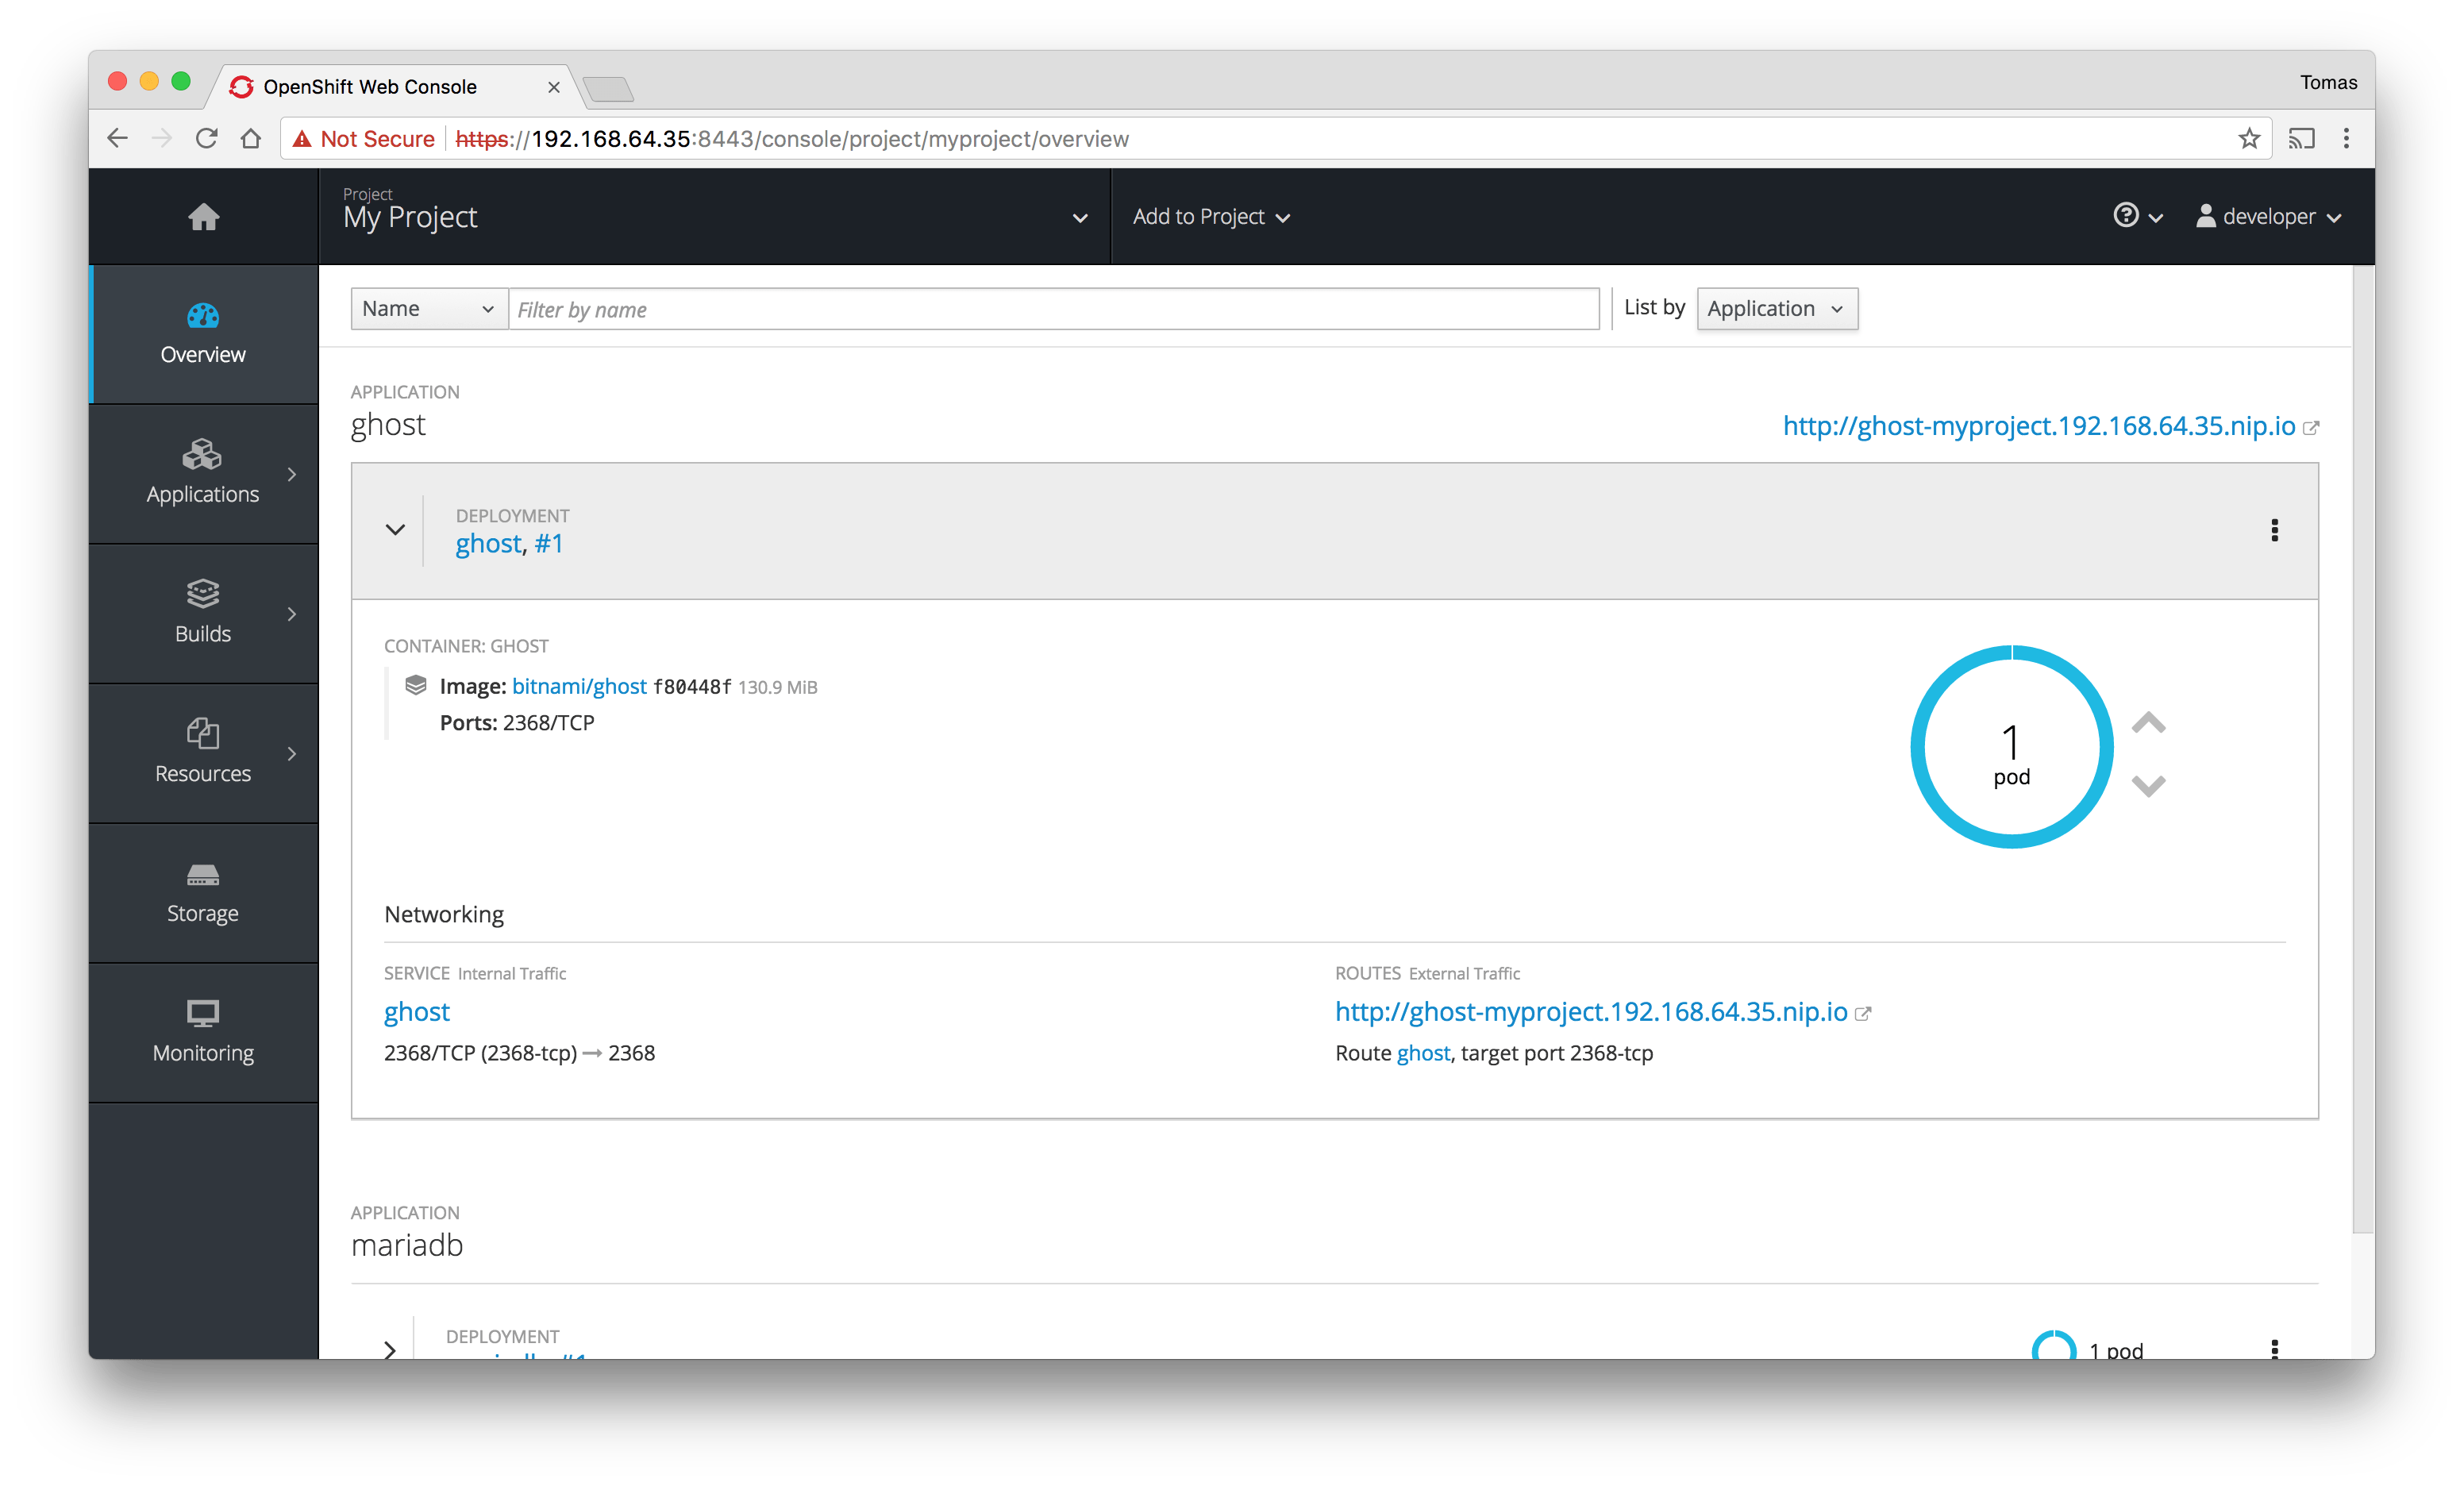
As an example, let's deploy Ghost, the blog platform. We need a database that runs on Openshift, like the Bitnami MariaDB container:
For simplicity we will use Minishift, a tool that helps you run OpenShift locally.
- Start the cluster and load the Openshift Client environment.
$ minishift start
$ eval $(minishift oc-env)
- Deploy both MariaDB and Ghost images:
$ oc new-app --name=mariadb ALLOW_EMPTY_PASSWORD=yes --docker-image=bitnami/mariadb
$ oc new-app --name=ghost --docker-image=bitnami/ghost
- Finally expose the Ghost service and access the URL:
$ oc expose svc/ghost
$ oc status
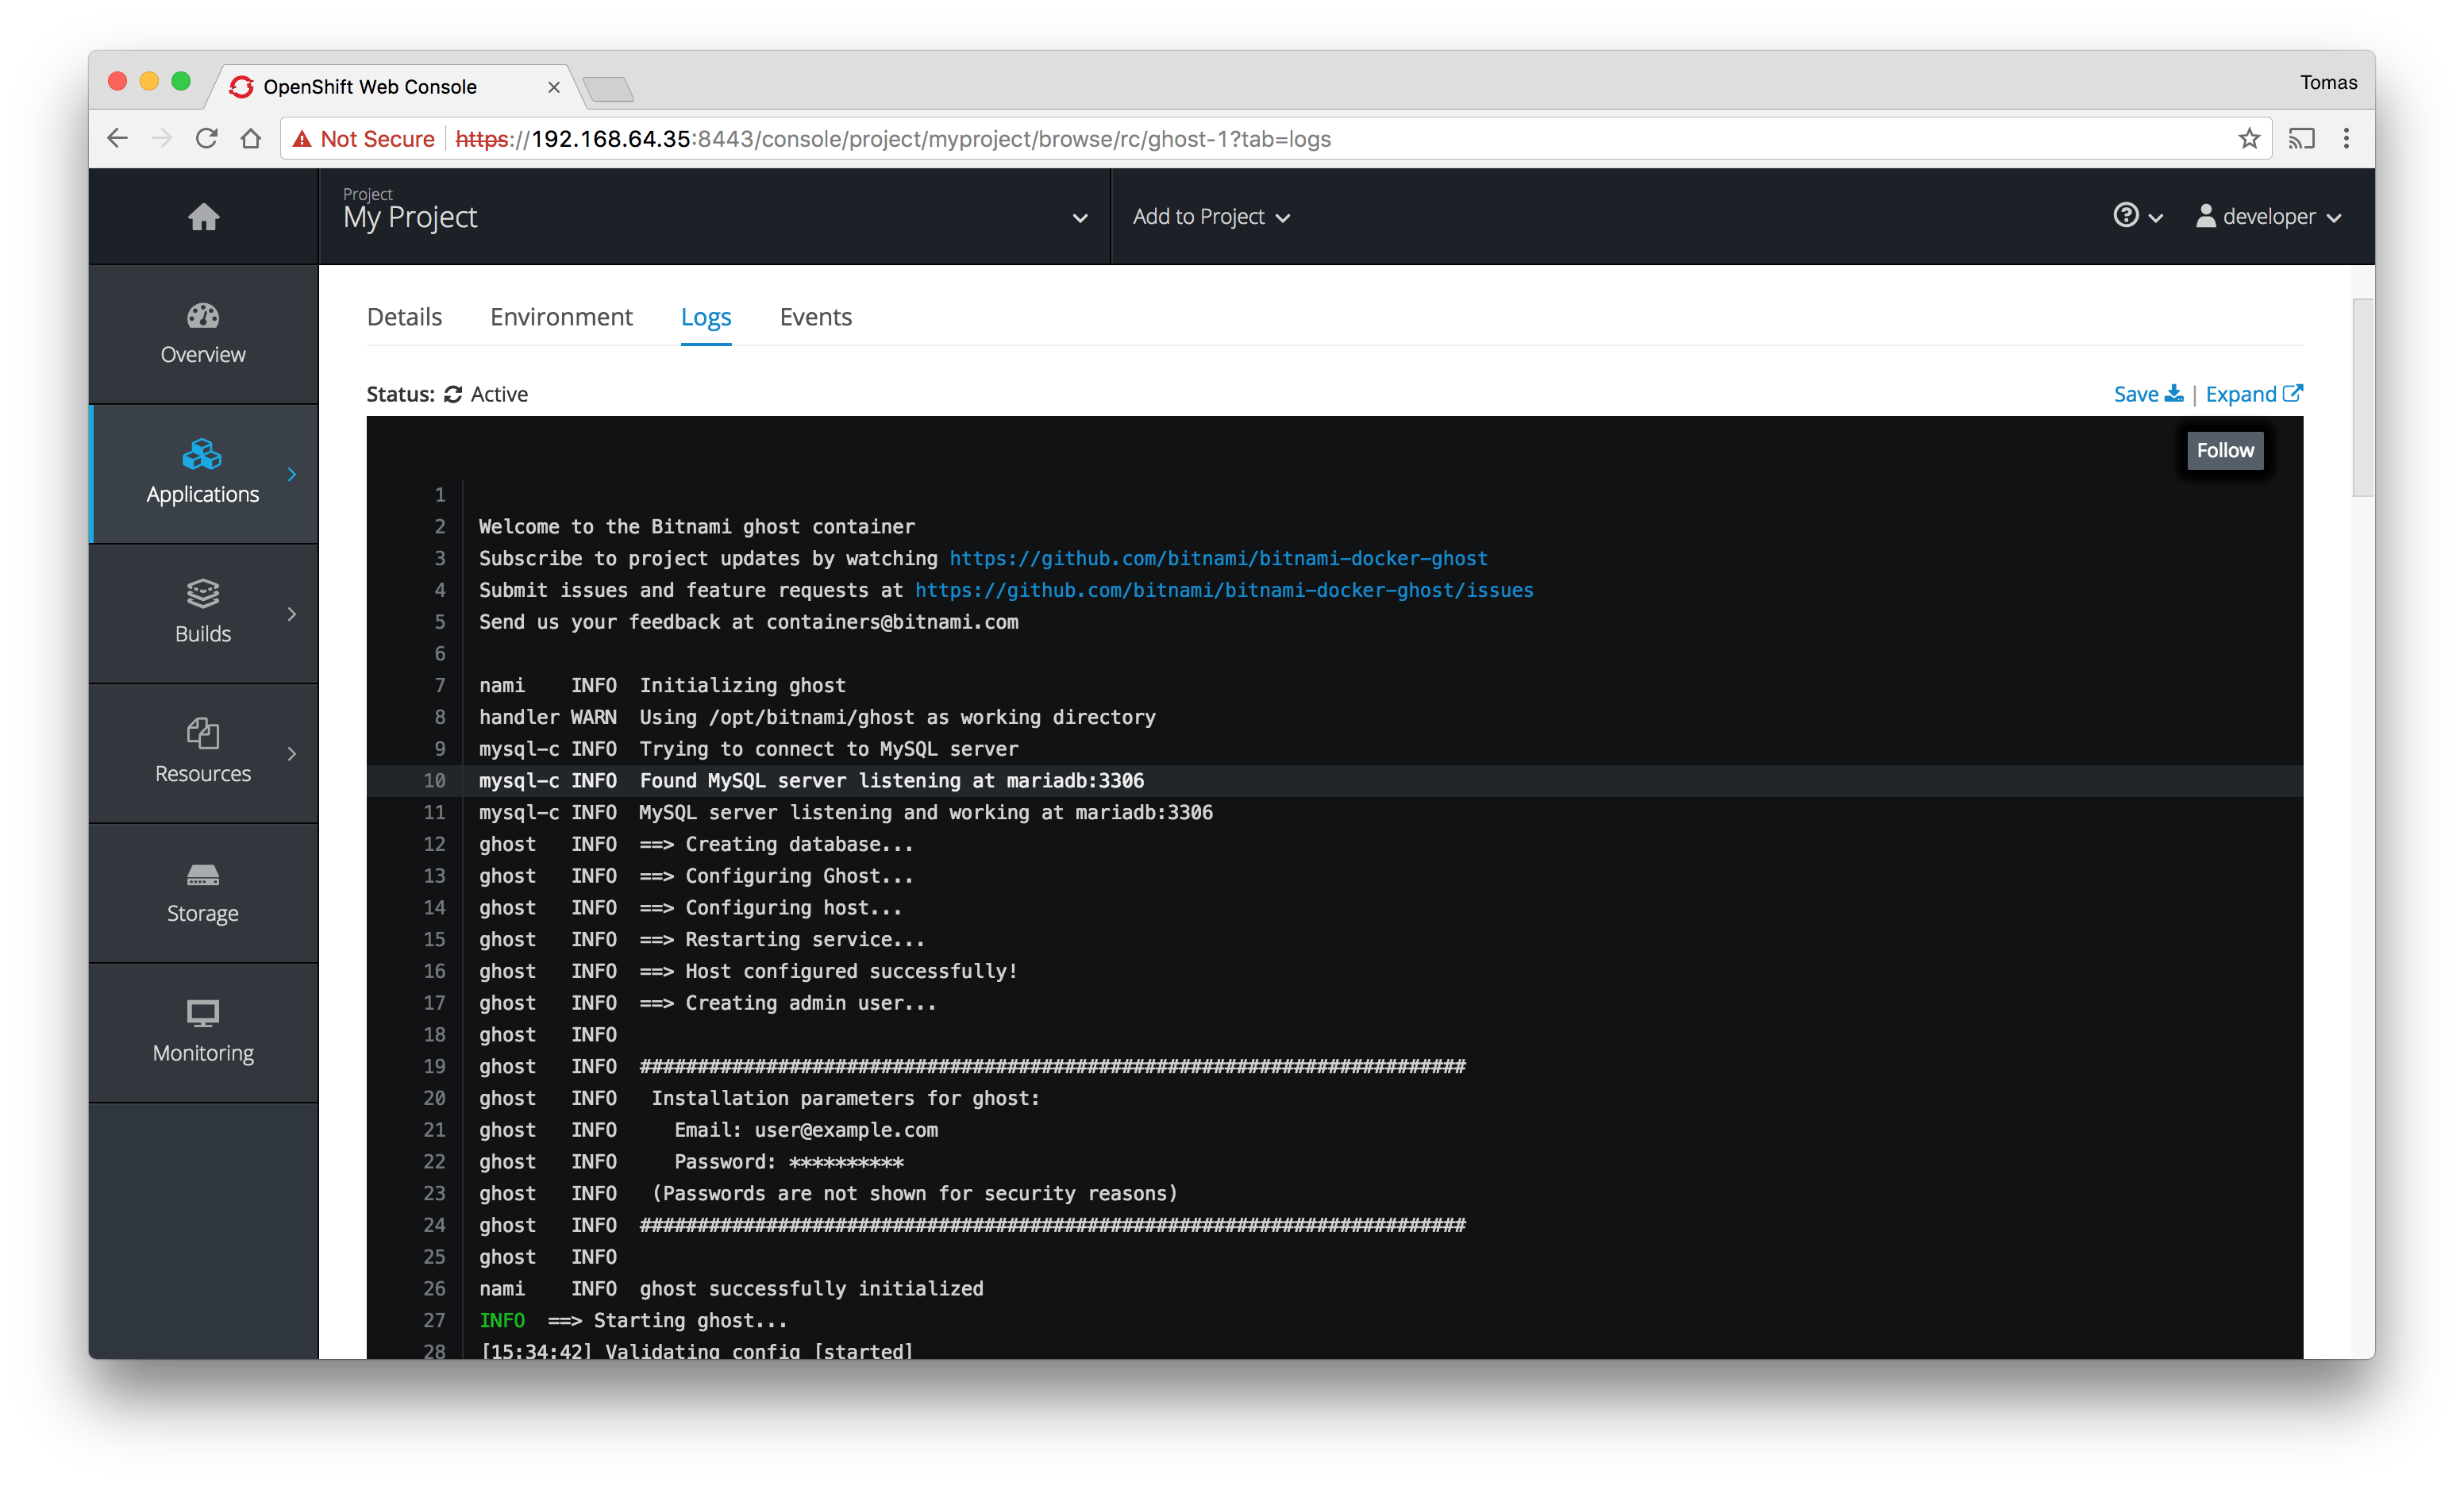
At this point, launch the Minishift dashboard with the following command, check the Ghost logs, and access the application:
$ minishift dashboard
The logs from the Ghost container show that it has been successfully initialized:
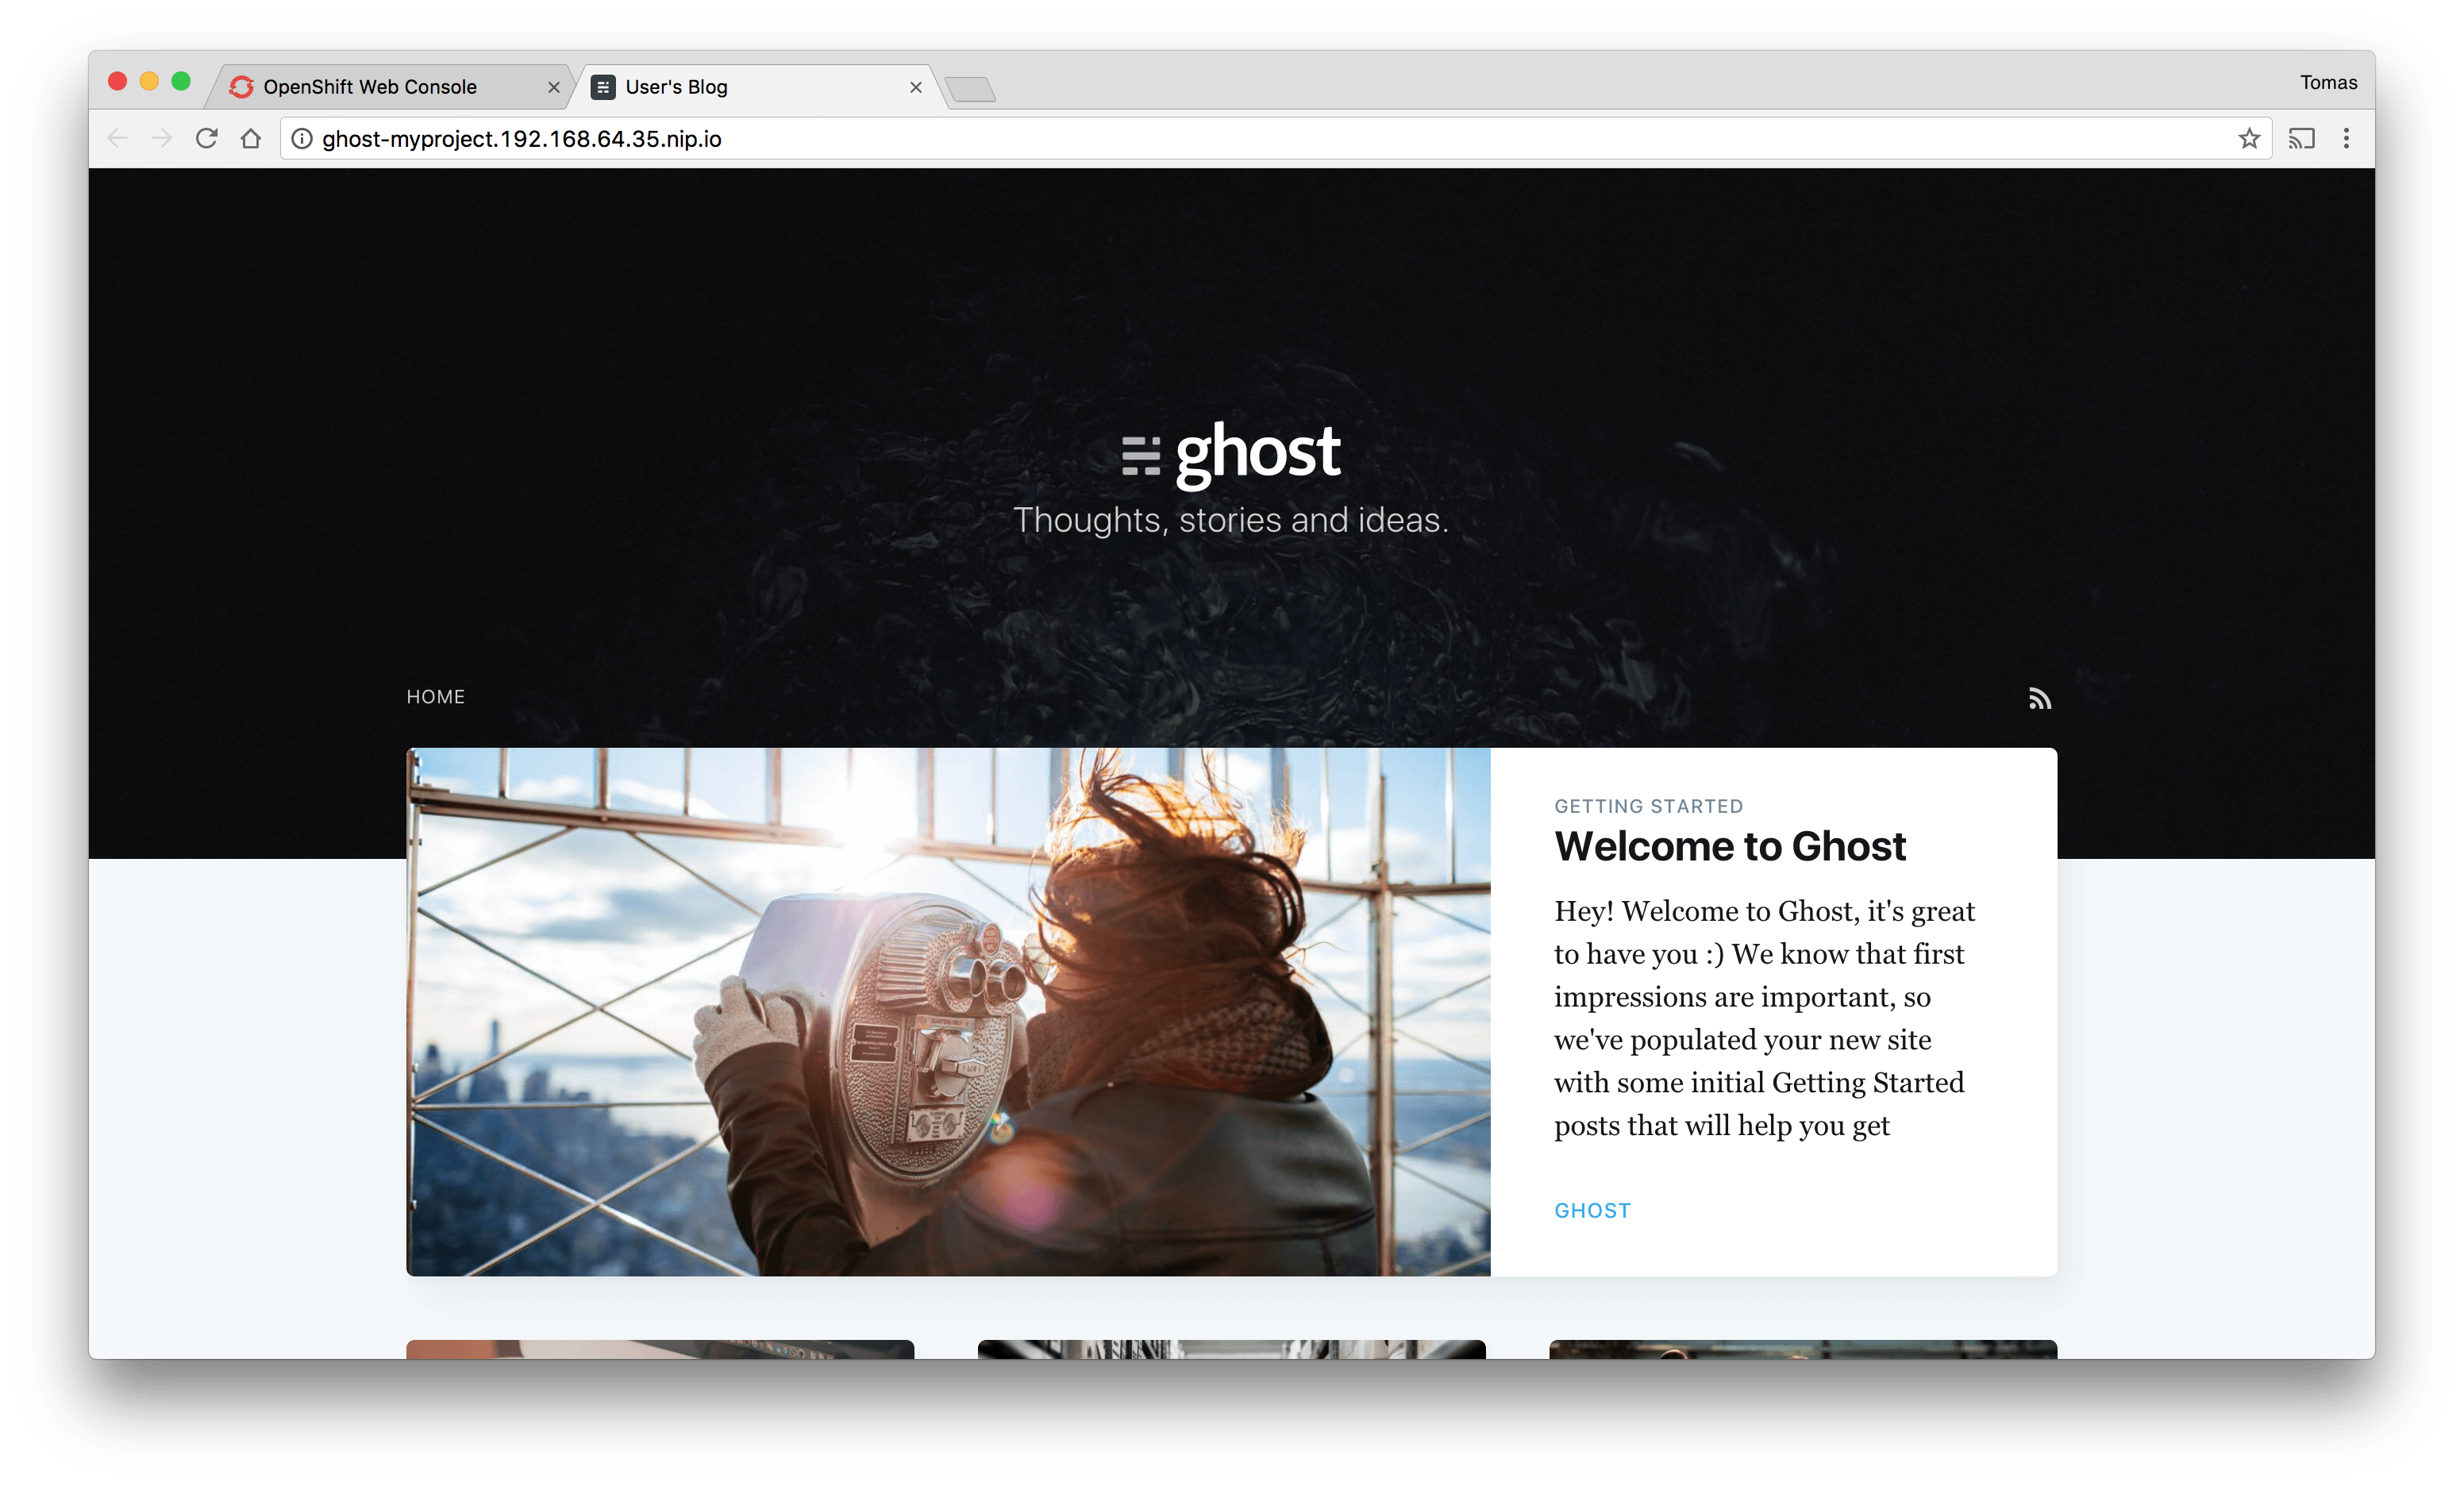
Access to the Ghost application by clicking the service URL. You can find it in the top-right corner in the first screenshot.
Lessons learned: issues and troubleshooting
All that glitters is not gold. Non-root containers have some disadvantages. Below are some issues we've run into as well as their possible solutions.
Look and feel
When you run the container, the command prompt appears unusual as the user does not exist.
I have no name!@a0e5d8399c5b:/$
Debugging experience
Troubleshooting problems on non-root containers can be challenging. Installing system packages like a text editor or running network utilities is restricted due to insufficient permissions.
As a workaround, it is possible to edit the Dockerfile to install a system package. Or, we can start the container as the root user using the --user root flag for Docker or the user: root directive for docker-compose.
Mounted volumes
Additional challenges arise when you try to mount a folder from your host. Docker preserves UUID and GUID from the host when mounting the host volume, potentially leading to permission issues within the Docker volume. The user executing the container might lack the necessary privileges to write to the volume.
Possible solutions are running the container with the same UUID and GUID as the host or change the permissions of the host folder before mounting it to the container.
Volumes in Kubernetes
Data persistence is configured using persistent volumes. Due to the fact that Kubernetes mounts these volumes with the root user as the owner, the non-root containers don't have permissions to write to the persistent directory.
Here are some steps we can take to address these permission issues:
- Use an init-container to change the permissions of the volume before mounting it in the non-root container. Example:
      spec:
        initContainers:
        - name: volume-permissions
          image: busybox
          command: ['sh', '-c', 'chmod -R g+rwX /bitnami']
          volumeMounts:
          - mountPath: /bitnami
            name: nginx-data
        containers:
        - image: bitnami/nginx:latest
          name: nginx
          volumeMounts:
          - mountPath: /bitnami
            name: nginx-data
- Use Pod Security Policies to specify the user ID and the FSGroup that will own the pod volumes. (Recommended)
      spec:
        securityContext:
          runAsUser: 1001
          fsGroup: 1001
        containers:
        - image: bitnami/nginx:latest
          name: nginx
          volumeMounts:
          - mountPath: /bitnami
            name: nginx-data
Config Maps in Kubernetes
This is a very similar issue to the previous one. Mounting a config-map to a non-root container creates the file path with root permissions. Therefore, if the container tries to write something else in that path, it will result in a permissions error. Since Pod Security Policies don't seem to work for configMaps, we'll need to employ an init-container to address any permission issues if they arise.
Issues with specific utilities or servers
Some utilities or servers may run some user checks and try to find the user in the /etc/passwd file.
For example, in Git, running commands as an existing user was necessary until version 2.6.5+. Otherwise, it triggers errors.
$ git clone https://github.com/tompizmor/charts
Cloning into 'charts'...
remote: Counting objects: 7, done.
remote: Total 7 (delta 0), reused 0 (delta 0), pack-reused 7
Unpacking objects: 100% (7/7), done.
Checking connectivity... done.
fatal: unable to look up current user in the passwd file: no such user
Another example of a server facing this problem is Zookeeper. During the startup process, Zookeeper encounters difficulty in determining the user name or user home. However, this issue is non-disruptive, as Zookeeper operates flawlessly thereafter.
zookeeper_1  | 2017-10-19 09:55:16,405 [myid:] - INFO  [main:Environment@100] - Server environment:os.name=Linux
zookeeper_1  | 2017-10-19 09:55:16,405 [myid:] - INFO  [main:Environment@100] - Server environment:os.arch=amd64
zookeeper_1  | 2017-10-19 09:55:16,405 [myid:] - INFO  [main:Environment@100] - Server environment:os.version=4.4.0-93-generic
zookeeper_1  | 2017-10-19 09:55:16,405 [myid:] - INFO  [main:Environment@100] - Server environment:user.name=?
zookeeper_1  | 2017-10-19 09:55:16,405 [myid:] - INFO  [main:Environment@100] - Server environment:user.home=?
zookeeper_1  | 2017-10-19 09:55:16,405 [myid:] - INFO  [main:Environment@100] - Server environment:user.dir=/
As we can see above, Zookeeper is unable to determine the user name or the user home.
Non-root containers' lights and shadows
We've observed that creating a Docker image without root privileges is simple and can be a crucial precaution in the event of a security issue. Deploying such images on an Openshift platform is also simple. These are compelling reasons to adopt non-root containers more frequently.
Nevertheless, in addition to the aforementioned advantages, we outlined a set of drawbacks that should be considered before transitioning to a non-root approach, particularly concerning file permissions.
For a hands-on exploration of the features and issues, check out one of the following Bitnami non-root containers.
Nginx Kafka Zookeeper Memcached Redis Ghost MariaDB
Also, if you are interested in non-root containers and Kubernetes security, I encourage you to take a look at the following articles articles:
Non-Root Containers To Show Openshift Some Love Unprivileged Containers With Azure Container Instances How to secure a Kubernetes cluster
