


Configure a TLS certificate by using a self-signed certificate
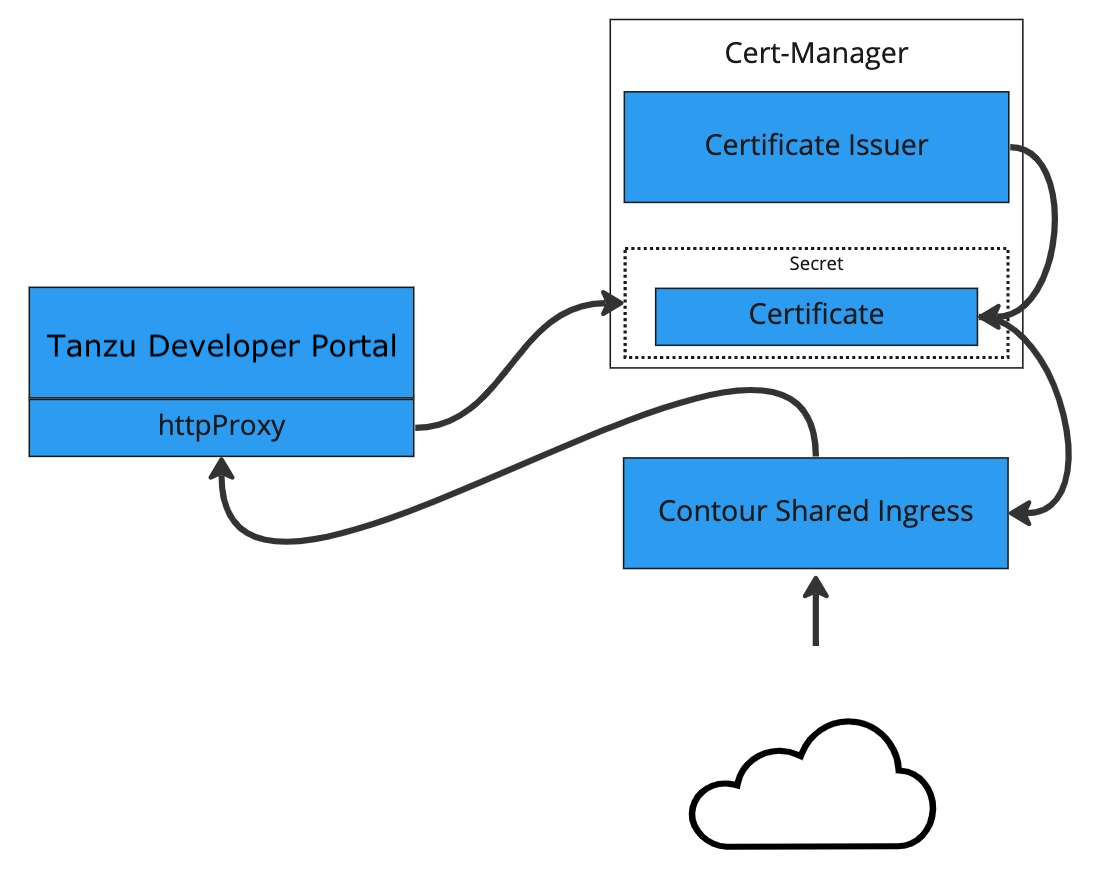
This topic tells you how to use cert-manager to create a self-signed certificate issuer and then generate a certificate for Tanzu Developer Portal (formerly named Tanzu Application Platform GUI) to use based on that issuer.
Some browsers and corporate policies do not allow you to visit webpages that have self-signed certificates. You might need to navigate through a series of error messages to visit the page.
Prerequisite
Install a Tanzu Application Platform profile that includes cert-manager. Verify you did this by running the following command to detect the cert-manager namespace:
kubectl get ns
Procedure
To configure a self-signed TLS certificate for Tanzu Developer Portal:
-
Create a
certificate.yamlfile that defines an issuer and a certificate. For example:apiVersion: cert-manager.io/v1 kind: Issuer metadata: name: ca-issuer namespace: tap-gui spec: selfSigned: {} --- apiVersion: cert-manager.io/v1 kind: Certificate metadata: name: tap-gui-cert namespace: tap-gui spec: secretName: tap-gui-cert dnsNames: - tap-gui.INGRESS-DOMAIN issuerRef: name: ca-issuerWhere
INGRESS-DOMAINis your domain value that matches the values you used when you installed the profile. -
Add the issuer and certificate to your cluster by running:
kubectl apply -f certificate.yaml -
Configure Tanzu Developer Portal to use the newly created certificate. Update the
tap-values.yamlfile used during installation to include the following under thetap-guisection:- A top-level
tlskey with subkeys fornamespaceandsecretName - A namespace referring to the namespace containing the
Certificateobject mentioned earlier - A secret name referring to the
secretNamevalue defined in yourCertificateresource earlier
Example:
tap_gui: tls: namespace: tap-gui secretName: tap-gui-cert # Additional configuration below this line as needed - A top-level
-
Update the Tanzu Application Platform package with the new values in
tap-values.yaml:tanzu package installed update tap -p tap.tanzu.vmware.com -v TAP-VERSION --values-file tap-values.yaml -n tap-installWhere
TAP-VERSIONis the version that matches the values you used when you installed the profile.
