


Generate an application with Application Accelerator
This topic guides you through how to generate a new project using Application Accelerator and how to deploy the project onto a Tanzu Application Platform (commonly known as TAP) cluster. For background information, see Application Accelerator.
Prerequisites
Before you start, complete all Getting Started prerequisites.
Generate a project using an Application Accelerator
There are multiple interfaces that you can use to generate a new project. The options are:
- Application Accelerator extension for VS Code
- Application Accelerator plug-in for IntelliJ
- Tanzu Developer Portal
Choose one of the following tabs for how to generate and deploy applications using your selected interface. If you have already generated a project and want to skip this step, you can go to Deploying your application with Tanzu Application Platform.
- VS Code
-
What you will do:
- Install the Application Accelerator extension for VS Code.
- (Optional) Provision a new GitHub repository and upload the project to the repository.
- Generate a project using an Application Accelerator.
To generate a new project using an Application Accelerator:
-
Install and configure the Application Accelerator extension for VS Code, see Application Accelerator Visual Studio Code extension.
-
Select an accelerator from the catalog. This example uses
Tanzu Java Web App.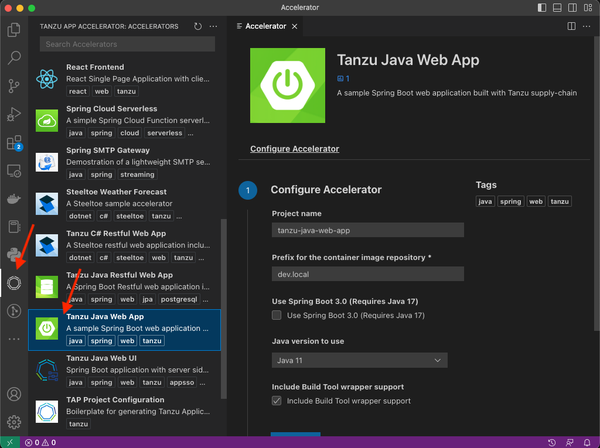
-
In Configure Accelerator, configure the accelerator as defined by your project’s requirements. This example configures the project to use Spring Boot v3.0 and Java v17.

-
Click Next Step.
-
If your organization’s Tanzu Application Platform is configured for Git repository creation, configure the Setup Repository step using the following sub-steps. If not, click Skip and go to step 5.
Note
For information about configuring optional Git repository creation and supported repositories, see Create an Application Accelerator Git repository during project creation.
-
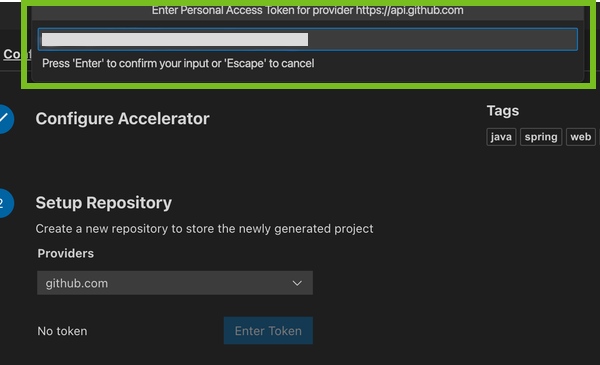
Using the Providers drop-down menu, select your Git provider. For example,
github.com. -
After you select the provider, a dialog box appears for you to enter an API token for your Git provider. Populate the text box with your provider’s API token and press Enter.
This API key must be able to create new repositories for an organization or user. For information about how to create an API token for Git repository creation, see Creating a personal access token in the GitHub documentation.
-
In the Owner text box, enter the name of either the GitHub organization or user name to create the repository under.
-
In the Repository Name text box, enter the name of the project repository.
-
In the Repository Branch text box, enter the name of the default branch for the project repository. Typically, this is set to
main. -
Click Next Step.
-
-
In the Review and Generate step, verify that all the information you provided is accurate, then click Generate Project.
-
A dialog box appears for you to choose a location for the project to be stored on the local file system. Choose a directory or create a new one.
-
After the project has generated, a second dialog box appears for you to open the new project in a new window. Click Yes.
-
When opened, the project is ready for development.
- IntelliJ
-
What you will do:
- Install the Application Accelerator plug-in for IntelliJ.
- Generate a project using an Application Accelerator.
To generate a new project using an Application Accelerator:
-
Install and configure the Application Accelerator plug-in for IntelliJ, see Application Accelerator plugin for IntelliJ.
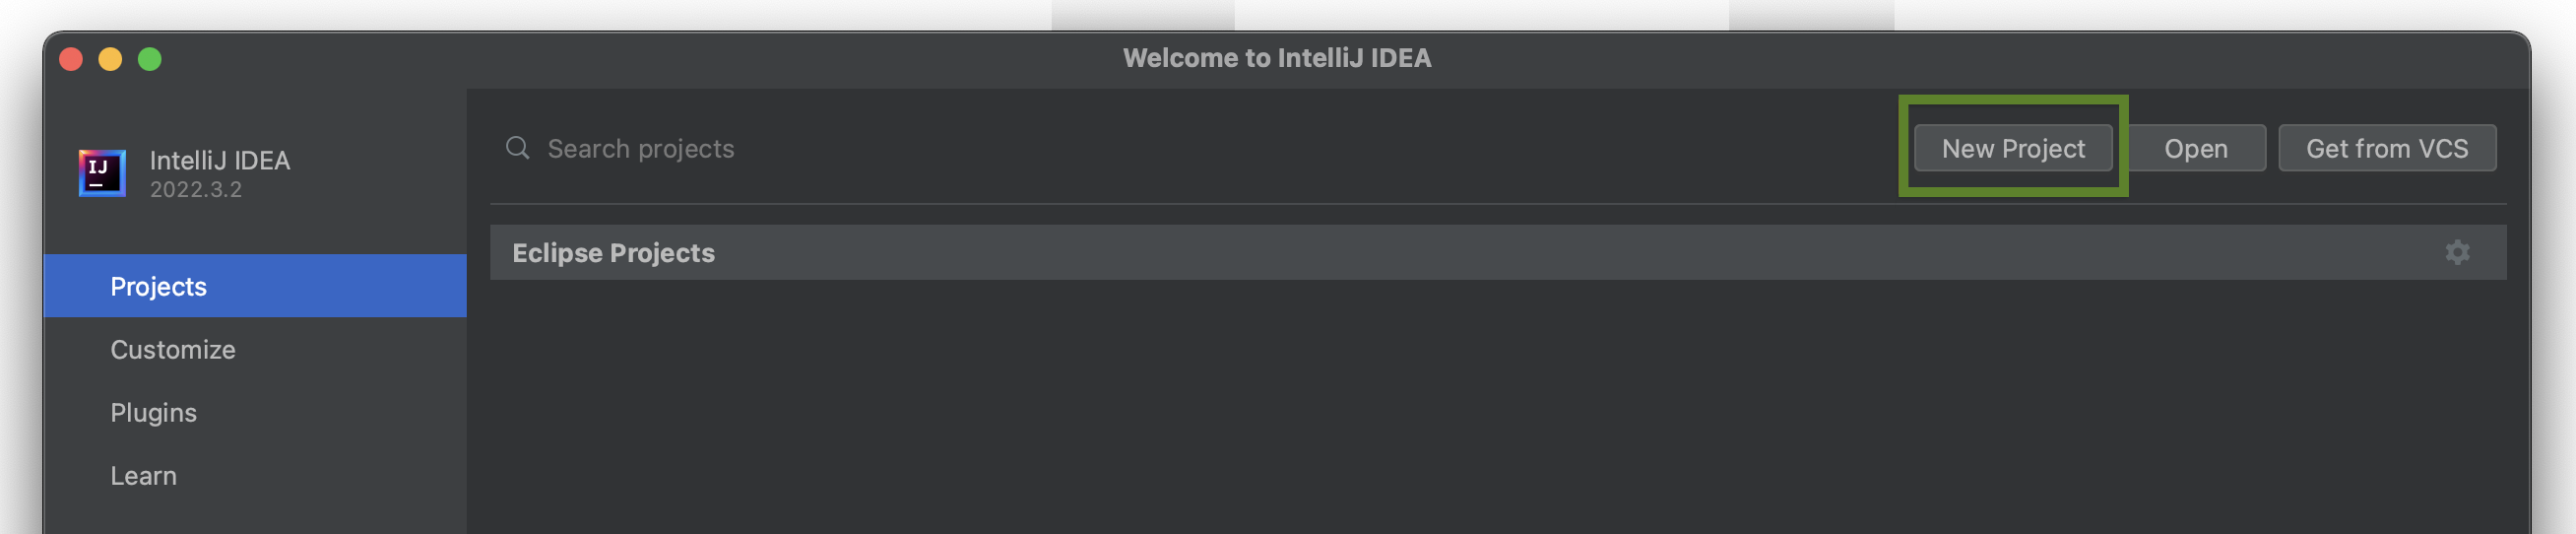
-
On the Welcome to IntelliJ IDEA page, click New Project.
-
Click Tanzu Application Accelerator in the left side panel.
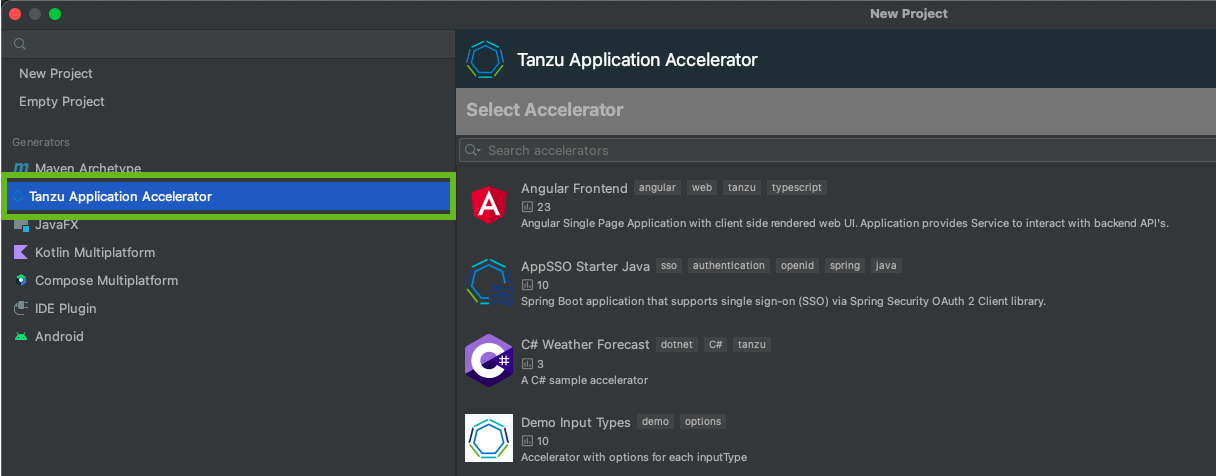
-
Select an accelerator from the catalog. This example uses
Tanzu Java Web App. -
Click Next.
-
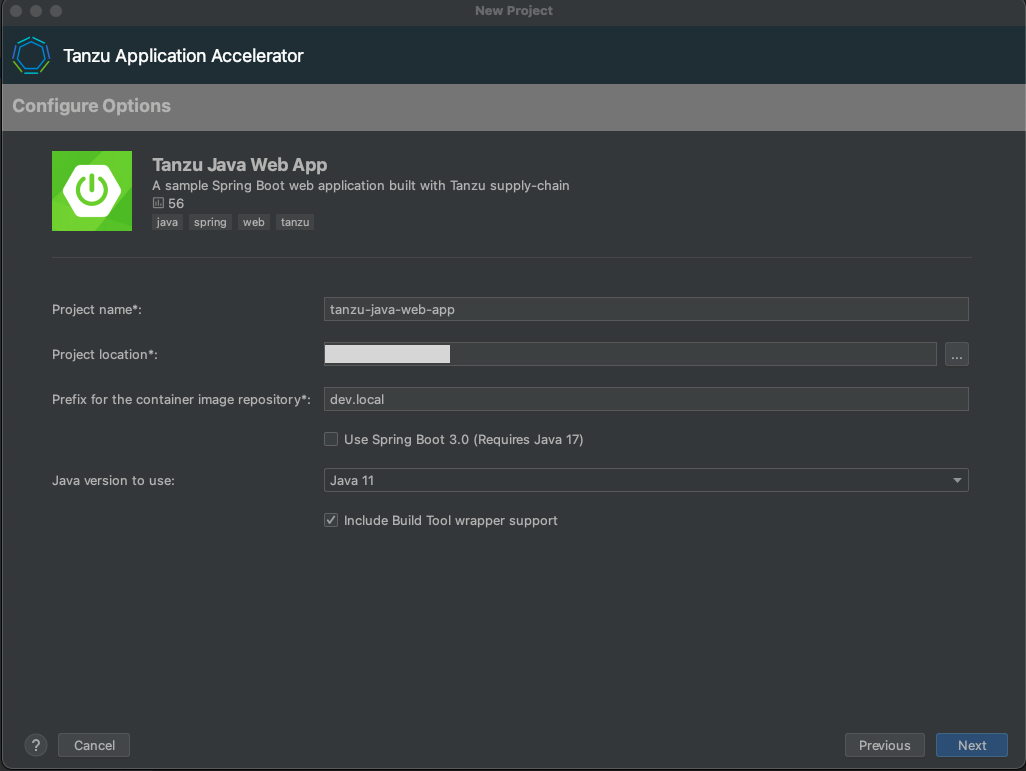
In the Configure Options step, configure the accelerator as defined by your project’s requirements.
-
Click Next.
-
In the Review and Generate step, verify that all the information provided is accurate then click Next.
-
After the project has generated, click Create to open the new project in IntelliJ.
-
When opened, the project is ready for development.
- Tanzu Developer Portal
-
In this example, you use the
Tanzu-Java-Web-Appaccelerator. You also use Tanzu Developer Portal. For information about connecting to Tanzu Developer Portal, see Access Tanzu Developer Portal.What you will do:
- Generate a project from an Application Accelerator.
- (Optional) Provision a new Git repository for the project.
- Upload it to your Git repository of choice.
To generate a new project using an Application Accelerator:
-
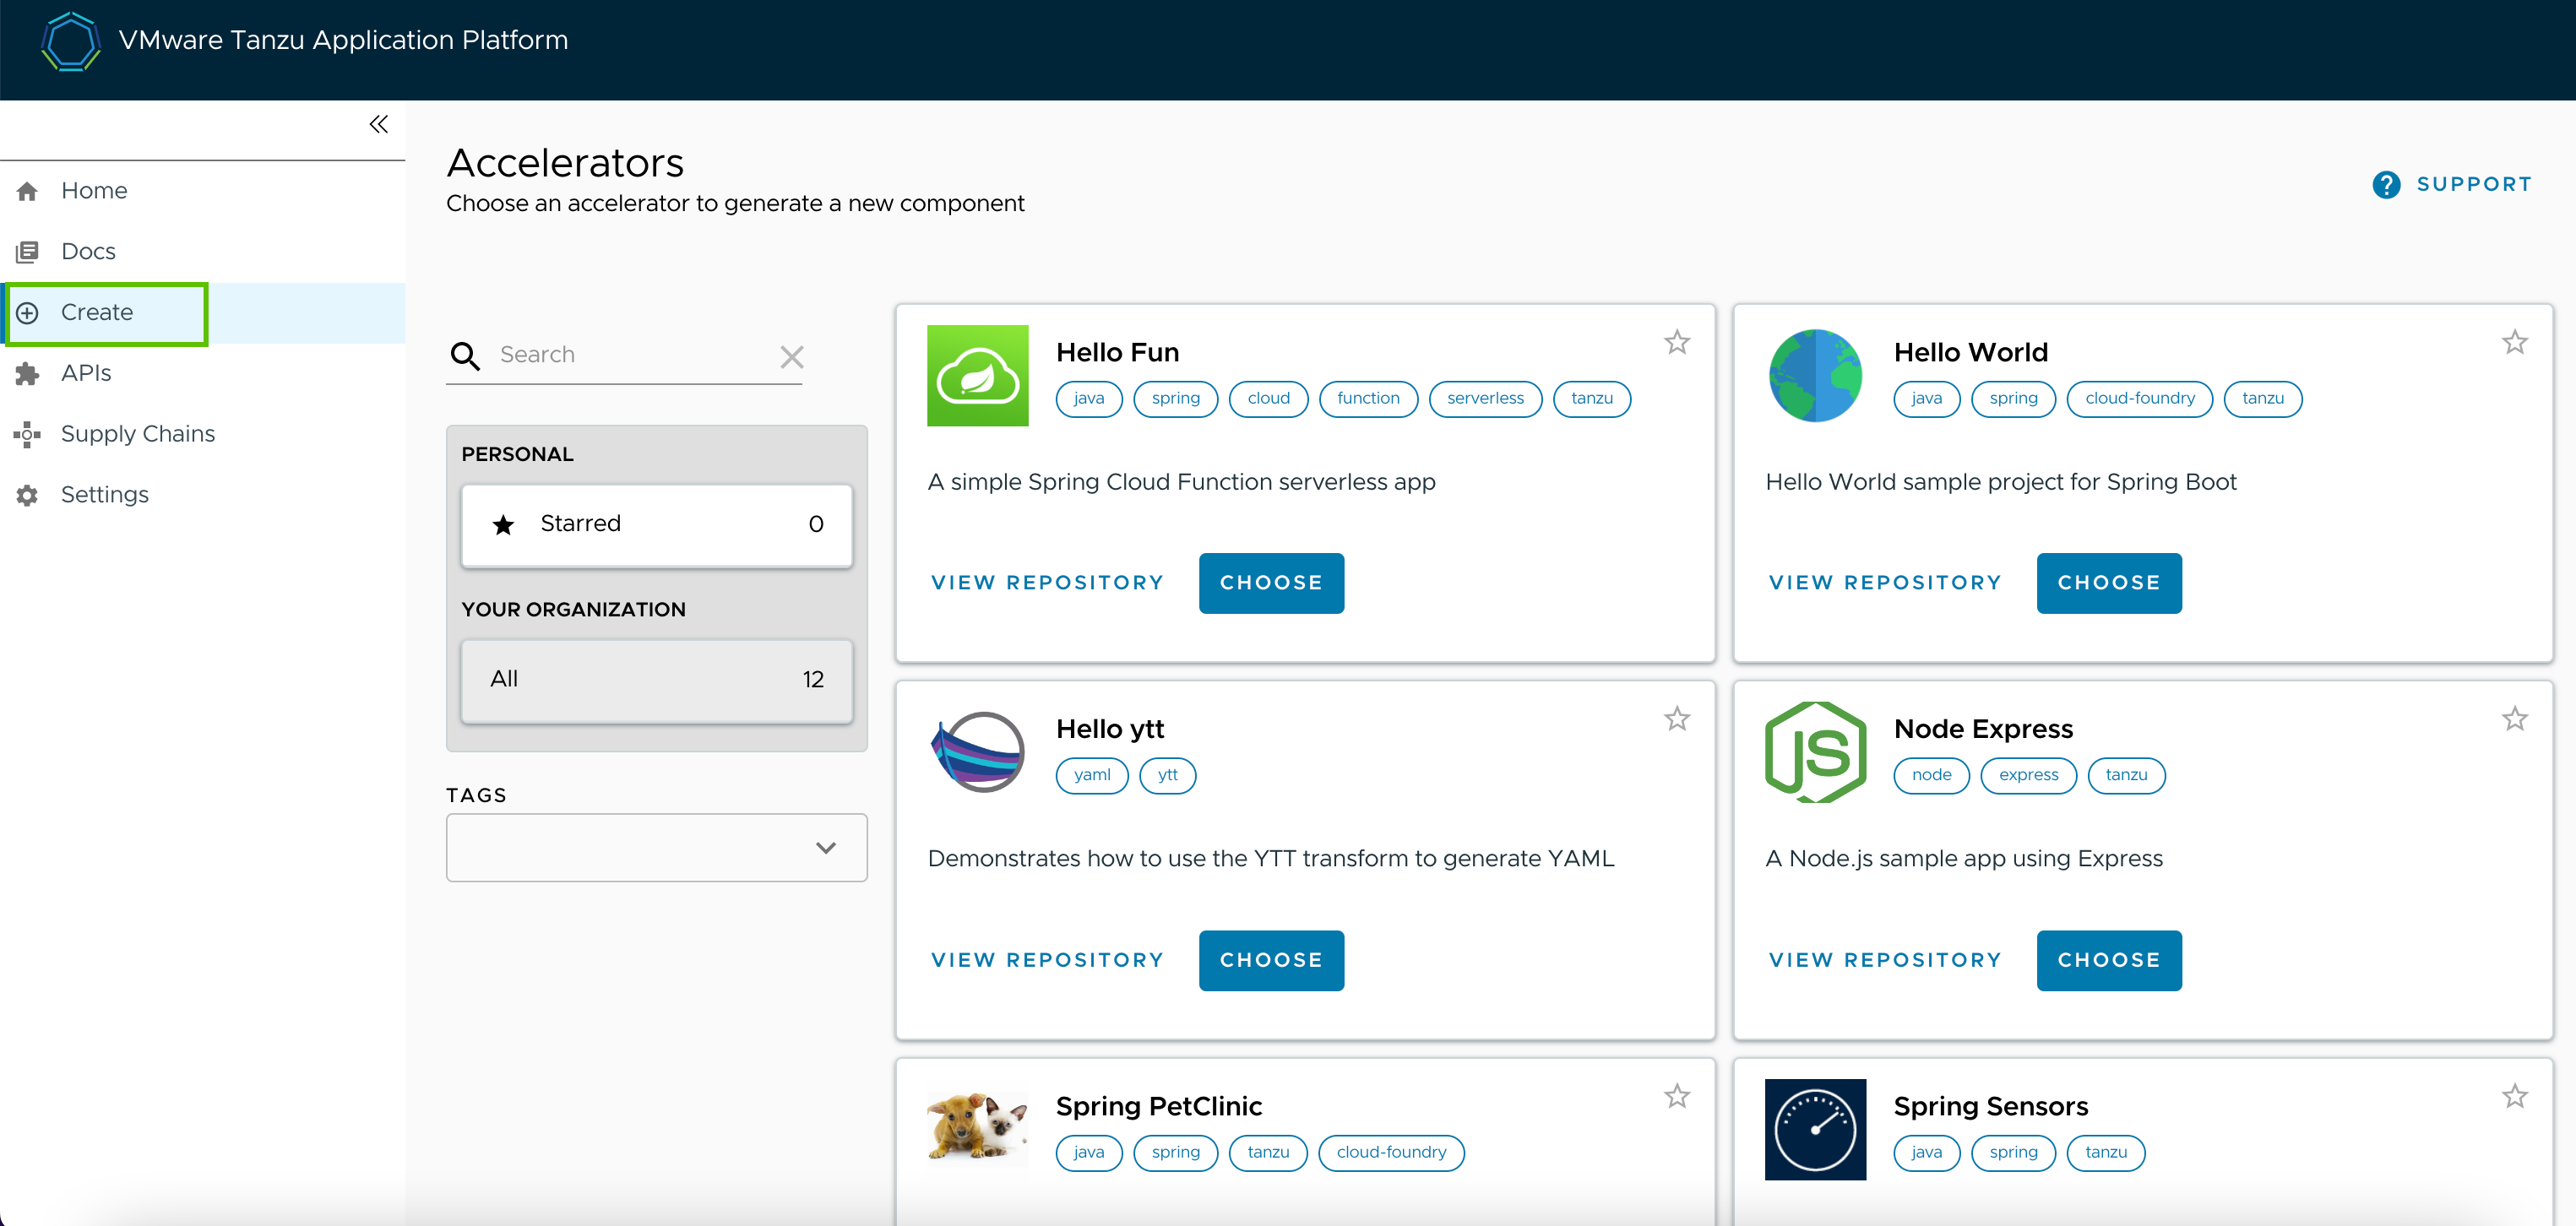
From Tanzu Developer Portal, click Create located on the left side of the navigation pane to see the list of available accelerators.
-
Locate the Tanzu Java Web App accelerator and click CHOOSE.
-
In the Generate Accelerators dialog box, replace the default value
dev.localin the prefix for container image registry text box with the registry in the form ofSERVER-NAME/REPO-NAME. TheSERVER-NAME/REPO-NAMEmust match what was specified forregistryas part of the installation values forootb_supply_chain_basic. See the Full Profile section on Installing Tanzu Application Platform package and../install-online/install.hbs.md profiles.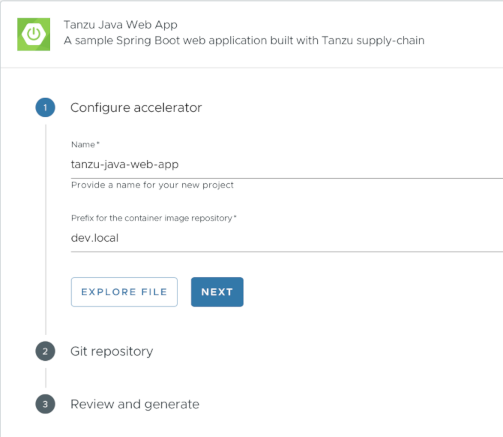
-
Click NEXT.
-
If your instance has optional Git repository support enabled, continue with the following sub-steps. If your instance does not support this, skip to step 5.
Note
For information about configuring optional Git repository creation and supported repositories, see Create an Application Accelerator Git repository during project creation.
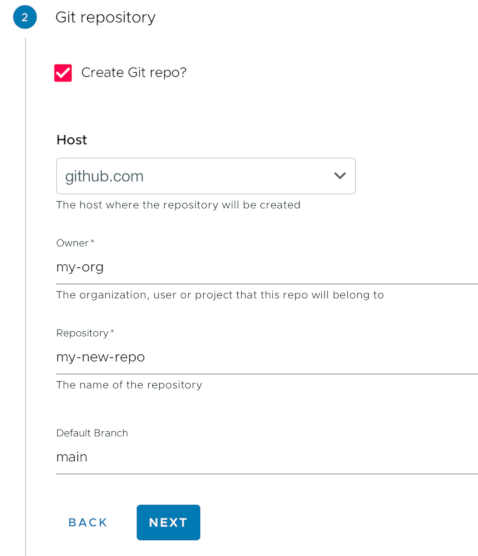
- Select the Create Git repo? check box.
- Select the host Git repository provider from the Host drop-down menu. For example,
github.com. -
Populate the Owner and Repository text boxes.
-
While you are populating the form, a dialog box appears asking for permission to provision Git repositories. Follow the prompts and continue.
-
Click NEXT.
-
Verify the provided information, and click GENERATE ACCELERATOR.
-
After the Task Activity processes complete, click DOWNLOAD ZIP FILE.
-
After downloading the ZIP file, expand it in a workspace directory. If you did not create a Git repository in the preceding steps, follow your preferred procedure for uploading the generated project files to a Git repository for your new project.
Learn more about Application Accelerator
-
For information about how to configure optional Git repository creation, see Configure in Create an Application Accelerator Git repository during project creation.
-
For information about Application Accelerator configurations, see Configure Application Accelerator.
-
For information about installing the Application Accelerator extension for Visual Studio Code, see Application Accelerator Visual Studio Code extension.
-
For general accelerator troubleshooting, see Troubleshooting Application Accelerator for VMware Tanzu.
Next Steps
Now that you have generated a project that is ready for Tanzu Application Platform, learn how to quickly deploy the application on a Tanzu Application Platform cluster in Deploy an app on Tanzu Application Platform.
