


By connecting TAS for VMs to SAML, LDAP, or OIDC external user store, you can use the User Account and Authentication (UAA) server to delegate authentication to existing enterprise user stores.
If your enterprise user store is exposed as a SAML, LDAP, or OIDC identity provider (IDP) for single sign-on (SSO), you can configure SSO to access Apps Manager and the Cloud Foundry Command Line Interface (cf CLI) without creating a new account, or if you use SAML or OIDC, without re-entering credentials.
For information about managing user identity and pre-provisioning user roles with SAML or LDAP, see Adding existing SAML or LDAP users to an Operations Manager deployment.
For an explanation of the process used by the UAA server when it attempts to authenticate a user through LDAP, see Configuring LDAP Integration with Operations Manager.
Note When integrating with an external IDP, such as LDAP, authentication within the UAA becomes chained. An authentication attempt with a user's credentials is first attempted against the UAA user store before the external provider, LDAP. For more information, see Chained Authentication in the User Account and Authentication LDAP Integration documentation on GitHub.
Use one of the following procedures to configure your deployment with SAML, LDAP, or OIDC.
Configure TAS for VMs to use a SAML identity provider
In SAML terminology, the SAML protocol communicates user data between an IdP (identity provider)| and a service provider (SP).
To connect TAS for VMs with SAML, follow both of these procedures:
Configure TAS for VMs as a service provider for SAML
To configure TAS for VMs to use a SAML IdP (identity provider):
-
Go to the VMware Tanzu Operations Manager Installation Dashboard.
-
Click the TAS for VMs tile.
-
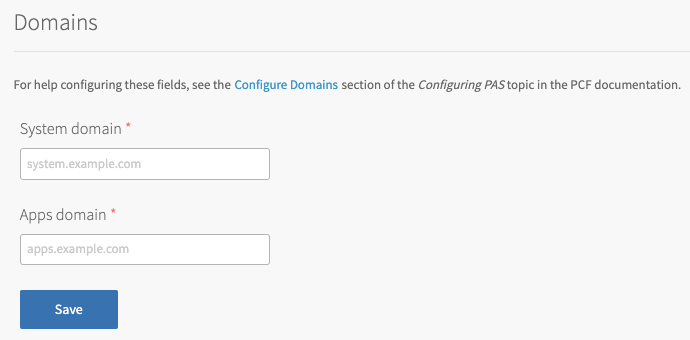
Click Domains.
-
Record your system domain.
-
Click Authentication and Enterprise SSO and select SAML Identity Provider.

You must manually deactivate a SAML IDP that was created by TAS for VMs when you no longer require it.
- Set the Provider name. This is a unique name you create for the identity provider. This name can include only alphanumeric characters,
+,_, and-. You must not change this name after deployment because all external users use this name to link to the provider. -
Enter a Display name. Your identity provider display name appears as a link on your Operations Manager login page. You can access this link at
https://login.SYSTEM-DOMAIN, whereSYSTEM-DOMAINis the system domain you recorded from the Domains pane. -
Retrieve the metadata from your IDP and copy it into the Provider metadata or the Provider metadata URL text boxes, depending on whether your IDP exposes a metadata URL or not. For more information, see Configure SAML as an Identity Provider for TAS for VMs. VMware recommends that you use the provider metadata URL rather than provider metadata because the metadata can change. Do one of the following:
- If your IDP exposes a metadata URL, provide the metadata URL.
- Download your IDP metadata and paste this XML into the Provider metadata text box.
You must select one of the previous configurations. If you configure both, your IDP by default goes to the Provider metadata URL.
For information about onboarding SAML users and mapping them to TAS for VMs user roles, see Adding existing SAML or LDAP users to an Operations Manager deployment.
-
Select the Name ID format for your SAML IdP (identity provider). This translates to
usernamein TAS for VMs. The default is Email Address. -
For ****, enter a comma-separated list of the email domains for external users who are to receive invitations to Apps Manager.
-
For First name attribute and Last name attribute, enter the attribute names in your SAML database that correspond to the first and last names in each user record. For example,
first_nameandlast_name. This text box is case-sensitive. -
For Email attribute, enter the attribute name in your SAML assertion that corresponds to the email address in each user record. For example,
EmailID. This text box is case-sensitive. -
For External groups attribute, enter the attribute name in your SAML database that defines the groups that a user belongs to. For example,
group_memberships. To map the groups from the SAML assertion to admin roles in TAS for VMs, see Grant Admin Permissions to an External Group (SAML or LDAP) in Creating and Managing Users with the UAA CLI (UAAC). This text box is case-sensitive. -
By default, all SAML authentication requests from TAS for VMs are signed. To change this, deselect the Sign authentication requests check box and configure your IdP (identity provider) to verify SAML authentication requests.
-
To validate the signature for the incoming SAML assertions, activate the Required signed assertions check box and configure your IdP (identity provider) to send signed SAML assertions.
-
Click Save and return to the Tanzu Operations Manager Installation Dashboard.
-
Click Review Pending Changes.
-
Click Apply Changes.
Configure SAML as an identity provider for TAS for VMs
To configure a SAML identity provider to designate TAS for VMs as an SP:
-
Download the SP metadata from
https://login.SYSTEM-DOMAIN/saml/metadata, whereSYSTEM-DOMAINis the system domain you recorded from the Domains pane.For configuration instructions, see the documentation from your identity provider.
-
See the following table for information about certain industry standard identity providers and how to integrate them with TAS for VMs:
Some identity providers permit uploads of SP metadata while other providers require you to manually enter the SP metadata into a form. If your identity provider requires manual entry but is not listed in the previous table, see Configuring CA as an identity provider.
Configure LDAP as an identity provider for TAS for VMs
To integrate the UAA with an LDAP server:
-
Go to the Tanzu Operations Manager Installation Dashboard.
-
Click the TAS for VMs tile.
-
Click Authentication and Enterprise SSO.
-
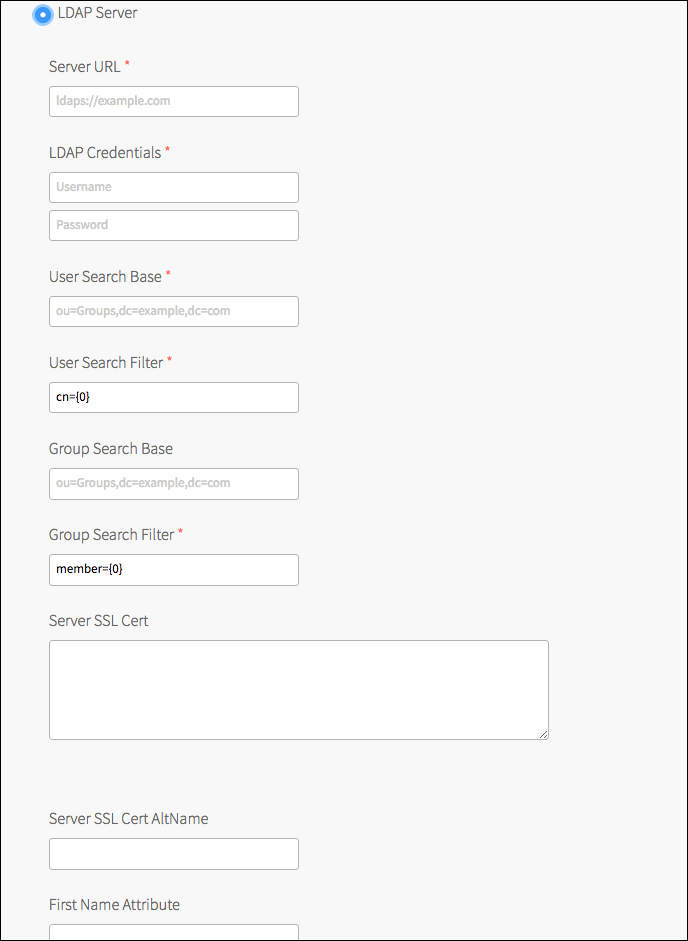
In User authentication mechanism, click LDAP server.
-
For Server URLs, enter the URL that points to your LDAP server. You can configure multiple LDAP server URLs for failover purposes, so that if UAA fails to connect to the first URL, it retries with the second URL, and so on. All URLs must be in the same domain. To configure multiple LDAP server URLs, enter a space-separated list. Each URL must include one of the following protocols:
ldap://: This specifies that the LDAP server uses an unencrypted connection.ldaps://: This specifies that the LDAP server uses SSL for an encrypted connection and requires that the LDAP server holds a trusted certificate or that you import a trusted certificate to the JVM trust store.
Important Only a single LDAP forest can be supported for the entire TAS for VMs installation. If you need support for multiple domains and forests, then SAML integration is the recommended solution.
-
For LDAP credentials, enter the LDAP distinguished name (DN) and password for binding to the LDAP server. For example,
cn=administrator,ou=Users,dc=example,dc=com.VMware recommends that you provide LDAP credentials that grant read only permissions on the LDAP search base and the LDAP group search base. Additionally, if the bind user belongs to a different search base, you must use the full DN.
Caution VMware and Cloud Foundry discourage the reusing of LDAP service accounts across environments. LDAP service accounts cannot be subject to manual lockouts, such as lockouts that result from users using the same account. Also, LDAP service accounts cannot be subject to automated deletions, because disruption to these service accounts might prevent user logins.
-
For User search base, enter the location in the LDAP directory tree from which any LDAP user search begins. The typical LDAP search base matches your domain name.
For example, a domain named “cloud.example.com” typically uses the following LDAP user search base:ou=Users,dc=example,dc=com -
For User search filter, enter a string that defines LDAP user search criteria. This search criteria allows LDAP to use more effective and efficient searches. For example, the standard LDAP search filter
cn=Smithreturns all objects with a common name equal toSmith.
In the LDAP search filter string that you use to configure TAS for VMs, use{0}instead of the user name.For example, use
cn={0}to return all LDAP objects with the same common name as the user name.
In addition tocn, other attributes commonly searched for and returned aremail,uidand, in the case of Active Directory,sAMAccountName. For instructions for testing and troubleshooting your LDAP search filters, see Configuring LDAP Integration with Operations Manager. -
For Group search base, enter the location in the LDAP directory tree from which the LDAP group search begins.
For example, a domain named “cloud.example.com” typically uses the following LDAP group search base:ou=Groups,dc=example,dc=com
This is required if you are mapping LDAP groups to an admin role. To map the groups under this search base to admin roles in TAS for VMs, see Grant Admin Permissions to an External Group (SAML or LDAP) in Creating and managing users with the UAA CLI (UAAC).To onboard individual LDAP users and map them to TAS for VMs roles, see Adding existing SAML or LDAP users to a Operations Manager deployment.
-
For Group search filter, enter a string that defines LDAP group search criteria. The standard value is
member={0}. This string is required if you are mapping LDAP groups to an admin role. -
For Maximum group search depth, enter a value between
1and10that sets the maximum LDAP group search depth. The default value is1, which turns off nested group search. -
For Server SSL certificate, copy and paste, in the root certificate, from your CA certificate or your self-signed certificate. This is required only for
ldaps://URLs. -
For First name attribute and Last name attribute, enter the attribute names in your LDAP directory that correspond to the first and last names in each user record. For example,
cnandsn. -
For Email attribute, enter the attribute name in your LDAP directory that corresponds to the email address in each user record. For example,
mail. -
For Email domains, enter a comma-separated list of the email domains for external users who are to receive invitations to Apps Manager.
-
For LDAP referrals, select how UAA handles LDAP server referrals out to other external user stores. UAA can:
- Automatically follow any referrals.
- Ignore referrals and return partial result.
- Throw exception for each referral and abort.
-
Click Save and return to the Tanzu Operations Manager Installation Dashboard.
-
Click Review Pending Changes.
-
Click Apply Changes.
Configure TAS for VMs to use an OIDC identity provider
To integrate the UAA with an external OIDC identity provider (IDP):
-
Go to the Tanzu Operations Manager Installation Dashboard.
-
Click the TAS for VMs tile.
-
Click Authentication and Enterprise SSO.
-
Click OIDC identity provider.
-
Set the Provider name. This is a unique name you create for the identity provider. This name can include only alphanumeric characters,
+,_, and-. Do not change this name after deployment because all external users use this name to link to the provider. -
Enter a Display name. Your identity provider display name appears as a link on your Operations Manager login page.
-
For Provider metadata URL, enter the OpenID server endpoint URL that returns the configuration metadata for your OIDC identity provider. This URL usually has this format:
https://<example-oidc-provider>.com/.well-known/openid-configuration. It serves as a JSON that contains the OIDC provider specifications. For example, itsissuer,authorization_endpoint, andtoken_endpointvalues. -
For Client ID, enter the ID of the client registered with the external OIDC provider for use by the UAA. This external OIDC client must be configured according to the following general requirements. If applicable, different OIDC providers might use slightly different naming for these configuration options:
- Client: Per security best practices, register a dedicated client for use by TAS for VMs. Some providers might refer to a “client” as an “application”. Save the client secret for the next step.
- Grant type: Make sure that the client can do the
Authorization CodeOAuth flow. - Sign-in redirect URIs: Include a URL in this format:
https://login.<SYSTEM-DOMAIN>/login/callback/<PROVIDER-NAME>where:SYSTEM-DOMAINis the domain for system level components. You can find this value under the Domains section of the TAS for VMs tile.PROVIDER-NAMEis the unique name you create for the identity provider in the UAA. This can match the Provider name value that you previously entered.
- Users: Make sure that the users to whom you want to grant access to TAS for VMs are allowed access to this client or application.
- Groups: Verify that this client can obtain all relevant OIDC user groups information that you need to use mappings from external OIDC user groups to internal TAS for VMs scopes. For example, if you want to grant TAS for VMs admin scopes to all external OIDC users belonging to the
example-inc-operatorsgroup, make sure that this client can access this group memberships.
For more information about how to perform external group mappings, see Grant Admin Permissions to an External Group (SAML, LDAP, or OIDC).
-
For Client secret, enter the client secret of the client whose ID was entered earlier in the procedure.
-
For Scopes, enter a comma-separated list of scopes to request from the external OIDC provider. In accordance with OIDC 1.0 specifications, requesting certain scopes from an OIDC provider can cause additional claims. For example, requesting
openid, profile, emailscopes (the current default value for this input field) can allow the UAA to obtain claims containing the user’s first name, last name, and email. Additionally, please include the scope or scopes, for example,groups) that allows the UAA to obtain the user’s group memberships. Consult your OIDC provider’s documentation to decide the exact scopes to request to obtain sufficient claims. -
For Email domains, enter a comma-separated list of the email domains for external users to invite to Apps Manager.
-
For Username claim, enter the attribute in your OIDC provider claim that corresponds to the TAS for VMs user name.
-
For First name claim, enter the attribute in your OIDC provider claim that corresponds to the user’s first name in TAS for VMs.
-
For Last name claim, enter the attribute in your OIDC provider claim that corresponds to the user’s last name in TAS for VMs.
-
For Email claim, enter the attribute in your OIDC provider claim that corresponds to the user’s email in TAS for VMs.
-
For External groups claims, enter the attribute in your OIDC provider claim that defines the groups to which a user belongs. This is a comma separated list, and is used to map to internal TAS for VMs scopes.
-
Enable caching for the JSON Web Key Set (JWKS) is enabled by default. This caching feature improves performance by using the locally cached keys to validate tokens from the external OIDC identity provider. Disabling caching is recommended in rare situations where the keys are rotated very frequently (for example, every hour).
-
Click Save and return to the Tanzu Operations Manager Installation Dashboard.
-
Click Review Pending Changes.
-
Click Apply Changes.
