With the Space Developer role, you can configure the App Autoscaler service in Apps Manager to scale apps in your TAS for VMs deployment.
You can use the App Autoscaler command-line interface (CLI) plug-in to configure App Autoscaler rules from the command line. For more information, see Using the App Autoscaler CLI.
Space Managers, Space Auditors, and all Org roles do not have permission to use App Autoscaler. For help managing user roles, see Managing user accounts and permissions using Apps Manager.
App Autoscaler overview
To use App Autoscaler to scale your apps in you VMware Tanzu Application Service for VMs (TAS for VMs) deployment, you must create and bind the App Autoscaler service, then configure scaling rules for App Autoscaler.
For more information about App Autoscaler, including information about how to create scaling rules, see About App Autoscaler.
Prerequisite
Before using the Autoscaler service in Apps Manager, you must configure the search-server app for any deployments that have restrictive networking policies around request proxying.
Autoscaler controls cannot appear for apps in Apps Manager if your TAS for VMs deployment has restrictive networking policies around request proxying.
To resolve this issue and enable Autoscaler controls in Apps Manager:
- Using the cf CLI, log in to the system org and system space.
- Locate the
search-serverapp. -
Update the
no_proxyenvironment variable for thesearch-serverapp to include your system domain.cf set-env search-server no_proxy '*.SYSTEM-DOMAIN'where
SYSTEM-DOMAINis the system domain configured for your TAS for VMs deployment. For example:cf set-env search-server no_proxy '*.example.com'
-
Restage the
search-serverapp.cf restage search-server
Configure App Autoscaler
To configure App Autoscaler:
-
Create and bind the App Autoscaler service to your app. See Create and bind the App Autoscaler service.
-
Configure autoscaling instance limits for your app. See Configure autoscaling for an app.
Create and bind the App Autoscaler service
To use App Autoscaler, you must create an instance of the App Autoscaler service and bind it to any app you want or from the Cloud Foundry Command Line Interface (cf CLI):
-
Apps Manager:
-
cf CLI:
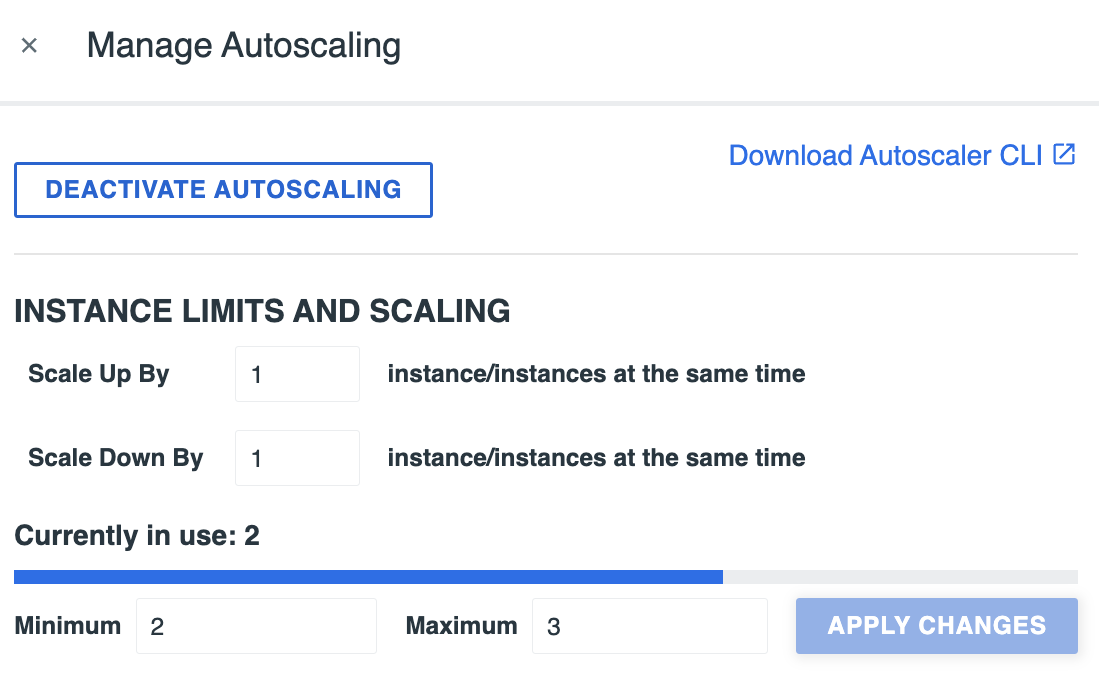
Important Manual scaling overrides scaling rules that you configure with App Autoscaler. If you manually scale an app bound to an App Autoscaler service instance, the App Autoscaler instance unbinds from that app, and the app scales to the manual setting. For more information, see Managing apps and service instances using Apps Manager.
To enable App Autoscaler for an app:
-
In Apps Manager, select an app from the space in which you created the App Autoscaler service.
-
Under Processes and Instances, click Autoscaling Deactivated to manage autoscaling.
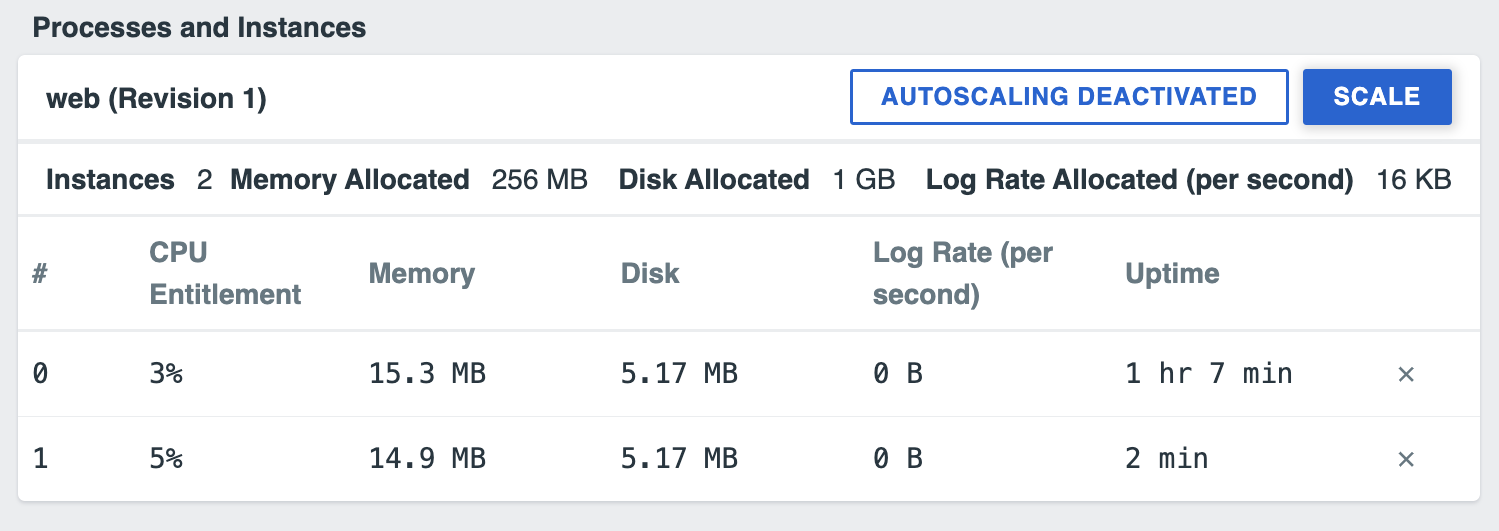
-
Click Activate Autoscaling to activate App Autoscaler. You can then configure instance limits, scaling rules, and scheduled limit changes for the app. For more information, see Configure autoscaling for an app.
Configure autoscaling for an app
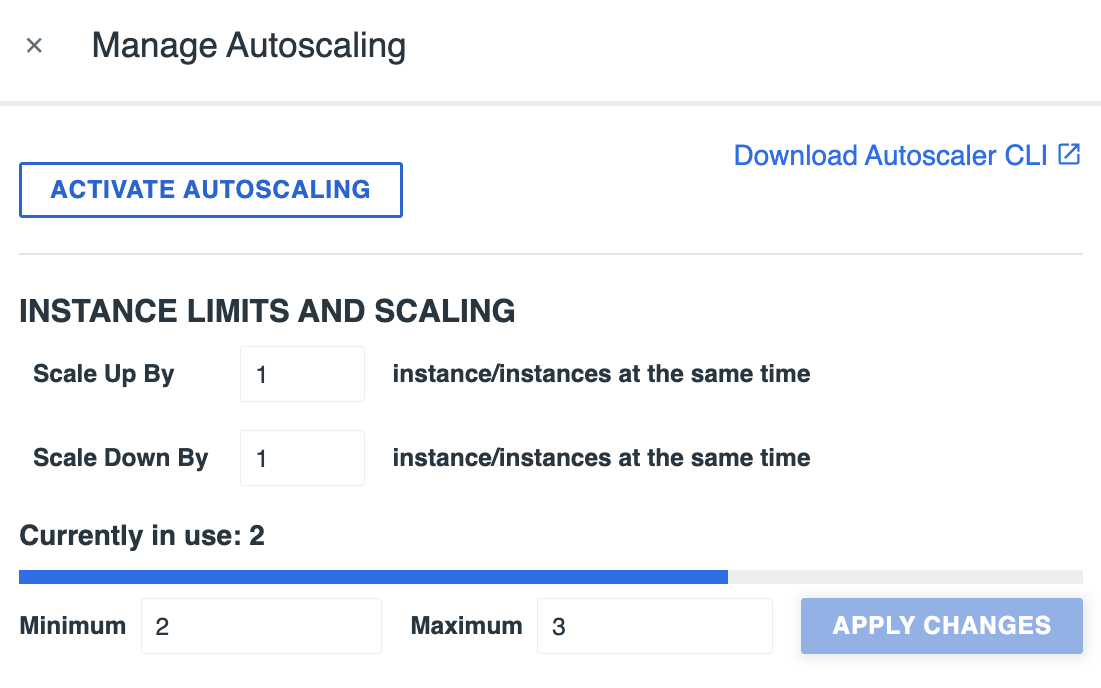
App Autoscaler keeps instance counts within an allowable range defined by minimum and maximum values. The minimum and maximum values are called instance limits.
For more information about how App Autoscaler makes scaling decisions for an app, see How App Autoscaler determines when to scale in About App Autoscaler.
Create or change instance limits
This section describes how to create and edit instance limits for app scaling rules. You can also schedule changes to your instance limits for a specific date and time. For more information, see Scheduled limit changes.
To manually edit instance limits:
-
In Apps Manager, navigate to the Overview page for your app. Under Processes and Instances, click Autoscaling Activated.
-
In the Instance Limits section, set values for Minimum and Maximum.
-
Click Apply Changes.
Add or delete scaling rules
The following procedures describe how to add and delete scaling rules for your apps with App Autoscaler.
For more information about scaling rules and metrics in App Autoscaler, see About App Autoscaler scaling rules.
To add a scaling rule for an app:
-
In the Manage Autoscaling pane, click Add Rule next to Scaling Rules. The Add Rule pane appears.
-
From the Rule Type options, select the metric for the new scaling rule.
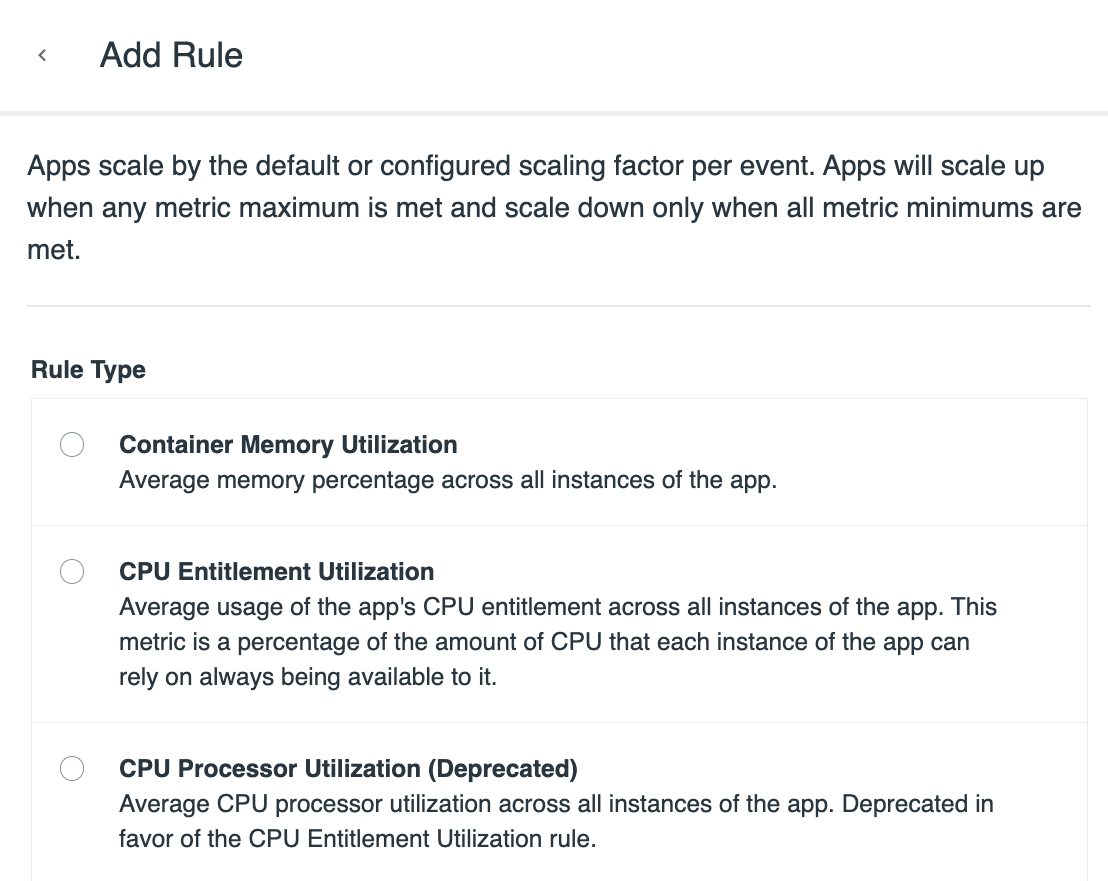
-
Set the minimum and maximum thresholds for the metric. For information about setting instance limits, see About App Autoscaler scaling rules in About App Autoscaler.
-
Select or fill in any other text boxes that appear under the threshold text boxes:
- If you are adding an HTTP Request Latency rule, configure Percent of traffic to apply.
- If you are adding a RabbitMQ Queue Depth rule, provide the name of the queue to measure.
- If you are adding a Custom App Metric rule, enter your custom Metric.
- If you are adding a Custom App Metric Ratio rule, enter values in the Metric and Comparison Metric text boxes.
-
Click Save.
To delete a scaling rule for an app:
- In the Manage Autoscaling pane, click the trash can icon next to the rule that you want to delete.
Create or edit scheduled limit changes
Because app demand often follows a weekly, daily, or hourly schedule, you can schedule App Autoscaler to change the allowable instance range to track expected surges or quiet periods.
To create or edit a scheduled limit change:
-
Next to Scheduled Limits, click Edit.
-
Click Add New to add a new scheduled limit, or select an existing entry and click EDIT next to the entry.
-
Edit the following values:
- Date and Time (local): Set the date and time of the change.
- Repeat (Optional): Set the day of the week for which you want to repeat the change.
- Min and Max: Set the allowable range within which App Autoscaler can change the instance count for an app.
-
Click Save.
In time zones that observe Daylight Saving Time, Apps Manager might not account for changes in offset from UTC time when it applies scheduled limit changes. Contact Tanzu Support if you need help.
To delete an existing entry, click the x icon next to the entry that you want to delete.
For example, to schedule an app to scale down for a weekend, you can enter these two rules:
-
Scale down to a single instance on Friday evening:
- Date and Time (local):
Dec,2,2018and7:00 PM - Repeat (Optional):
Fr - Min and Max:
1and1
- Date and Time (local):
-
Increase instances to between 3 and 5 on Monday morning:
- Date and Time (local):
Dec,5,2018and7:00 AM - Repeat (Optional):
M - Min and Max:
3and5
- Date and Time (local):
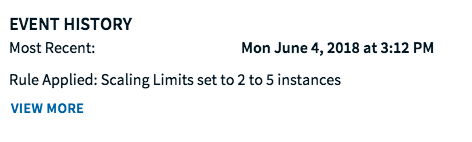
View and manage App Autoscaler events and notifications
App Autoscaler logs all autoscaling events. You can view event history and manage notifications for App Autoscaler.
View event history
To view all autoscaling events in the past 24 hours, click View More in the Event History section of the Manage Autoscaling pane.
Manage App Autoscaler notifications
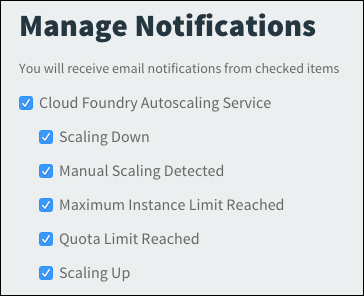
App Autoscaler emails or texts its event notifications to all users with the Space Developer role by default.
To subscribe or unsubscribe from autoscaling event notifications:
-
Go to the Manage Notifications page in Operations Manager. If installed, Notifications Management must be available at
https://notifications-ui.SYSTEM-DOMAIN/preferences, whereSYSTEM-DOMAINis your system domain. -
Decide which notifications you want to receive from App Autoscaler.