


This topic describes how to install and configure NSX Managers on vSphere in a clustered arrangement for high-availability for VMware Tanzu Kubernetes Grid Integrated Edition (TKGI).
Prerequisites
Before completing this section, make sure you have completed the following sections:
Deploy NSX-T Manager 1
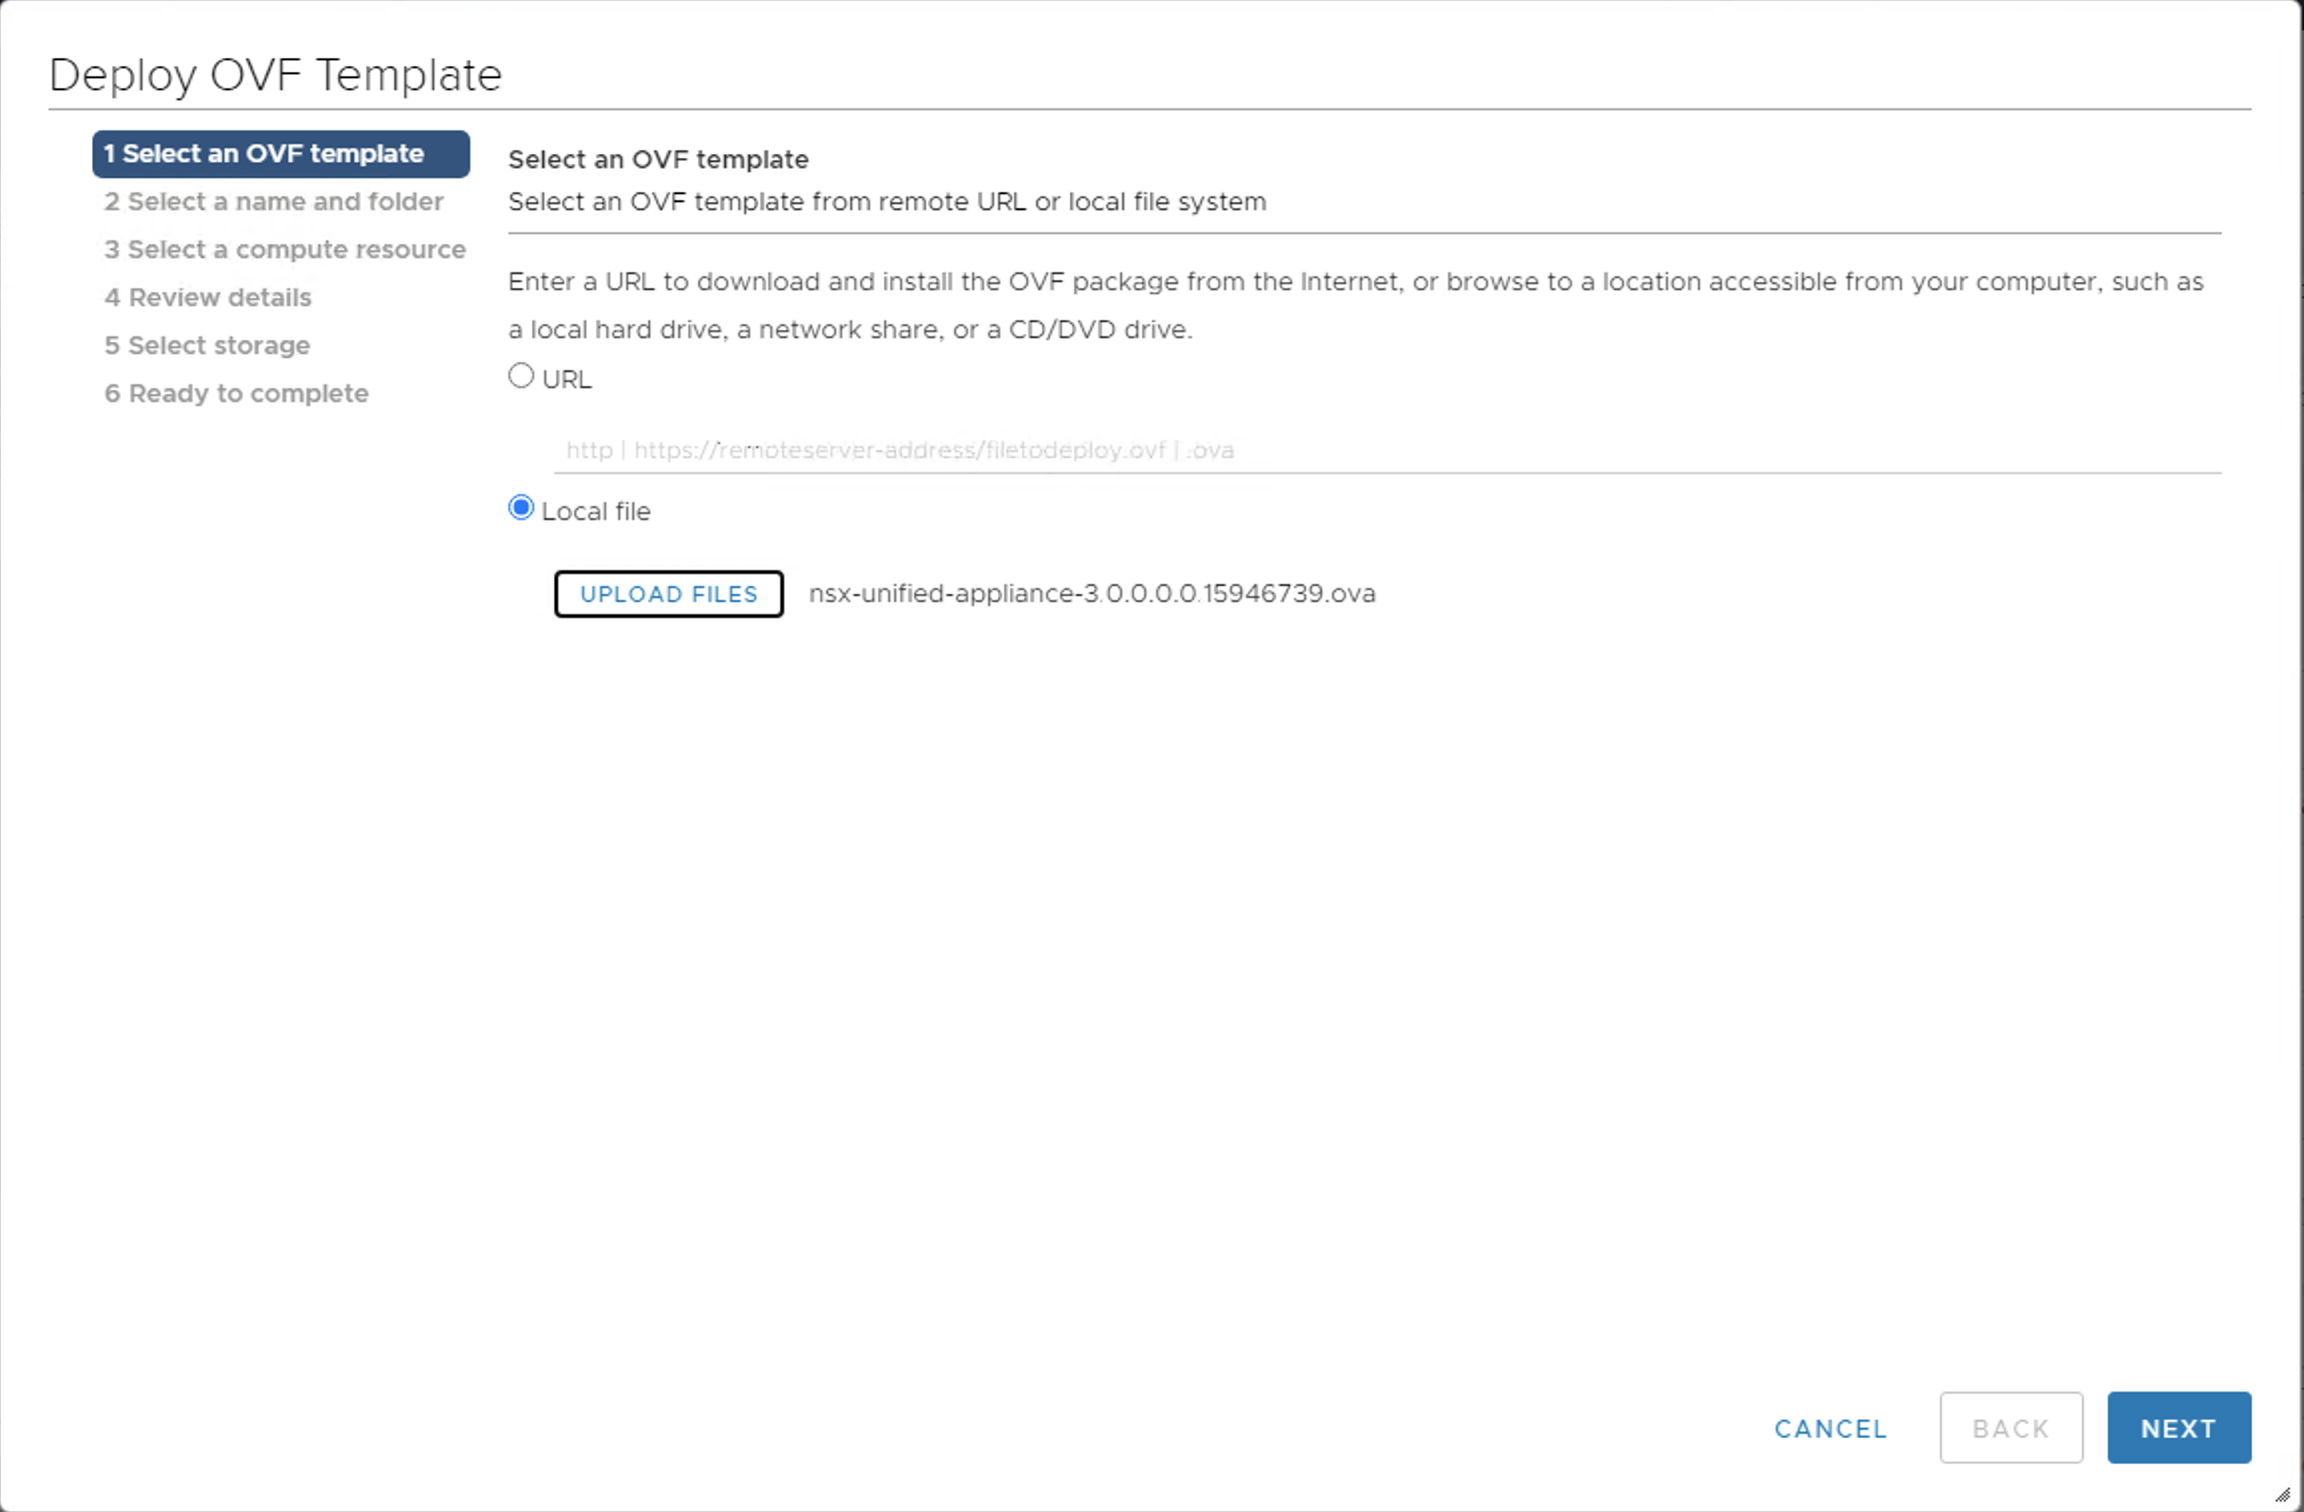
Deploy the NSX-T Manager OVA in vSphere. Download the OVA from the VMware software download site.
- Using the vSphere Client, right-click the vCenter cluster and select Deploy OVF Template.
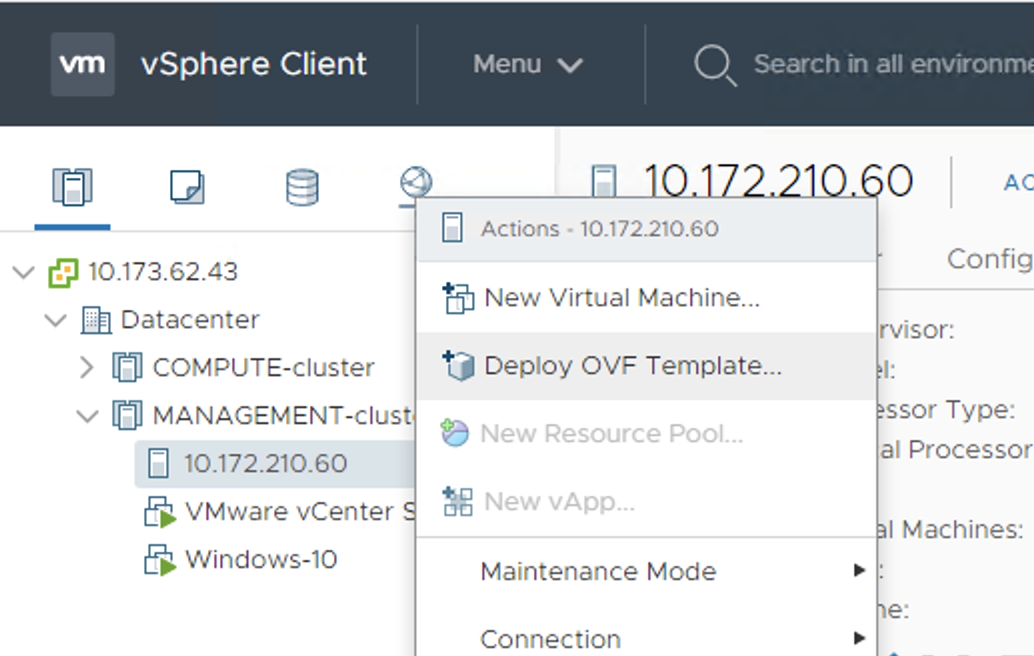
- At the Select an OVF Template screen, browse to and select the NSX Unified Appliance OVA file.
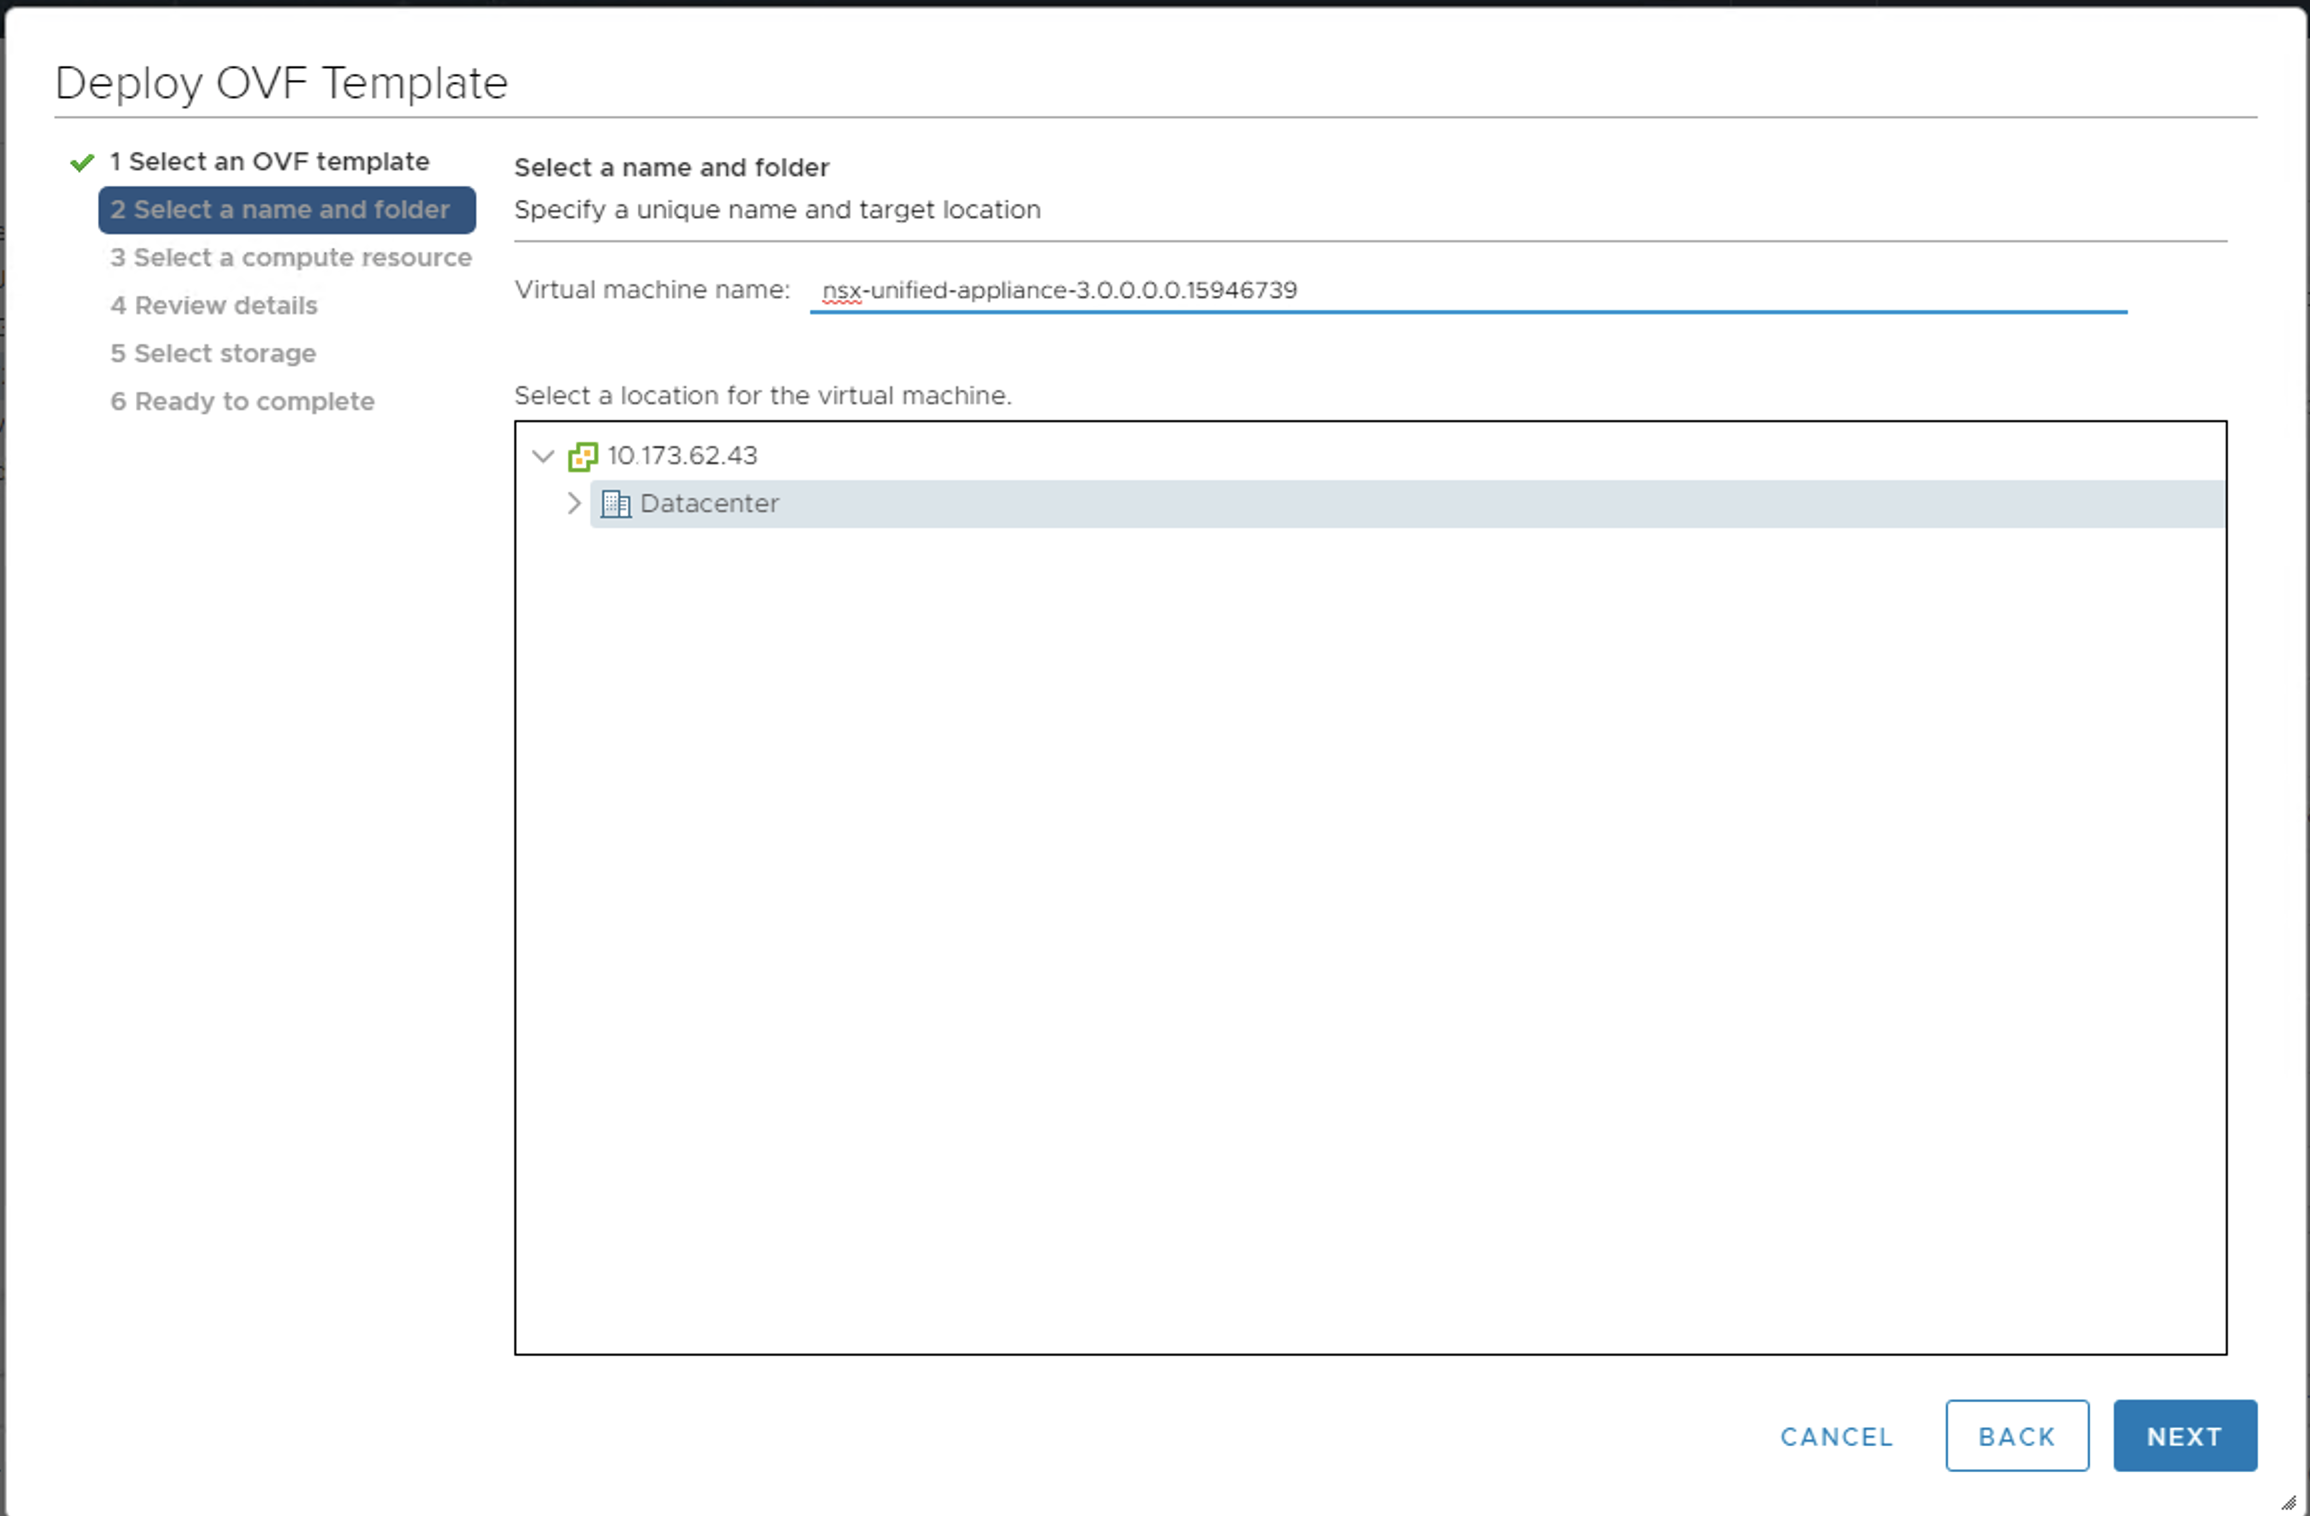
- At the Select a name and folder screen, select the target Datacenter object.
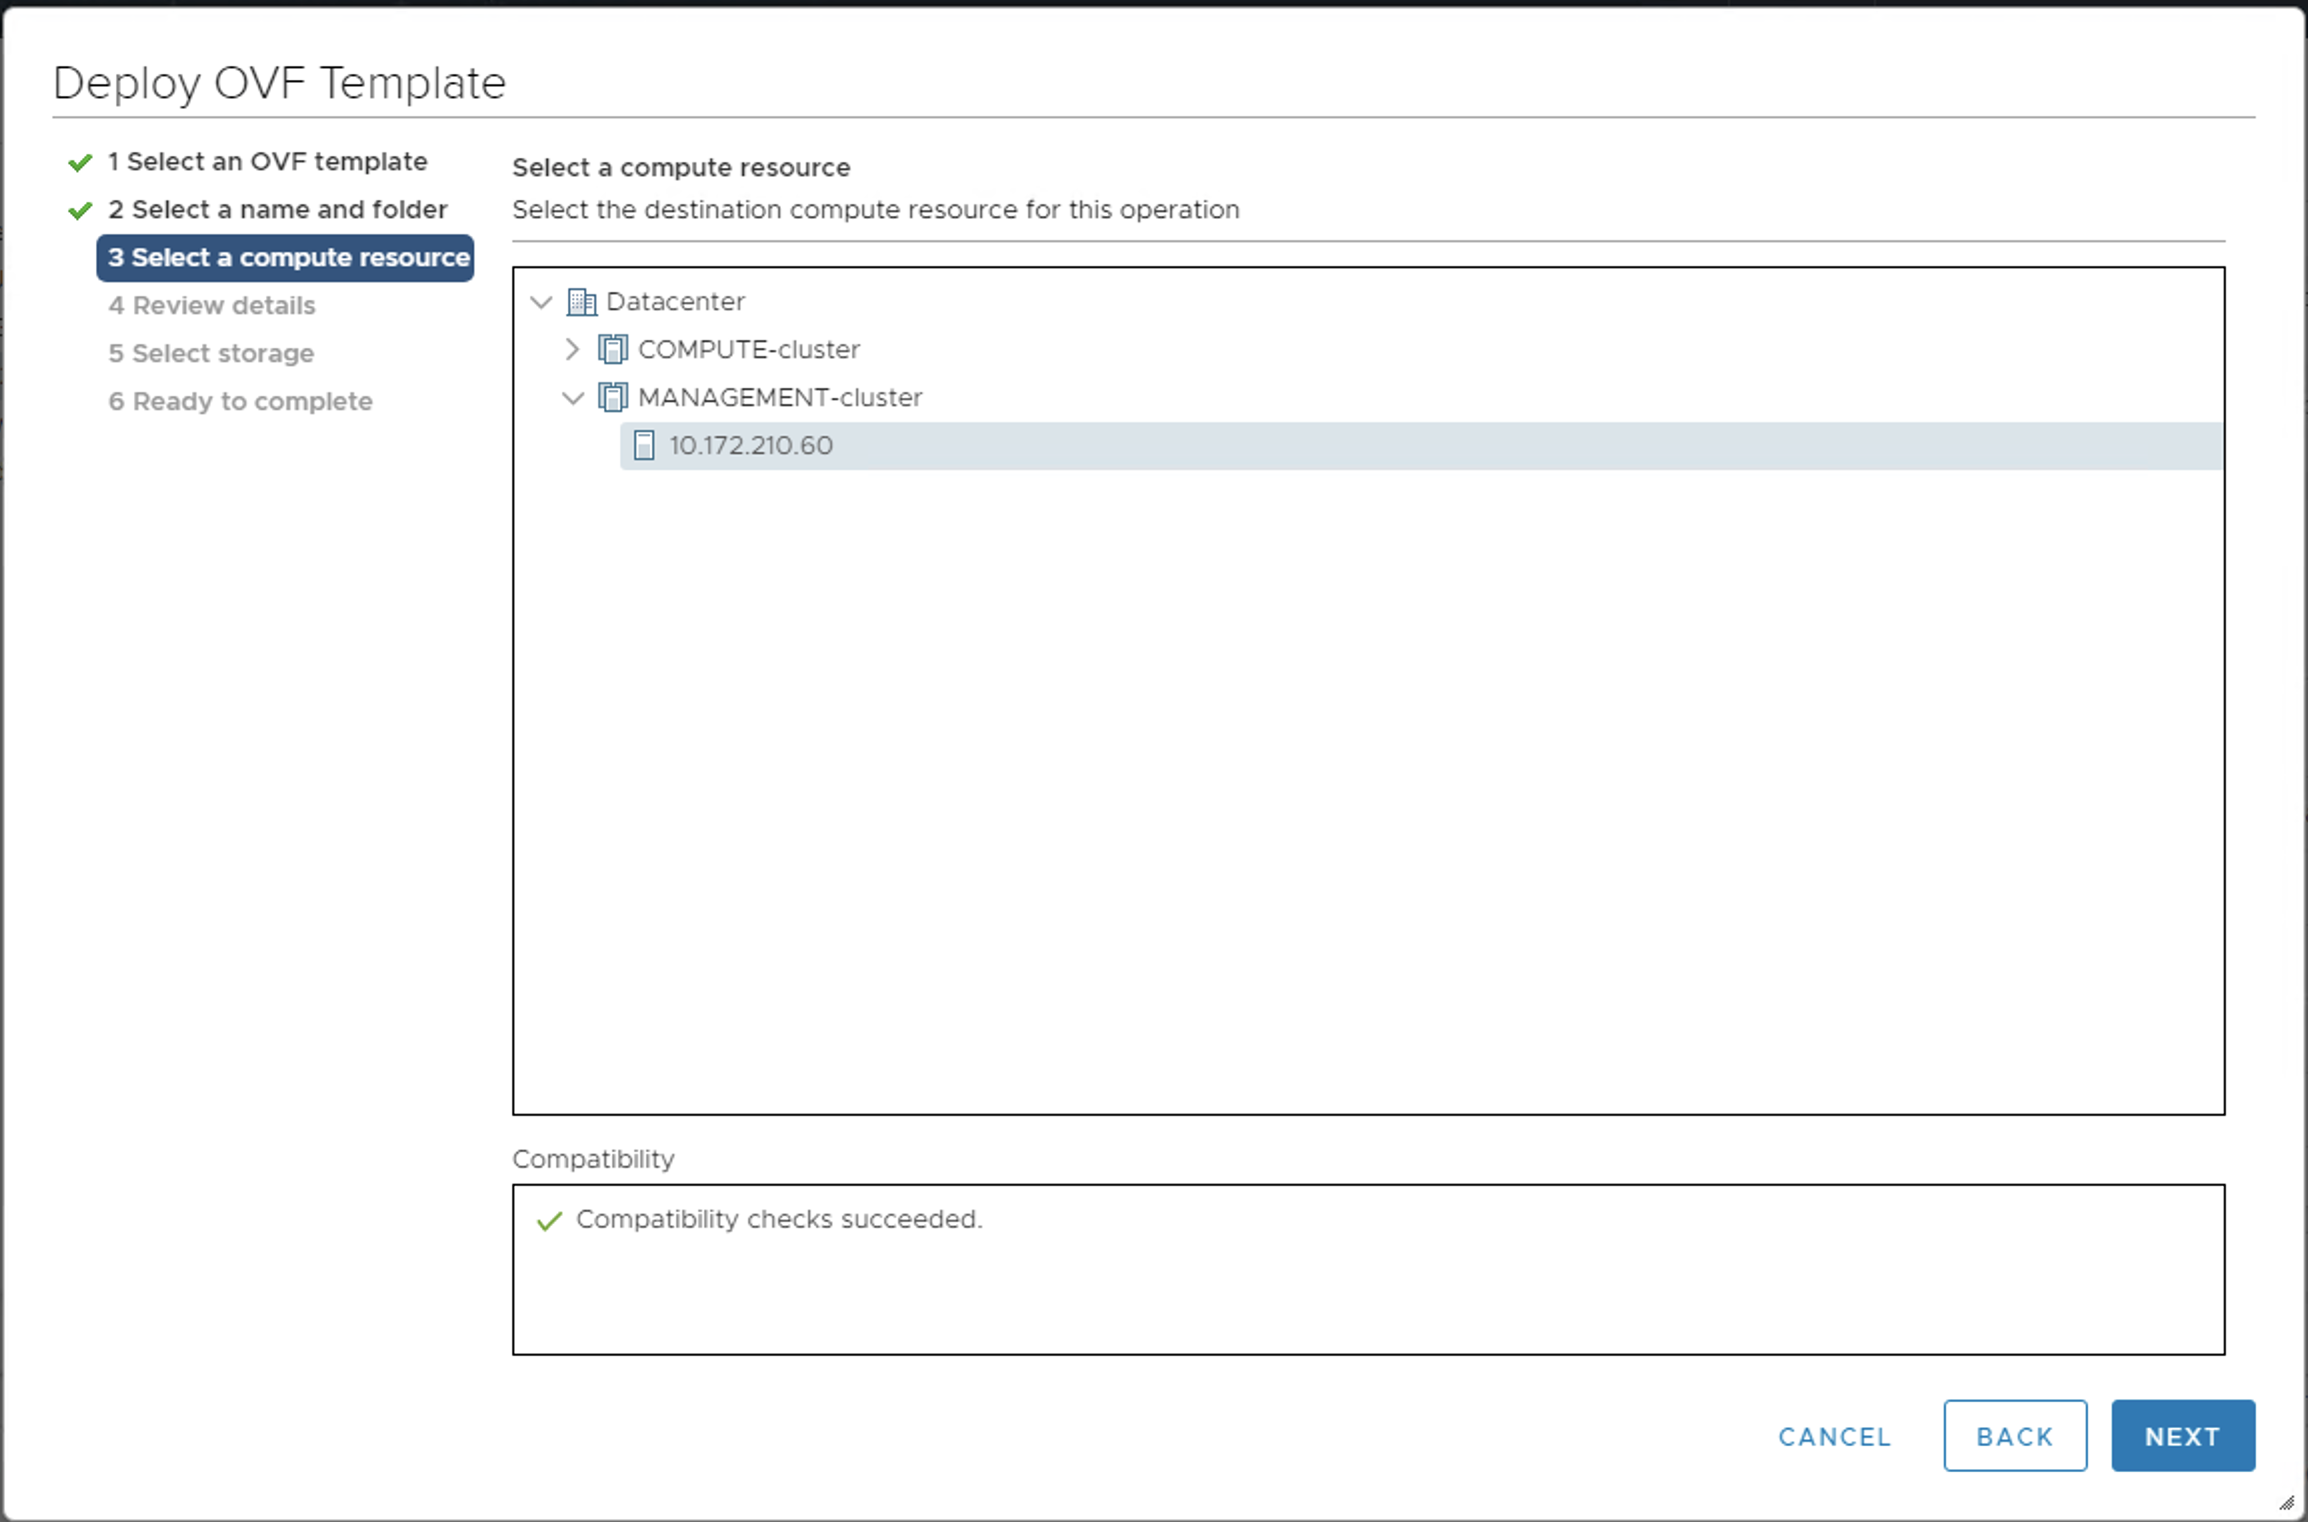
- At the Select a compute resource screen, select the target vCenter cluster.
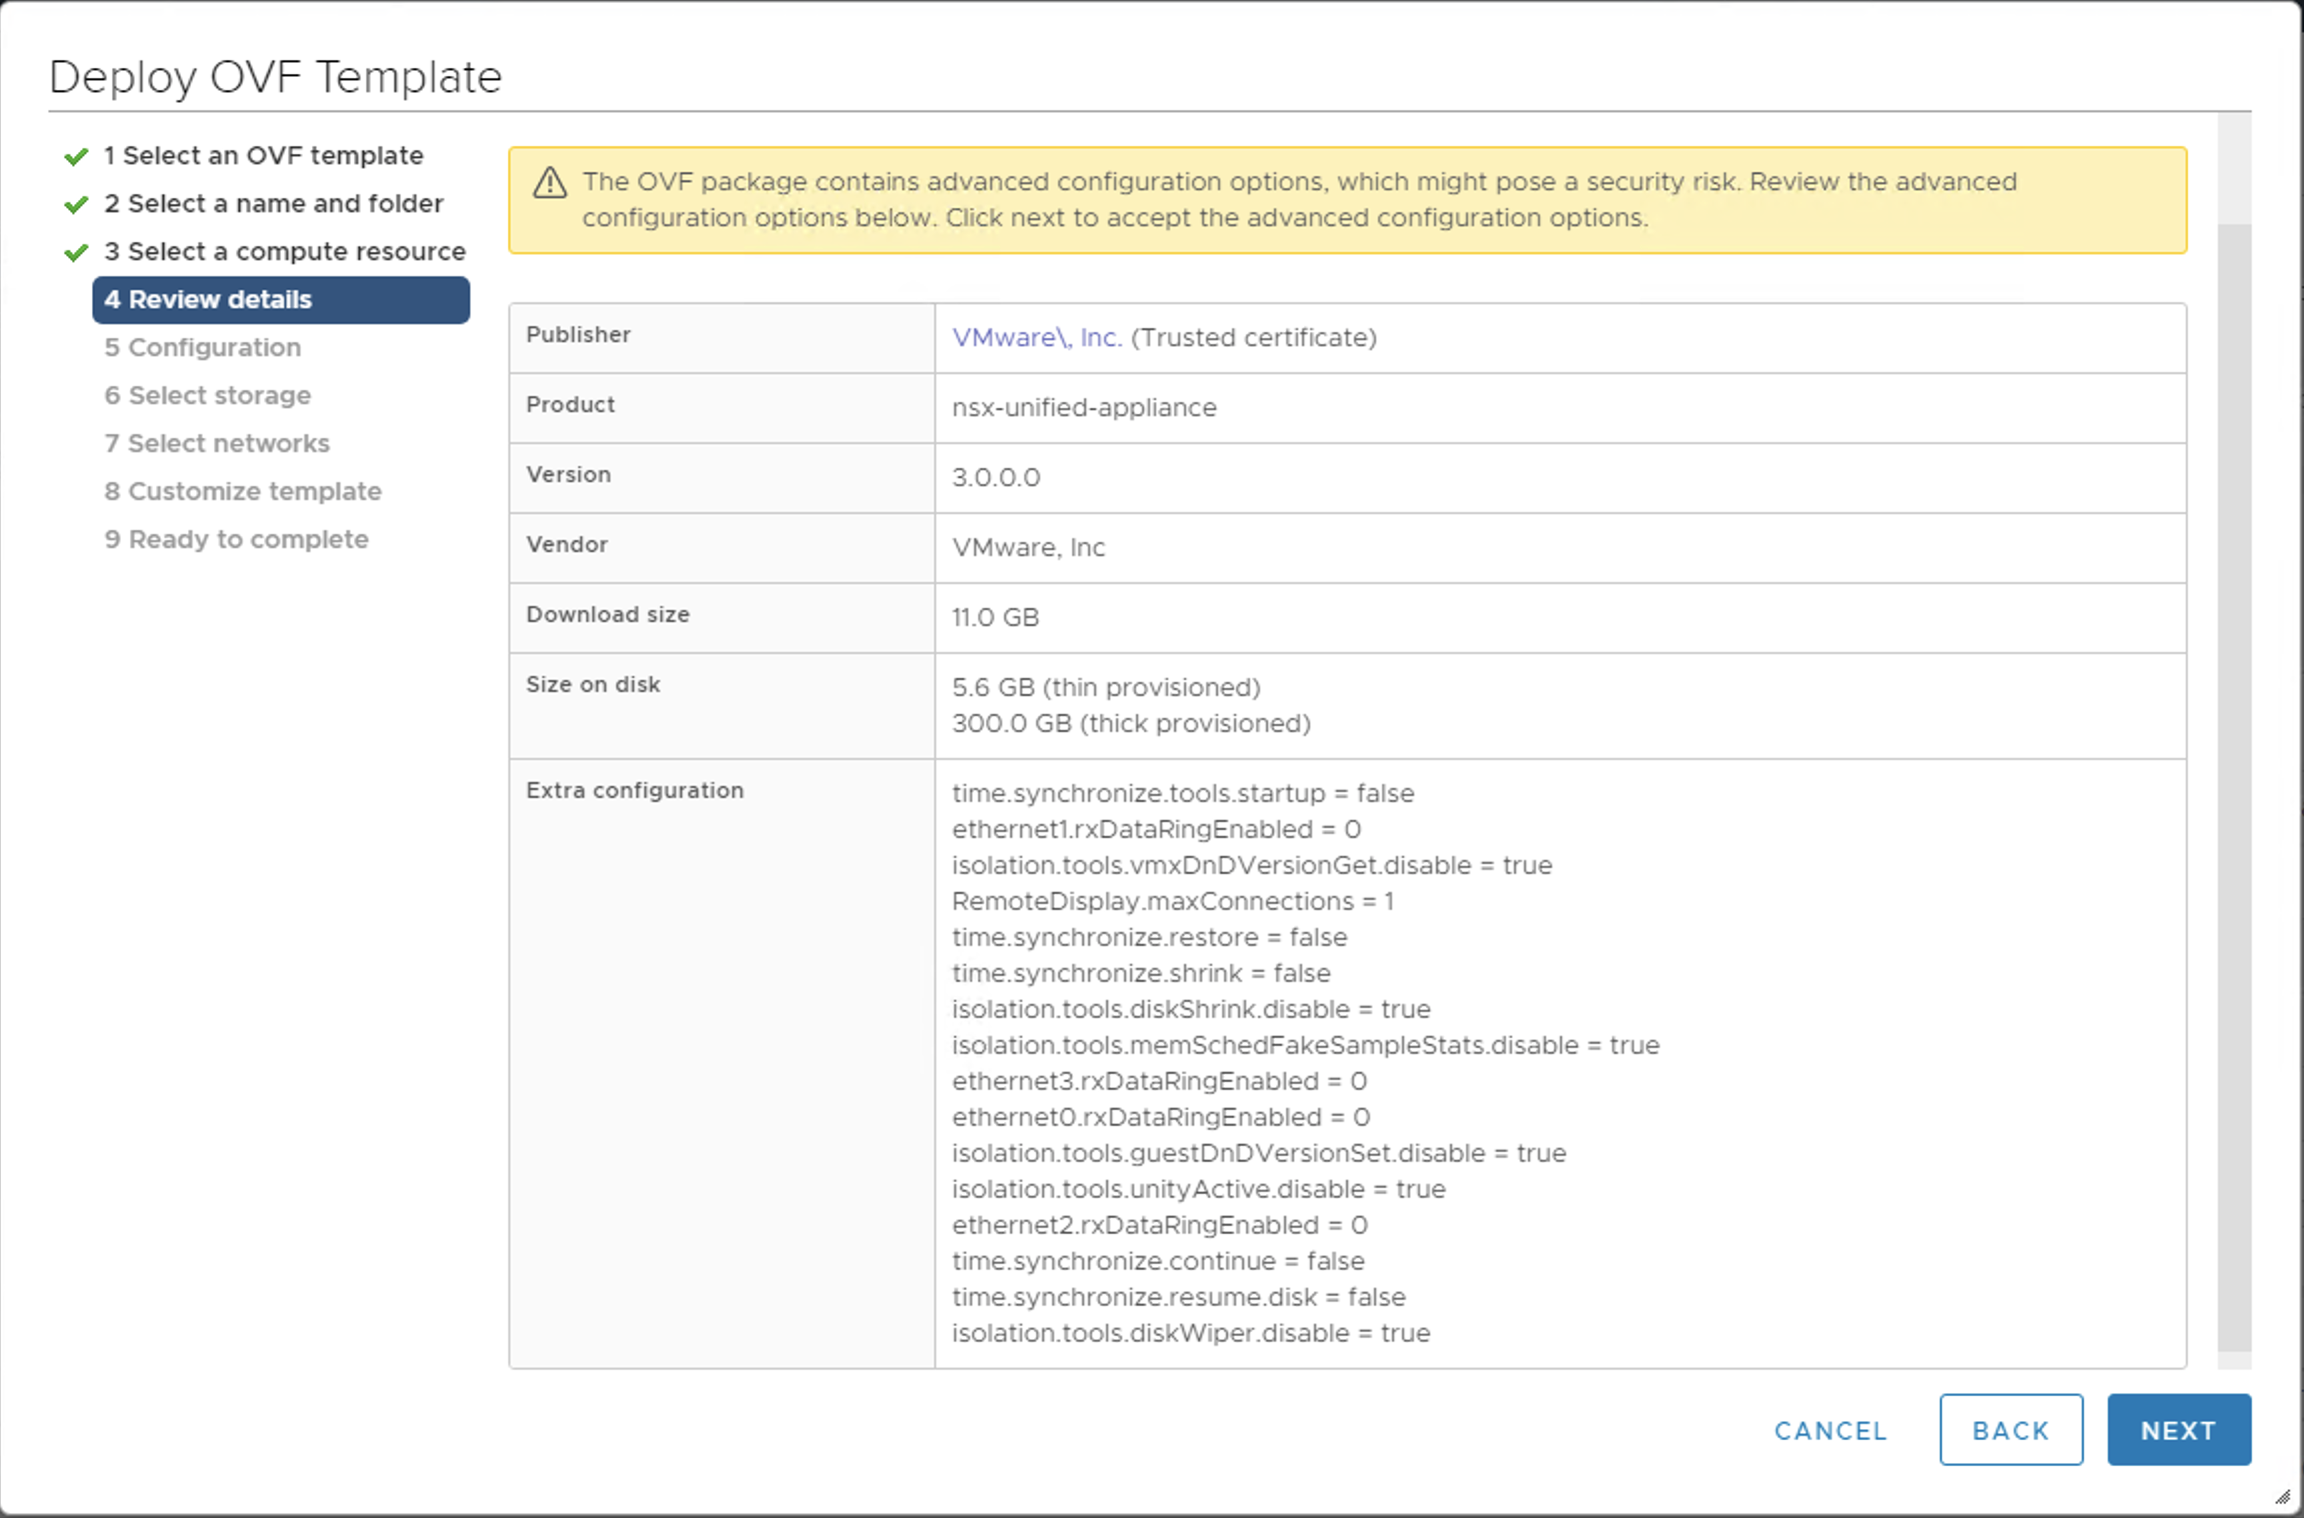
- Review the details.
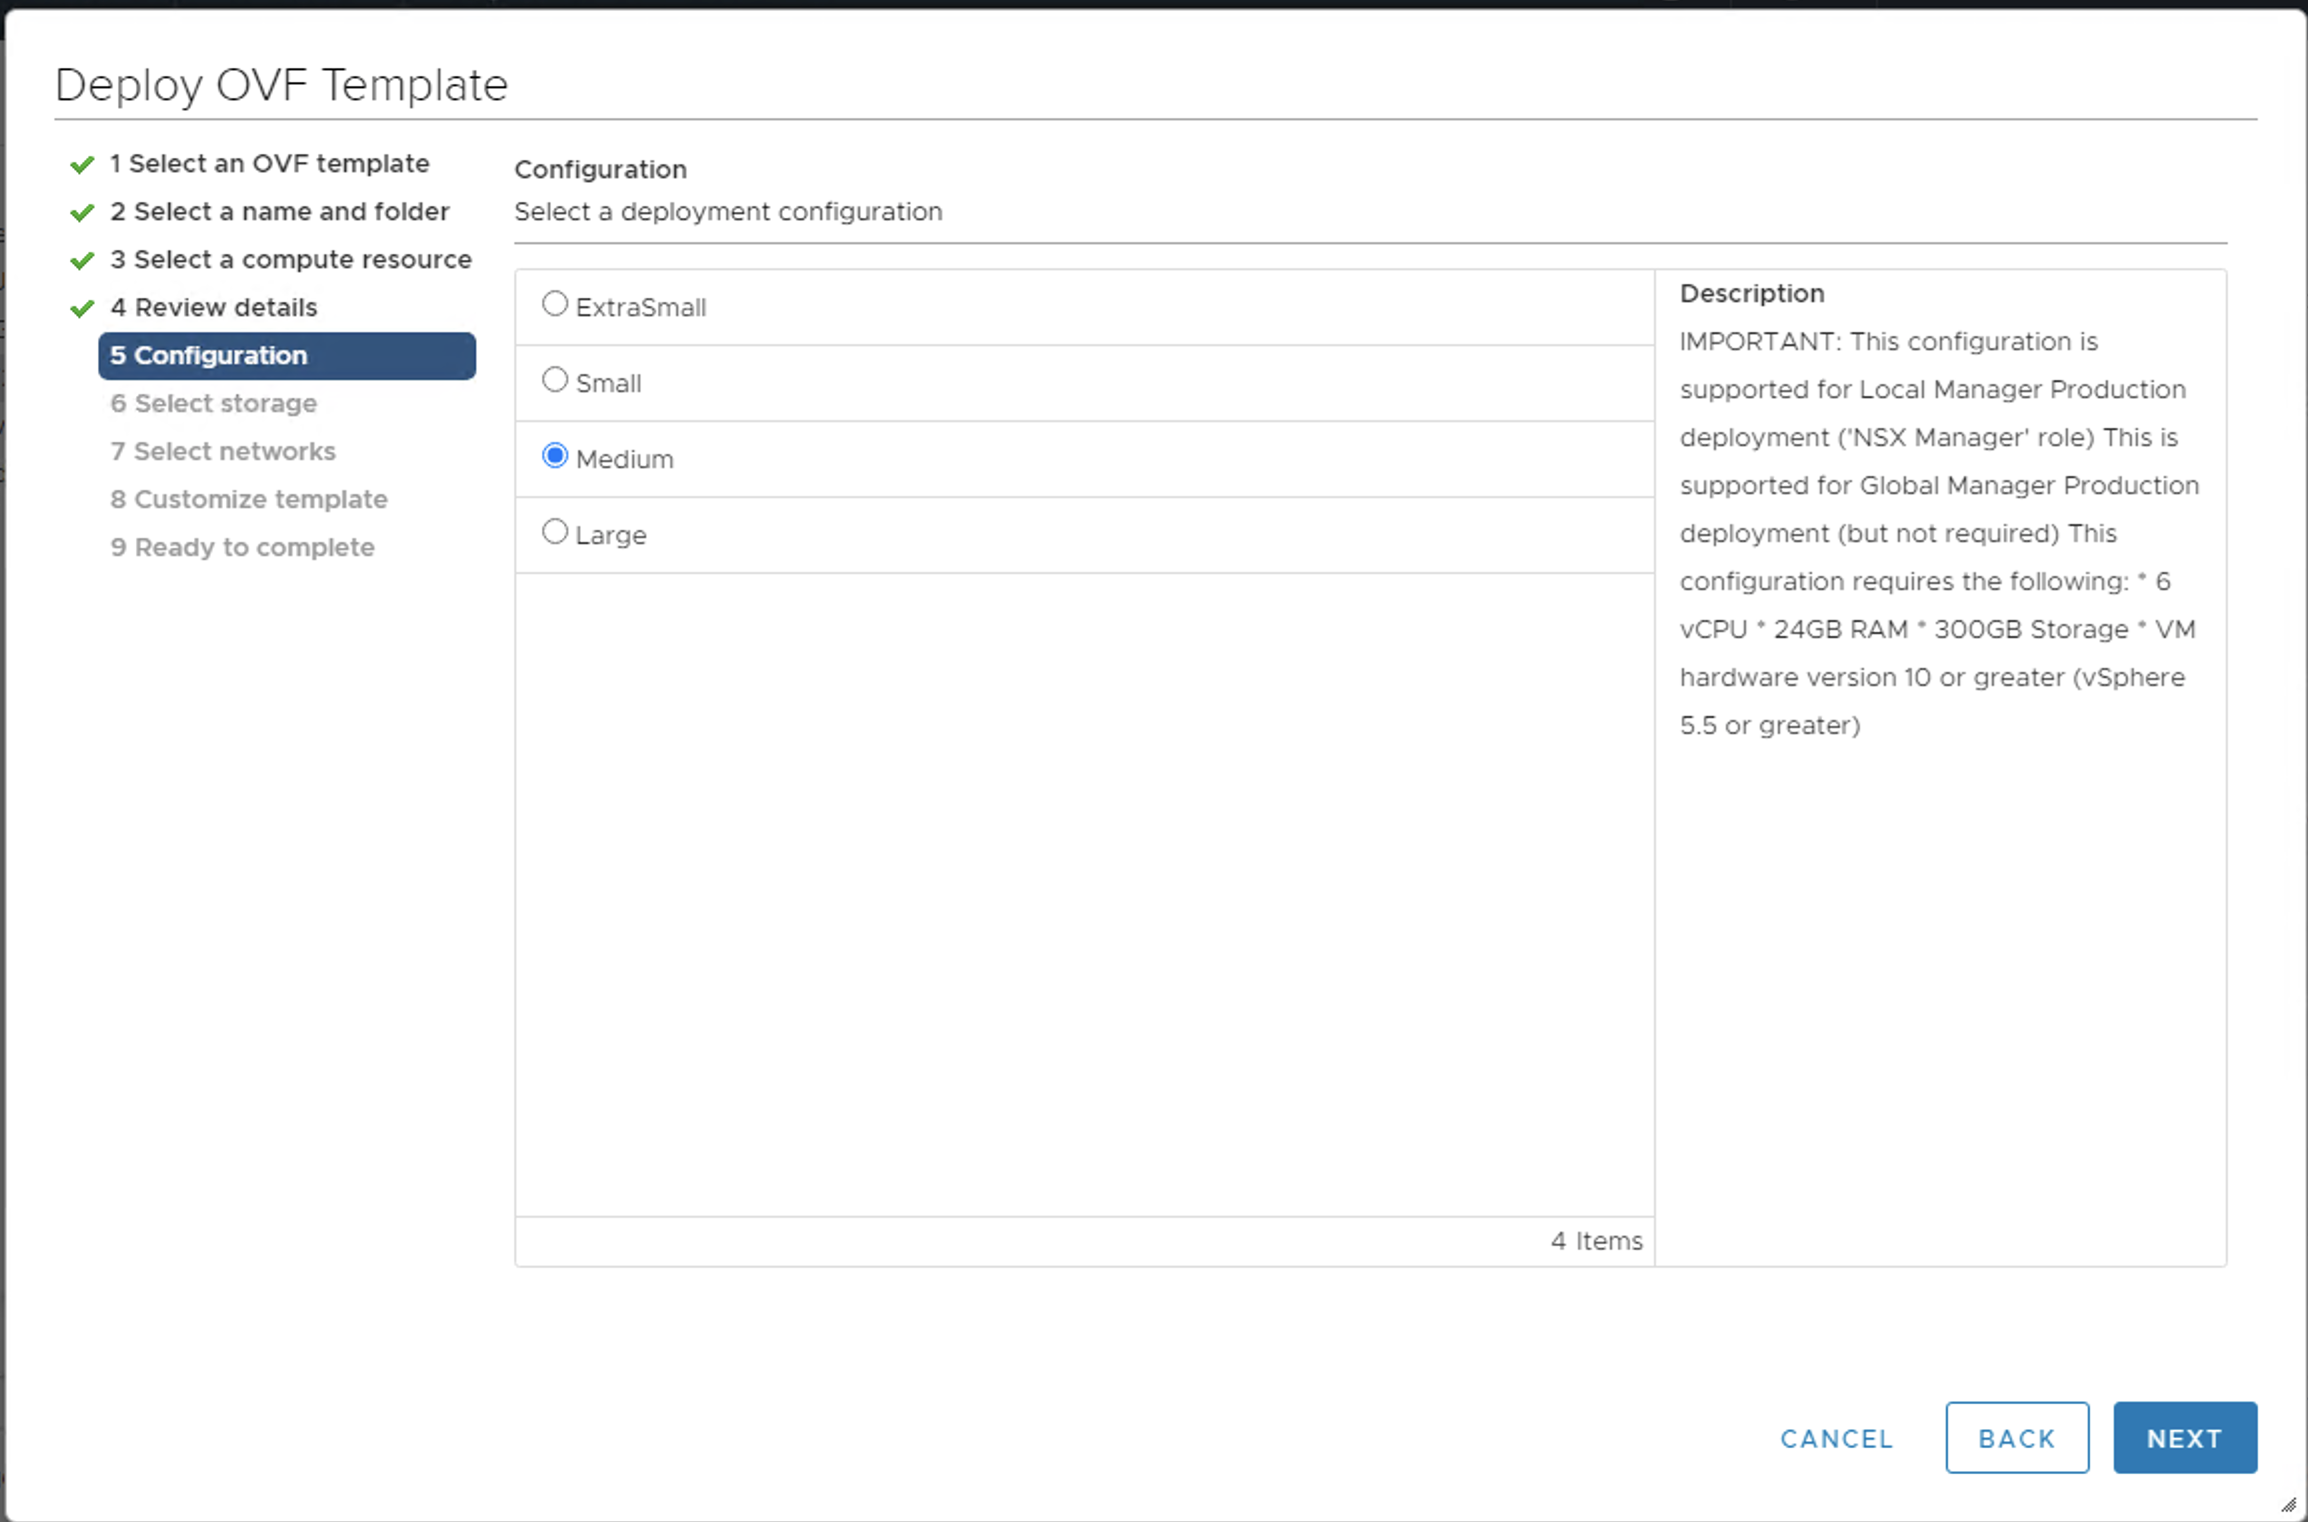
- At the Configuration screen, select at least Medium for the configuration size.
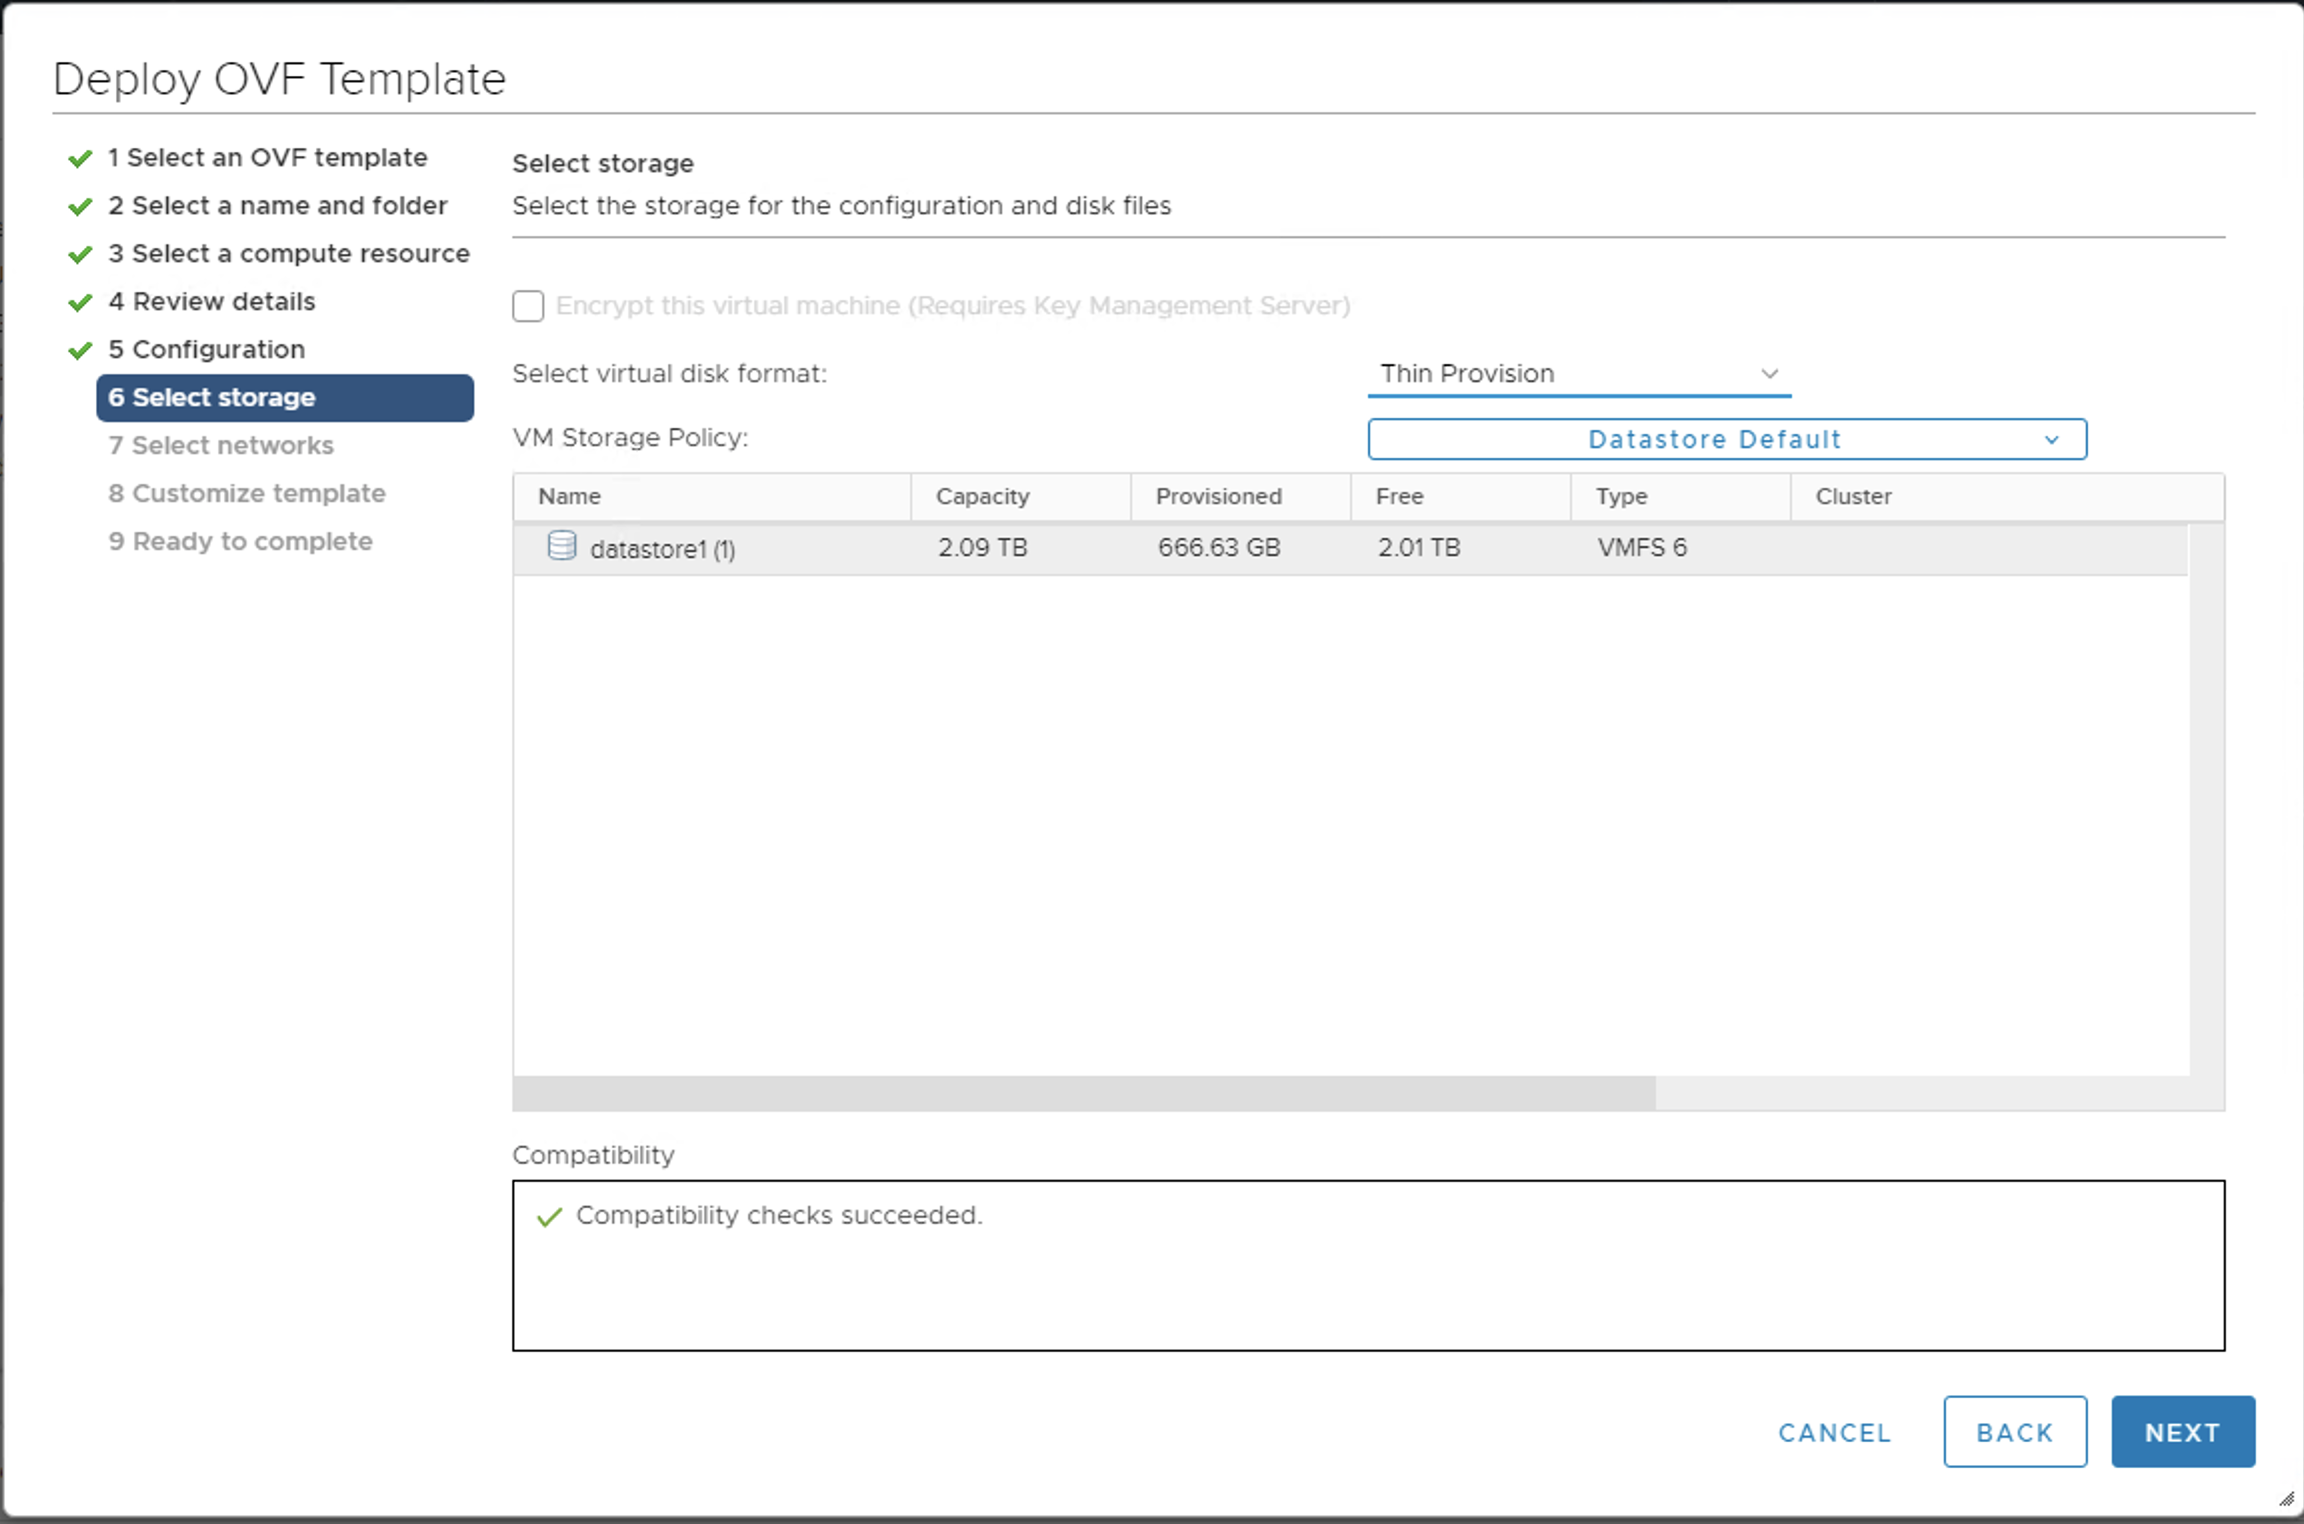
- At the Select storage screen, choose Thin Provision and the desired datastore.
- For Network1, enter the VLAN management network, such as
PG-MGMT-VLAN-1548.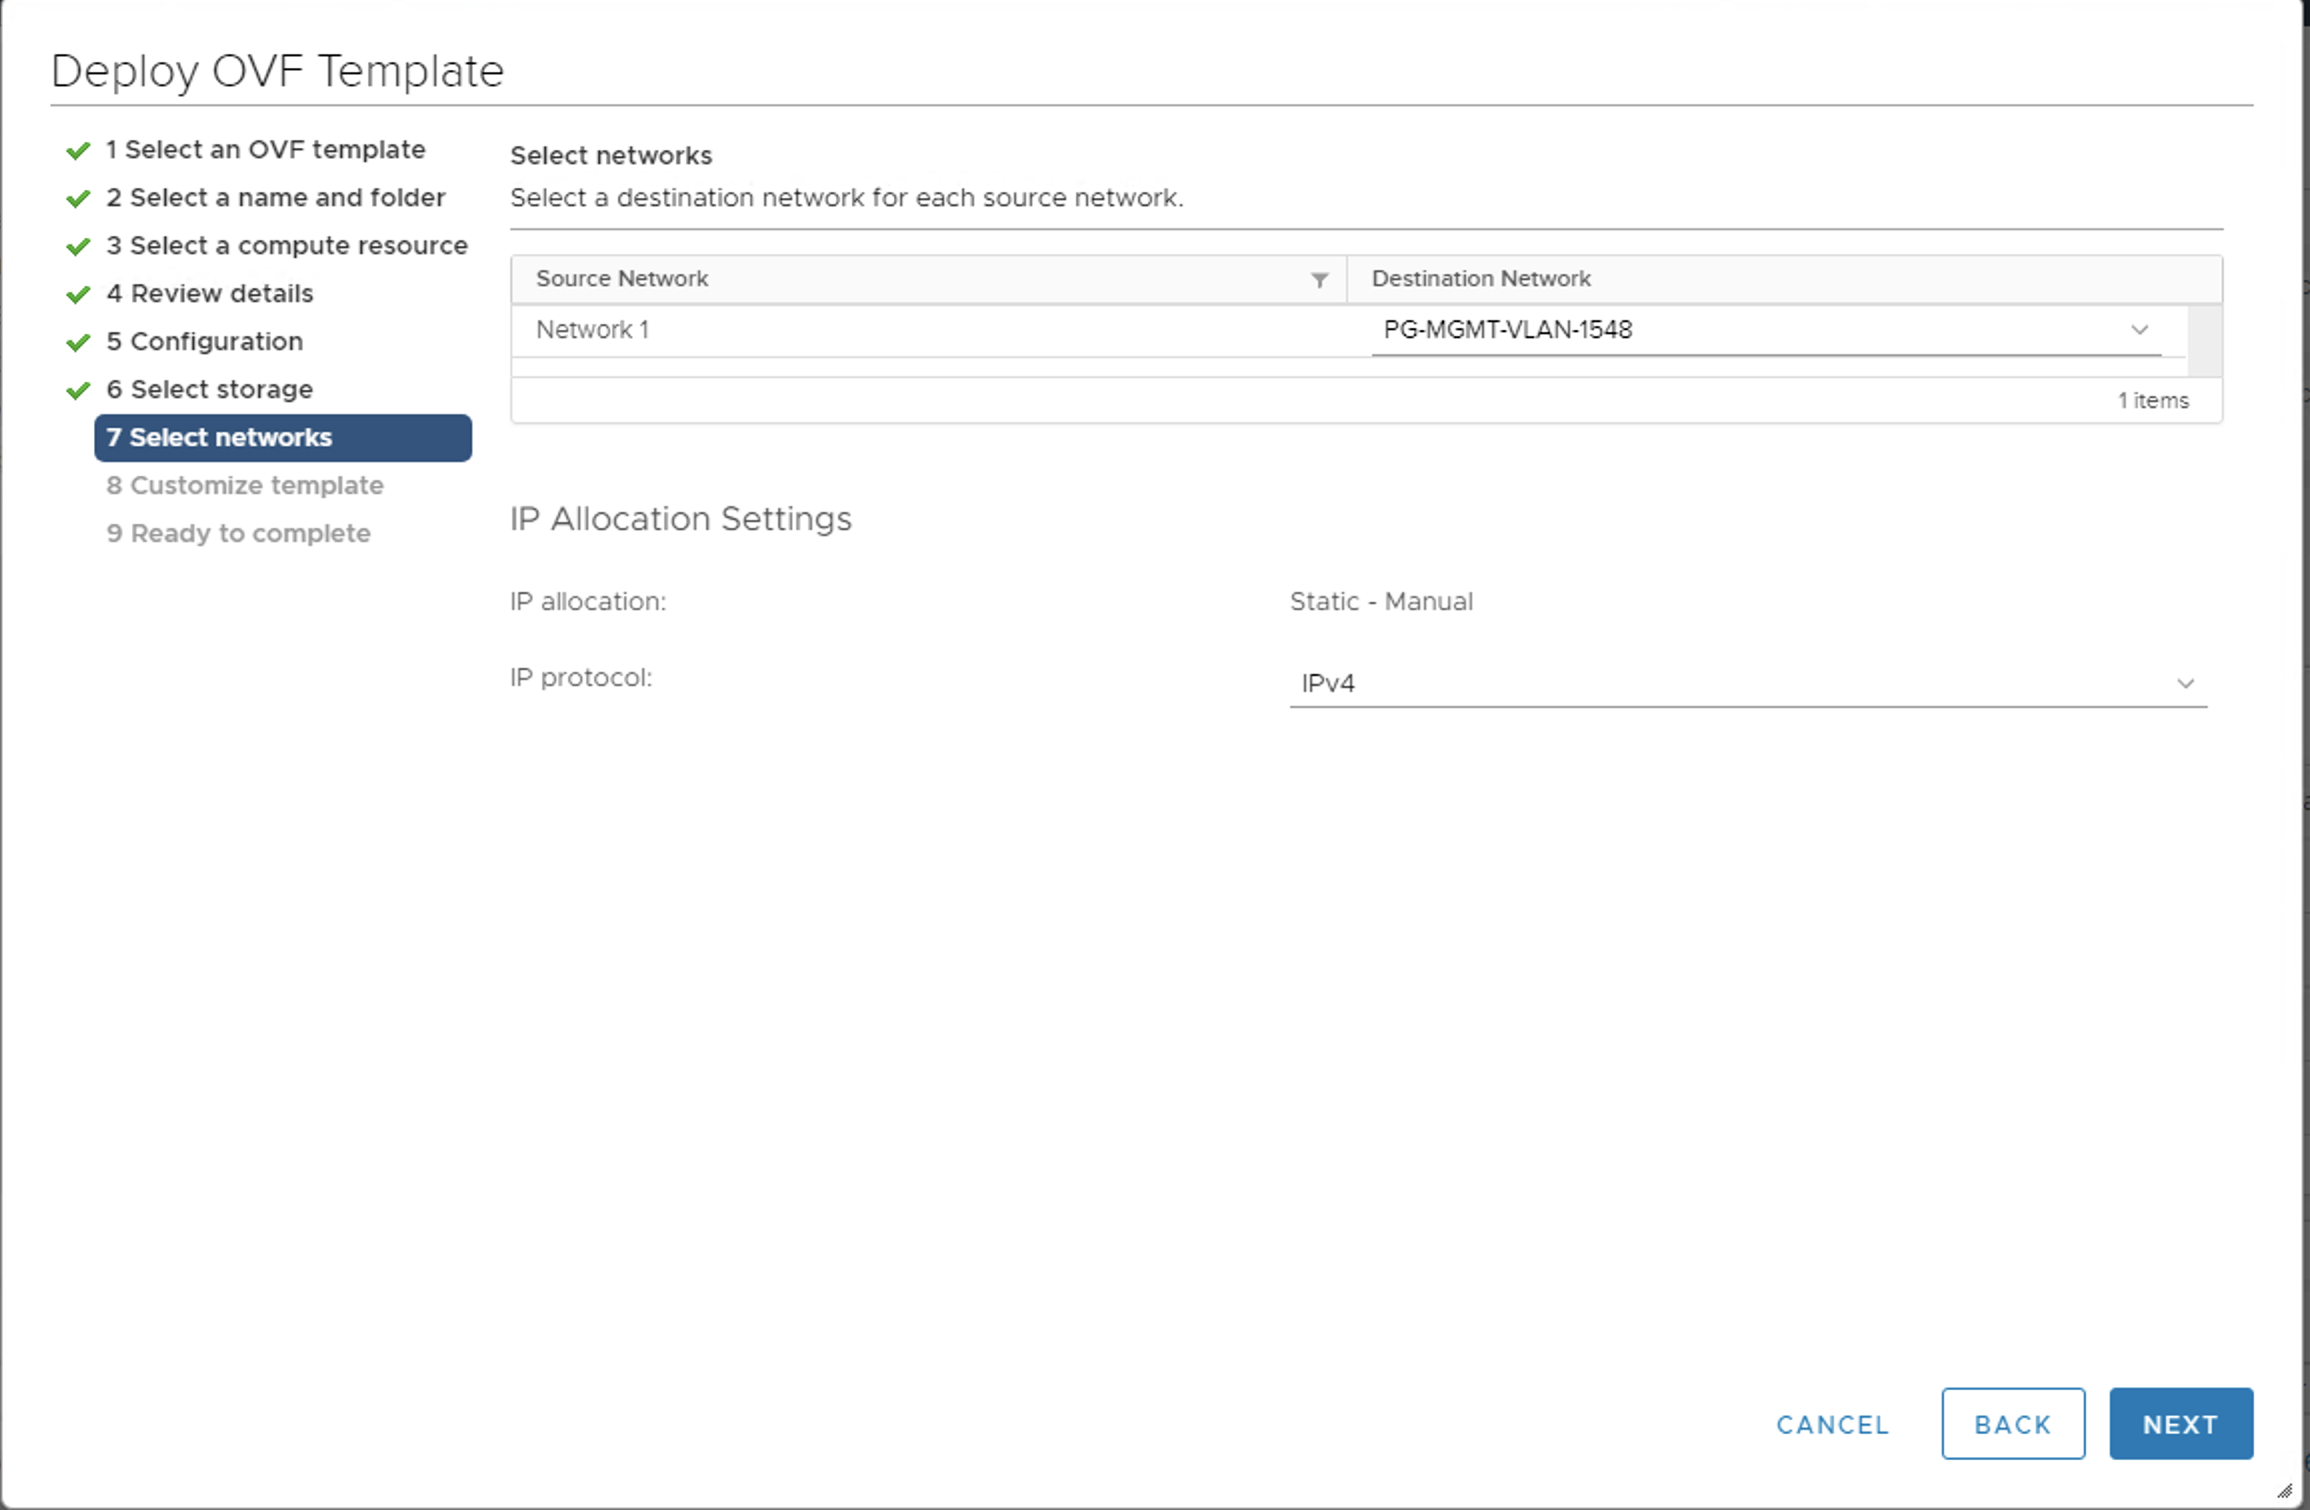
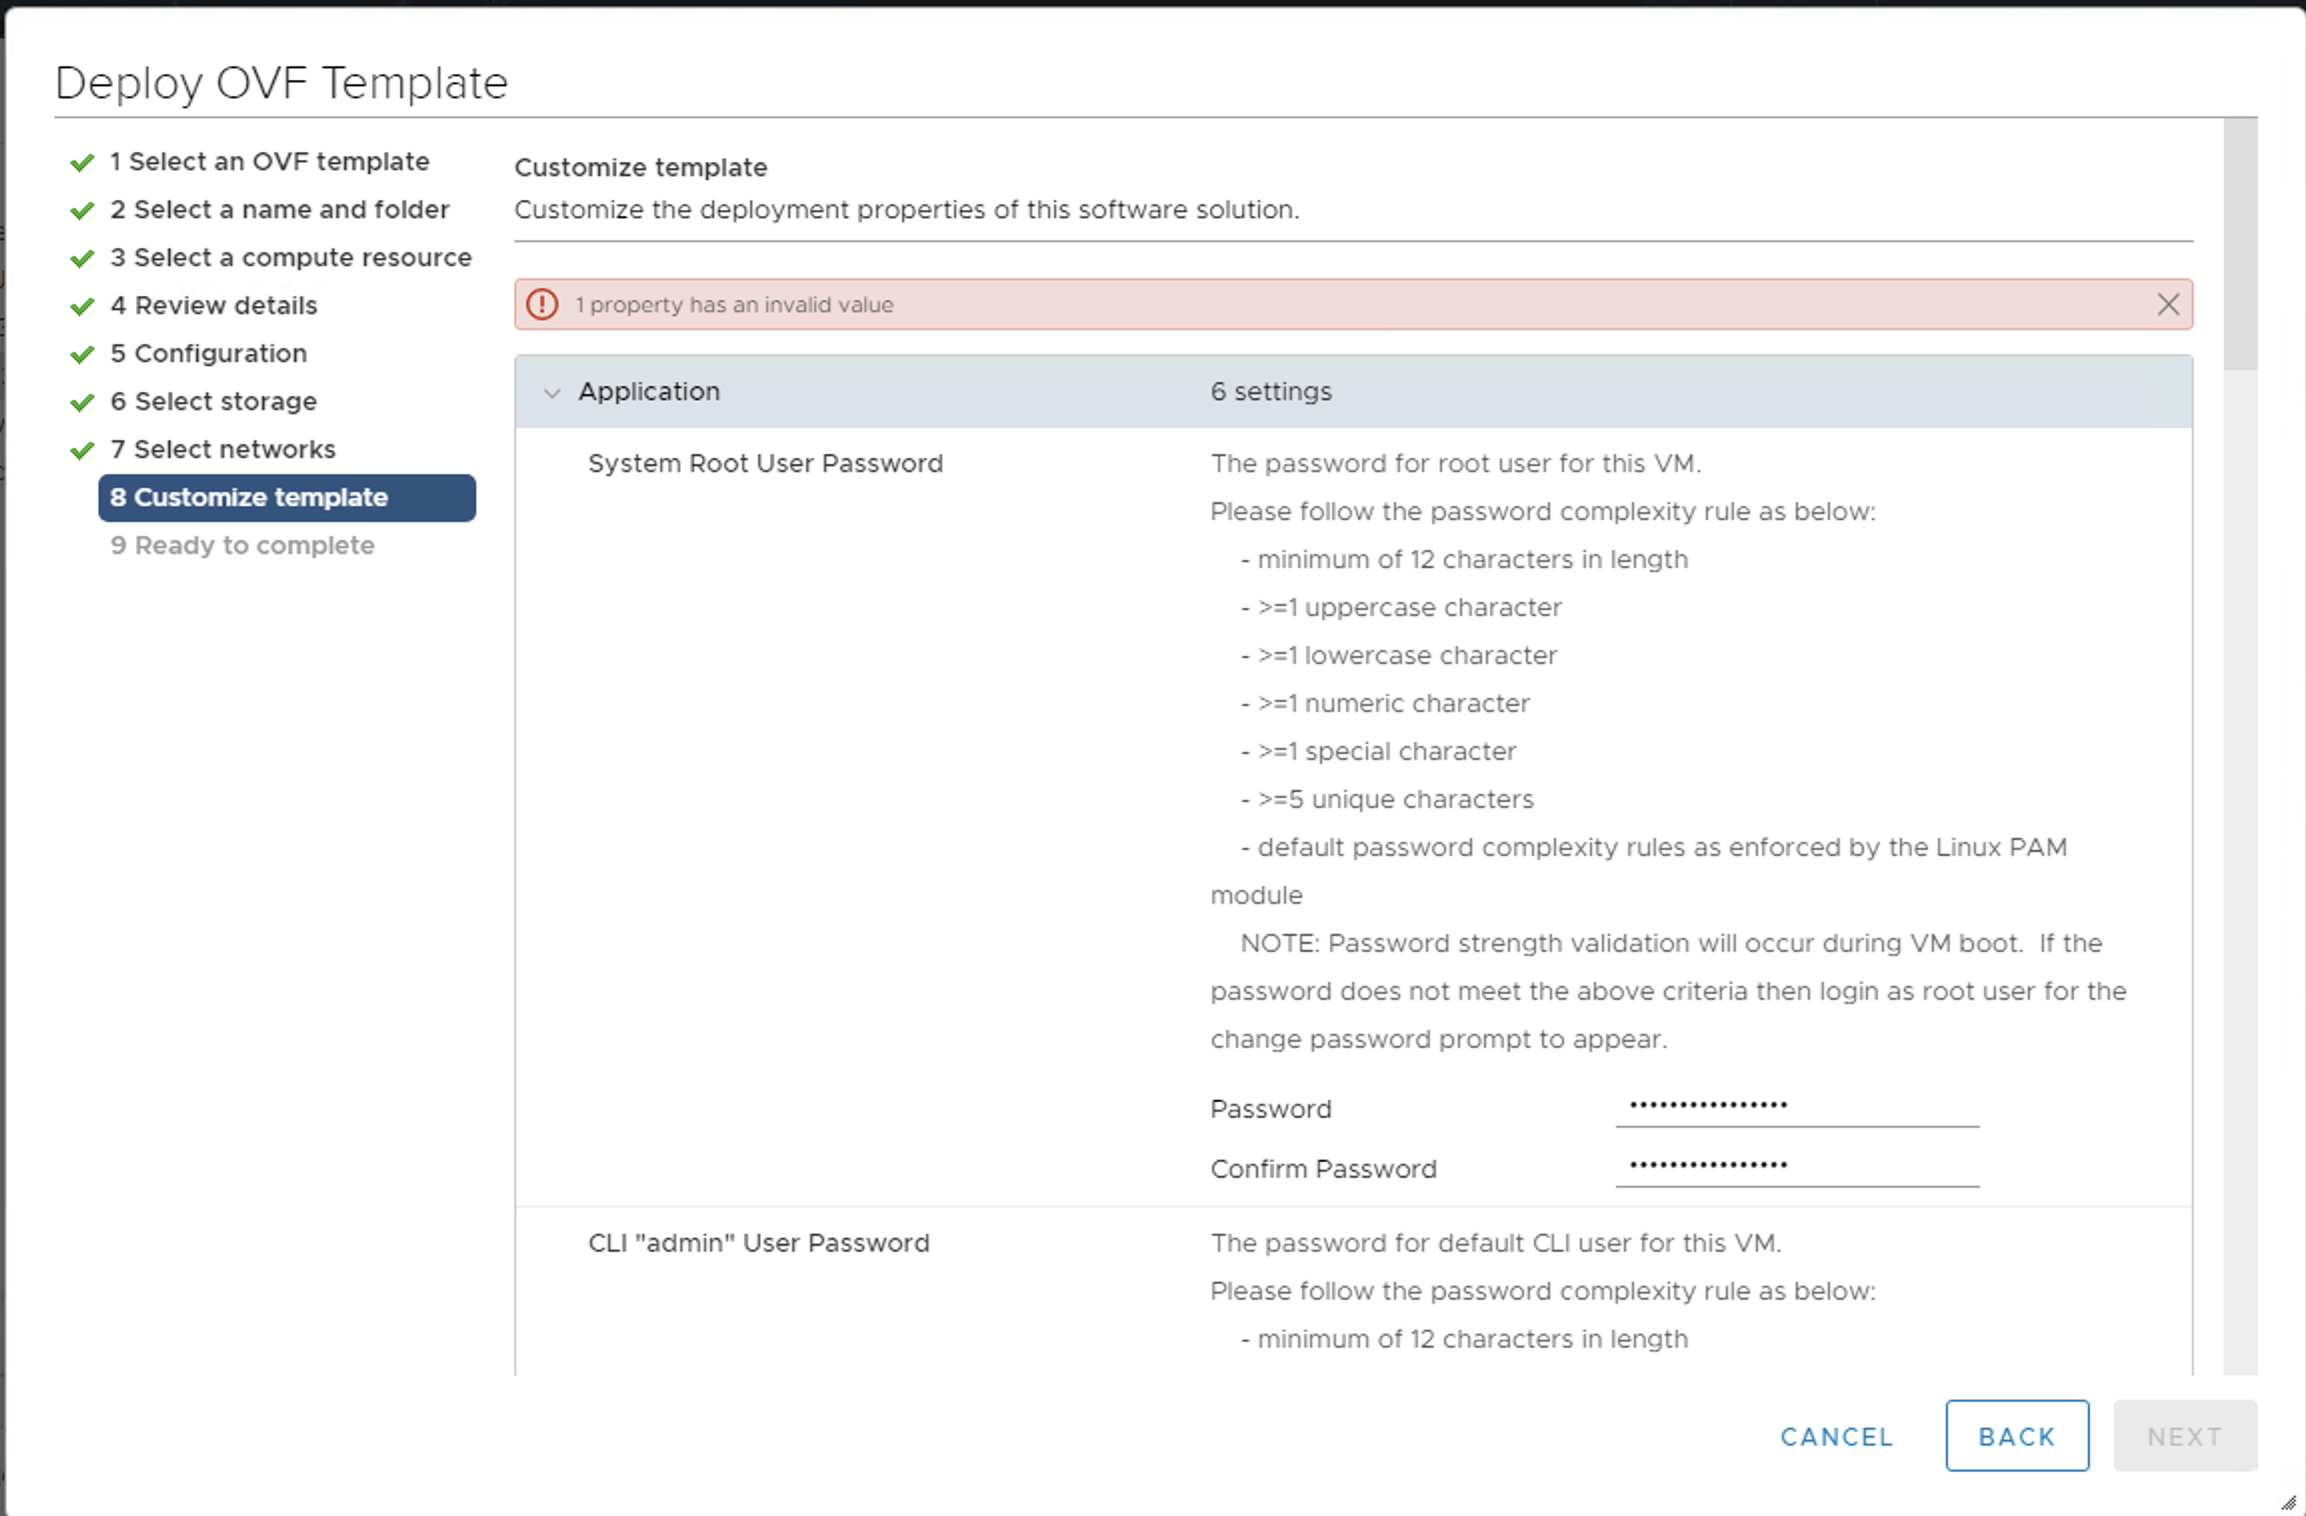
- Enter strong passwords for all user types.
- Enter the hostname, such as
nsx-manager-1. - Enter the rolename, such as
NSX Manager. - Enter the Gateway IP address, such as
10.173.62.253. - Enter a public IP address for the VM, such as
10.173.62.44. - Enter the Netmask, such as
255.255.255.0.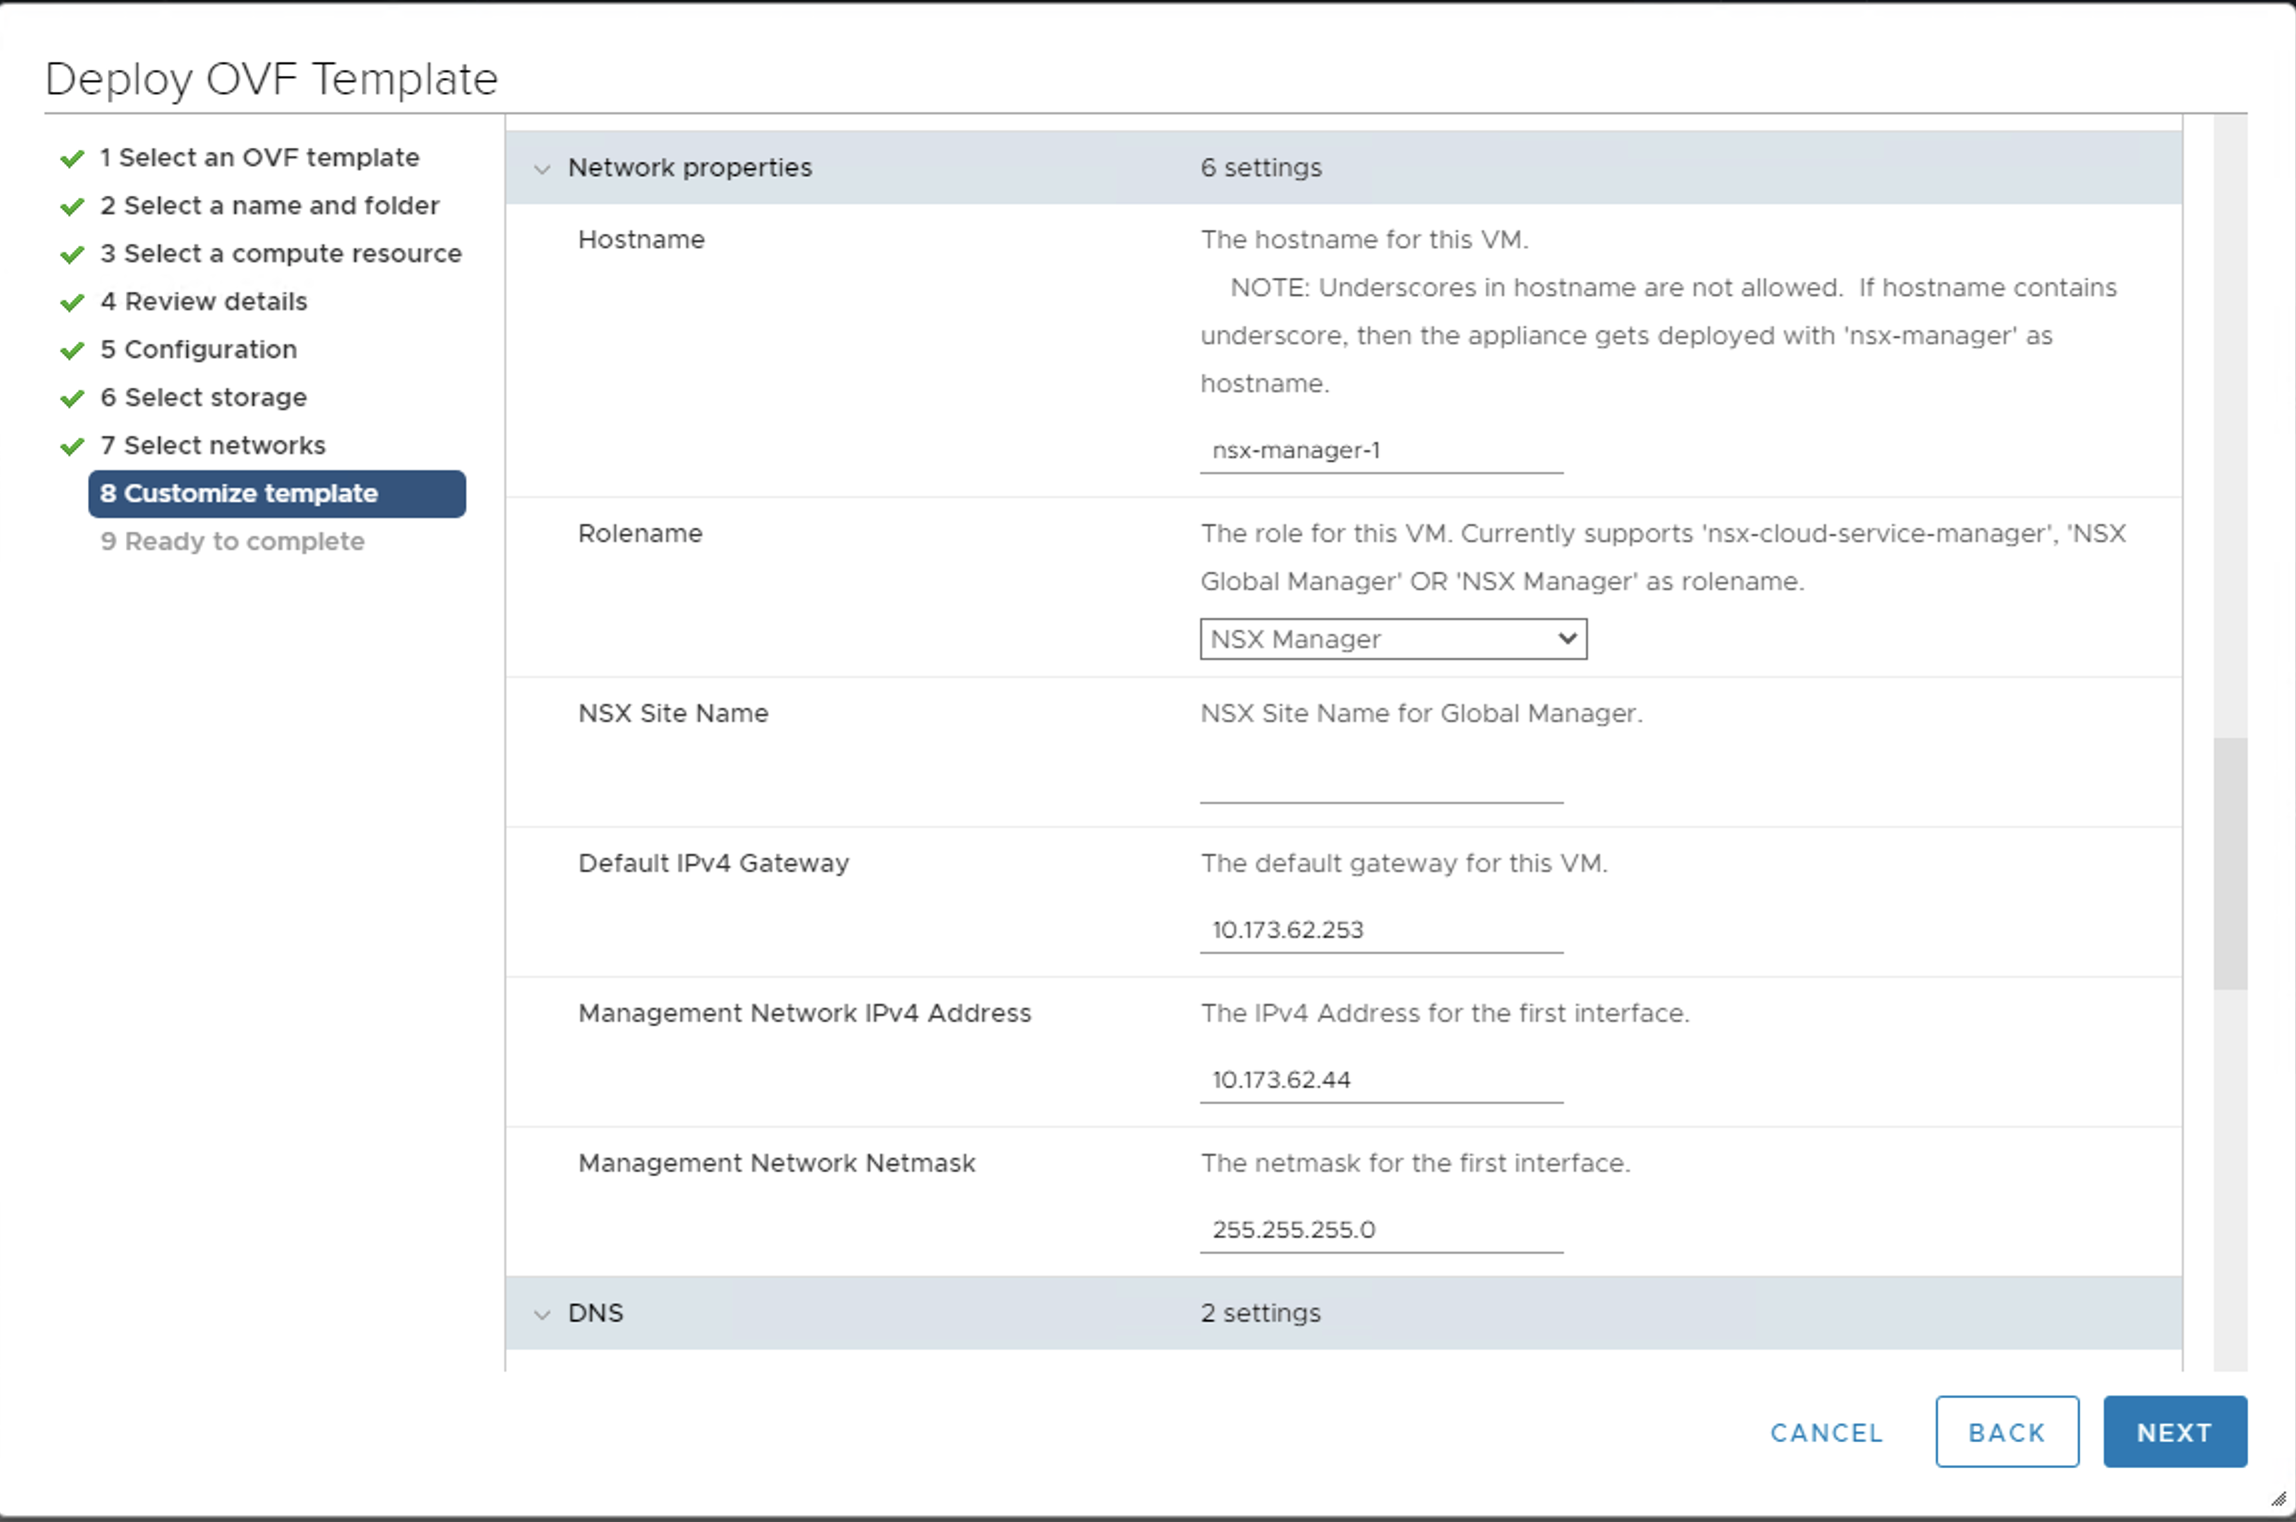
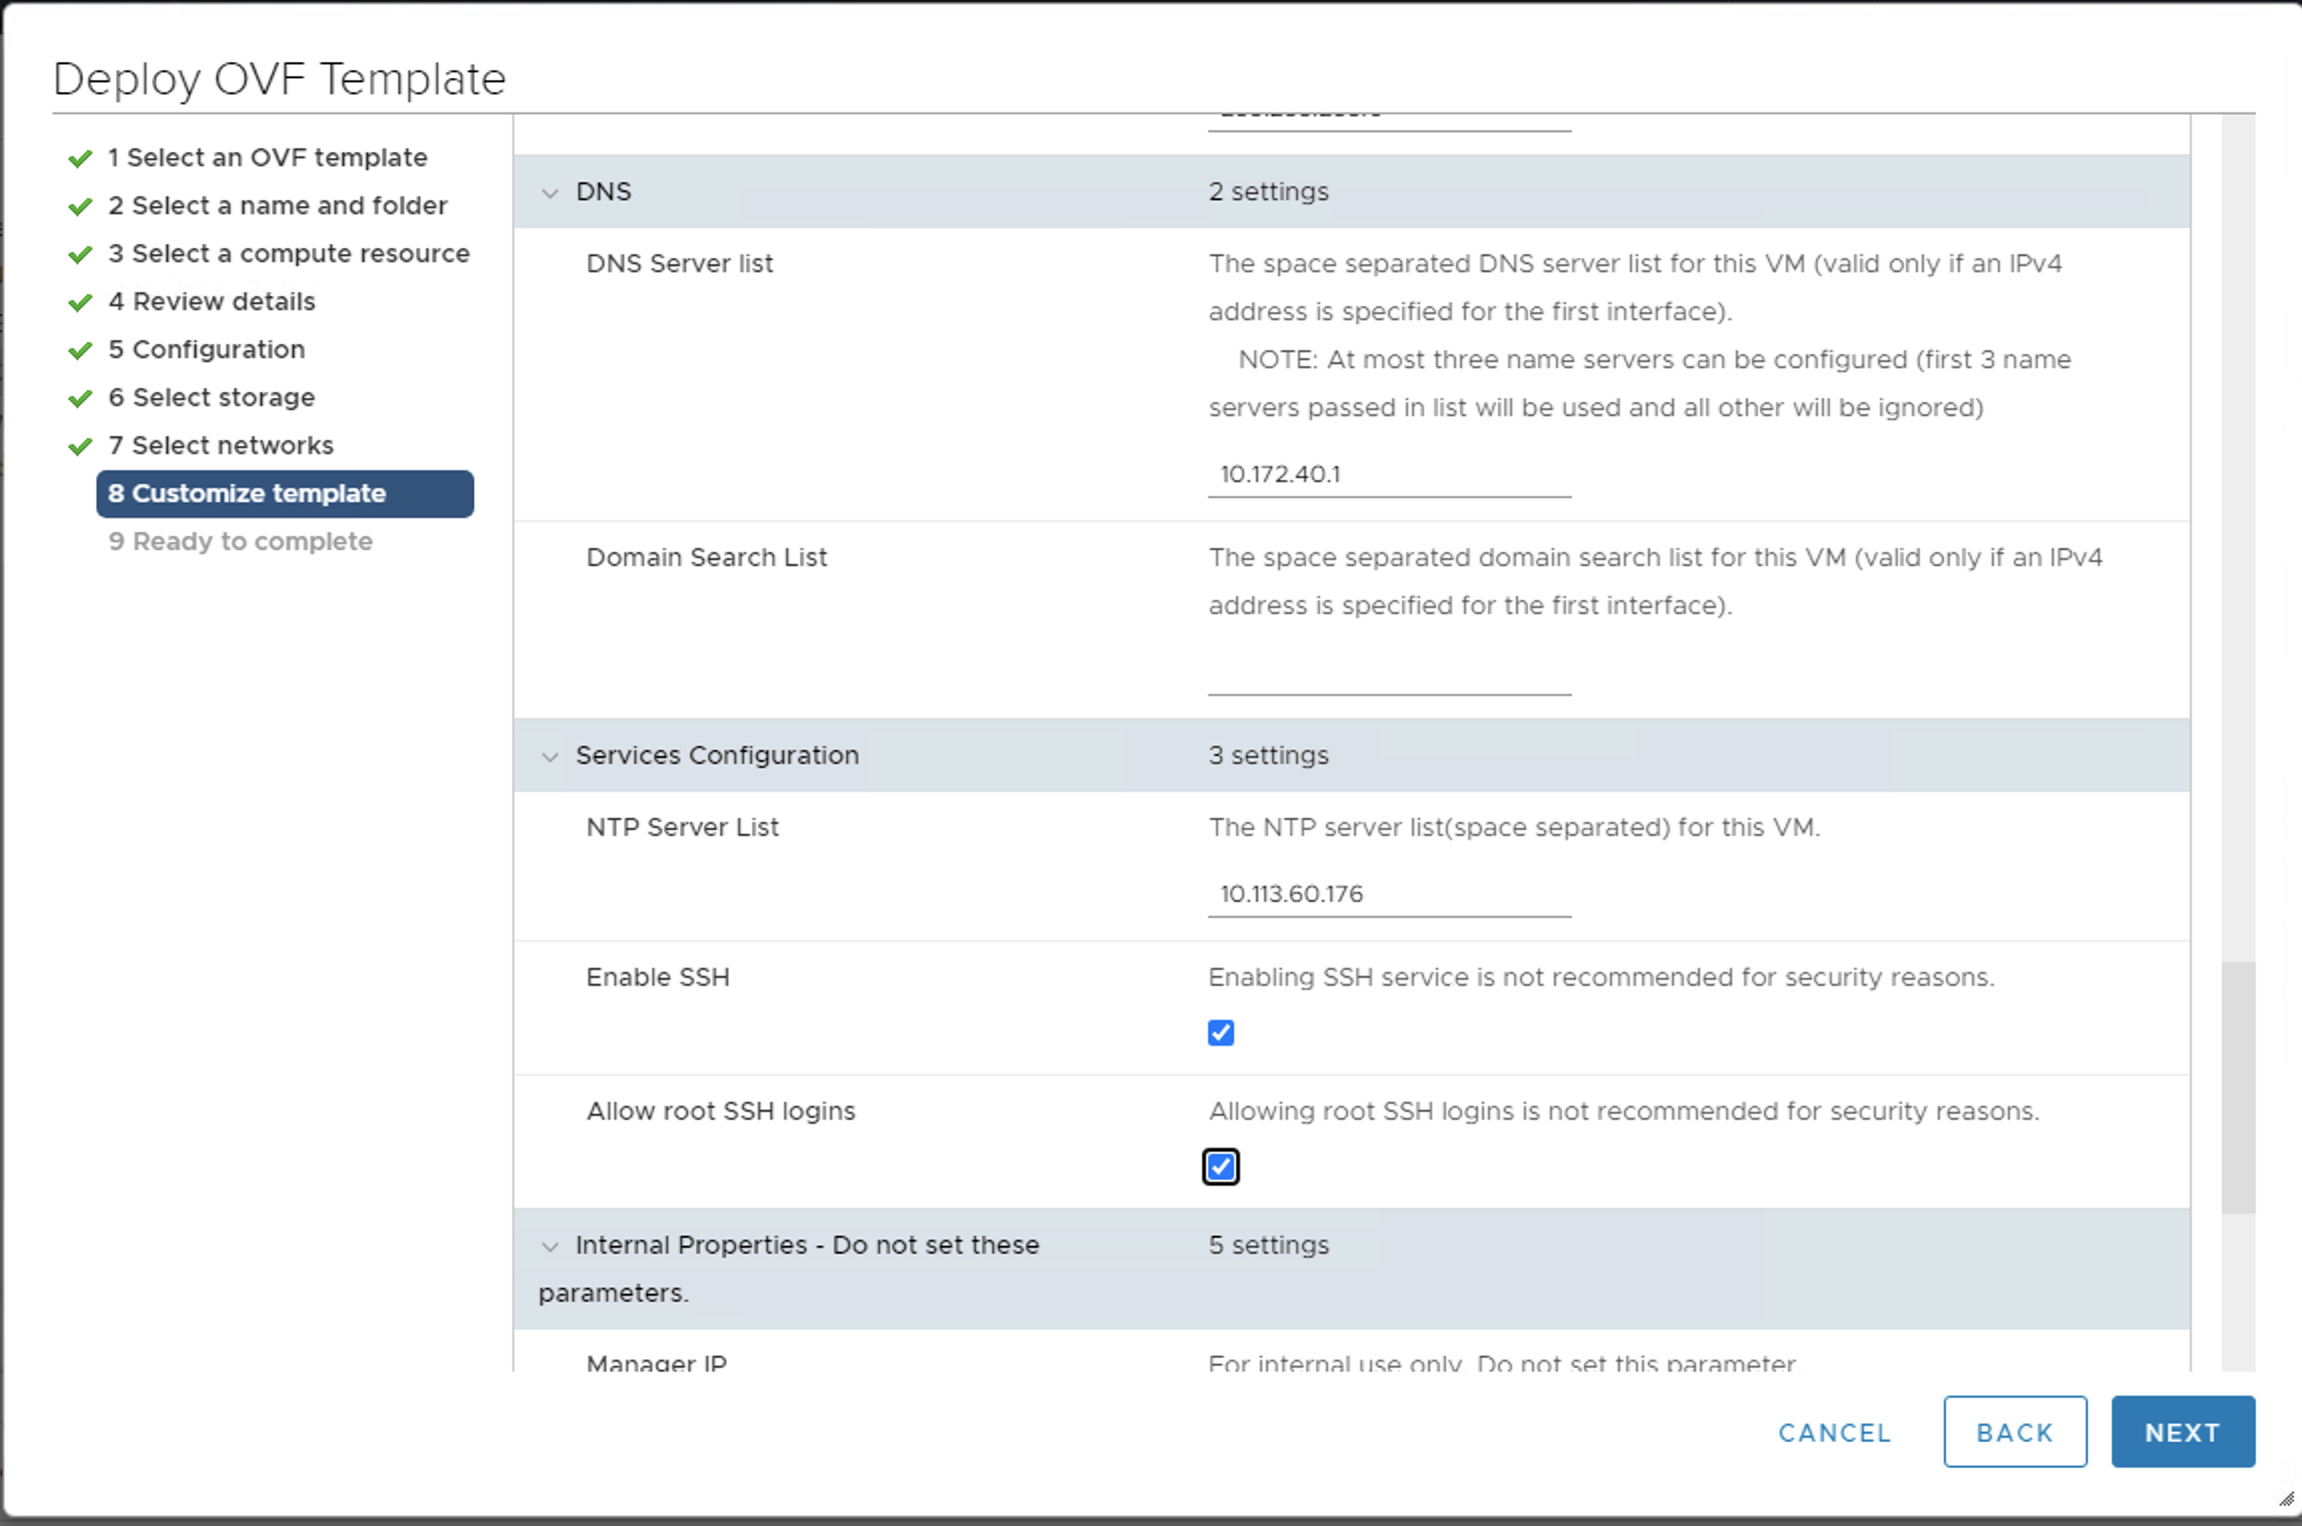
- Enter the DNS server, such as
10.172.40.1. - Enter the
NTP server, such as10.113.60.176. - Enable the Enable SSH check box.
- Enable the Allow SSH root logins check box.
- Click Finish, and NSX-T Manager 1 starts deploying.
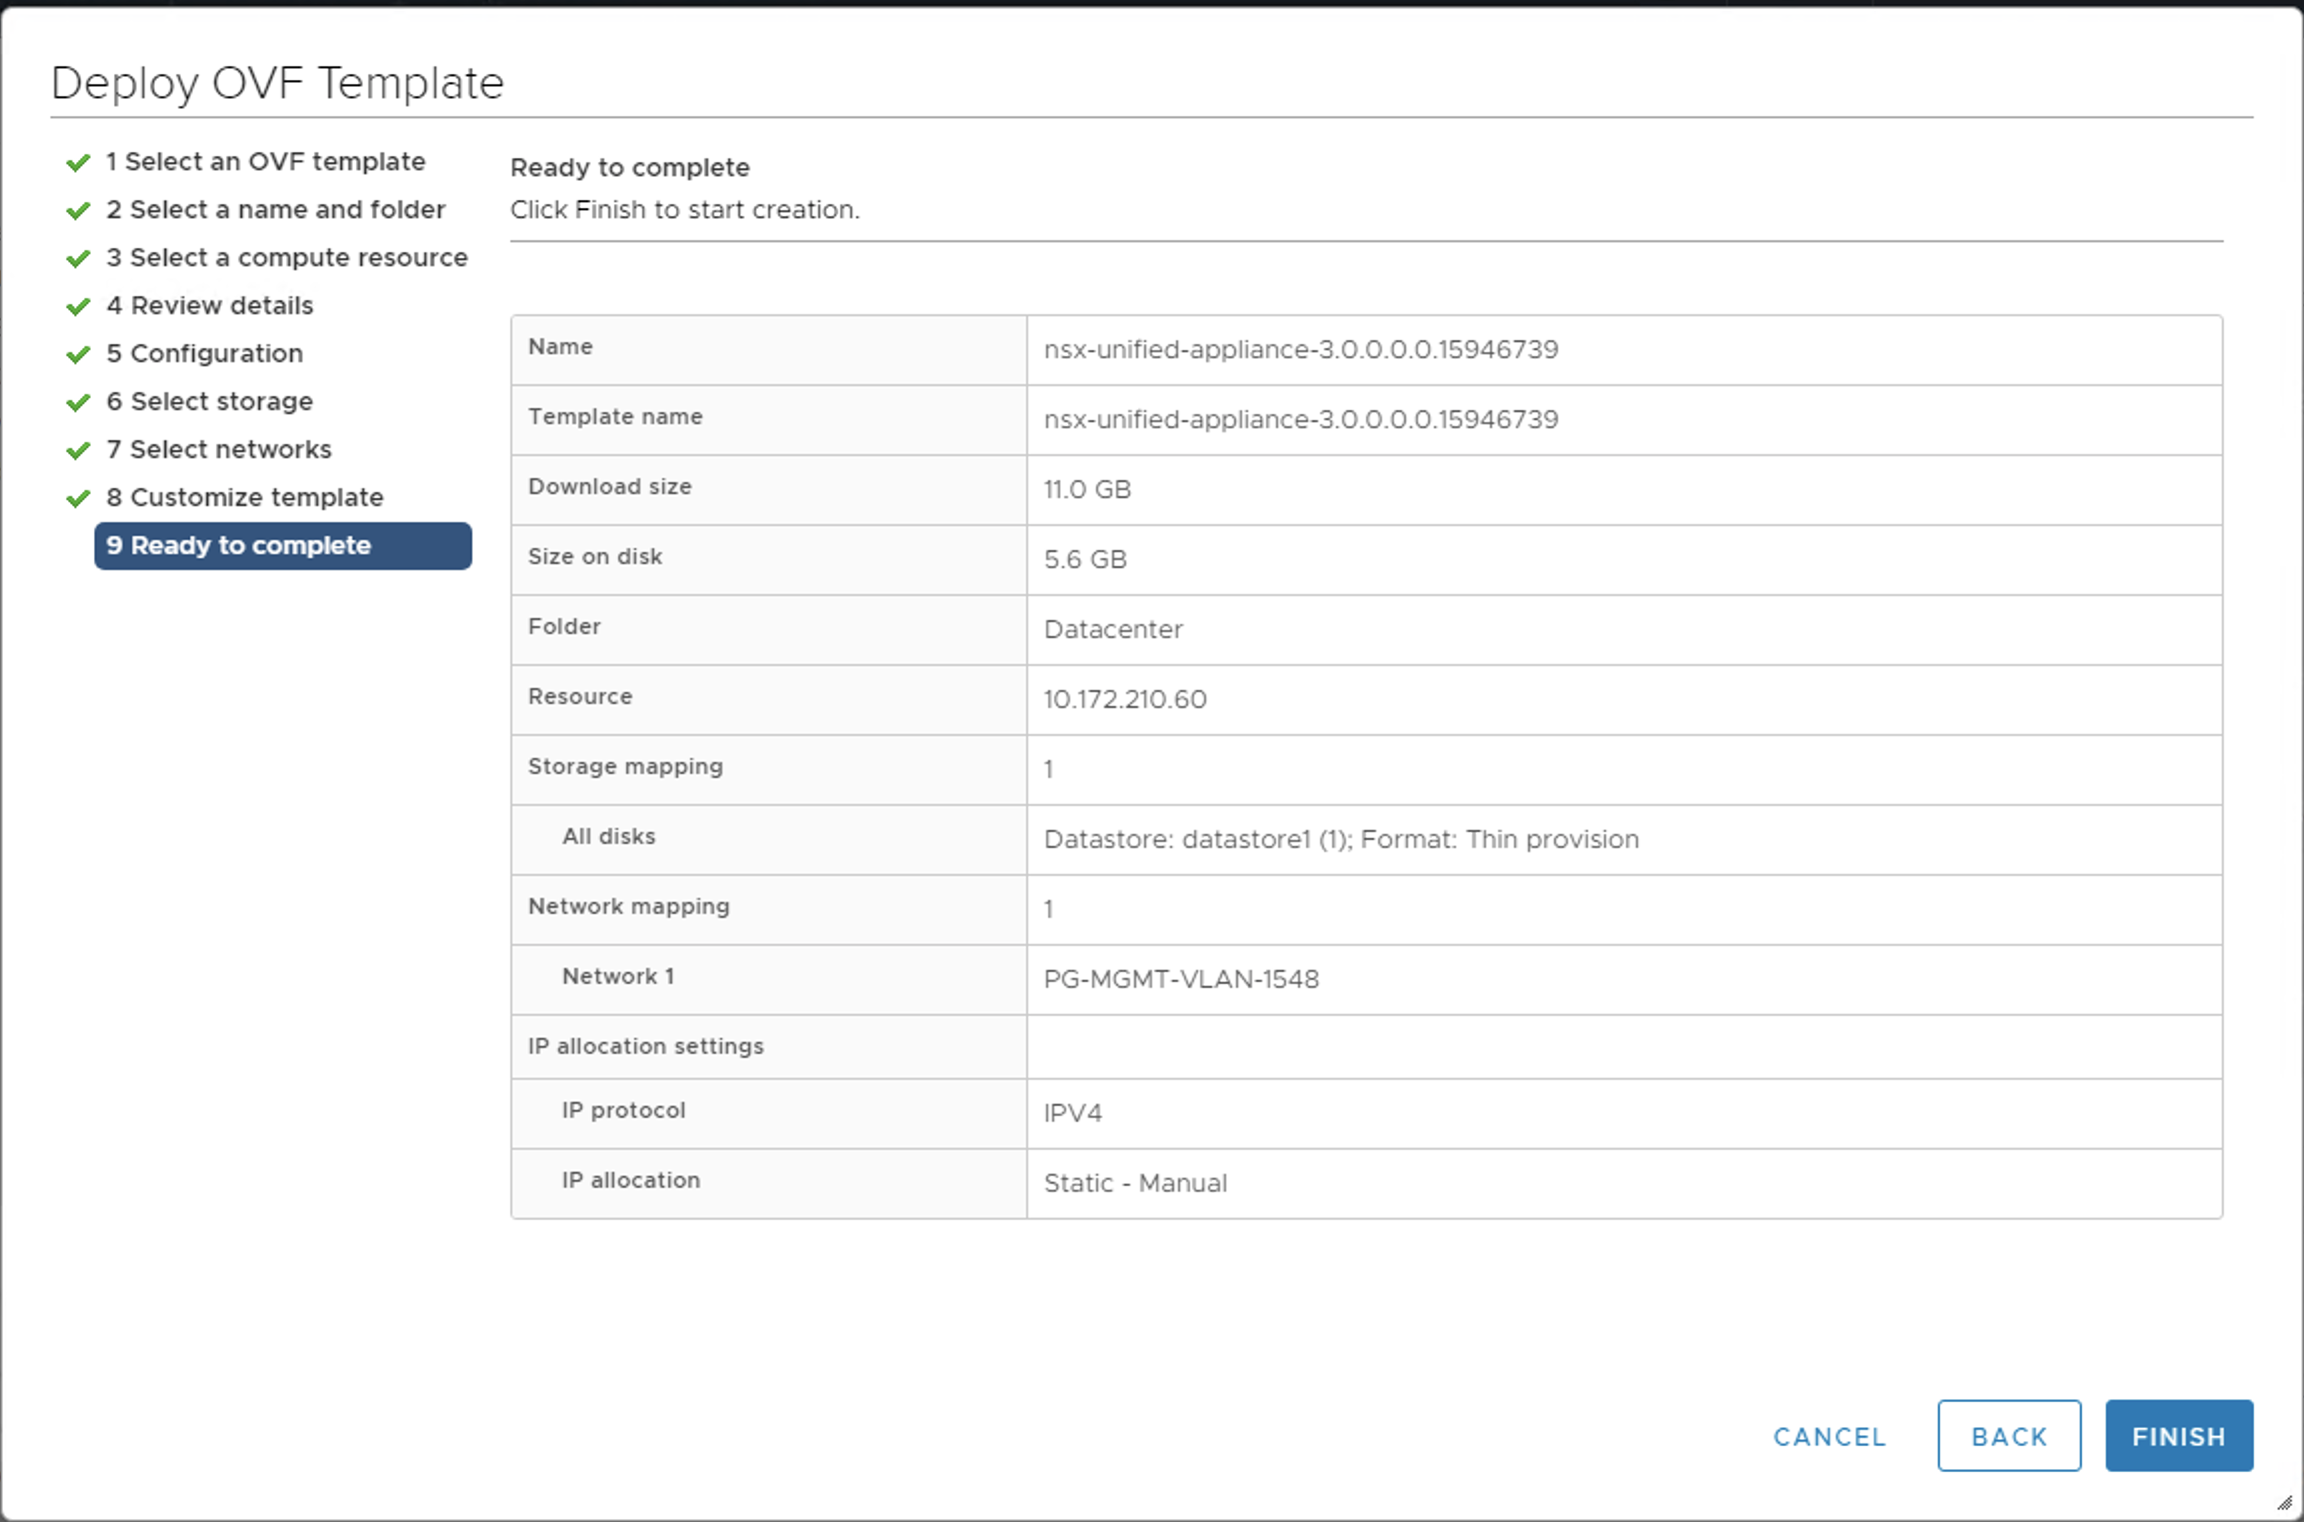
- Monitor the deployment using the Recent Tasks pane.
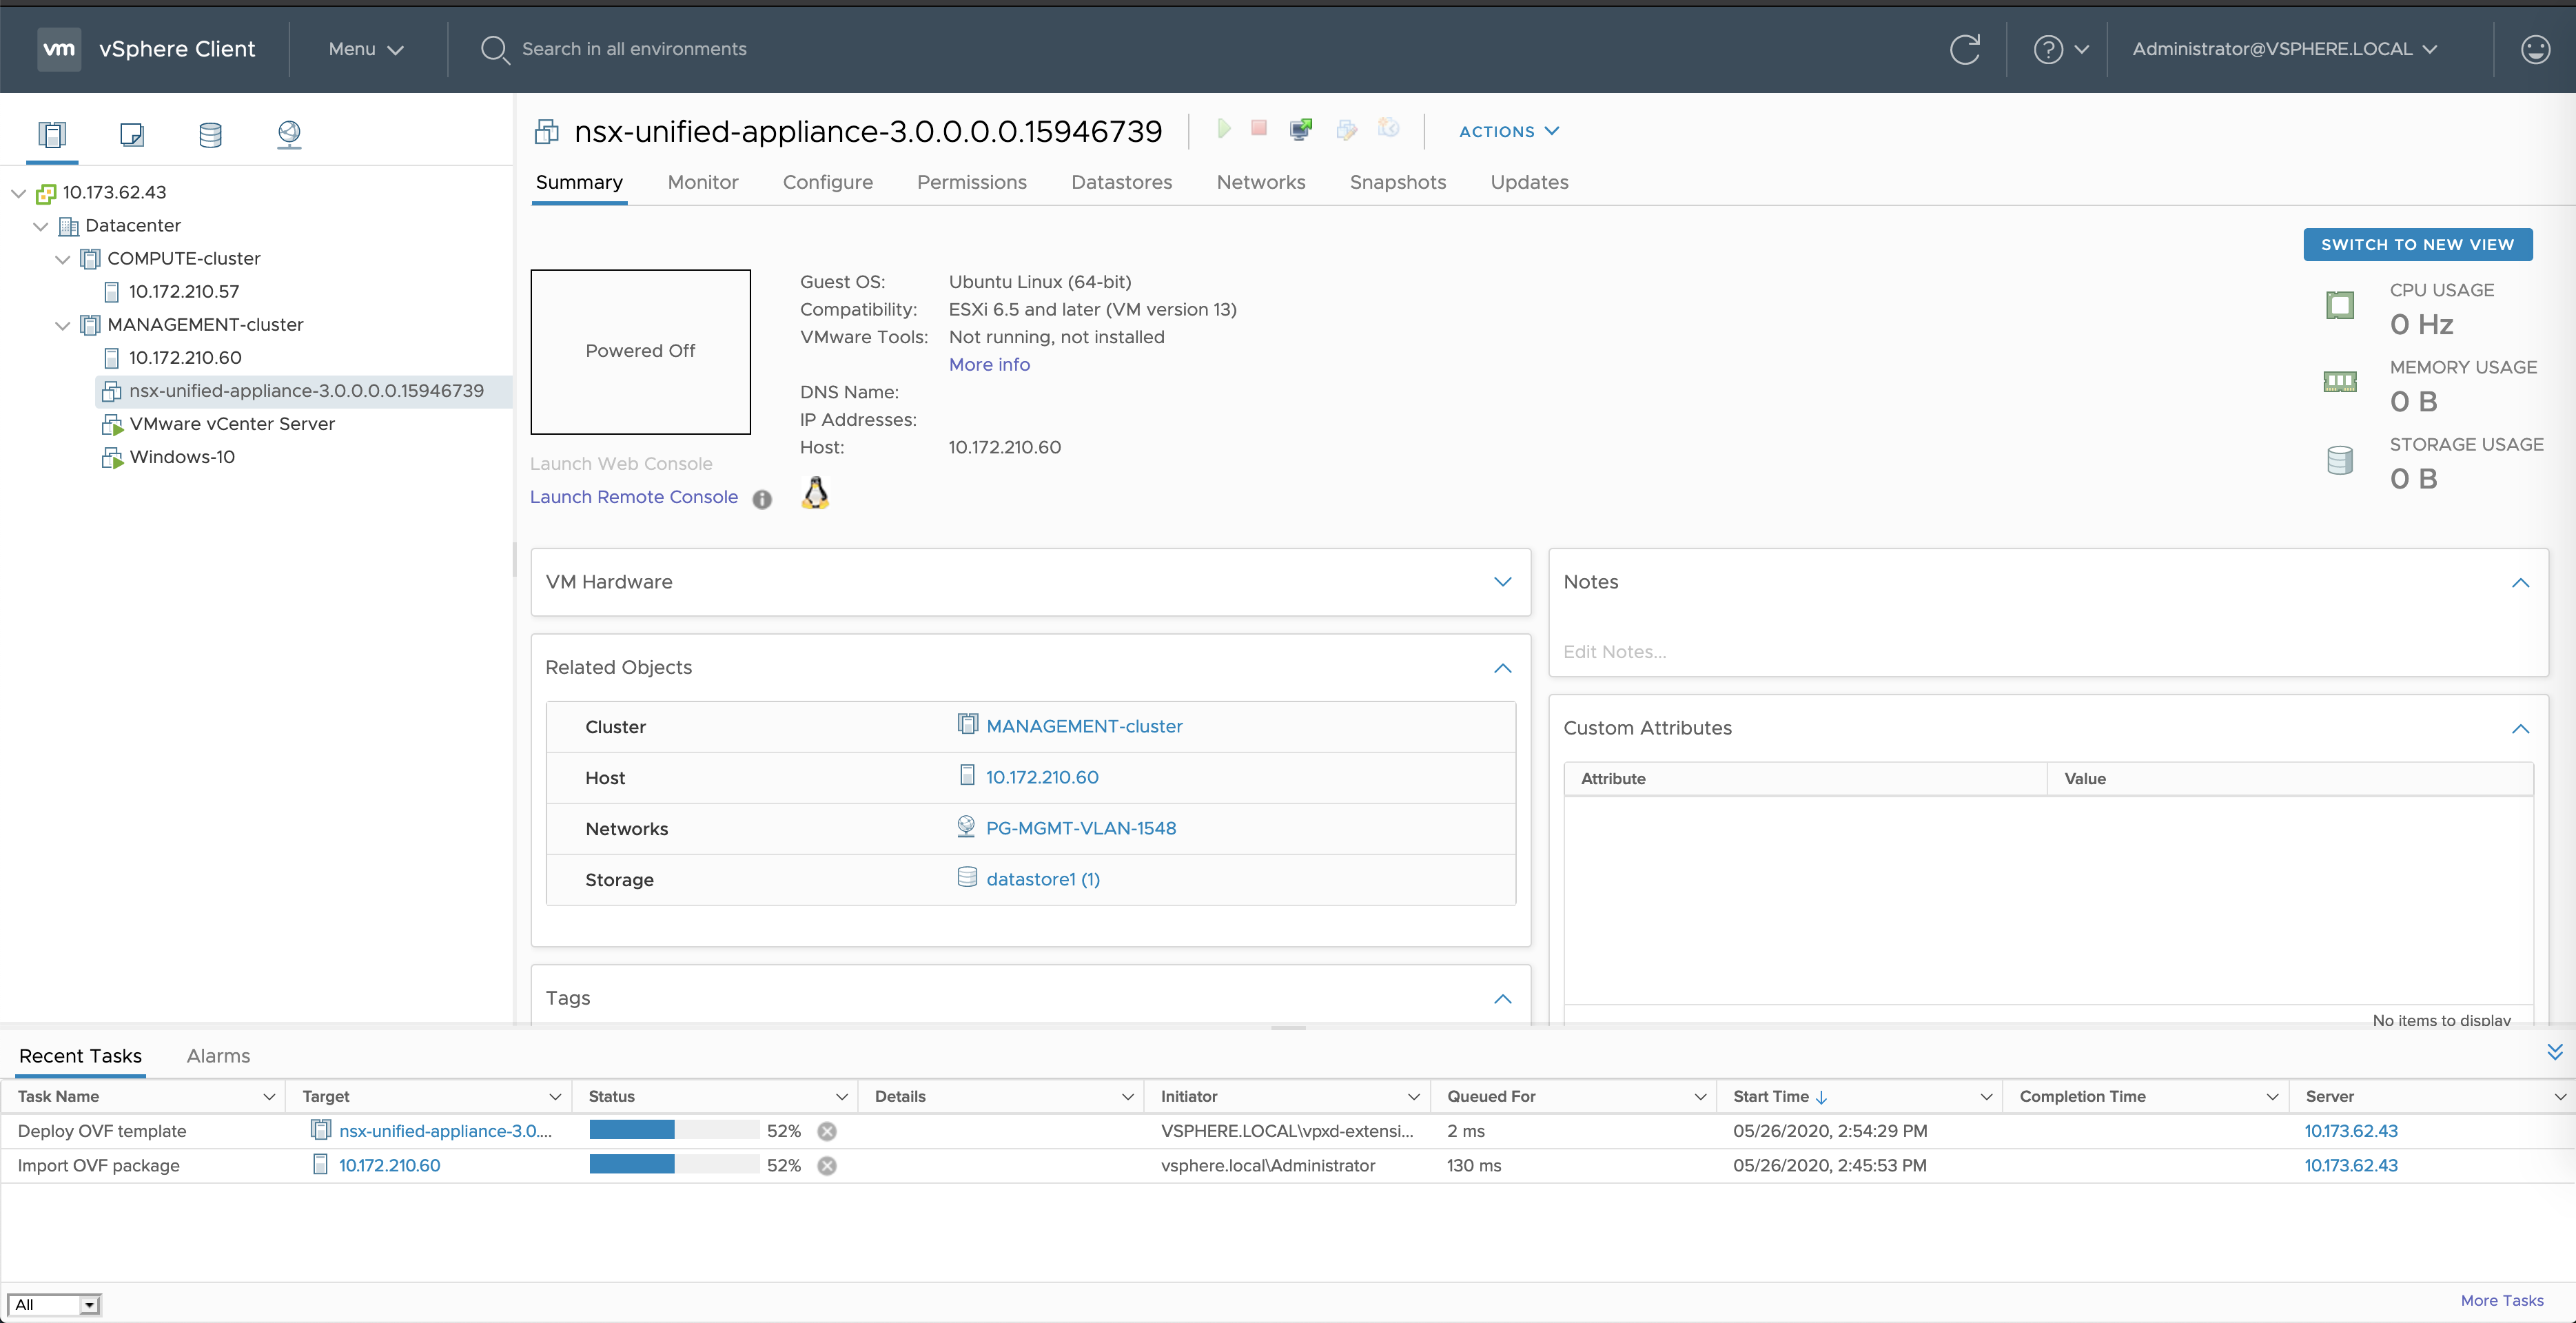
- When the deployment completes, select the VM and power it on.
- Access the NSX-T Manager 1 web console by navigating to the URL, such as:
https://10.173.62.44/.
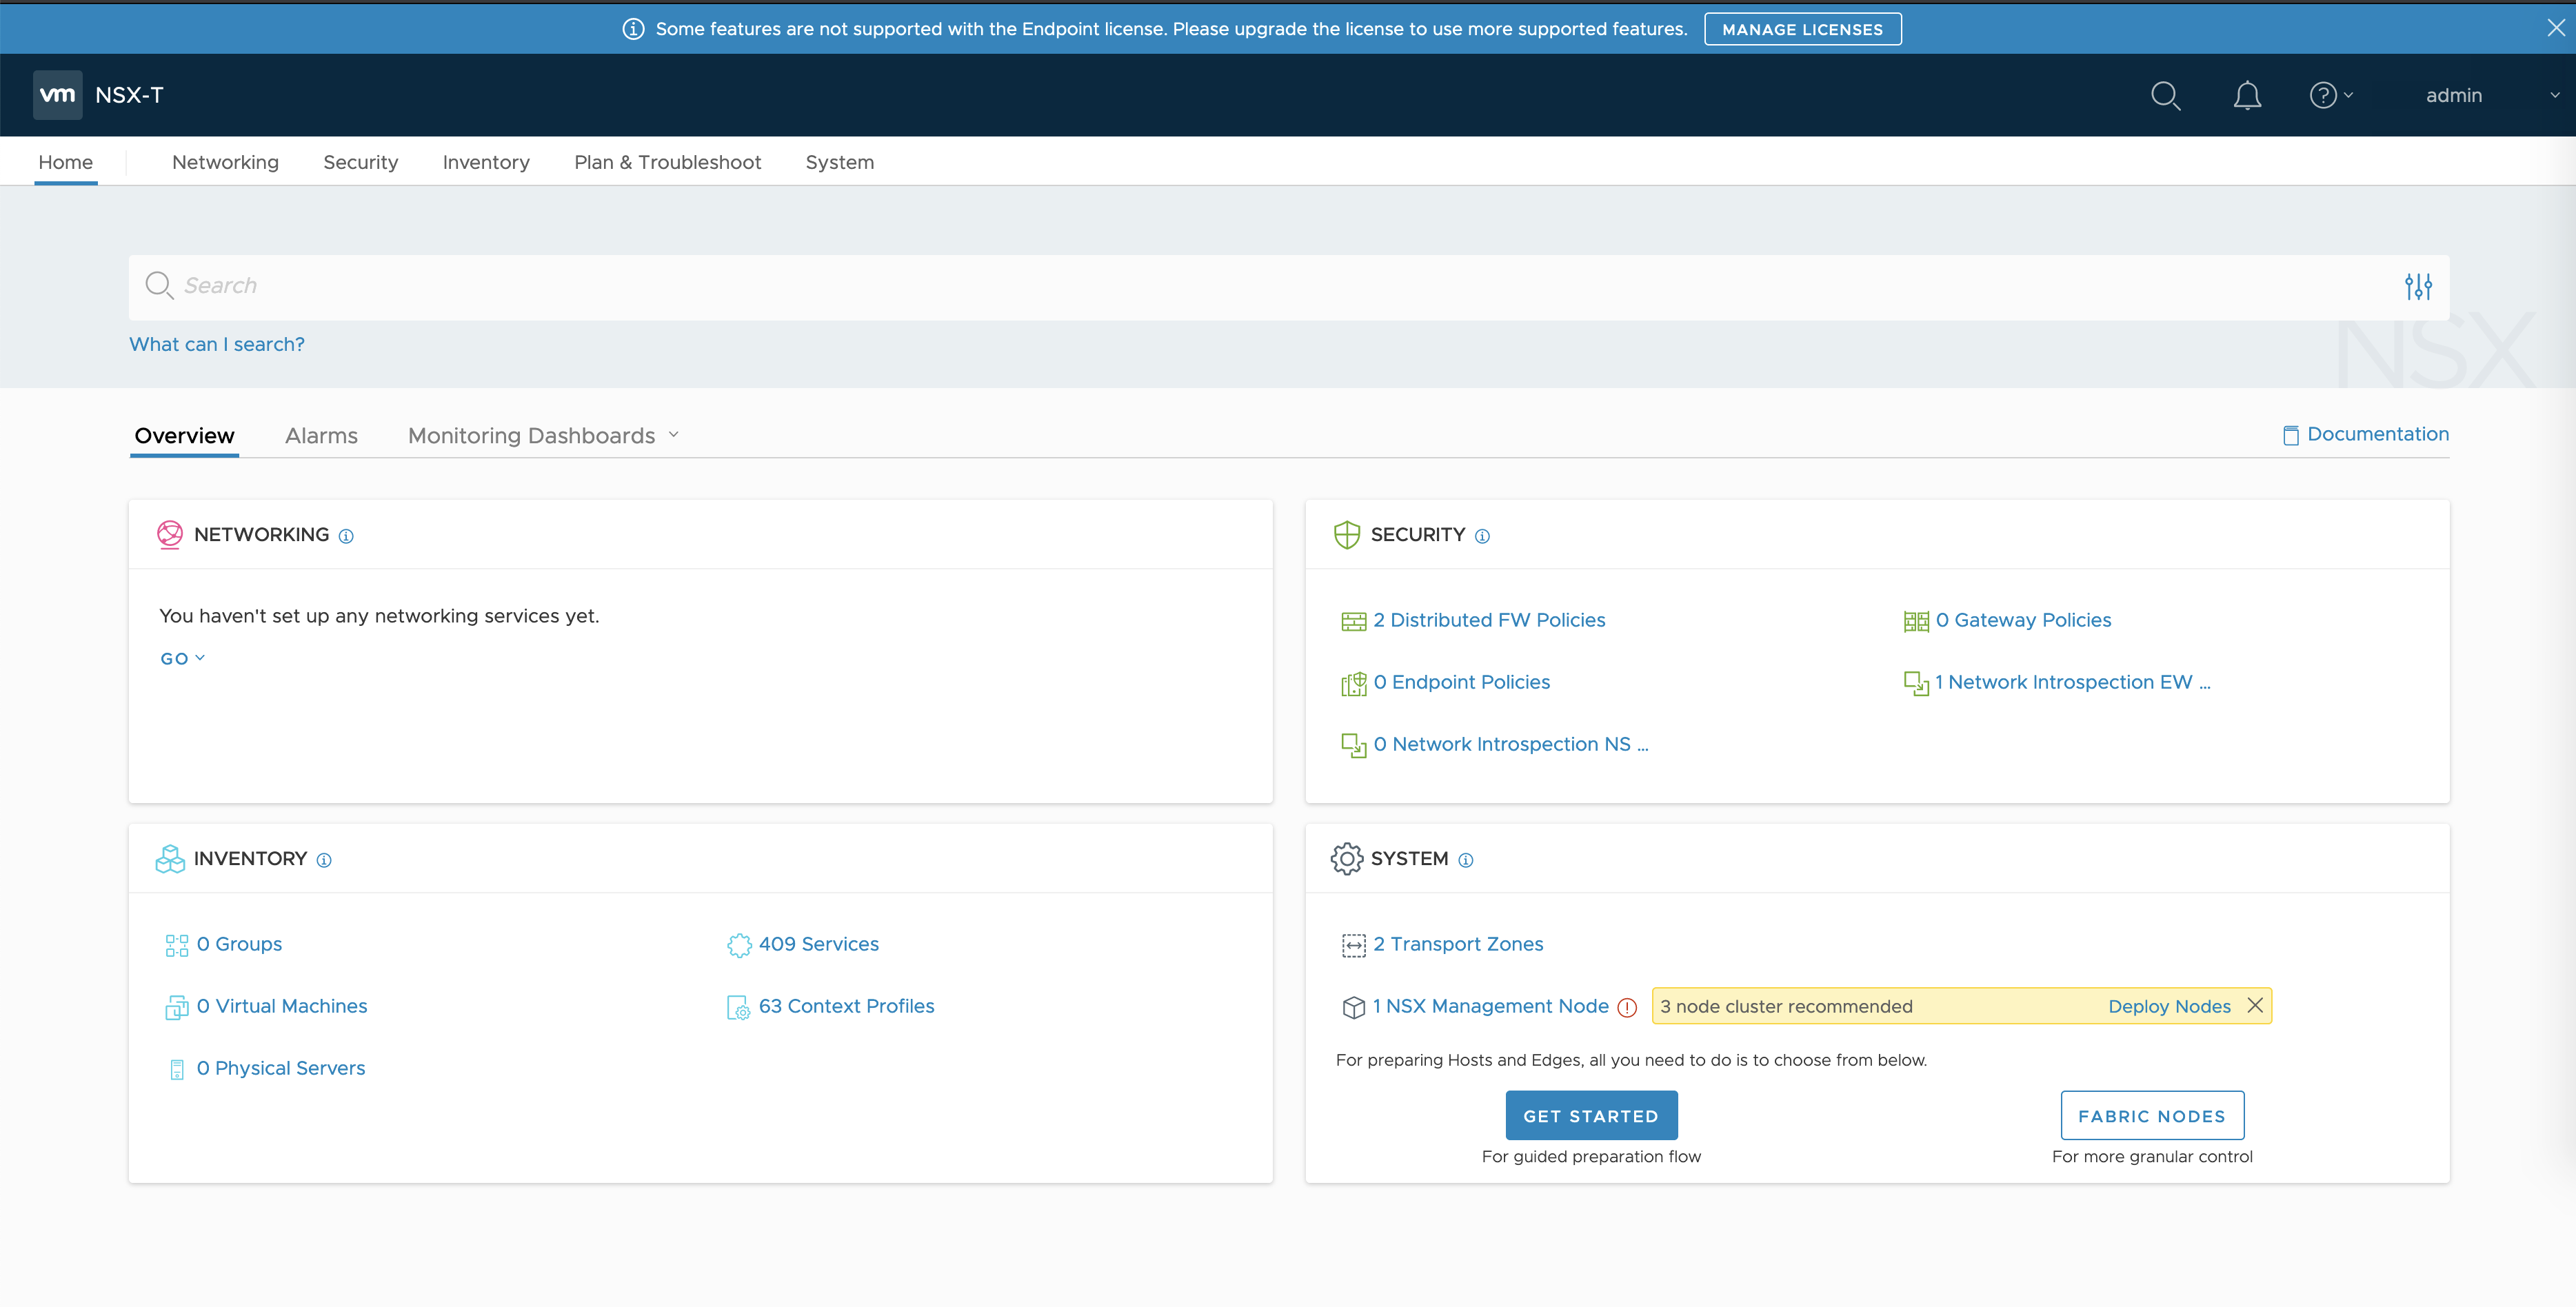
- Log in and verify the installation. Note the system message that a “3 node cluster” is recommended.
Add vCenter as the Compute Manager
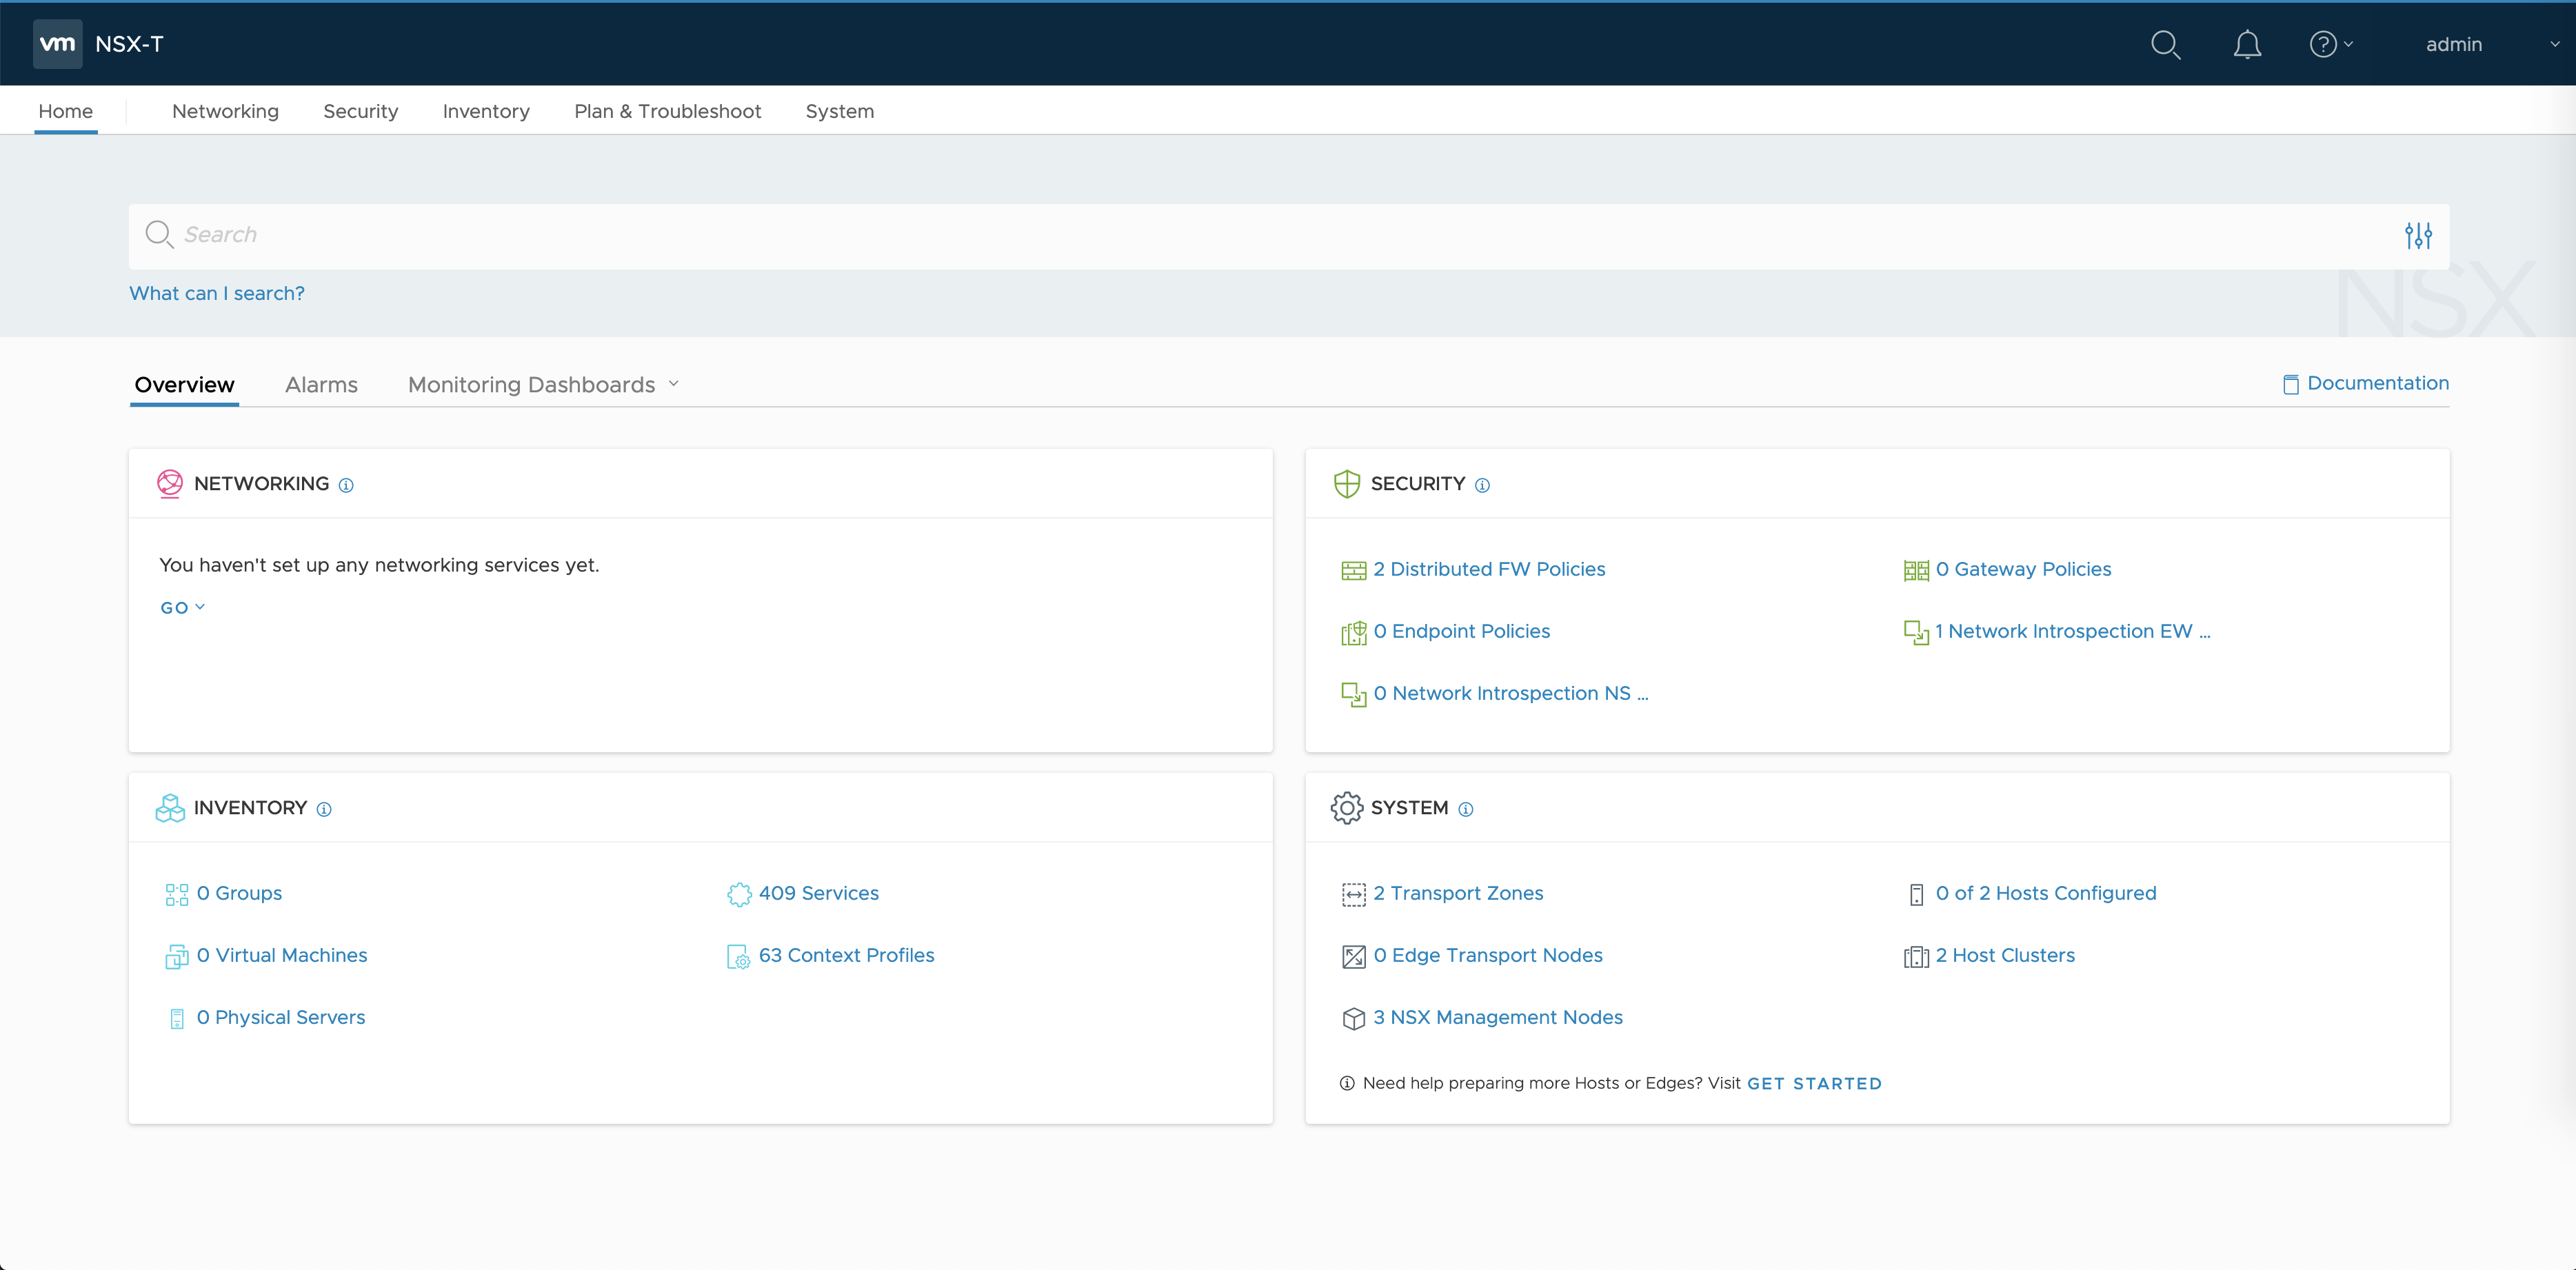
A compute manager is required for NSX-T environments with multiple NSX-T Manager nodes. A compute manager is an application that manages resources such as hosts and VMs. For TKGI we use the vCenter Server as the compute manager.
Complete the following steps to add vCenter as the Compute Manager. For additional guidance, refer to the NSX-T documentation.
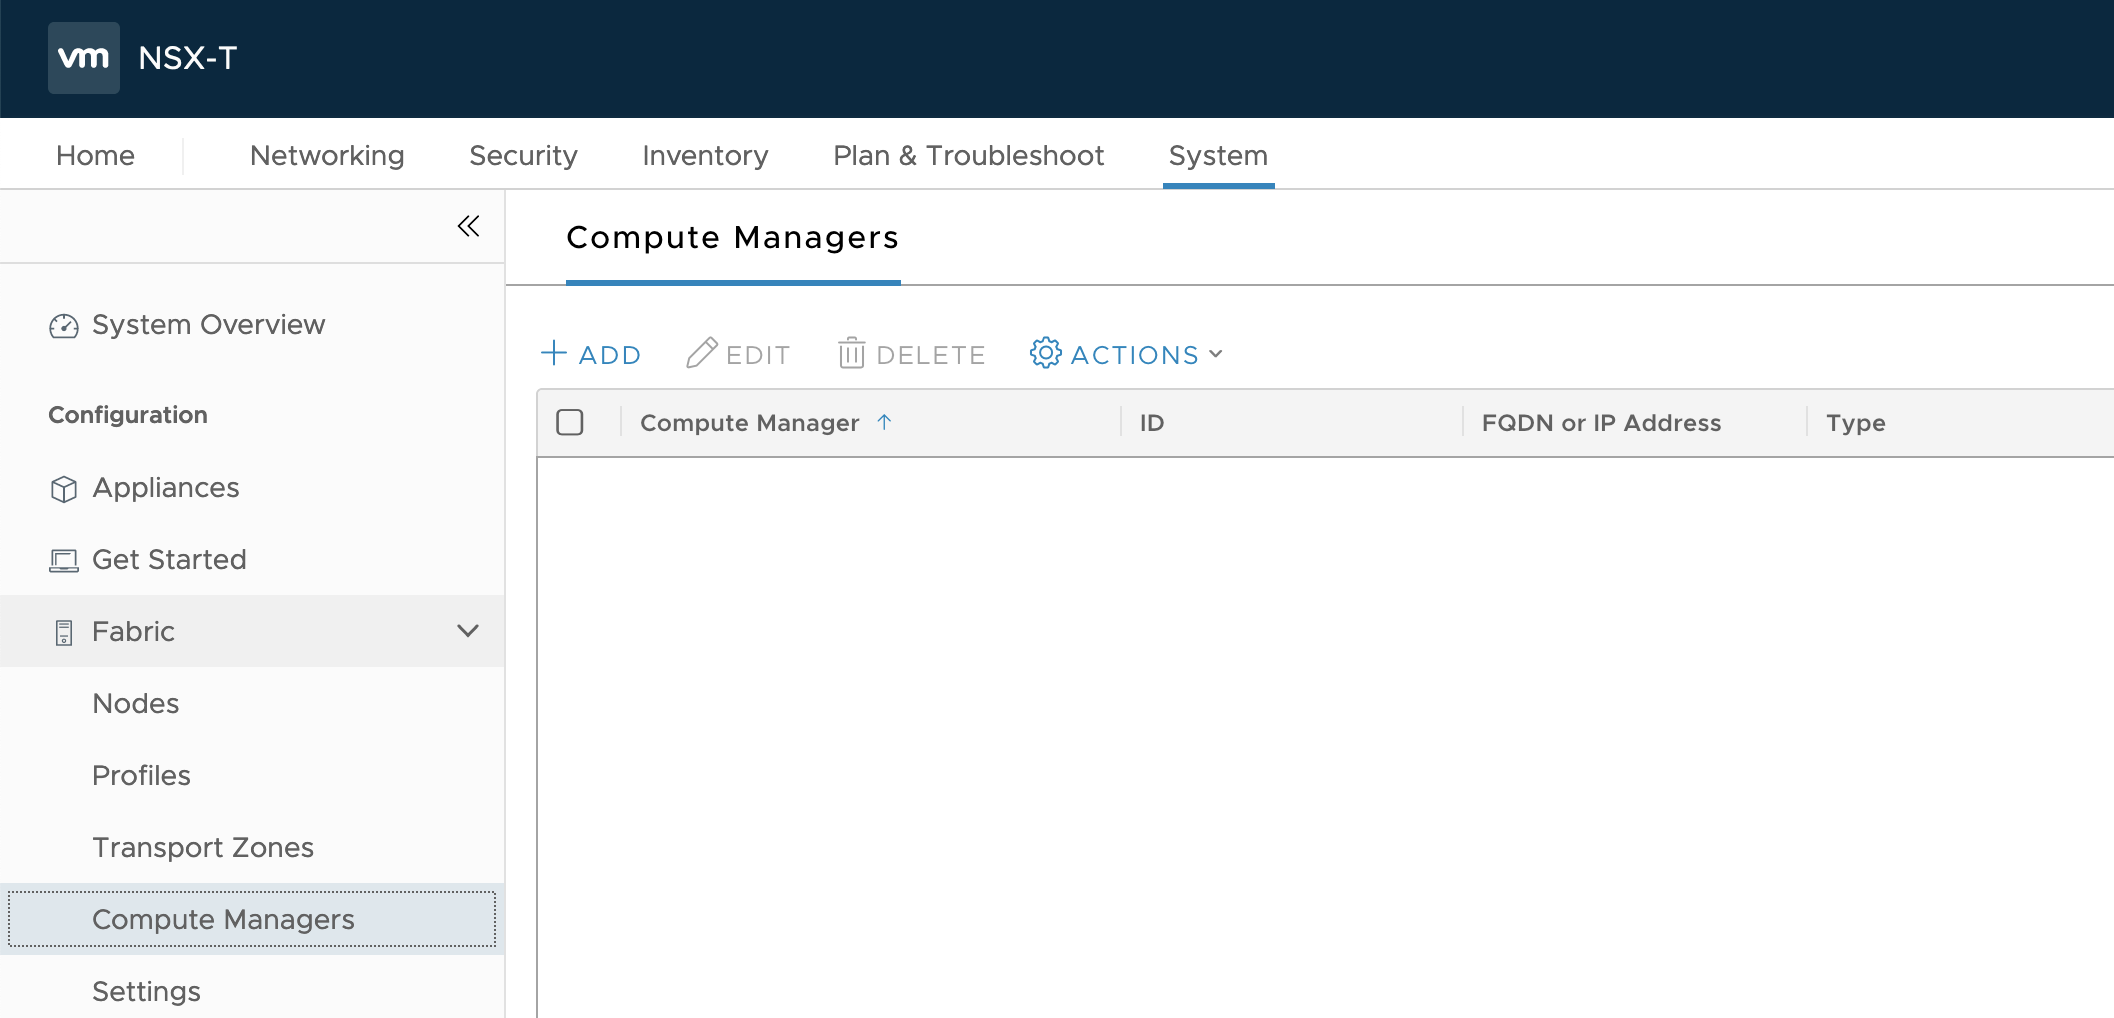
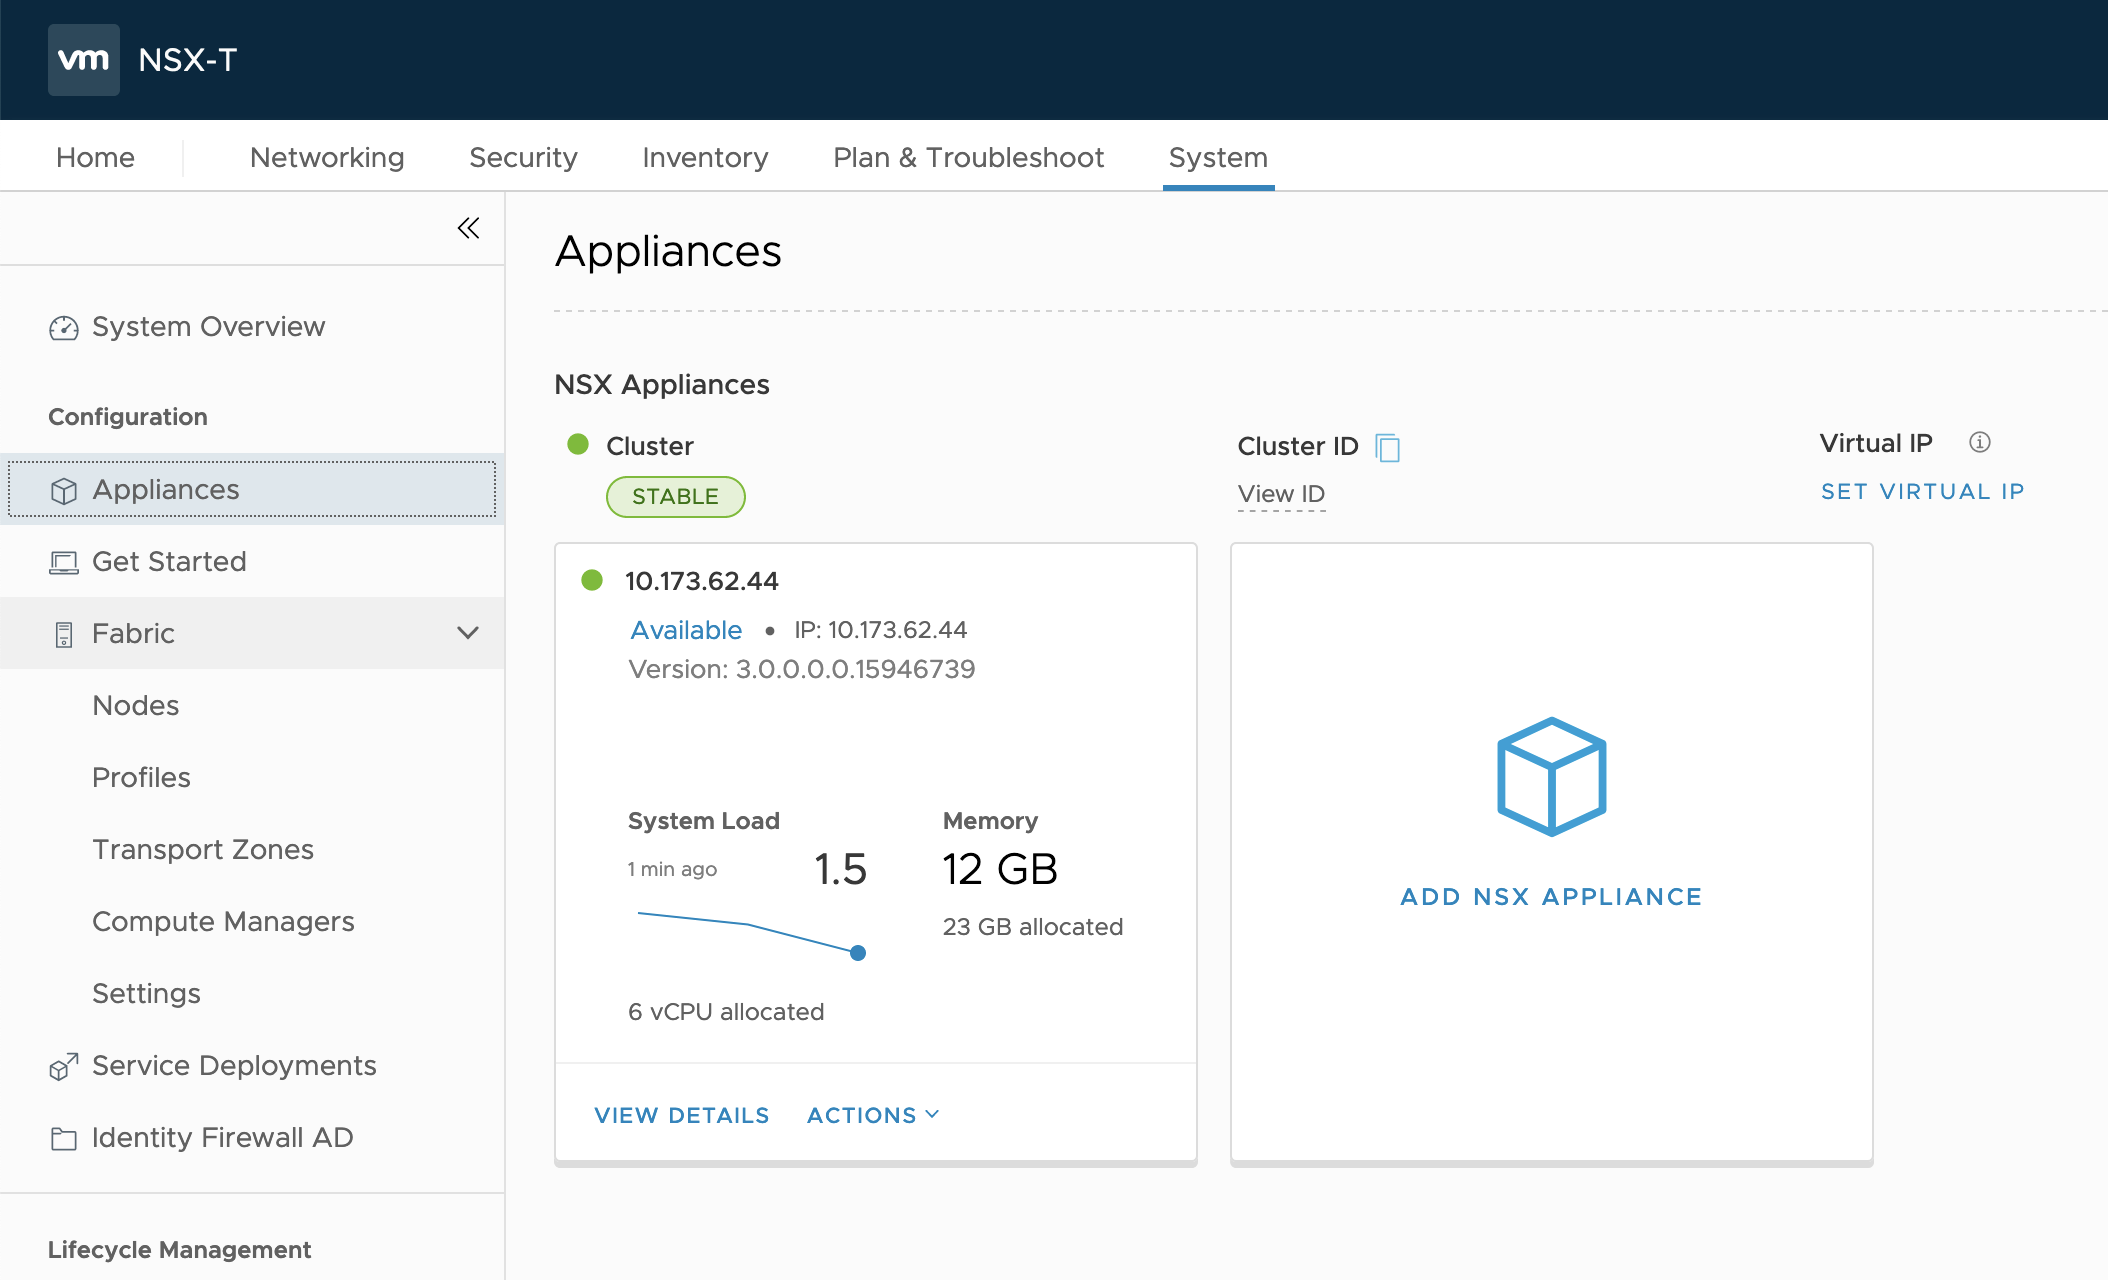
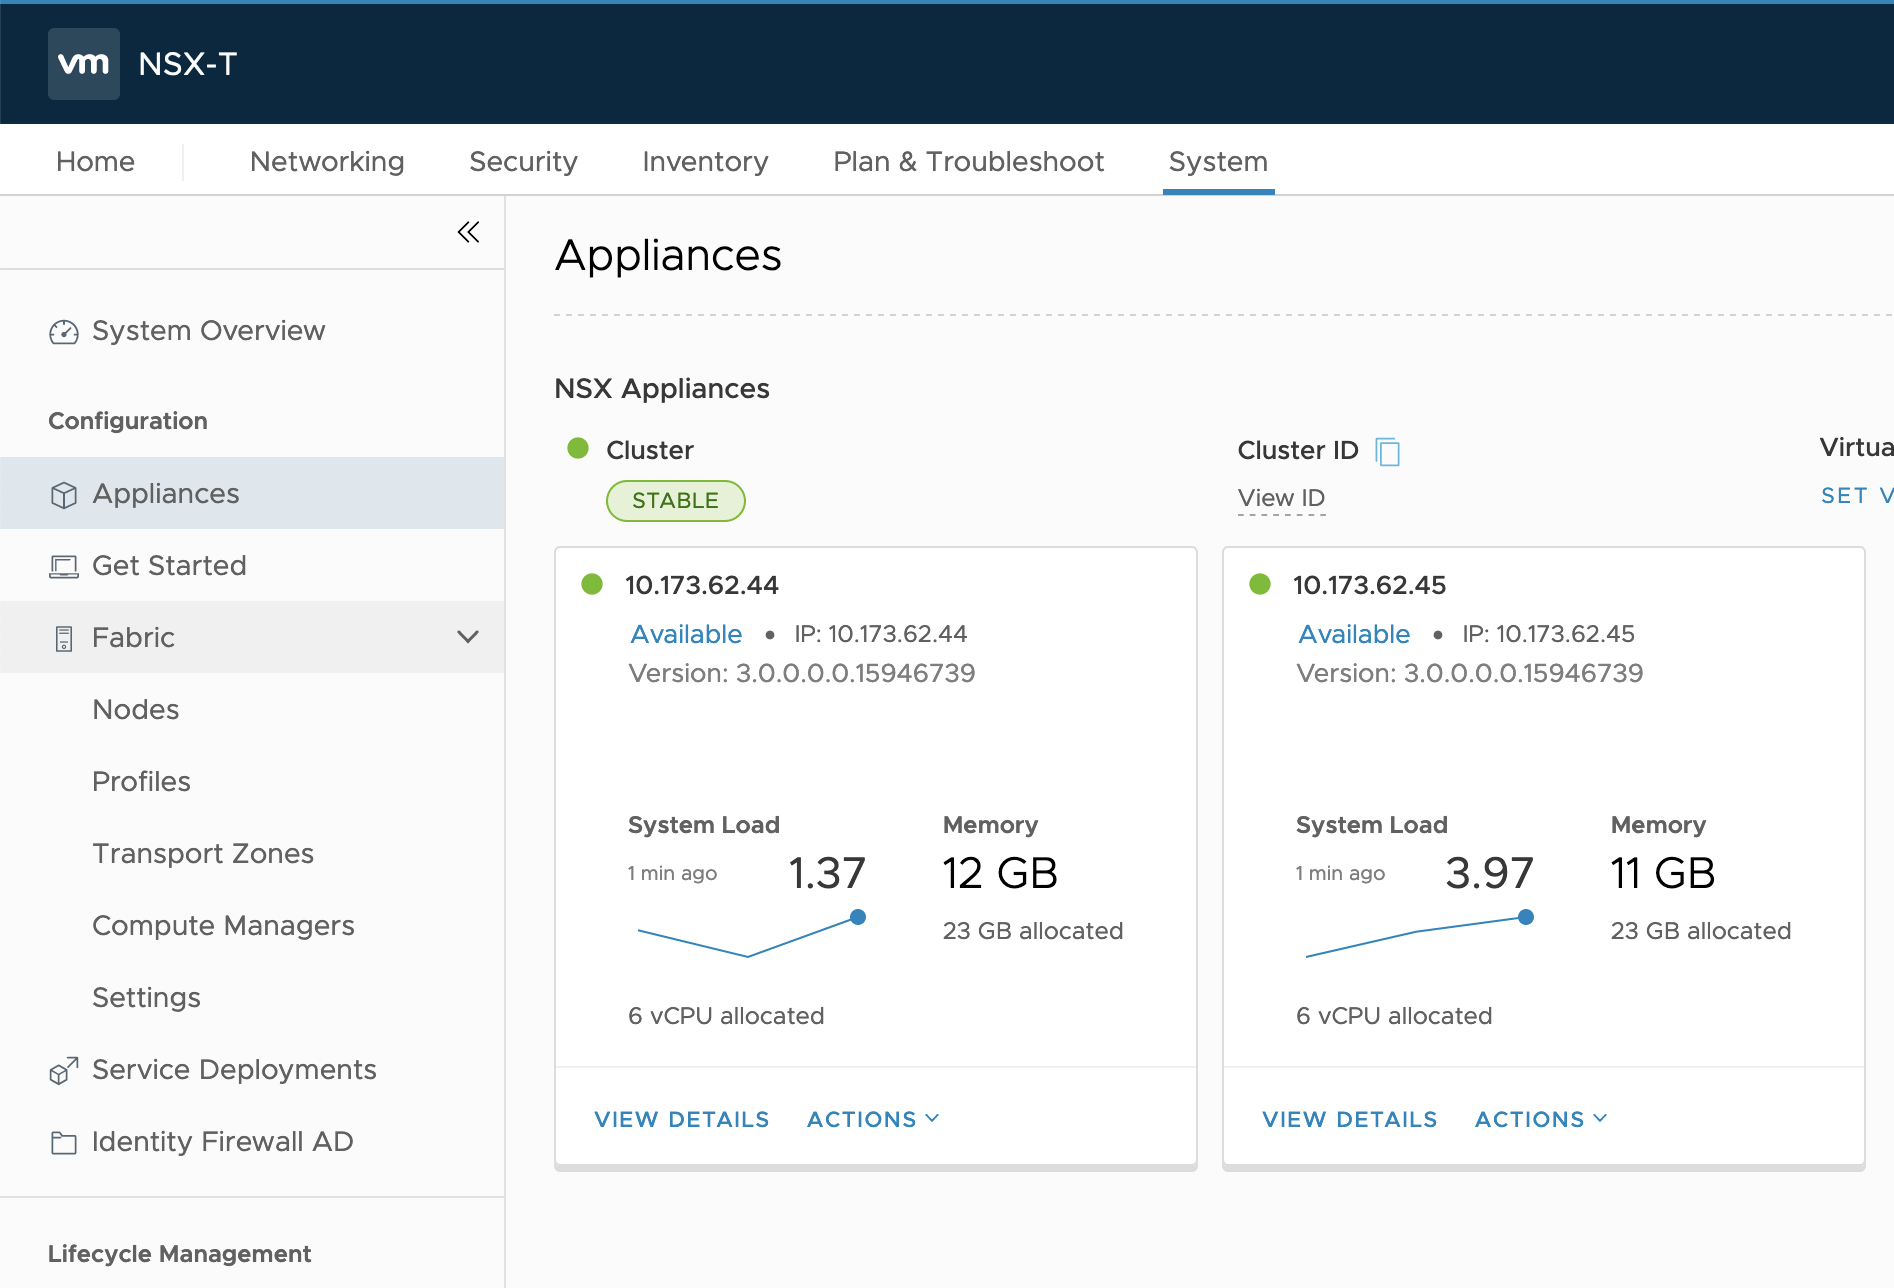
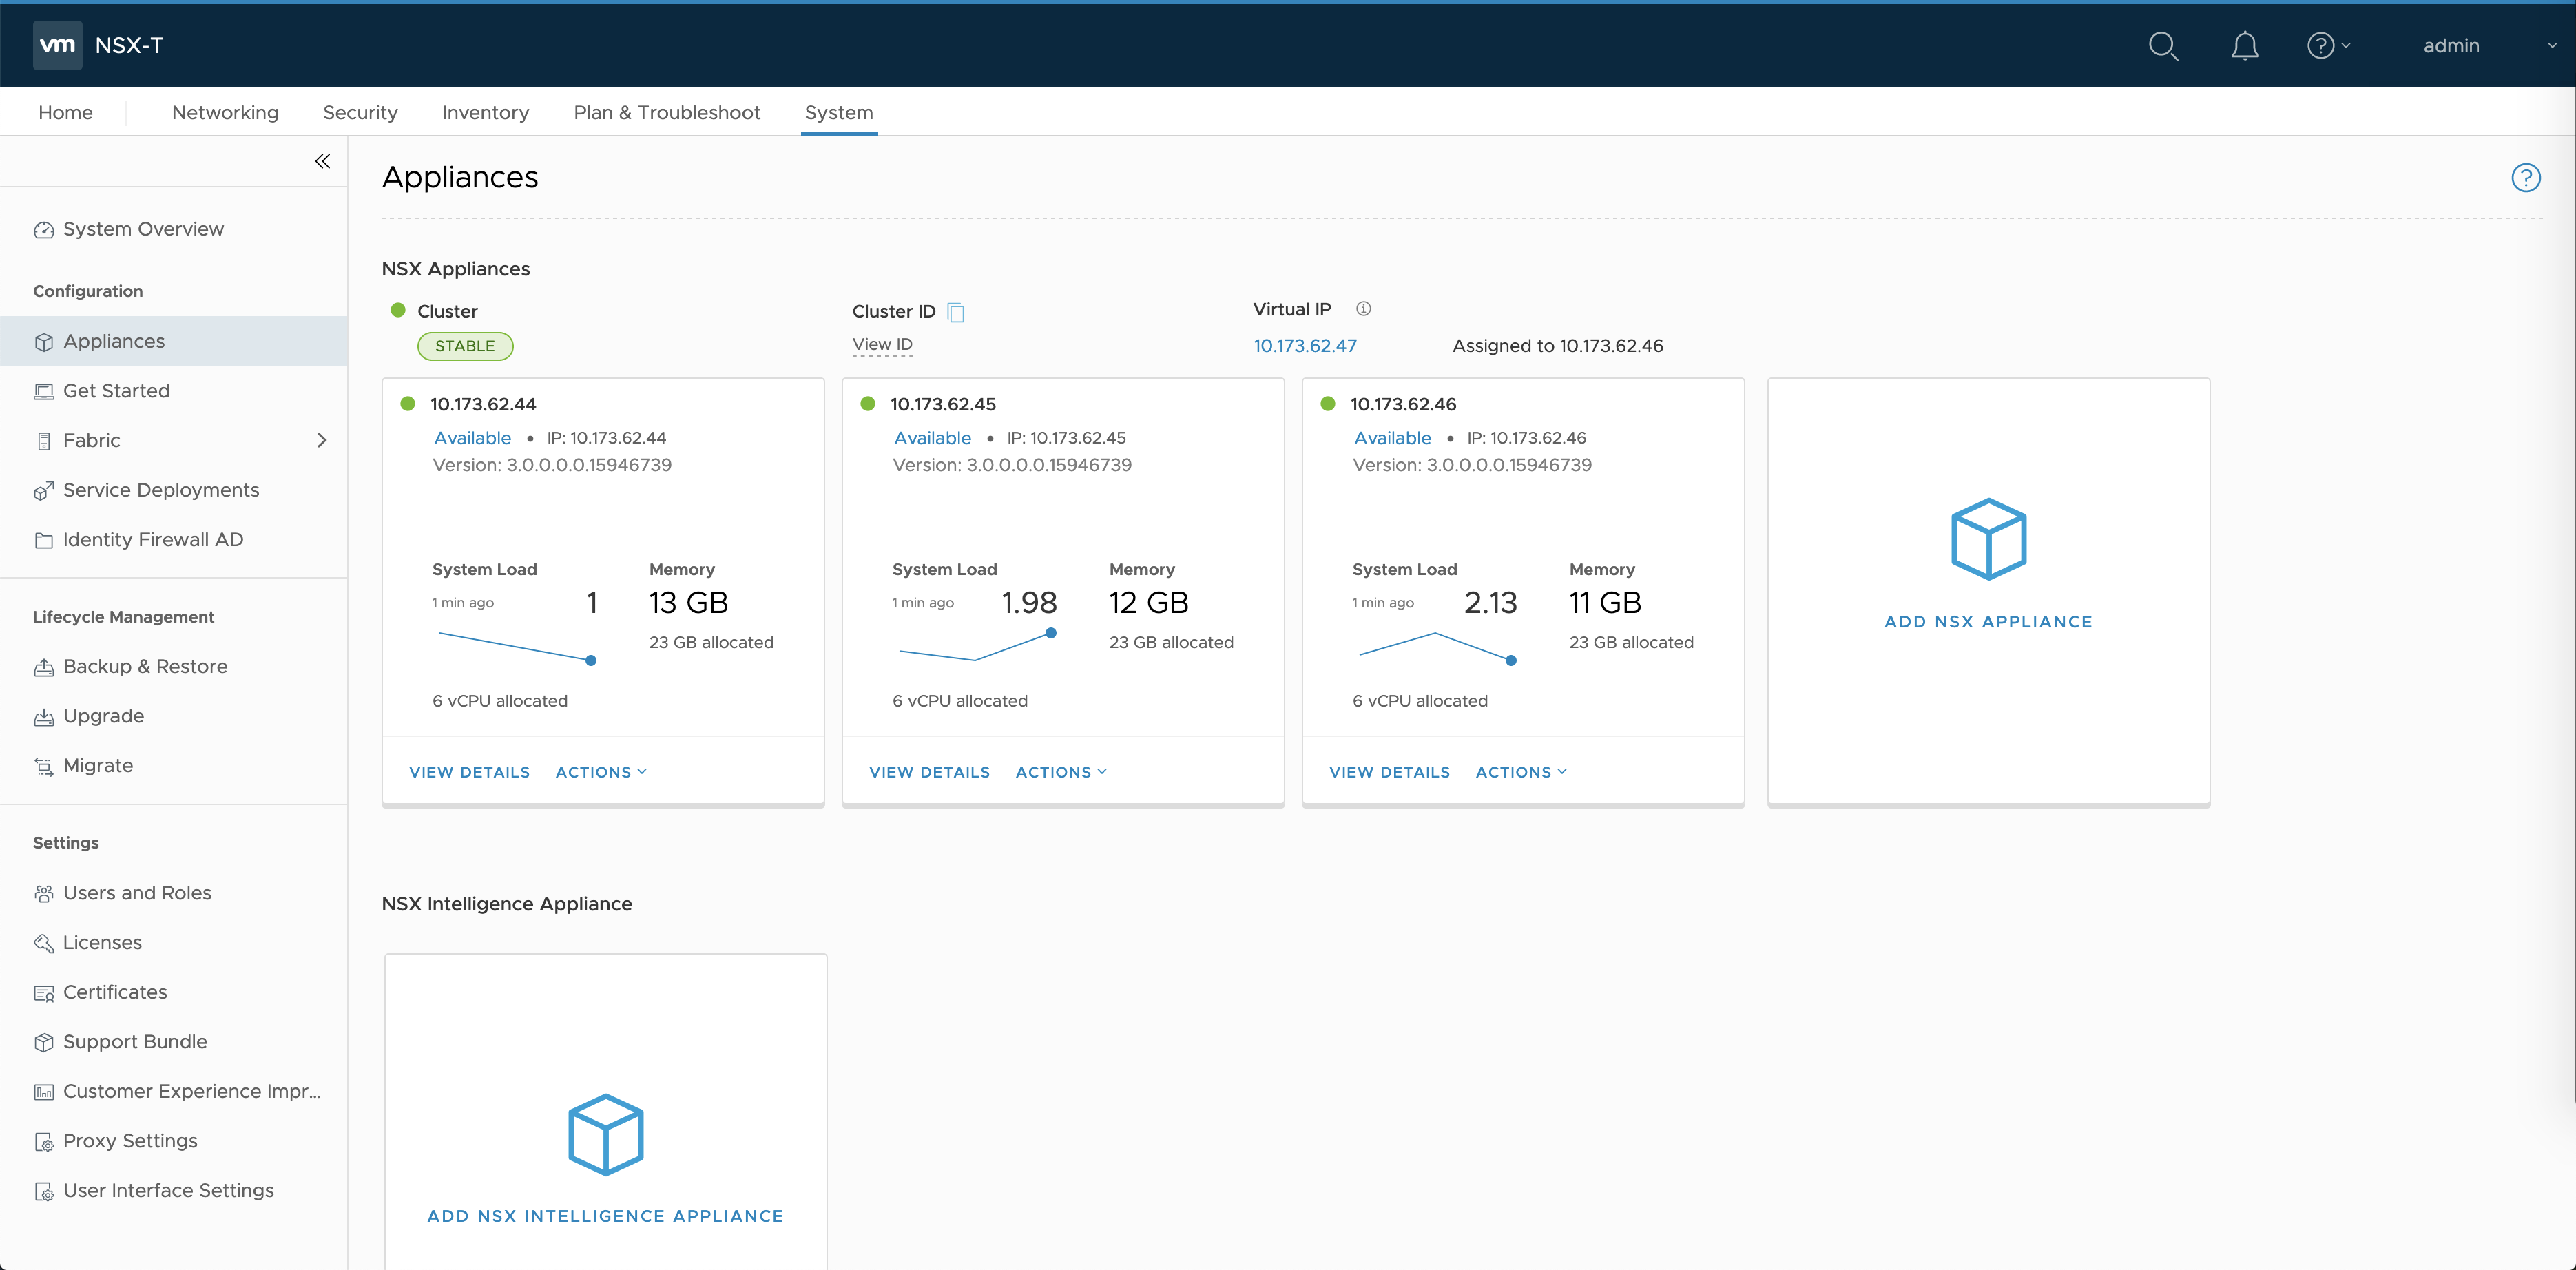
- In the NSX Management console, navigate to System > Appliances.
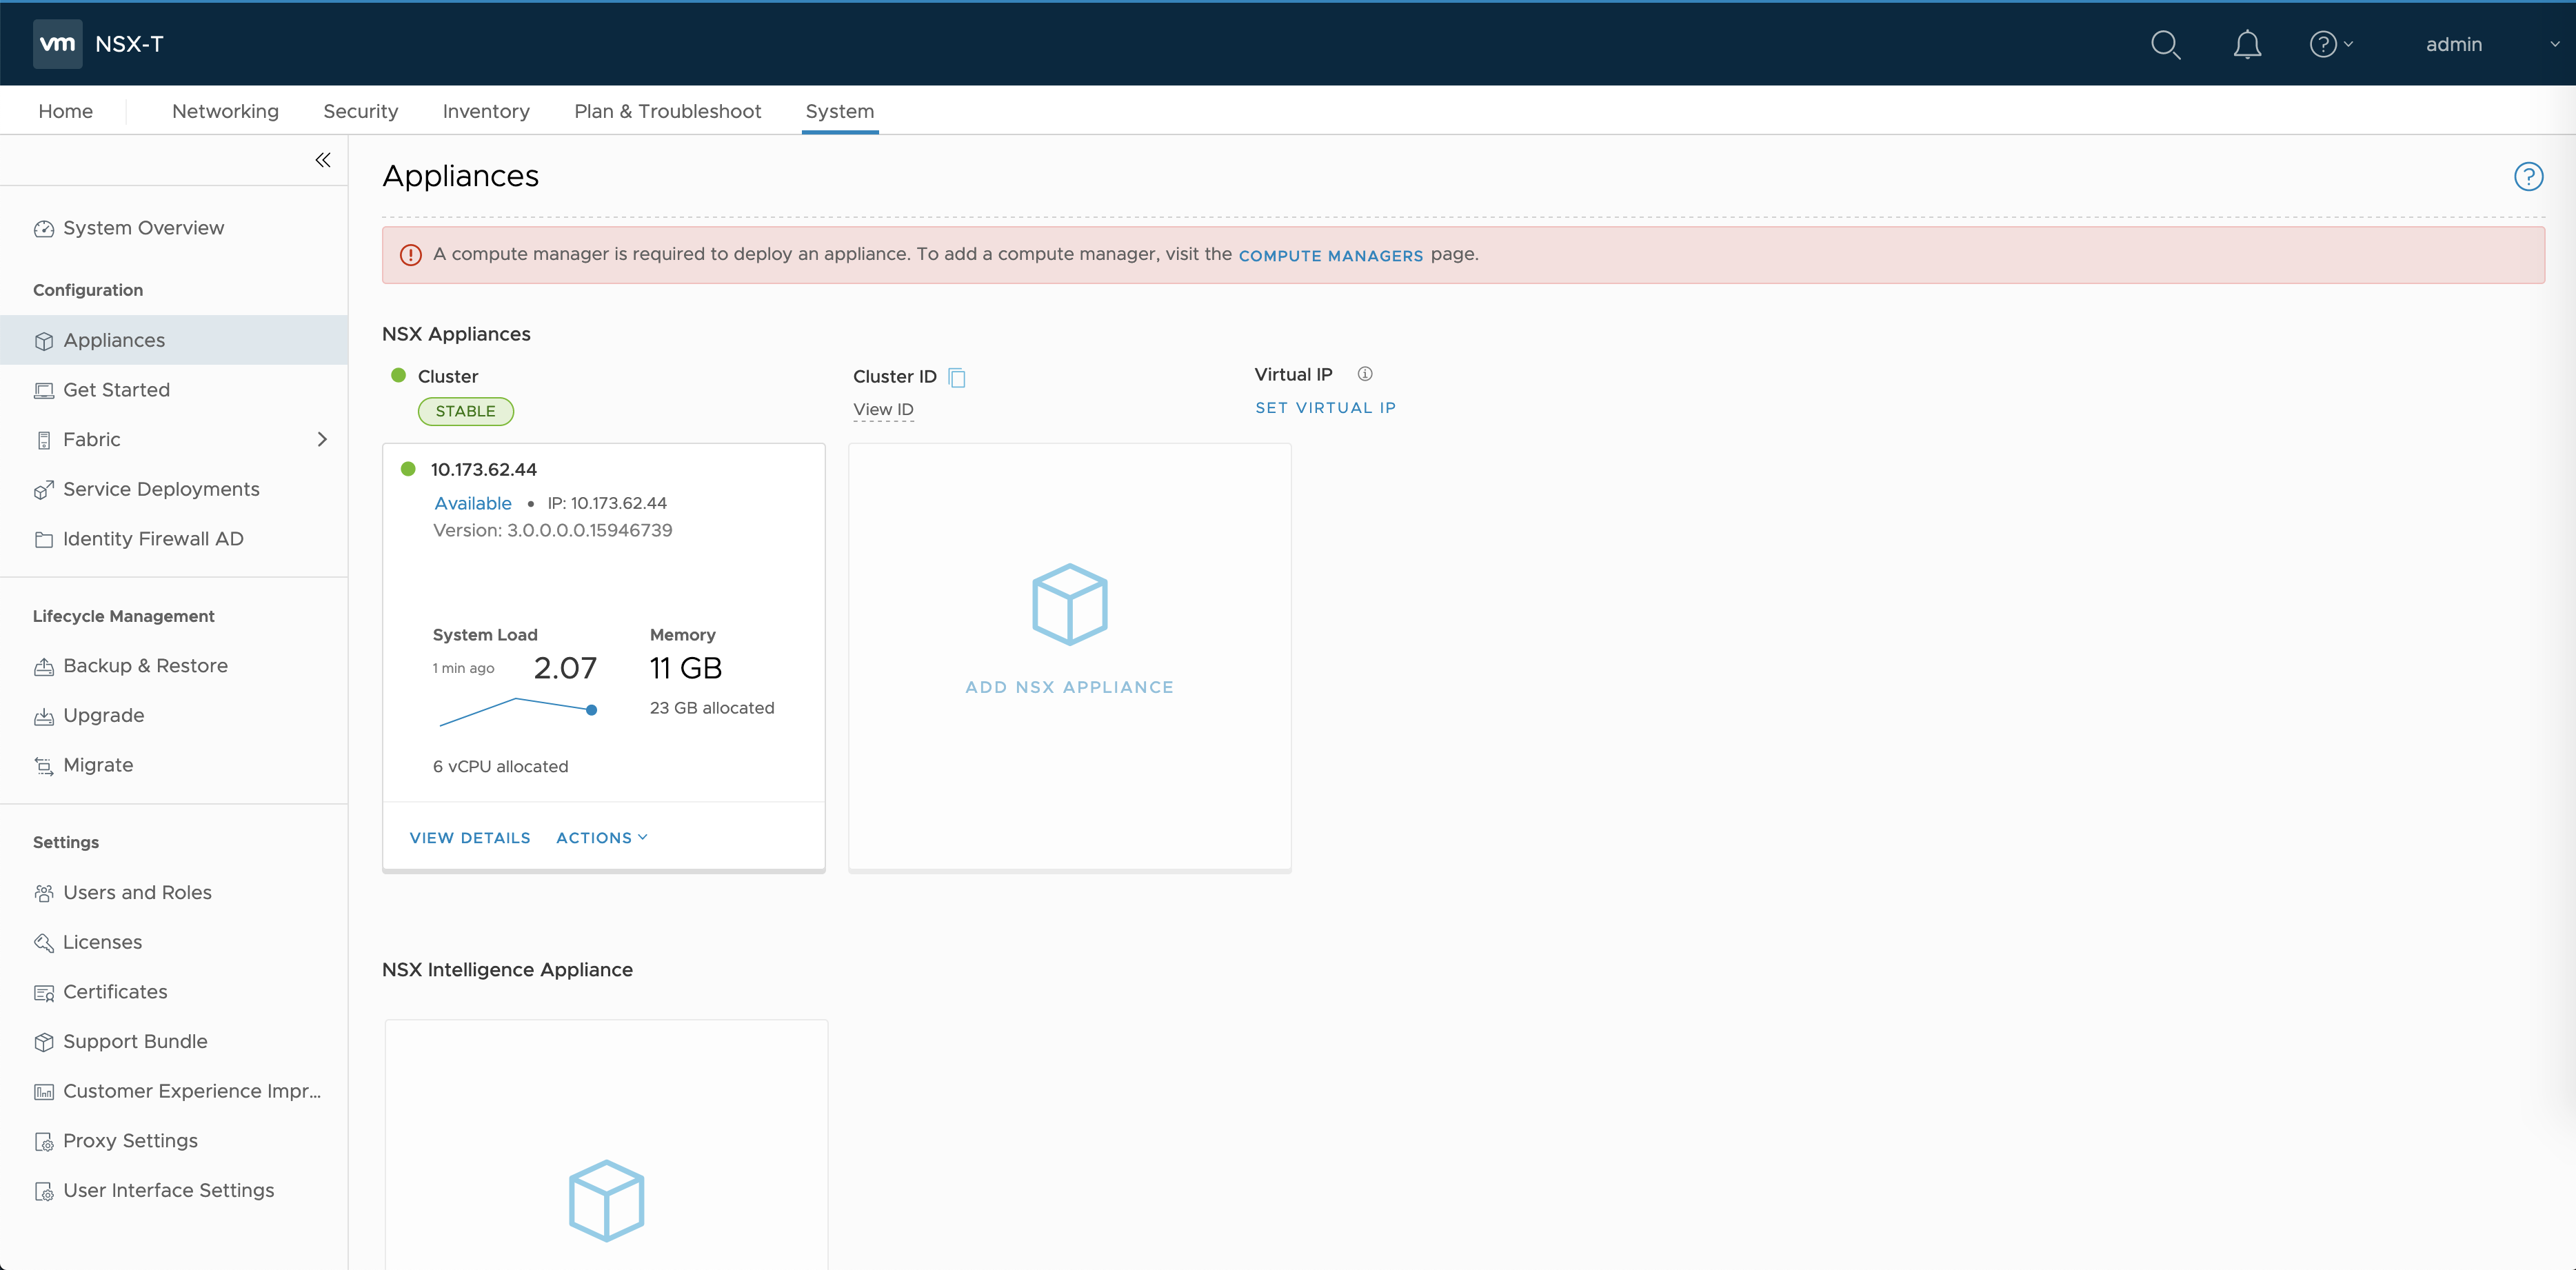
- Select Compute Managers.
- Click Add.
- Enter a Name, such as vCenter.
- Enter an IP address, such as
10.173.62.43. - Enter the vCenter user name, such as
[email protected]. - Set the Enable Trust toggle to Yes.
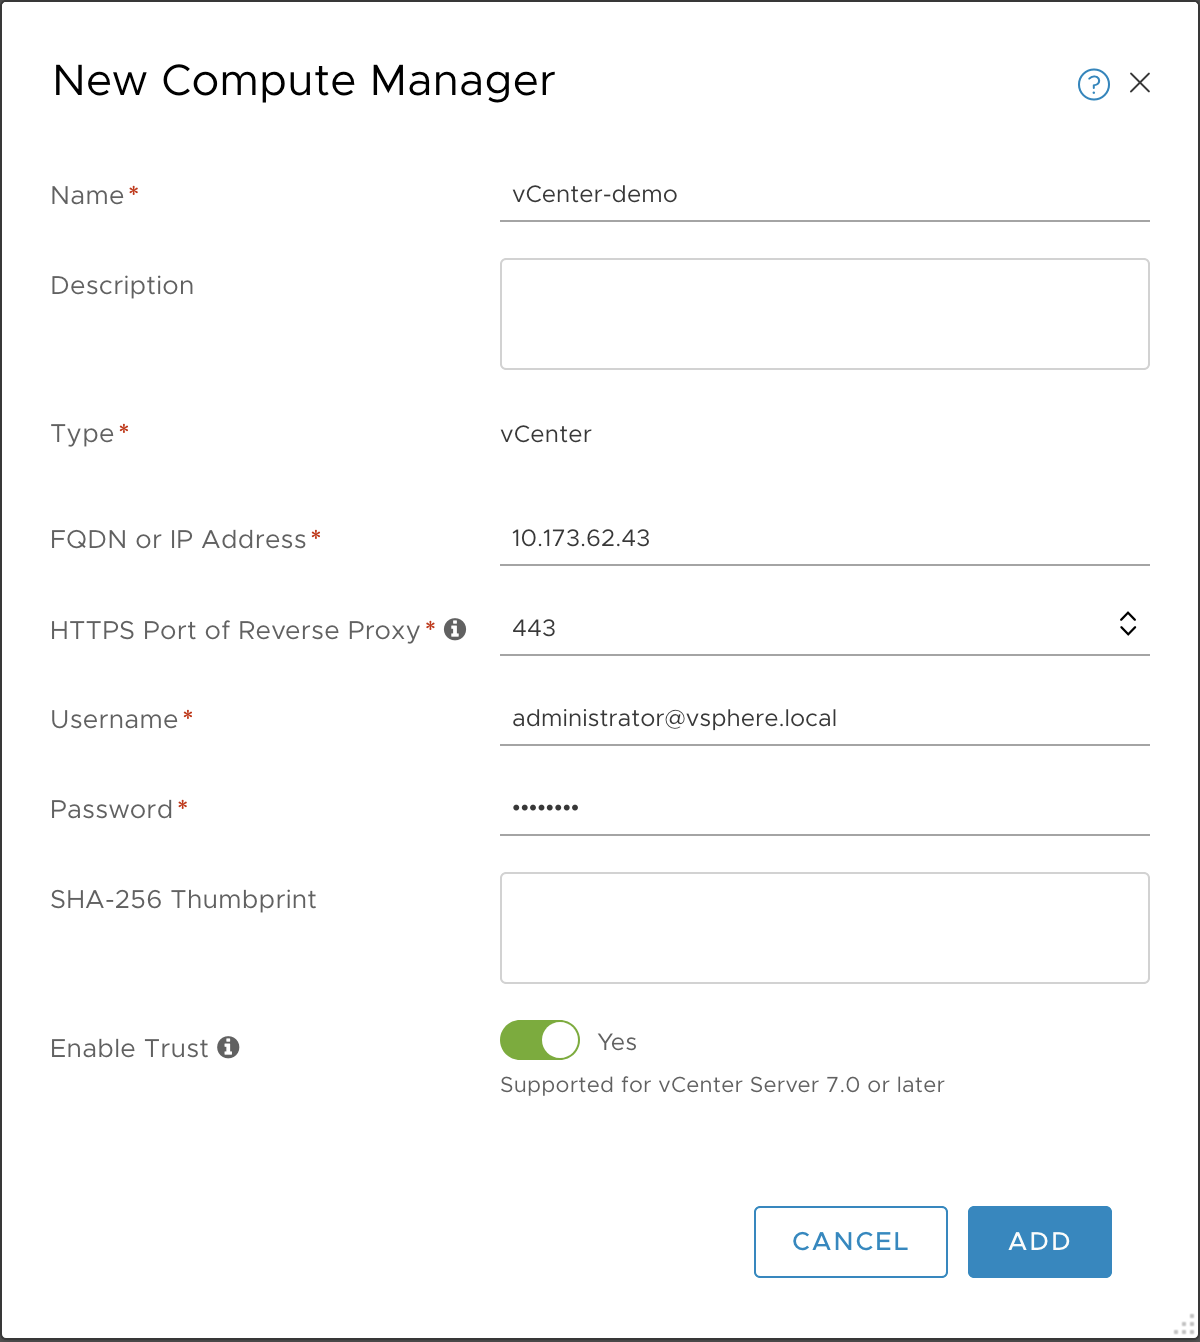
- Click Add.
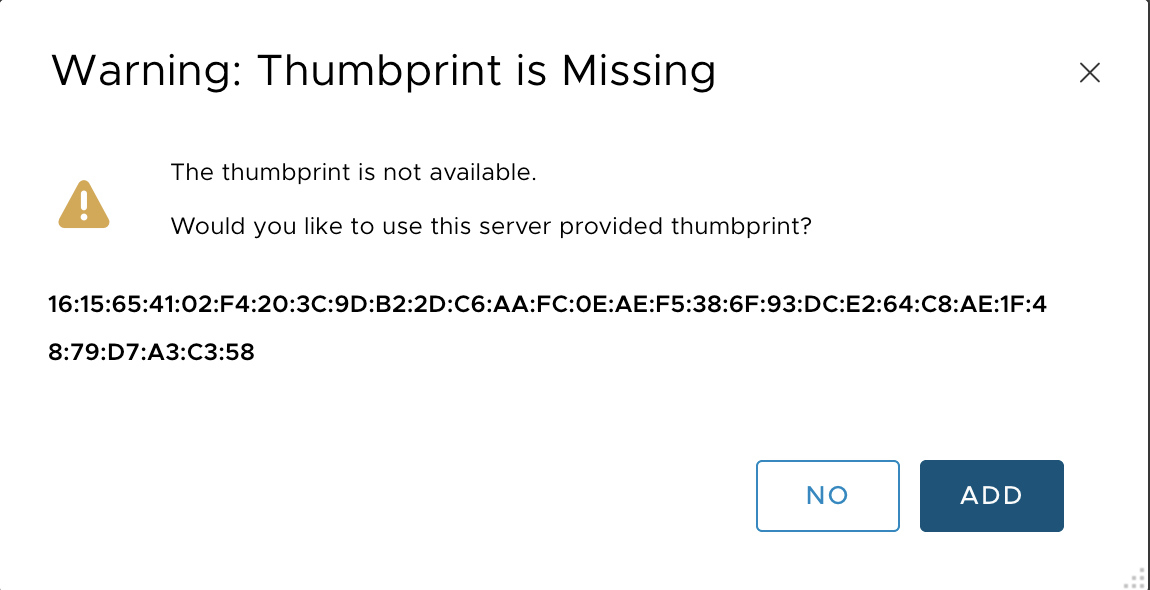
- Click Add again at the thumbprint warning.
- Verify that the Compute Manager is added and registered.

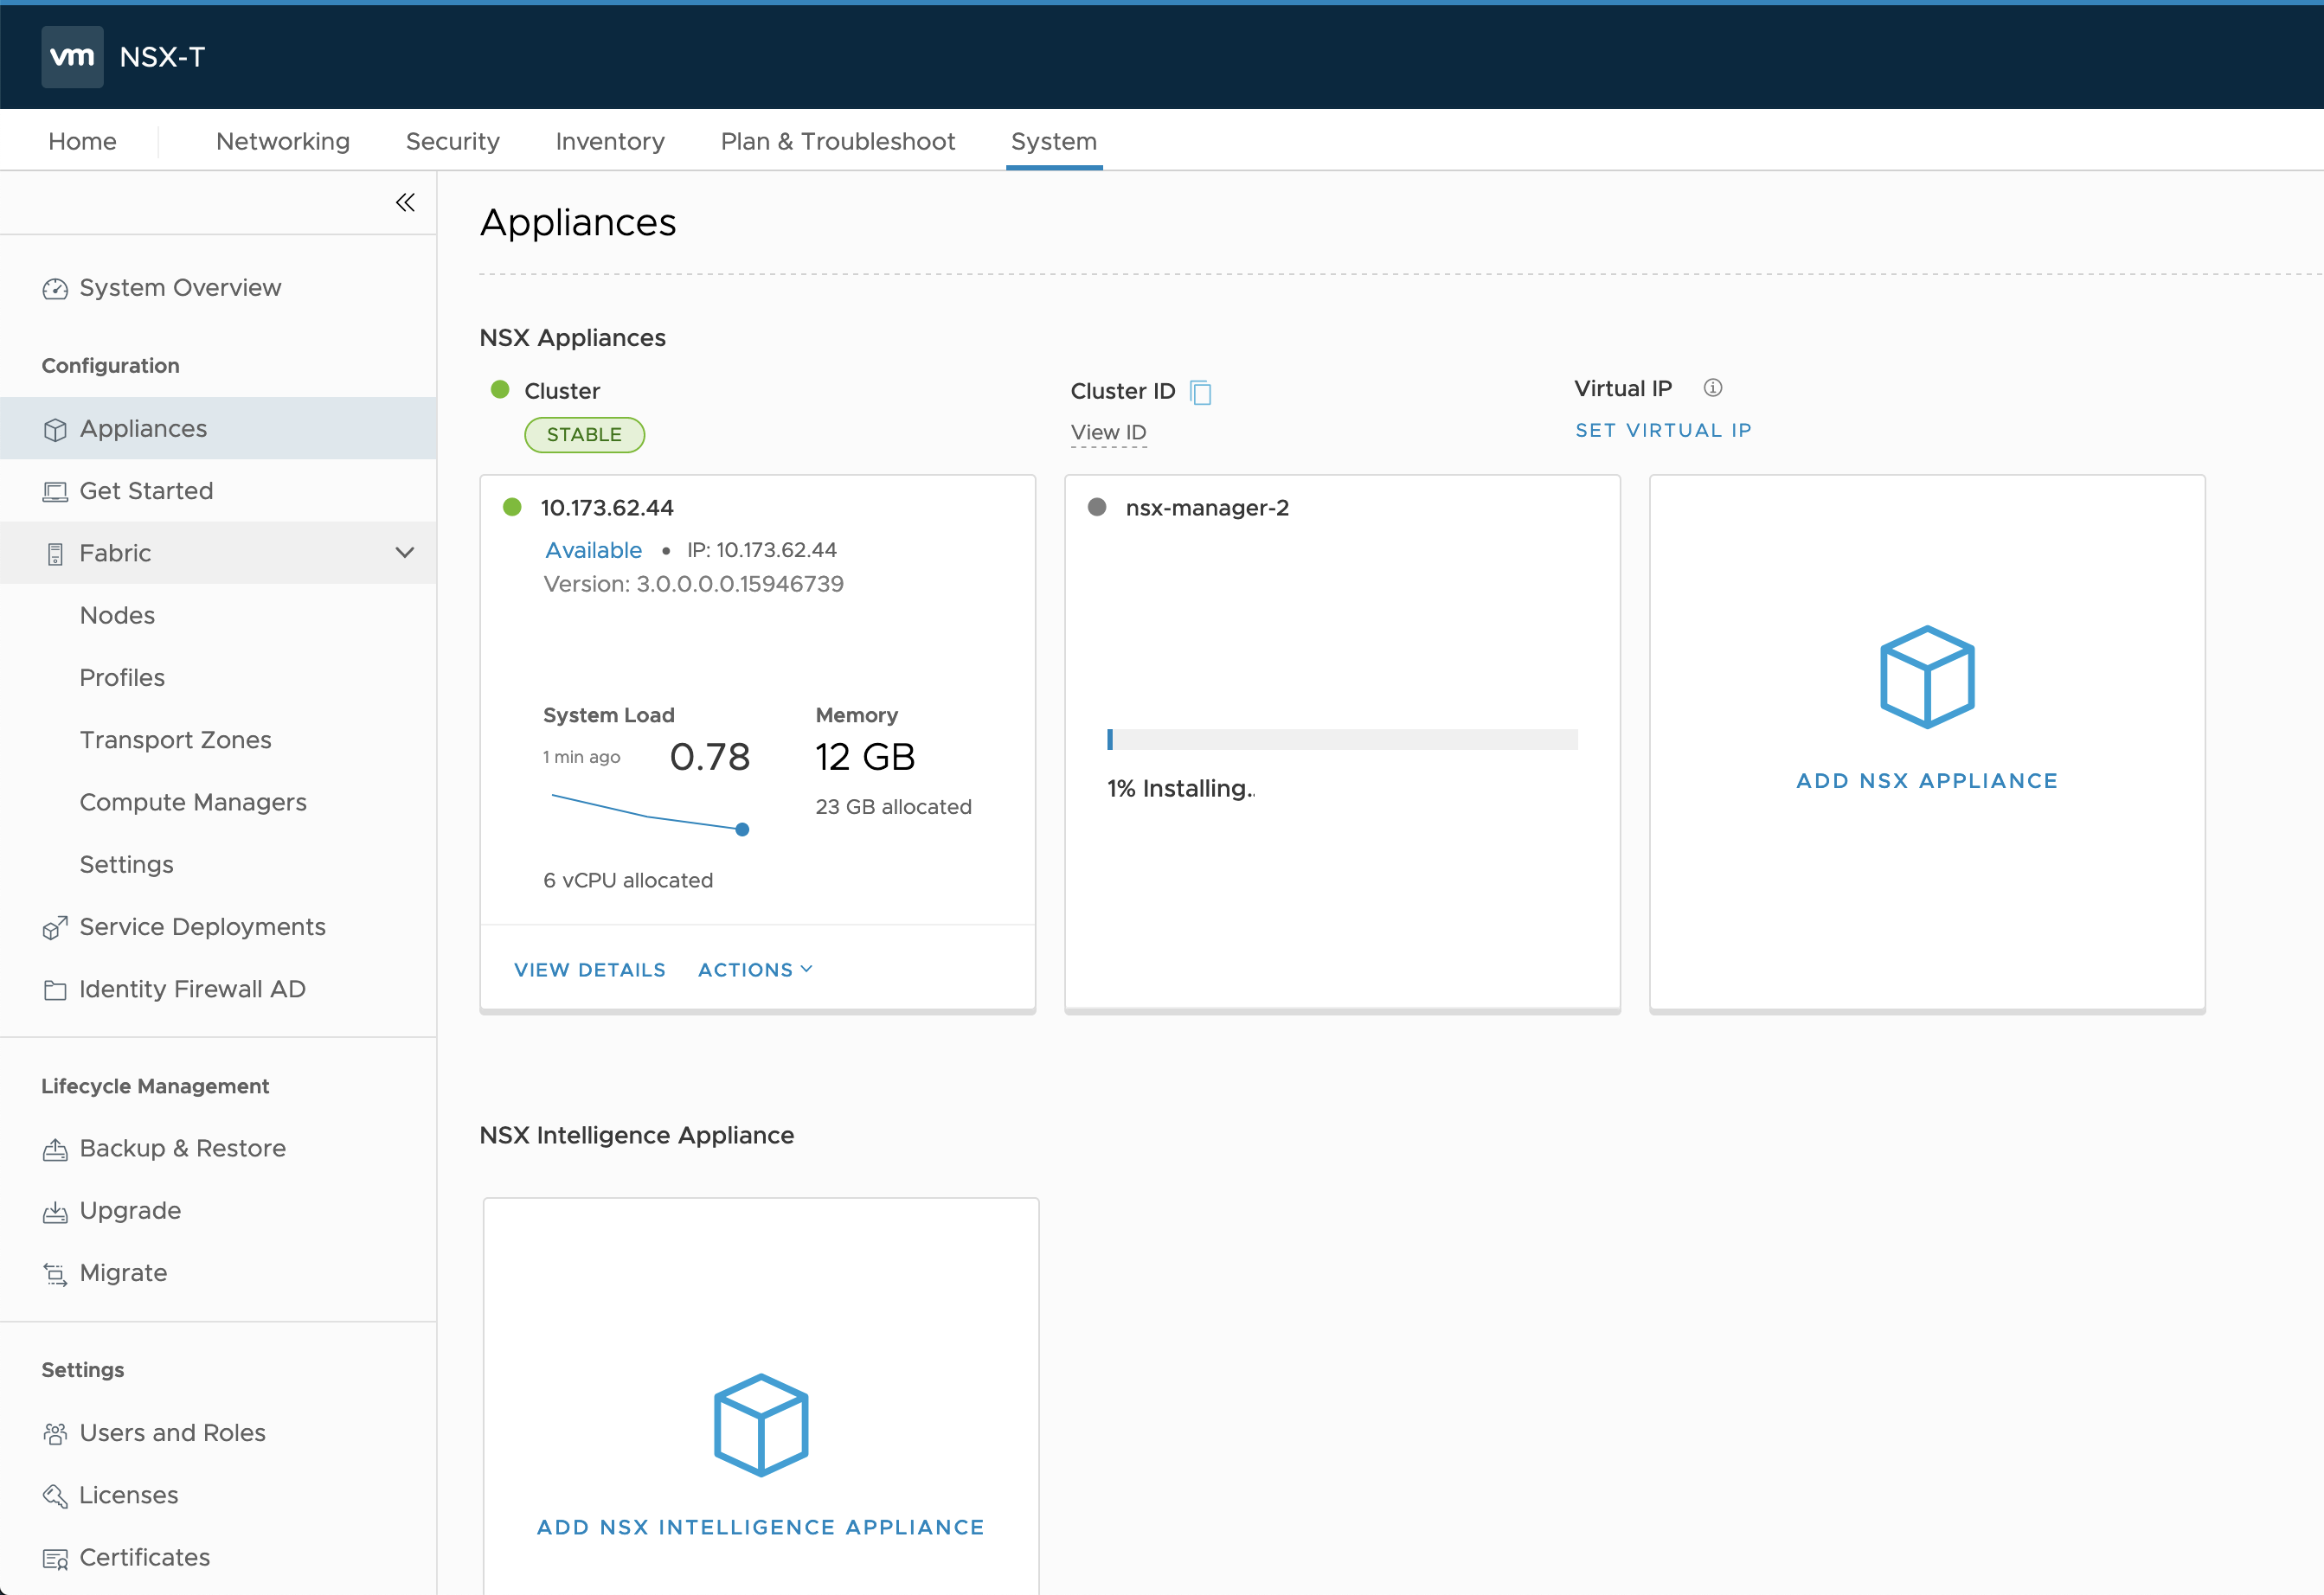
Deploy NSX-T Manager 2
Use the NSX-T Management Console to deploy an additional NSX-T Manager node as part of the NSX-T Management layer. For more information, refer to the NSX-T documentation.
- In the NSX Management Console, navigate to System > Appliances.
- Select Add NSX Appliance.
- Enter a hostname, such as
nsx-manager-2. - Enter the Management IP/netmask, such as
10.173.62.45/24. - Enter the Gateway, such as
10.173.62.253. - For the Node size, choose
medium.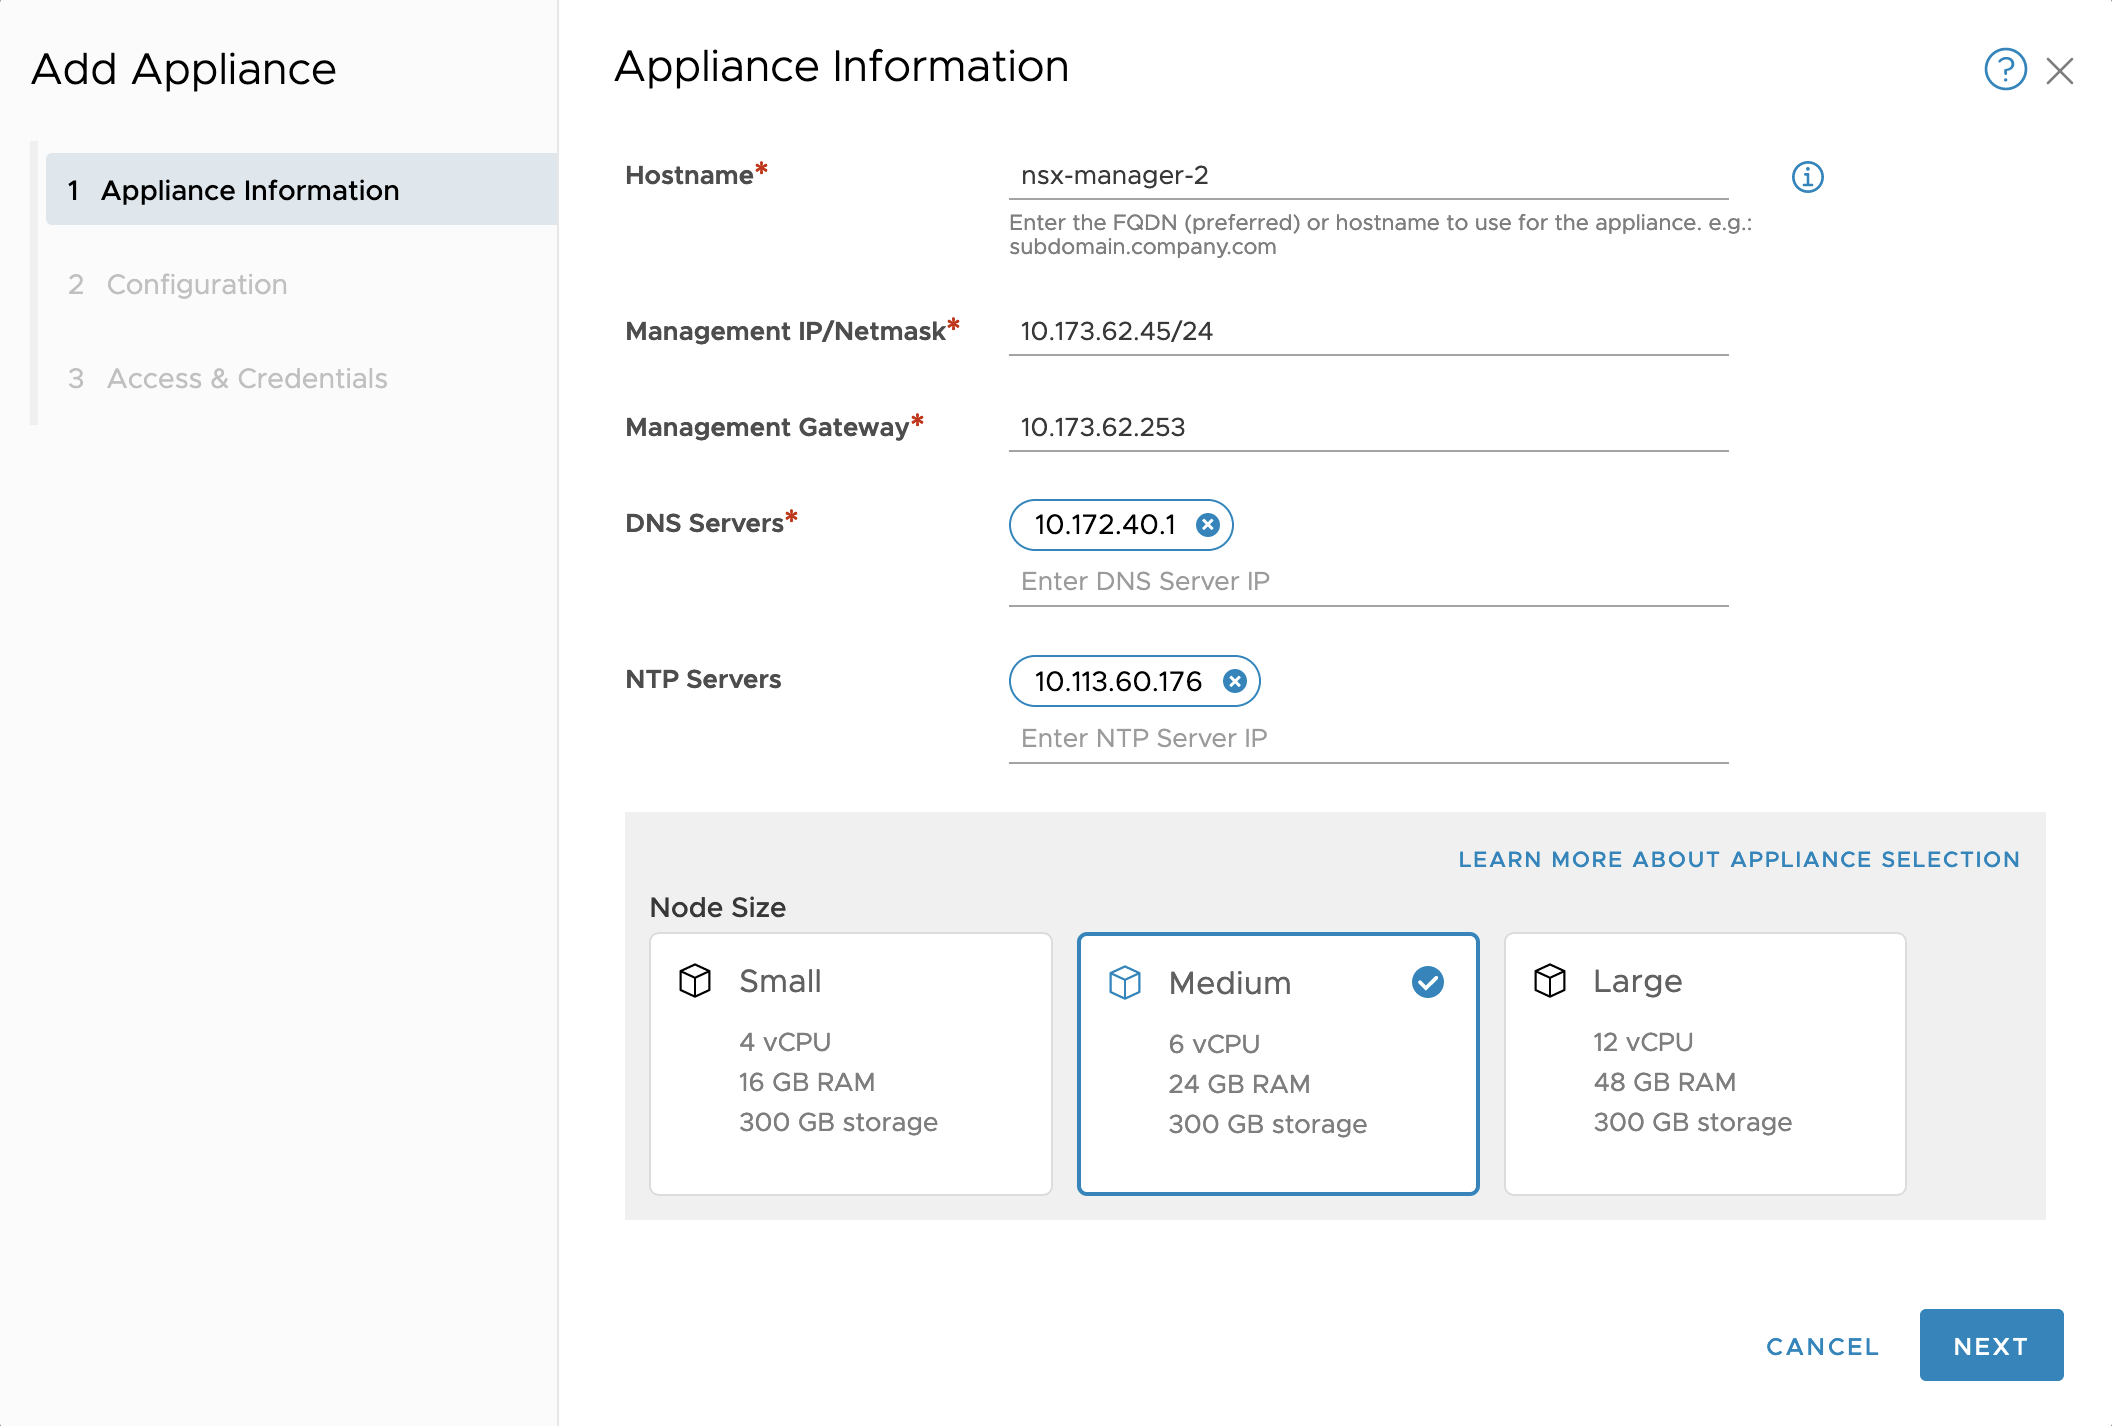
- For the Compute Manager, select
vCenter. - For the Compute Cluster, enter
MANAGEMENT-cluster. - For the Datastore, select the datastore, such as
datastore2. - For the Virtual Disk Format, select
thin provision. - For the Network, select the VLAN management network, such as
PG-MGMT-VLAN-1548.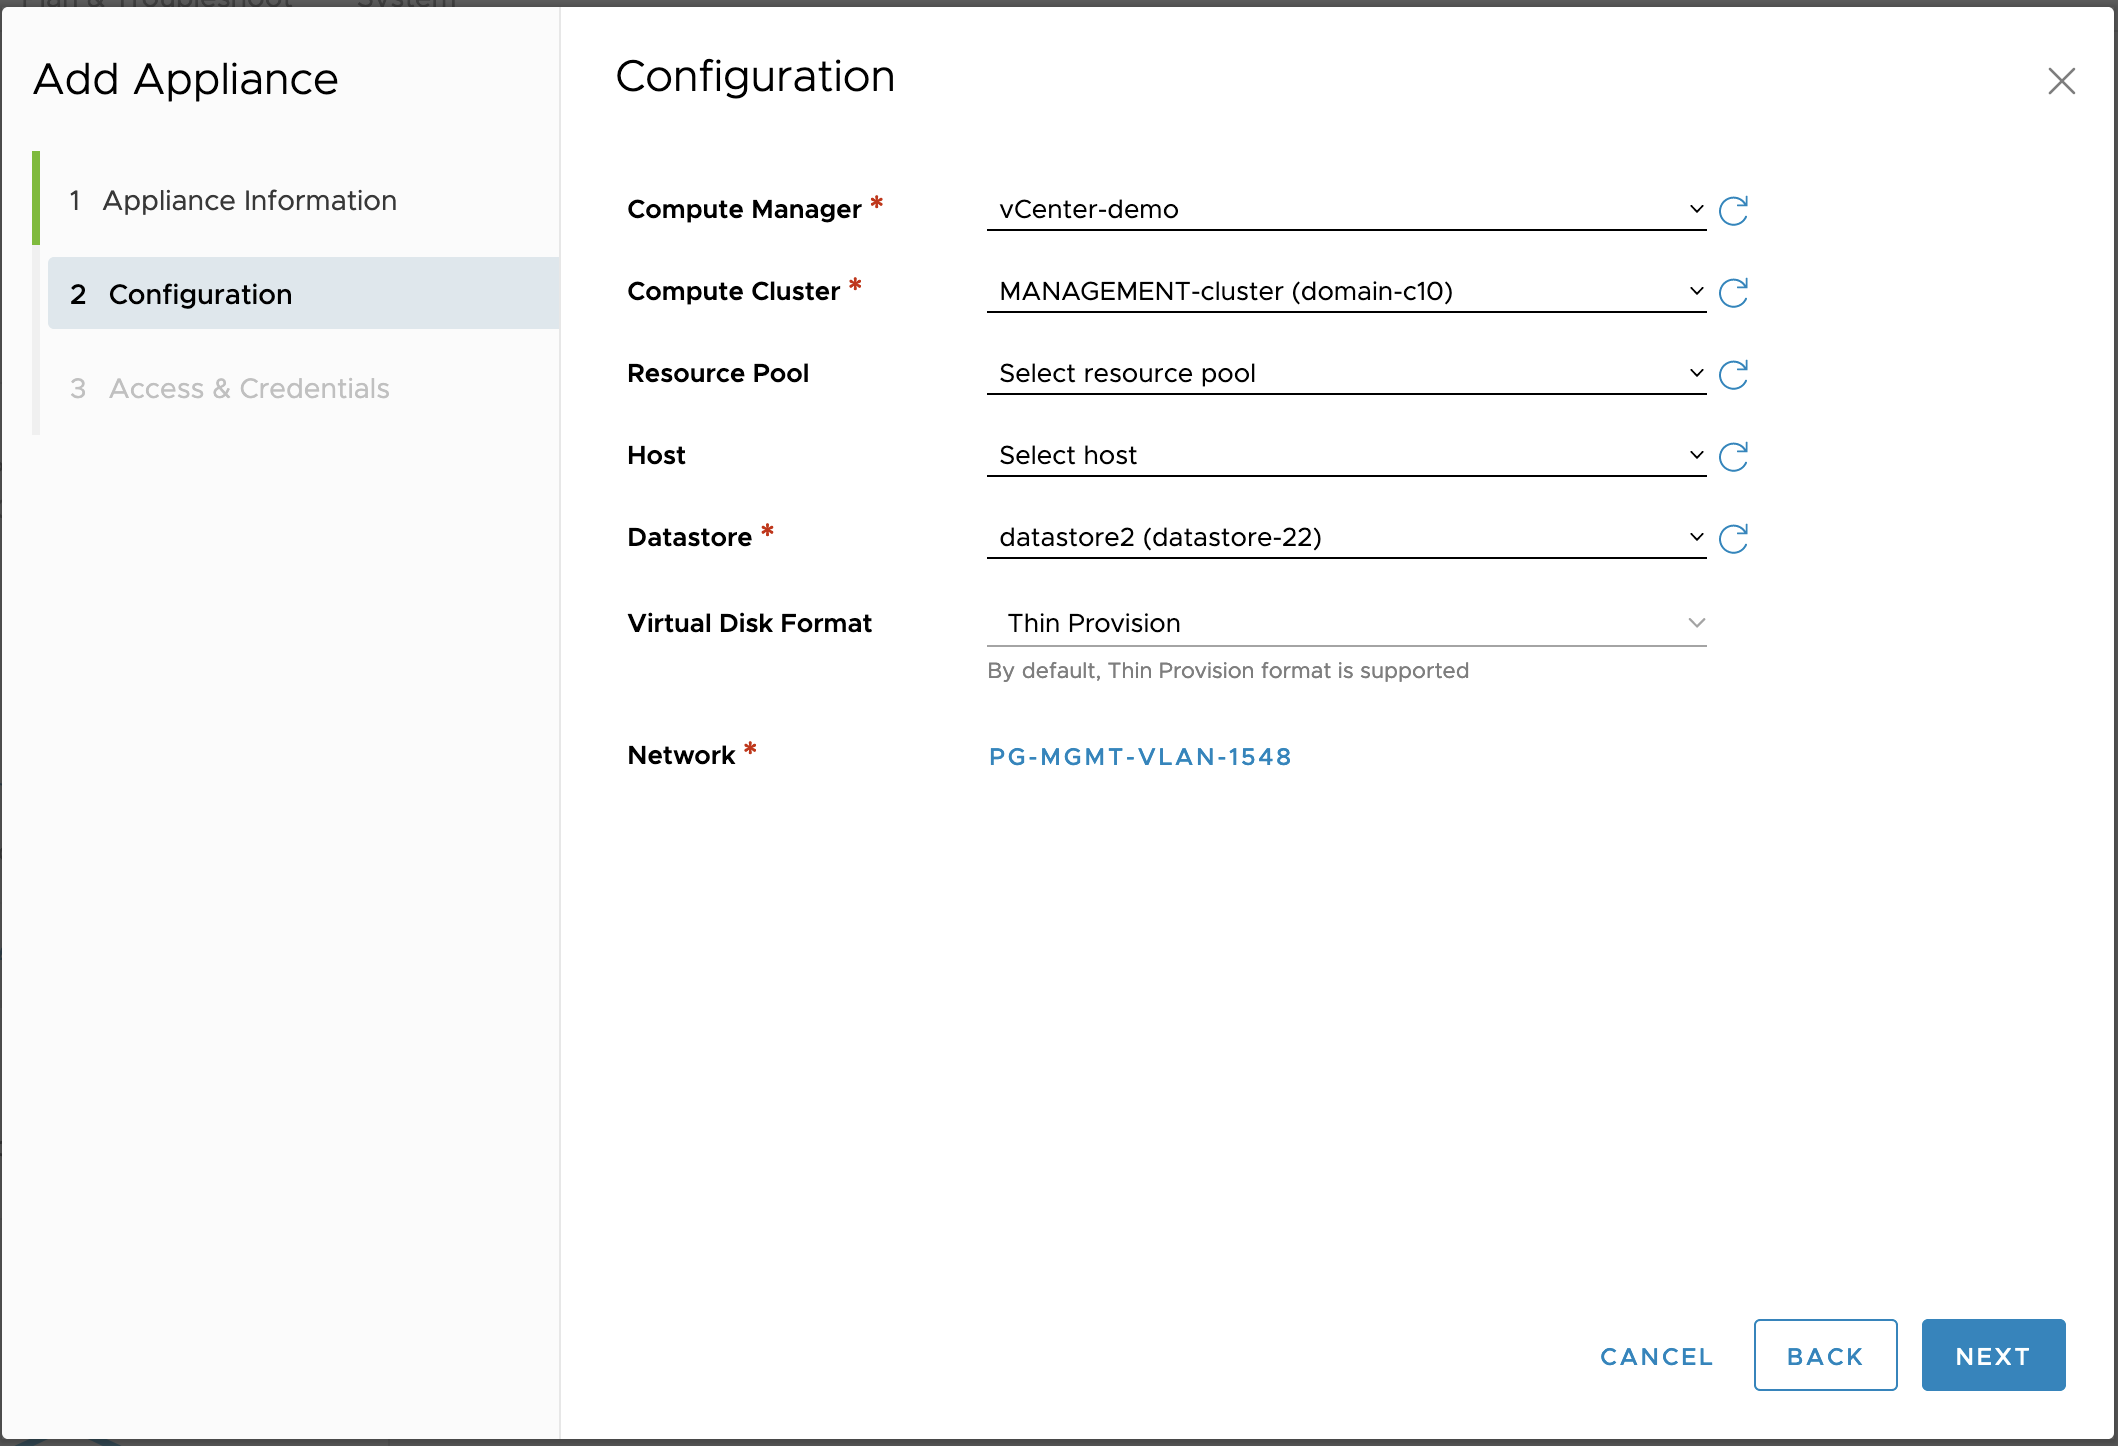
- Select Enable SSH.
- Select Enable root access.
- Enter a strong password.
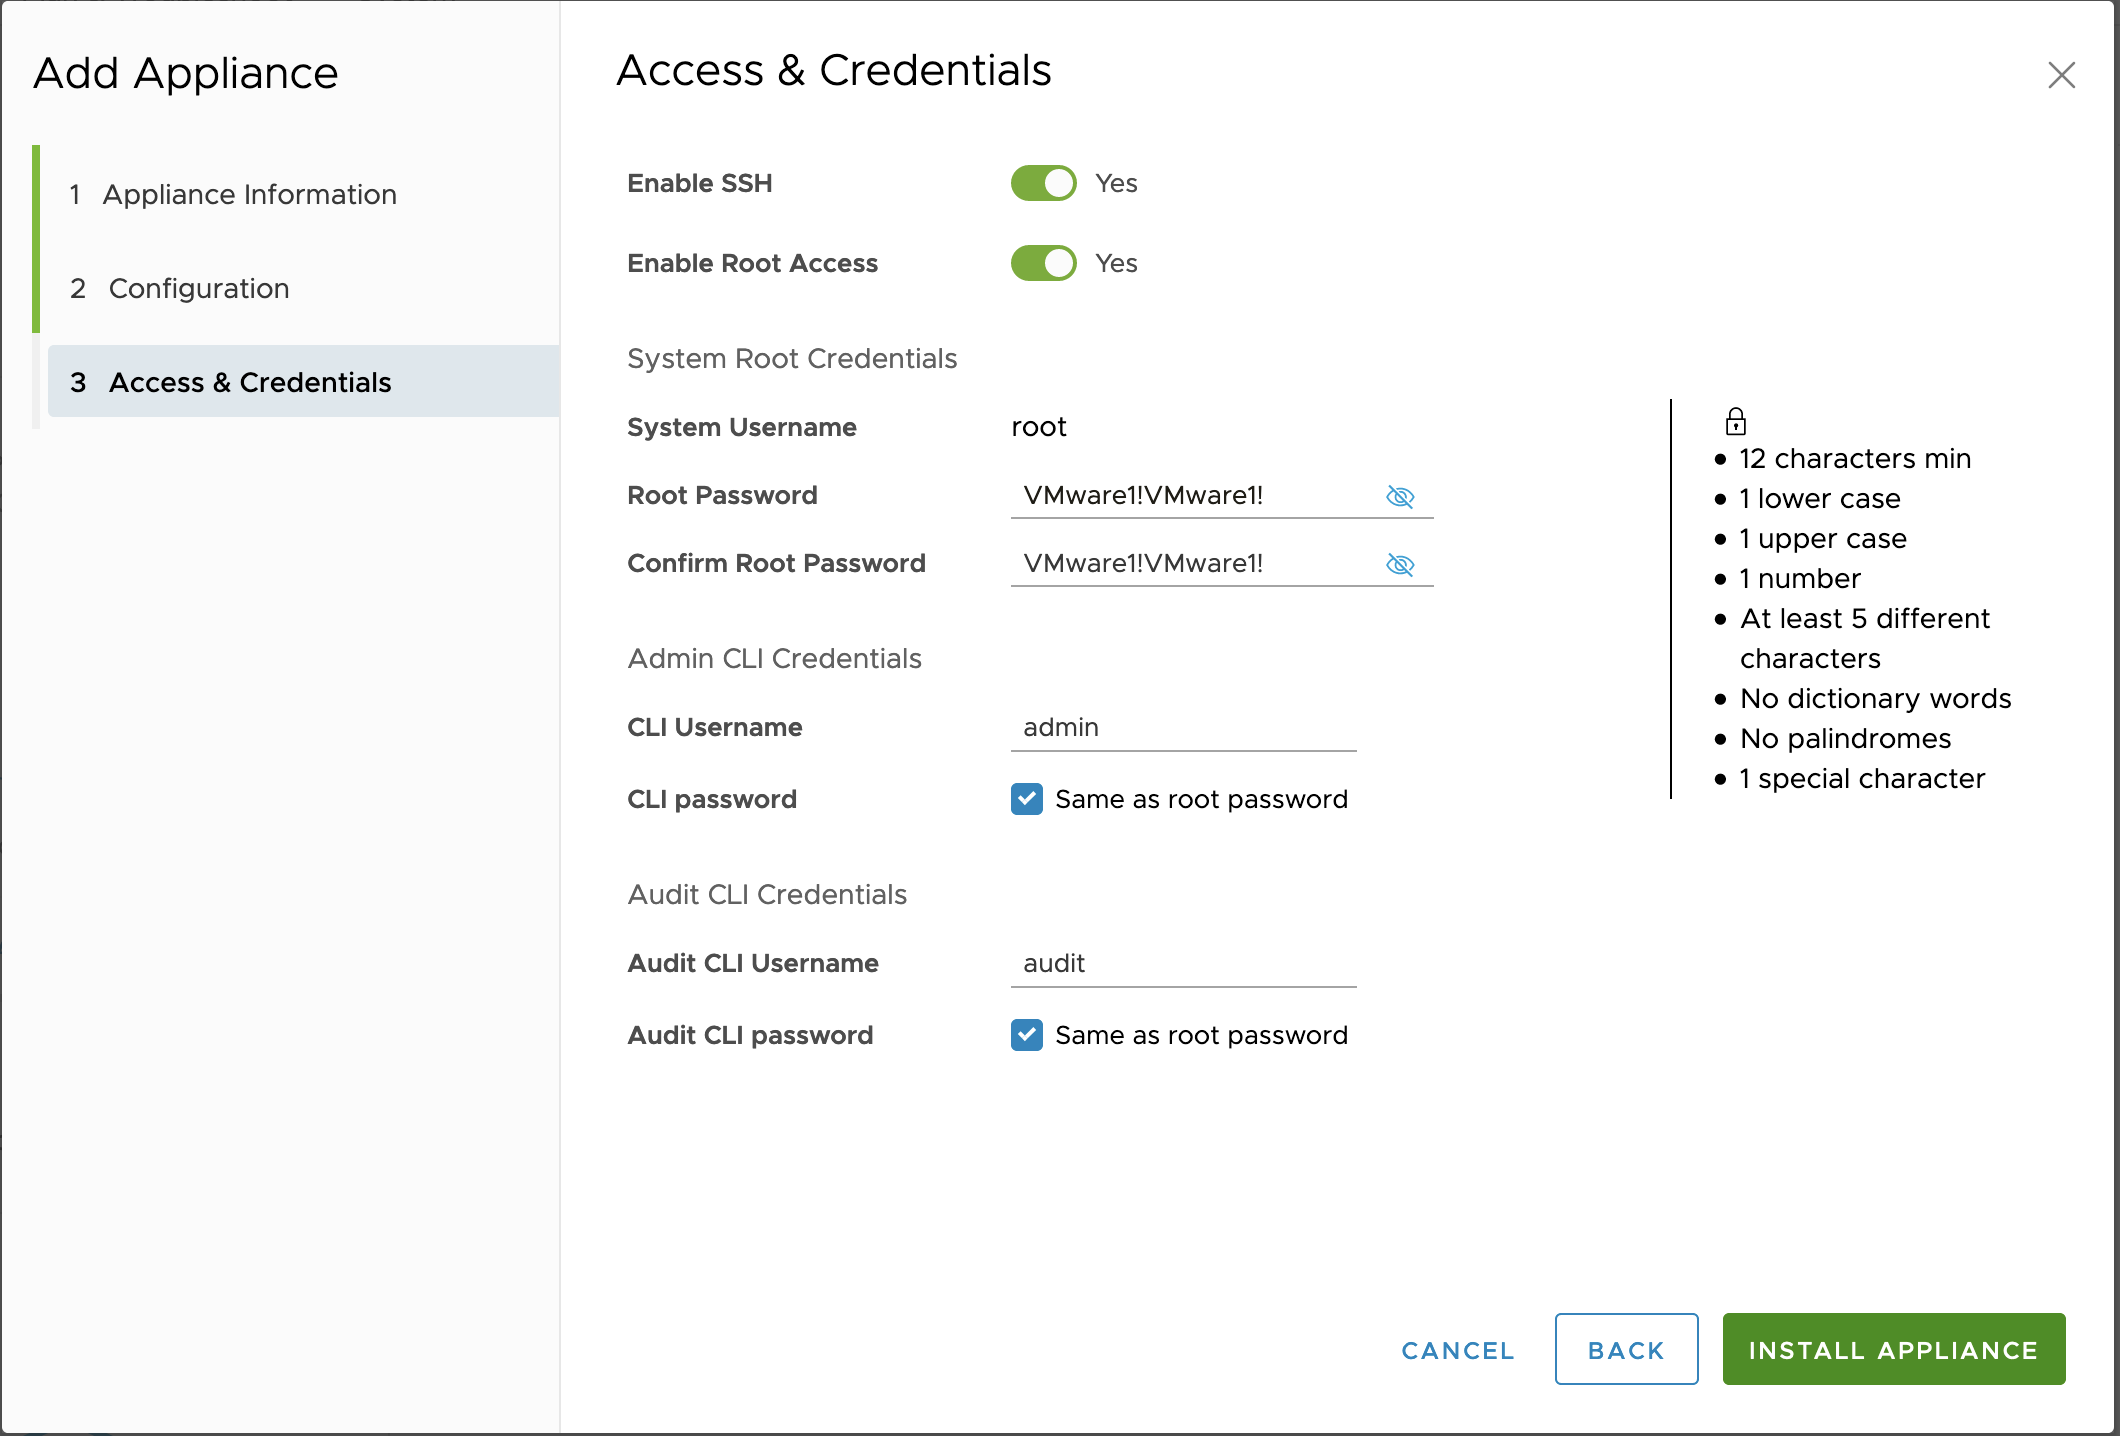
- Click Install Appliance.
- Verify that the NSX-T Manager 2 appliance is added.
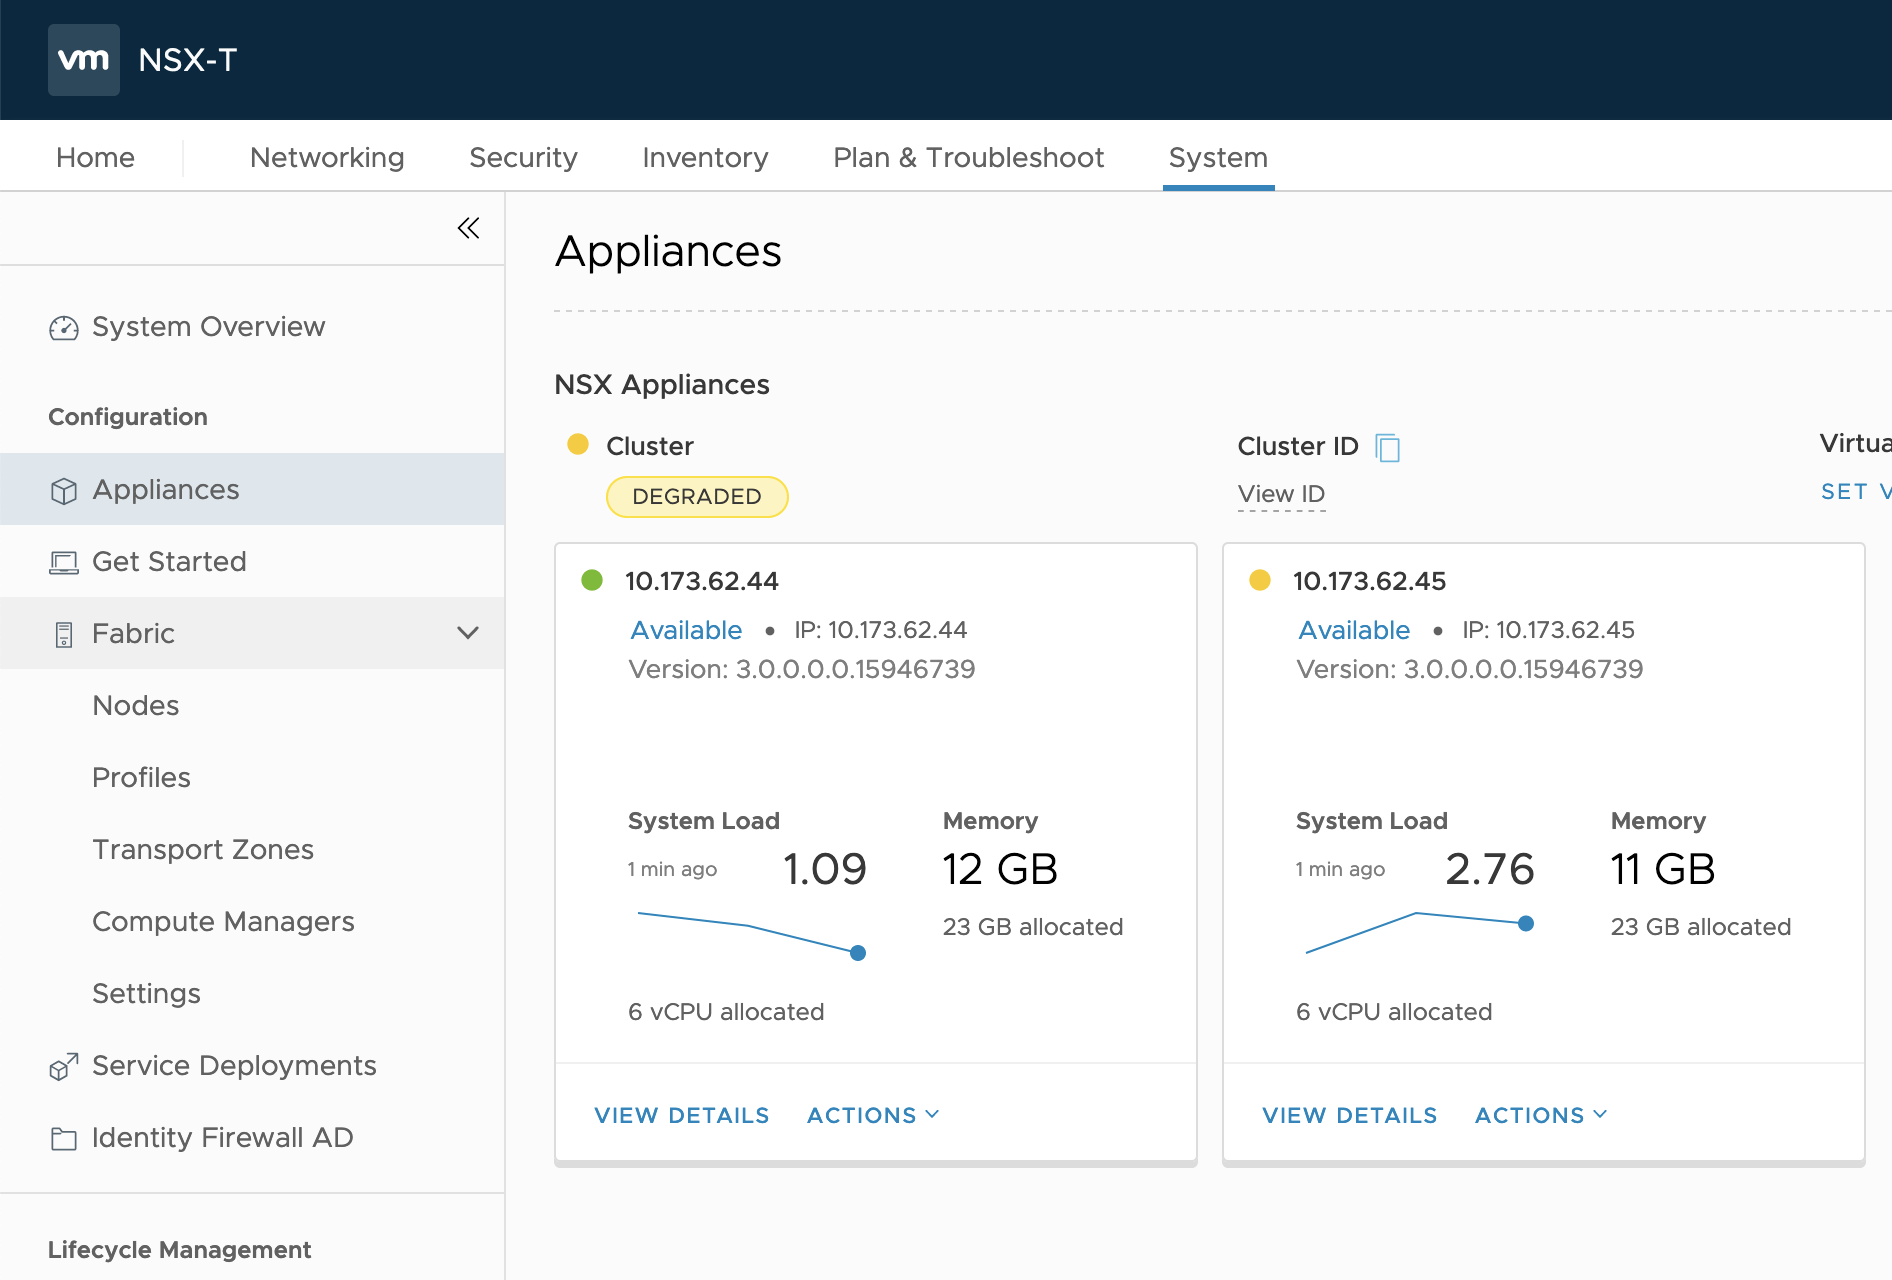
Deploy NSX-T Manager 3
Use the NSX-T Management Console to deploy a third NSX-T Manager node as part of the NSX-T Management layer. For more information, refer to the NSX-T documentation.
- In the NSX Management Console, navigate to System > Appliances.
- Select Add NSX Appliance.
- Enter a hostname, such as
nsx-manager-3. - Enter the Management IP/netmask, such as
10.173.62.46/24. - Enter the Gateway, such as
10.173.62.253. - For the Node size, choose
medium. - For the Compute Manager, select
vCenter. - For the Compute Cluster, enter
MANAGEMENT-cluster. - For the Datastore, select the datastore, such as
datastore2. - For the Virtual Disk Format, select
thin provision. - For the Network, select the VLAN management network, such as
PG-MGMT-VLAN-1548. - Select Enable SSH.
- Select Enable root access.
- Enter a strong password.
- Click Install Appliance.
- Verify that the NSX-T Manager 3 appliance is added.
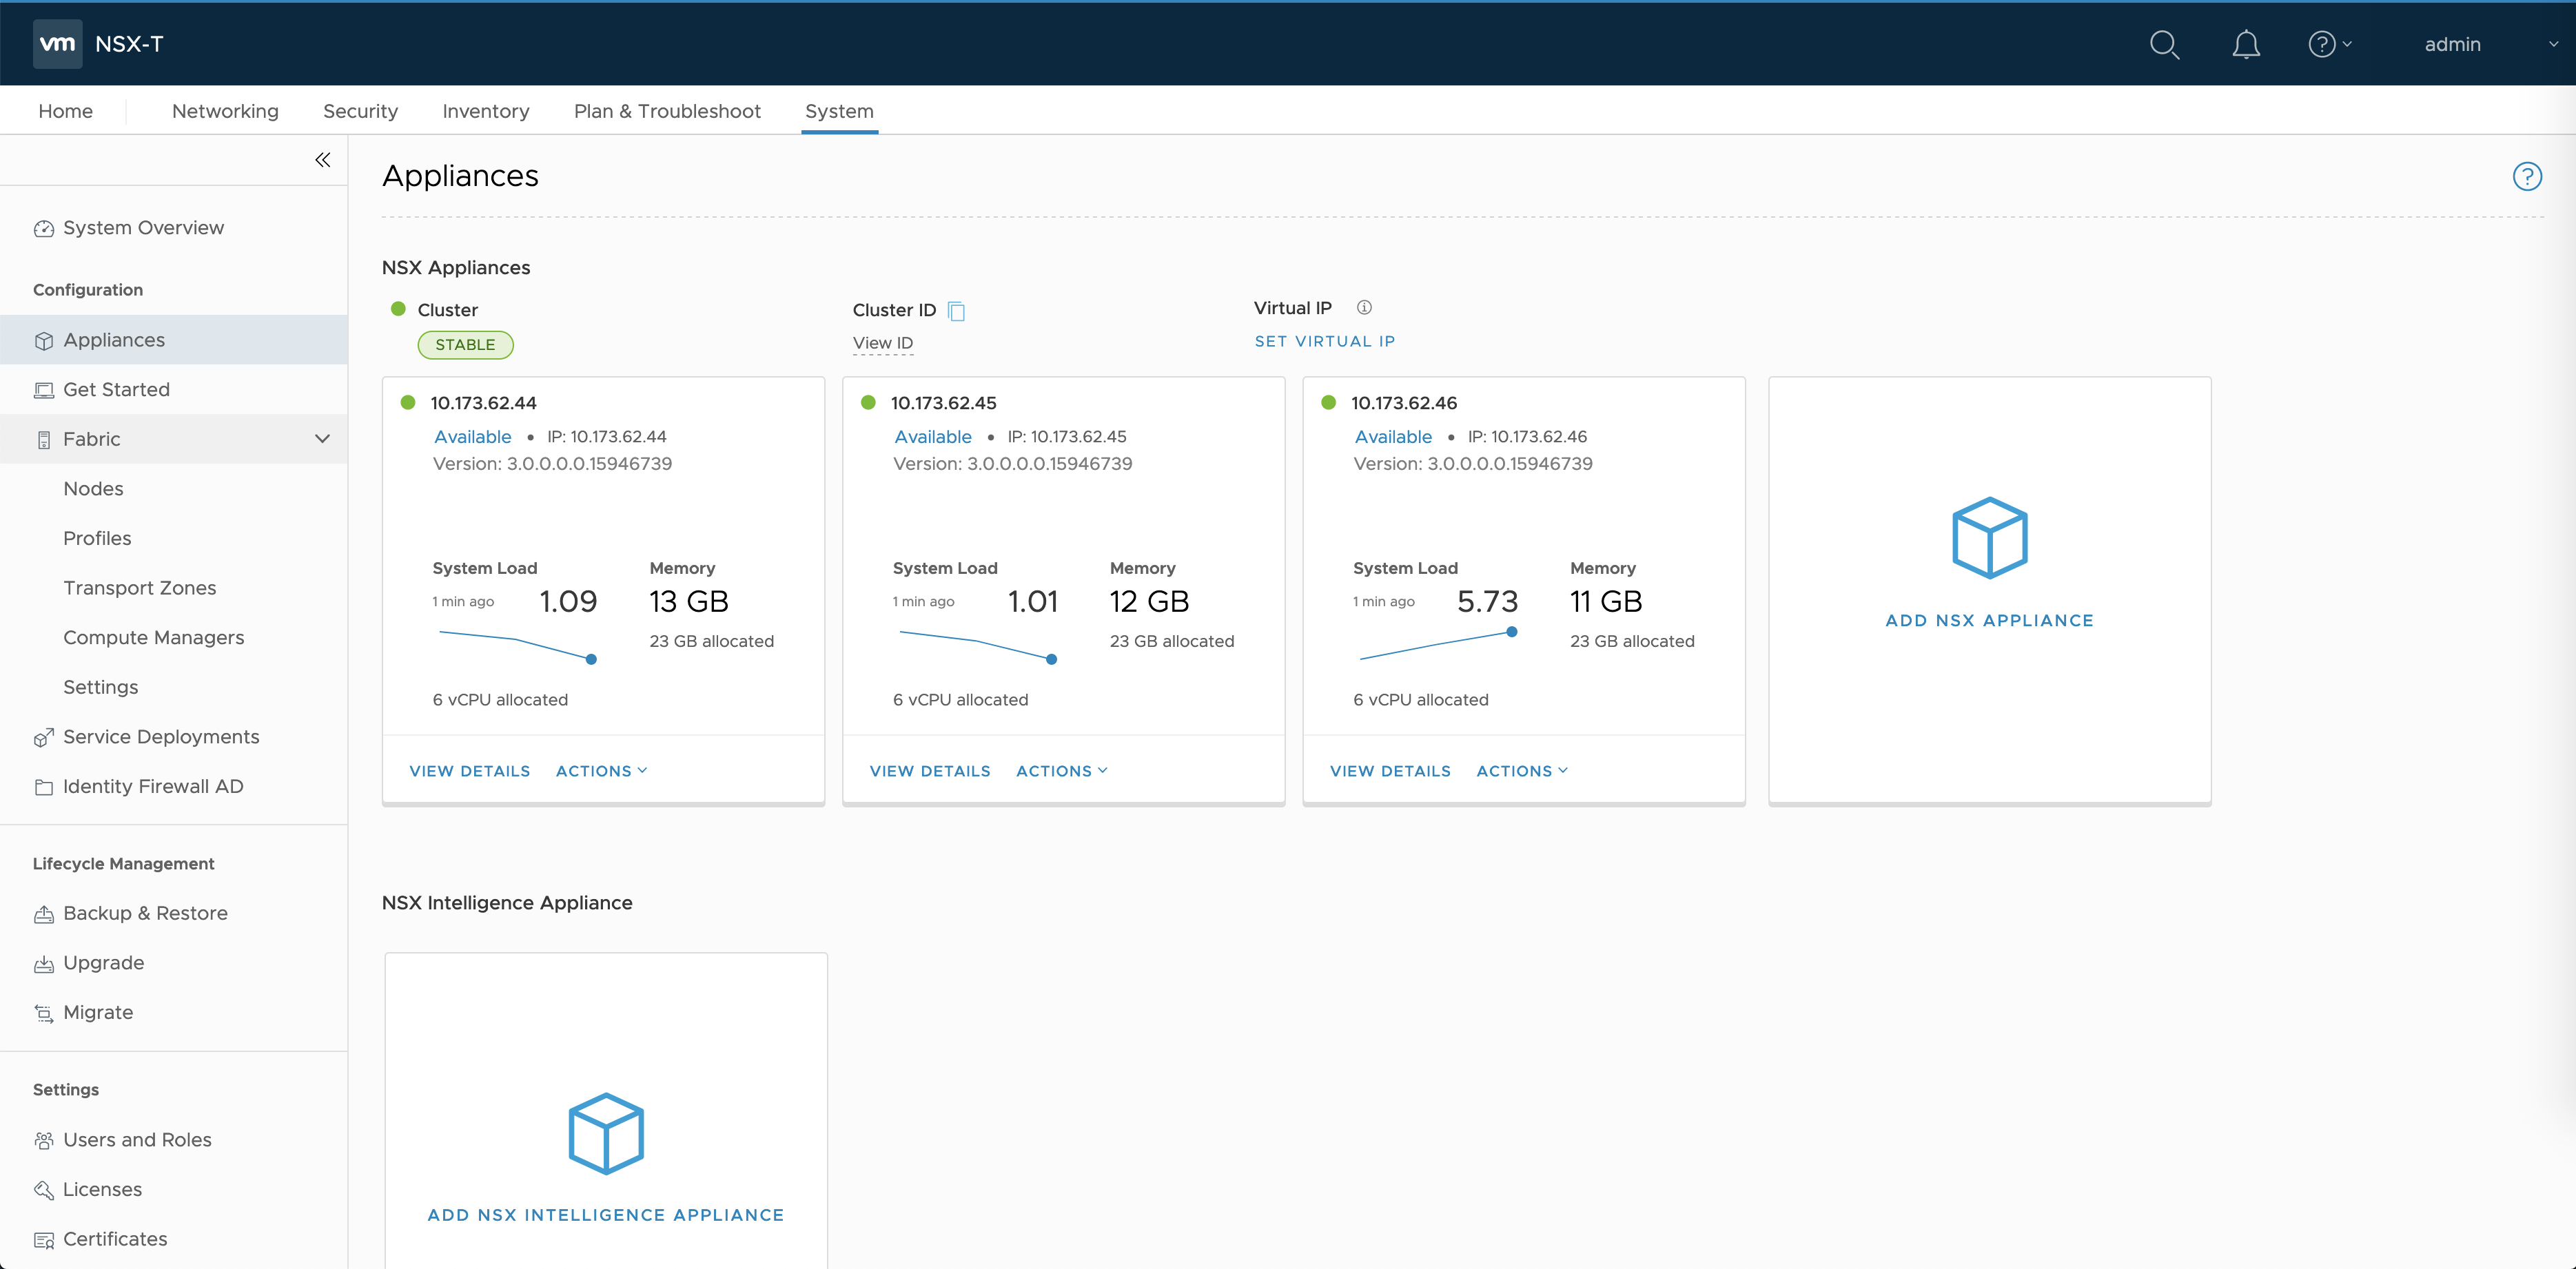
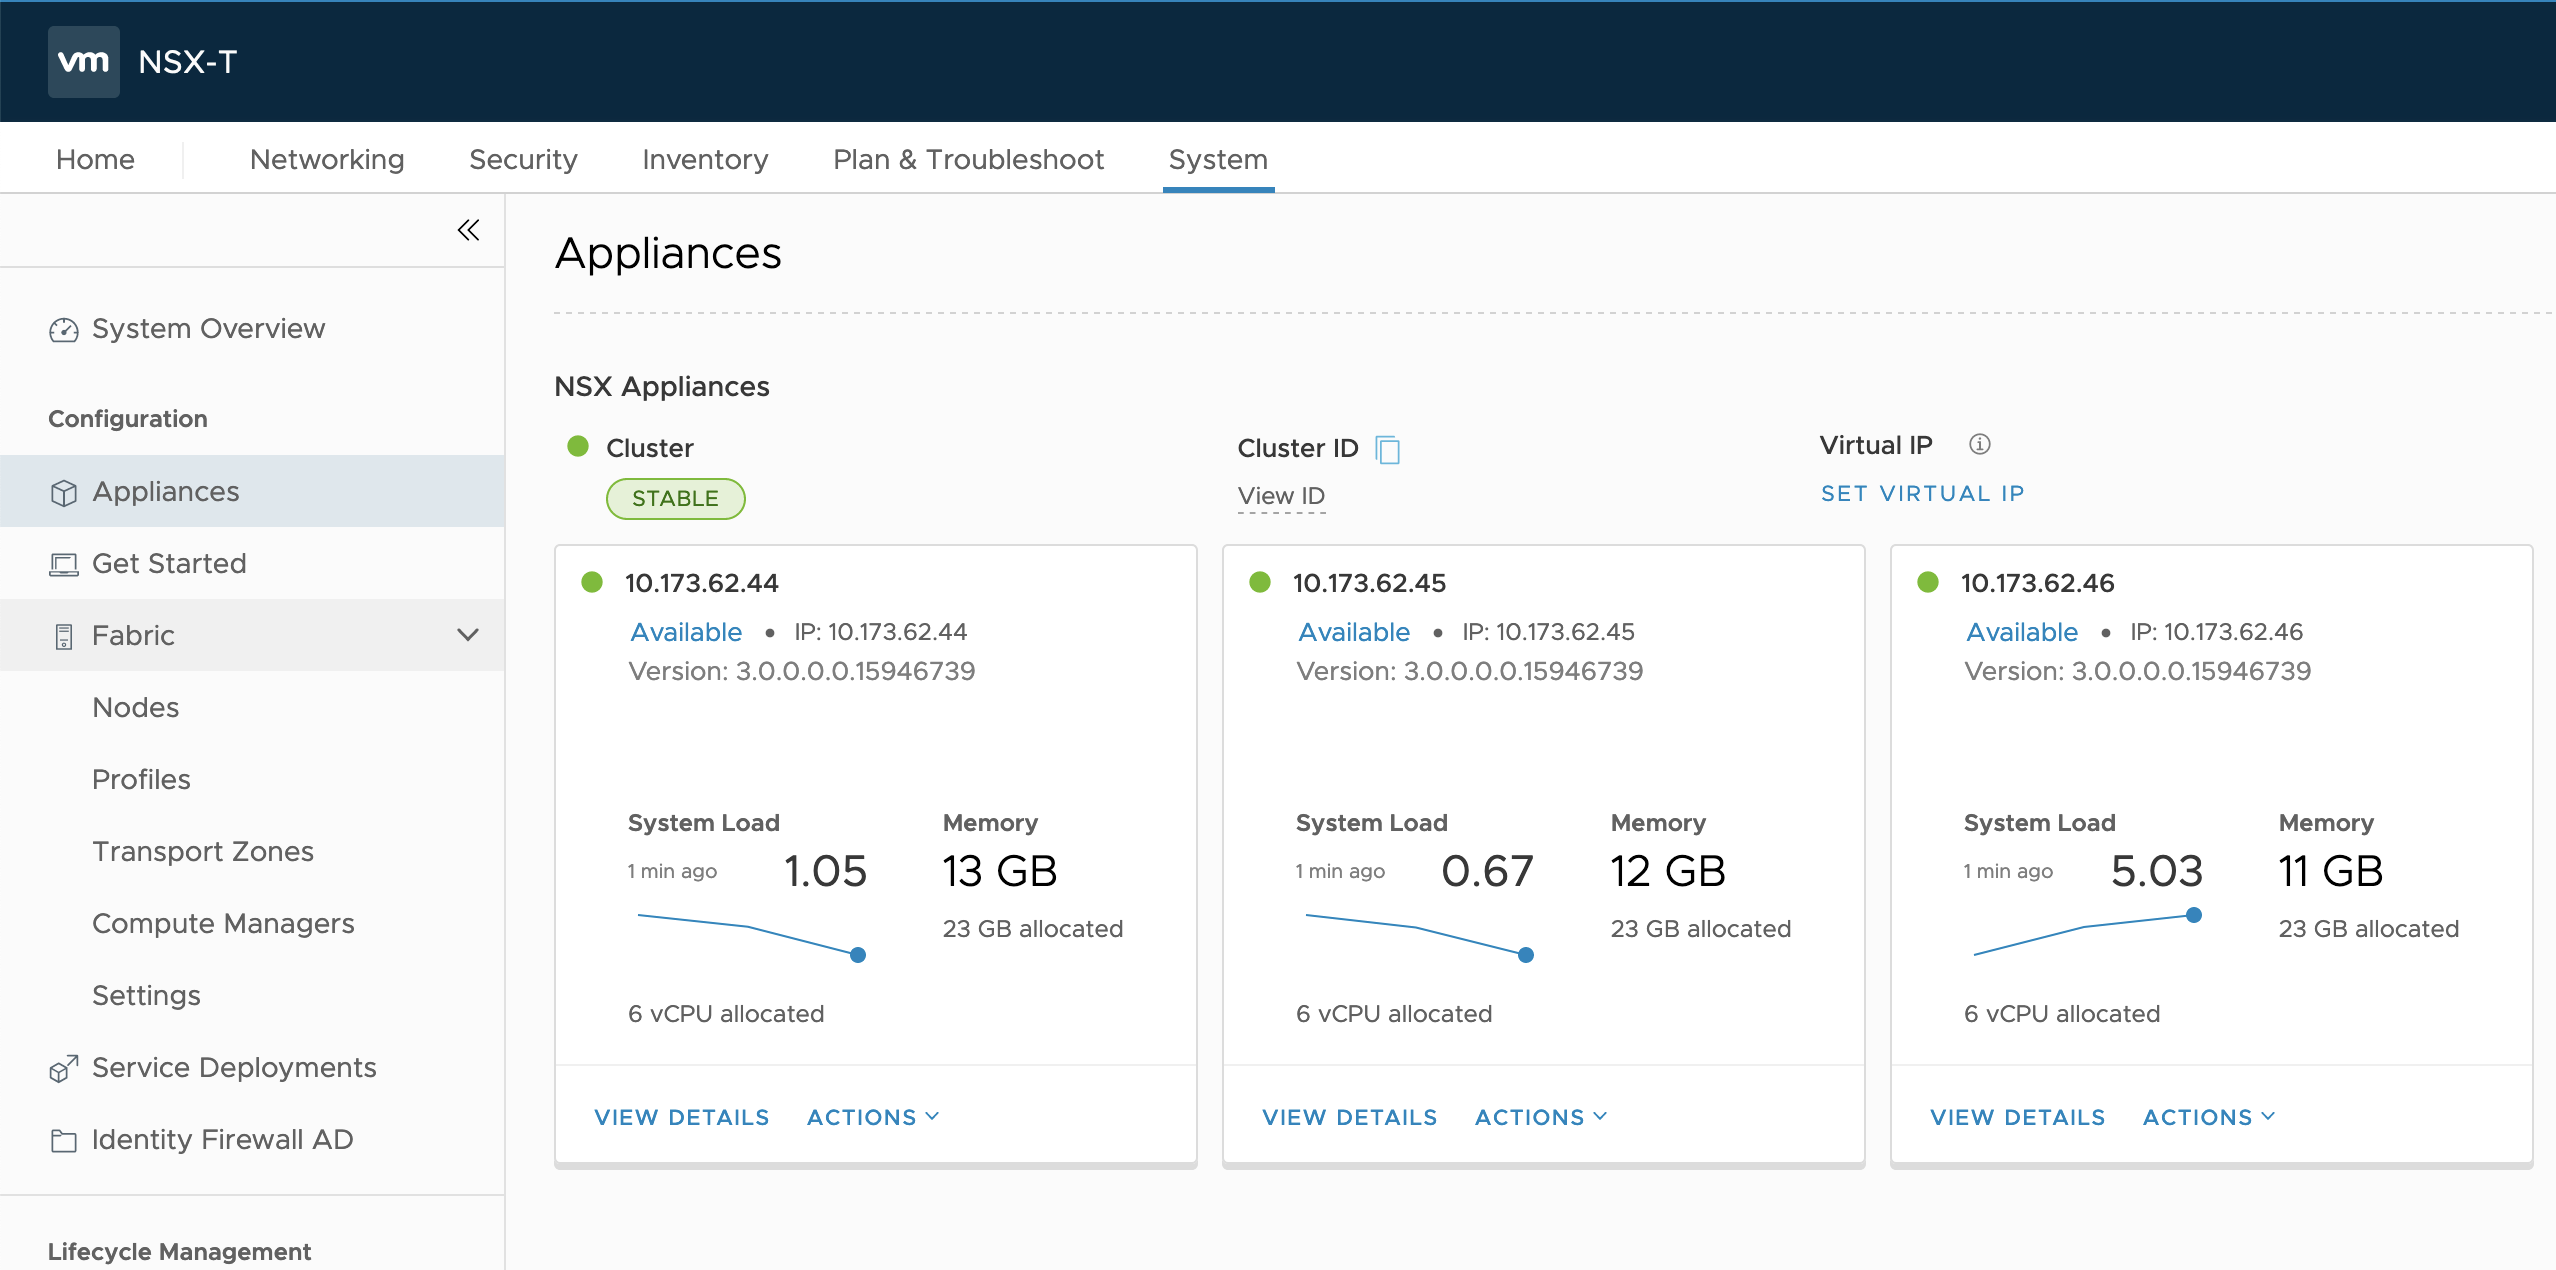
Configure the NSX-T Management VIP
The NSX-T Management layer includes three NSX-T Manager nodes. To support a single access point, assign a virtual IP Address (VIP) to the NSX-T Management layer. Once the VIP is assigned, any UI and API requests to NSX-T are redirected to the virtual IP address of the cluster, which is owned by the leader node. The leader node then routes the request forward to the other components of the appliance.
Using a VIP makes the NSX Management Cluster highly-available. If you need to scale, an alternative to the VIP is to provision a load balancer for the NSX-T Management Cluster. Provisioning a load balancer requires that NSX-T be fully installed and configured. It is recommended that you configure the VIP now, then install a load balancer after NSX-T is installed and configured, and only if needed.
Complete the following instructions to create a VIP for the NSX Management Cluster. The IP address you use for the VIP must be part of the same subnet as the NSX-T Management nodes.
- In the NSX Management Console, navigate to System > Appliances.
- Click the Set Virtual IP button.
- Enter a Virtual IP address, such as
10.173.62.47.
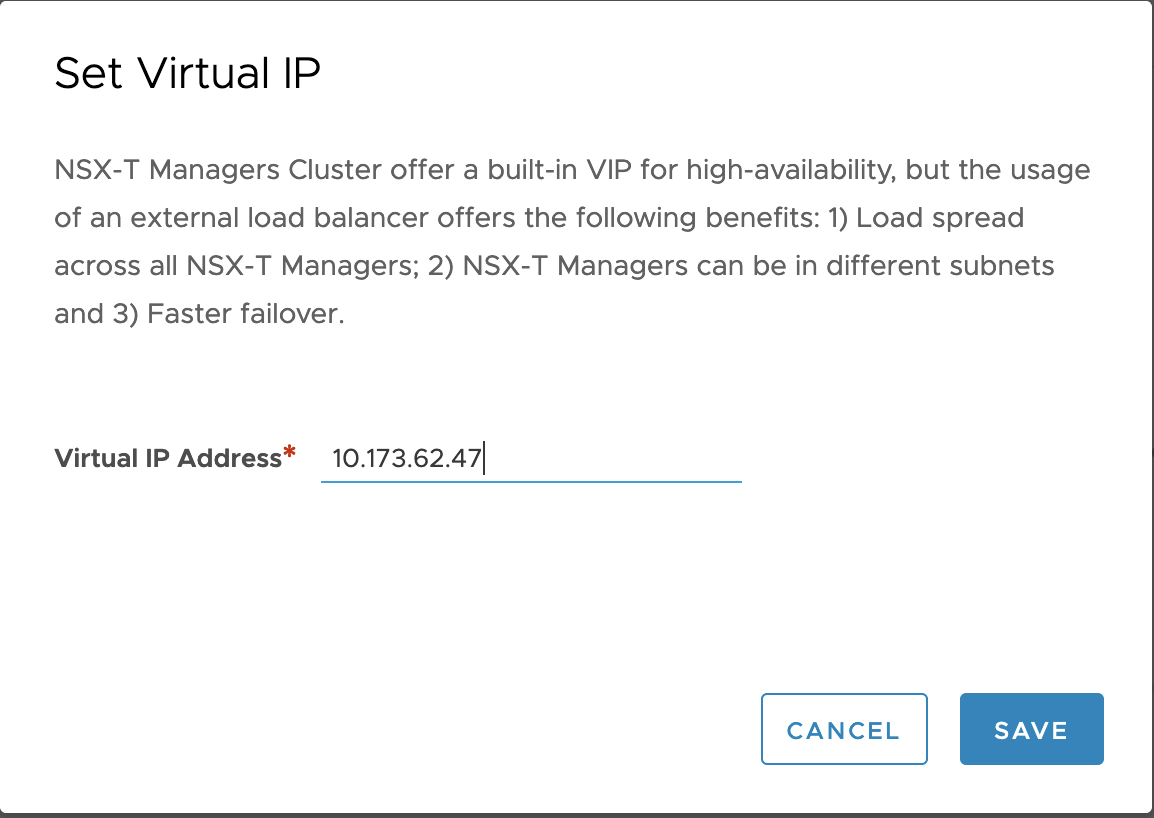
- Verify that the VIP is added.

- Access the NSX-T Management console using the VIP, such as
https://10.173.62.47/login.jsp.
Add the NSX-T Manager License
If you do not add the proper NSX-T license, you will receive an error when you try to deploy an Edge Node VM.
- In the NSX-T Manager console, navigate to System > Licenses.
- Add the NSX Data Center Advanced (CPU) license.
- Verify that the license is added.
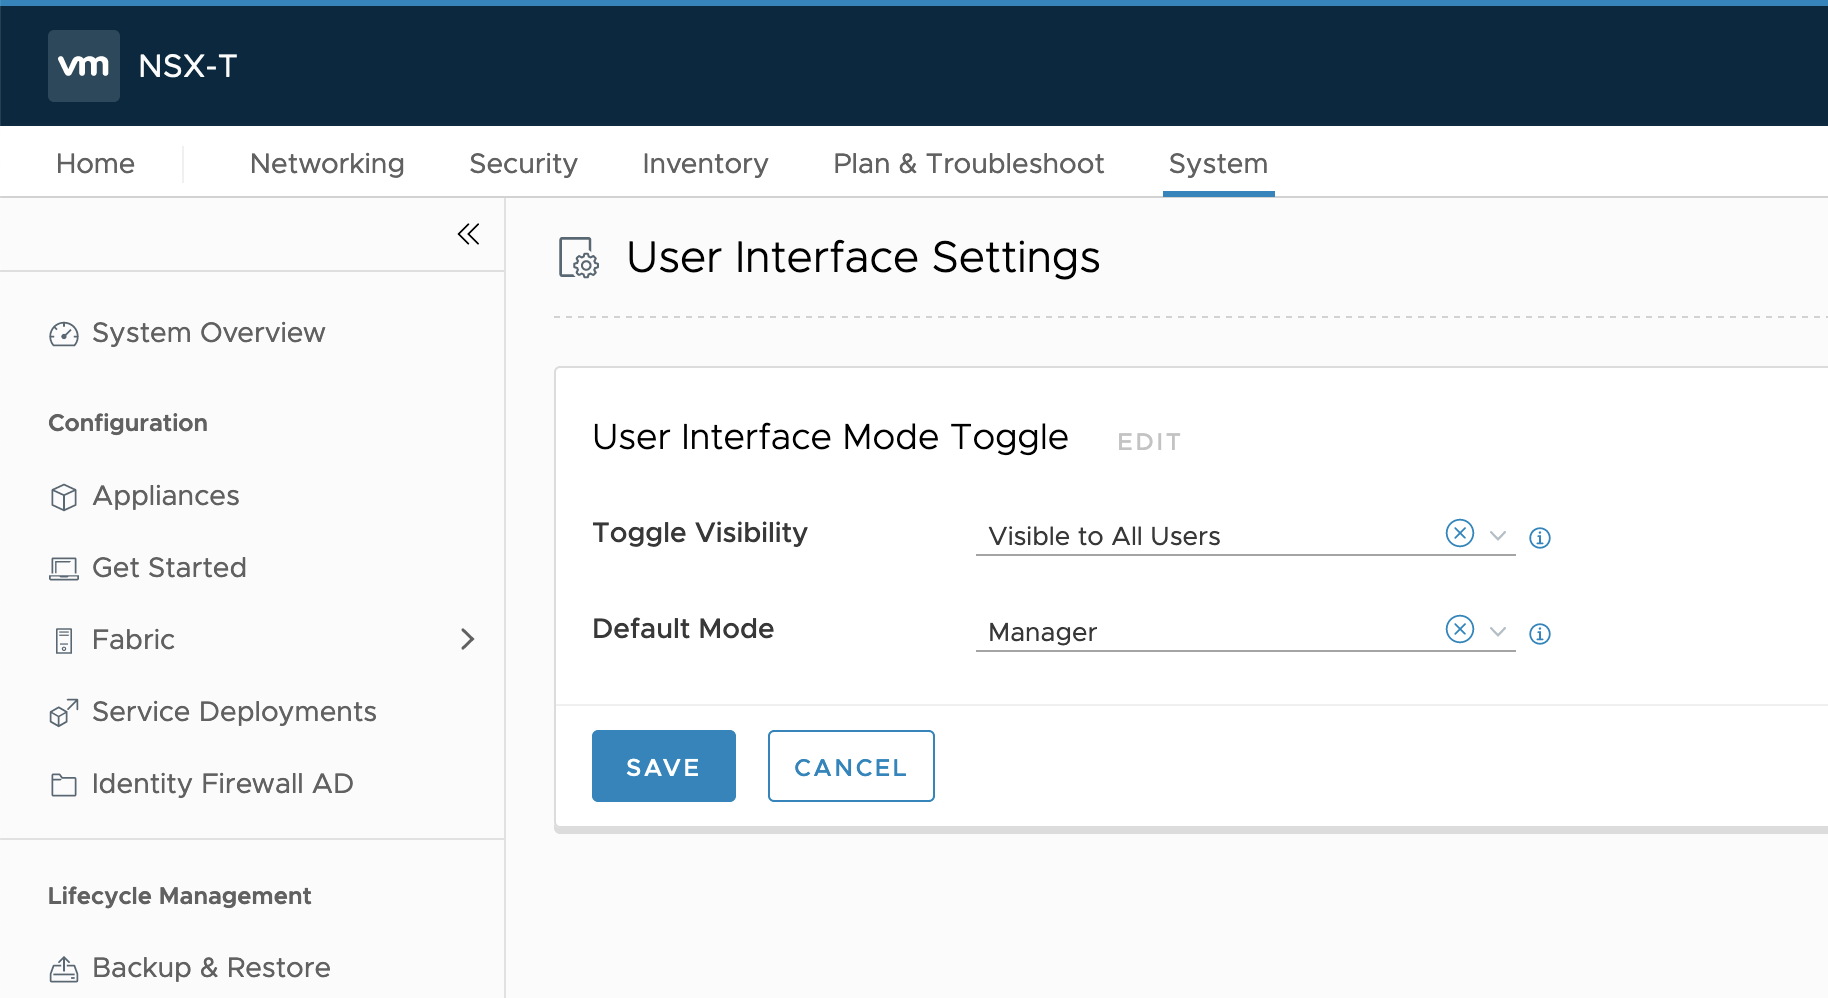
Enable the NSX-T Manager Interface (if necessary)
The NSX Management Console provides two user interfaces: Policy and Manager. TKGI supports both.
The Policy interface is the default. If you are using the Manager interface for configuring the networking and security objects, you need to enable the Manager interface.
- In the NSX-T Manager console, navigate to System > User Interface Settings.
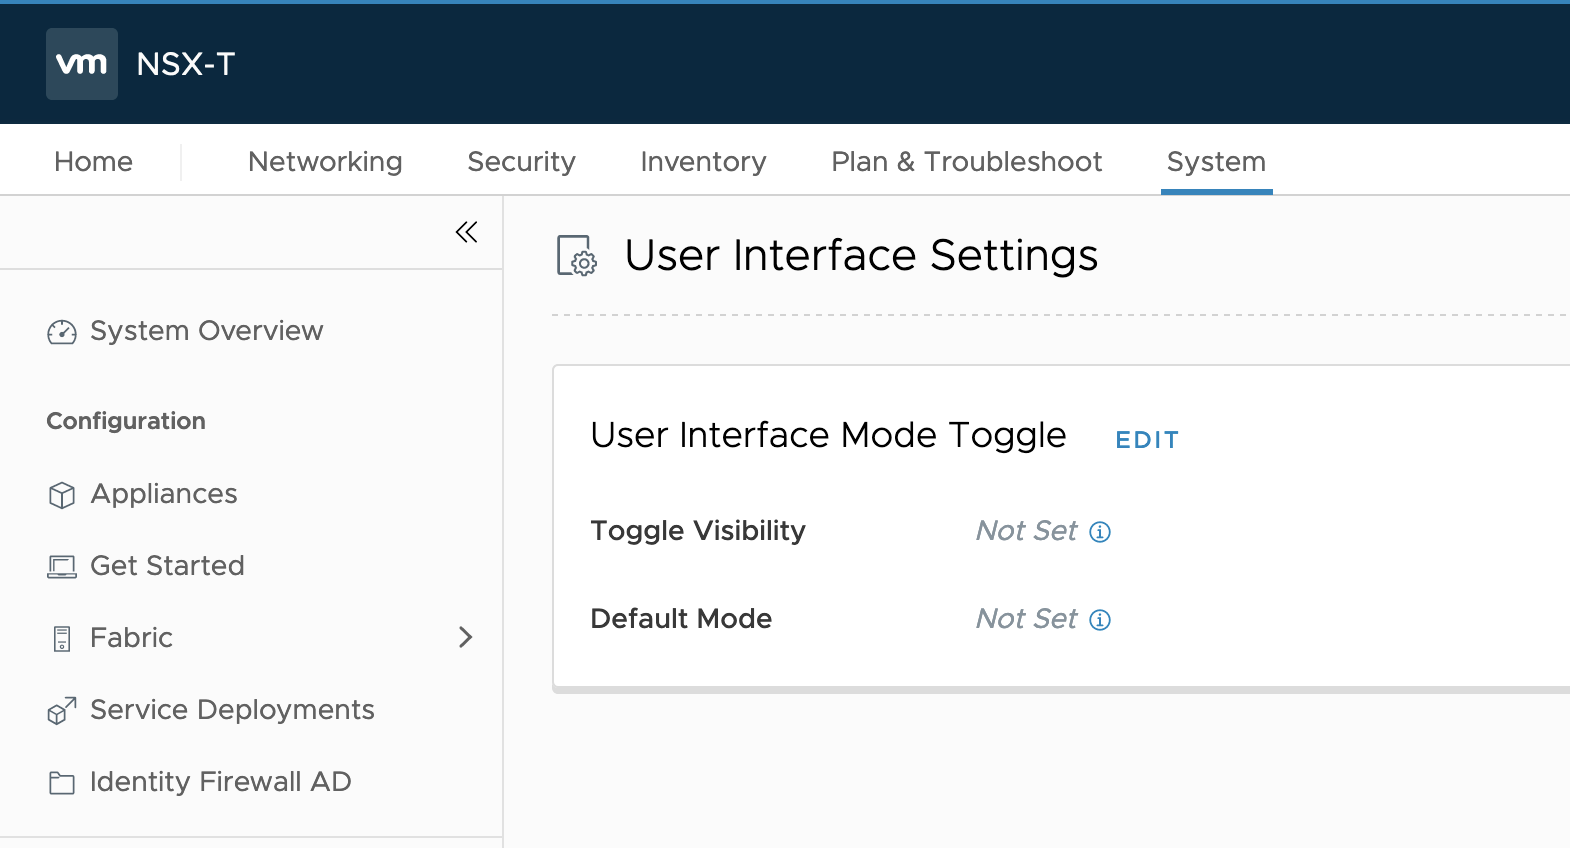
- Click Edit.
- For the Toggle Visibility field, select Visible to all Users.
- For the Default Mode field, select Manager.
- Click Save.

- Refresh the NSX-T Manager Console and navigate to an area of the console that is not listed under System.
- In the upper-right area of the console, verify that the Manager option is enabled.
