


This topic describes how to shut down and startup VMware Tanzu Kubernetes Grid Integrated Edition (TKGI), including TKGI-provisioned Kubernetes cluster nodes, TKGI components, and vSphere hosts (vSphere only).
Many of these operations use your IaaS dashboard, such as vSphere Client, Azure Portal, AWS Management Console, or GCP Console.
Shutdown Sequence and Tasks
To perform a graceful shutdown of all Kubernetes, Tanzu Kubernetes Grid Integrated Edition, and infrastructure components, complete the following tasks in sequence.
Step 1: Deactivate BOSH Resurrection
If you have the Enable VM Resurrector Plugin check box selected in the BOSH Director tile > Director Config pane, you must turn BOSH resurrection off before restarting TKGI, to prevent BOSH from recreating VMs.
To do this, run the command bosh update-resurrection off.
Step 2: Delete All PodDisruptionBudgets
To ensure that all workloads are drained as the worker nodes shutdown, remove all PodDisruptionBudgets before deleting your apps.
-
To confirm the names of your existing PodDisruptionBudgets:
kubectl get poddisruptionbudgets -A -
Back up all PodDisruptionBudgets.
To back up a single PodDisruptionBudget:kubectl get poddisruptionbudget PDB-NAME -o yaml > PDB-NAME.yamlWhere
PDB-NAMEis the name of one of your PodDisruptionBudgets. -
Delete each PodDisruptionBudget until you have removed all PodDisruptionBudgets.
To delete a single PodDisruptionBudget:kubectl edit poddisruptionbudget PDB-NAMEWhere
PDB-NAMEis the name of one of your PodDisruptionBudgets.
Step 3: Shut Down Customer Apps
Shut down all customer apps running on Tanzu Kubernetes Grid Integrated Edition-provisioned Kubernetes clusters.
Note: This task is optional. Perform it after considering the types of apps you have deployed. For example, stateful, stateless, or legacy apps.
Step 4: Shut Down Kubernetes Clusters
Shut down all Tanzu Kubernetes Grid Integrated Edition-provisioned Kubernetes clusters following the procedure defined in the How to shutdown and startup a Multi Control Plane Node TKGI cluster knowledge base article.
For each Kubernetes cluster that you intend to shut down, do the following:
-
Using the BOSH CLI, retrieve the BOSH deployment name of your Tanzu Kubernetes Grid Integrated Edition clusters by running the following command:
bosh deploymentsKubernetes cluster deployment names begin with
service-instance_and include a unique BOSH-generated hash. -
Using the BOSH CLI, stop the Kubernetes worker nodes:
-
For a Linux worker:
bosh -d service-instance_CLUSTER-UUID stop worker -
For a Windows worker:
bosh -d service-instance_CLUSTER-UUID stop windows-worker
Where
CLUSTER-UUIDis the BOSH deployment name of your Tanzu Kubernetes Grid Integrated Edition cluster.For example:
$ bosh -d service-instance_aa1234567bc8de9f0a1c stop workerNote: When you use the BOSH
stopcommand, all processes on the Kubernetes node are stopped. BOSH marks them stopped so that when the VM is powered back on, the processes do not start automatically. -
-
Using the BOSH CLI, stop the Kubernetes control plane nodes by running the following command:
bosh -d service-instance_CLUSTER-UUID stop masterWhere
CLUSTER-UUIDis the BOSH deployment name of your Tanzu Kubernetes Grid Integrated Edition cluster. For example:$ bosh -d service-instance_aa1234567bc8de9f0a1c stop master -
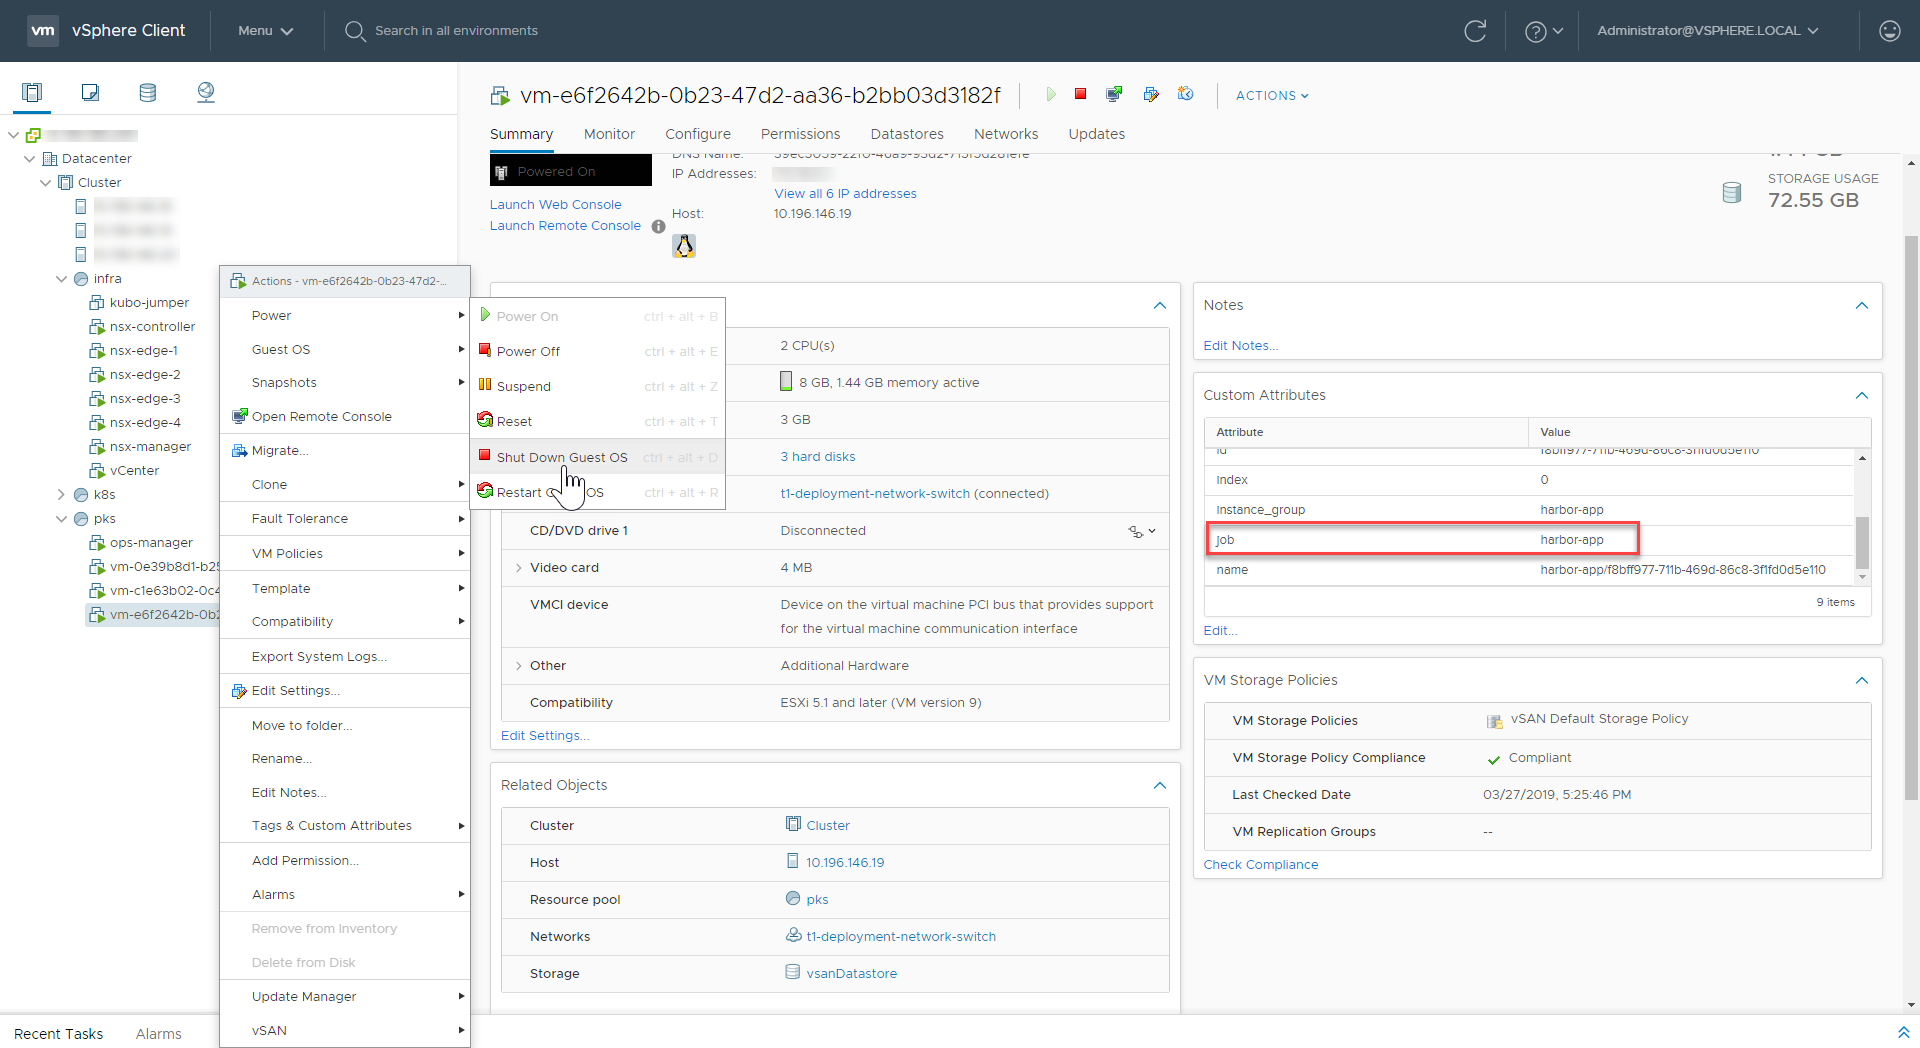
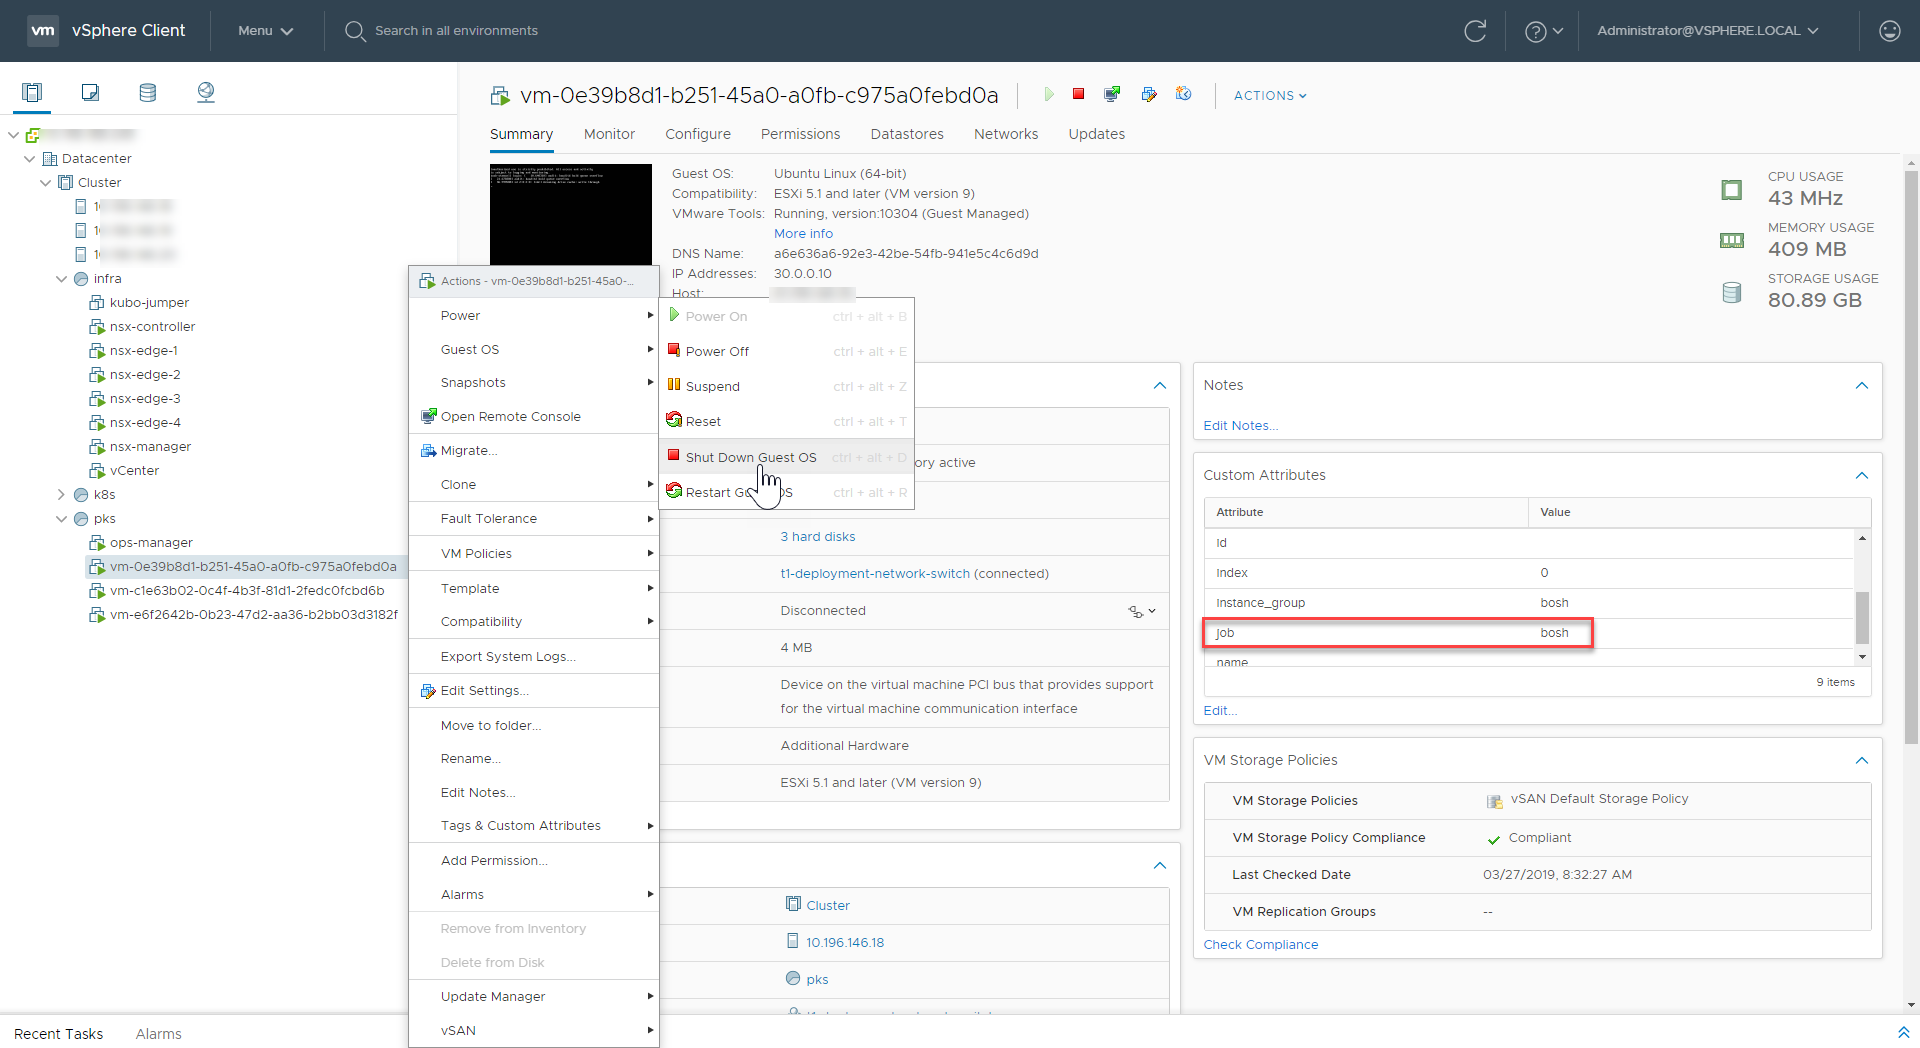
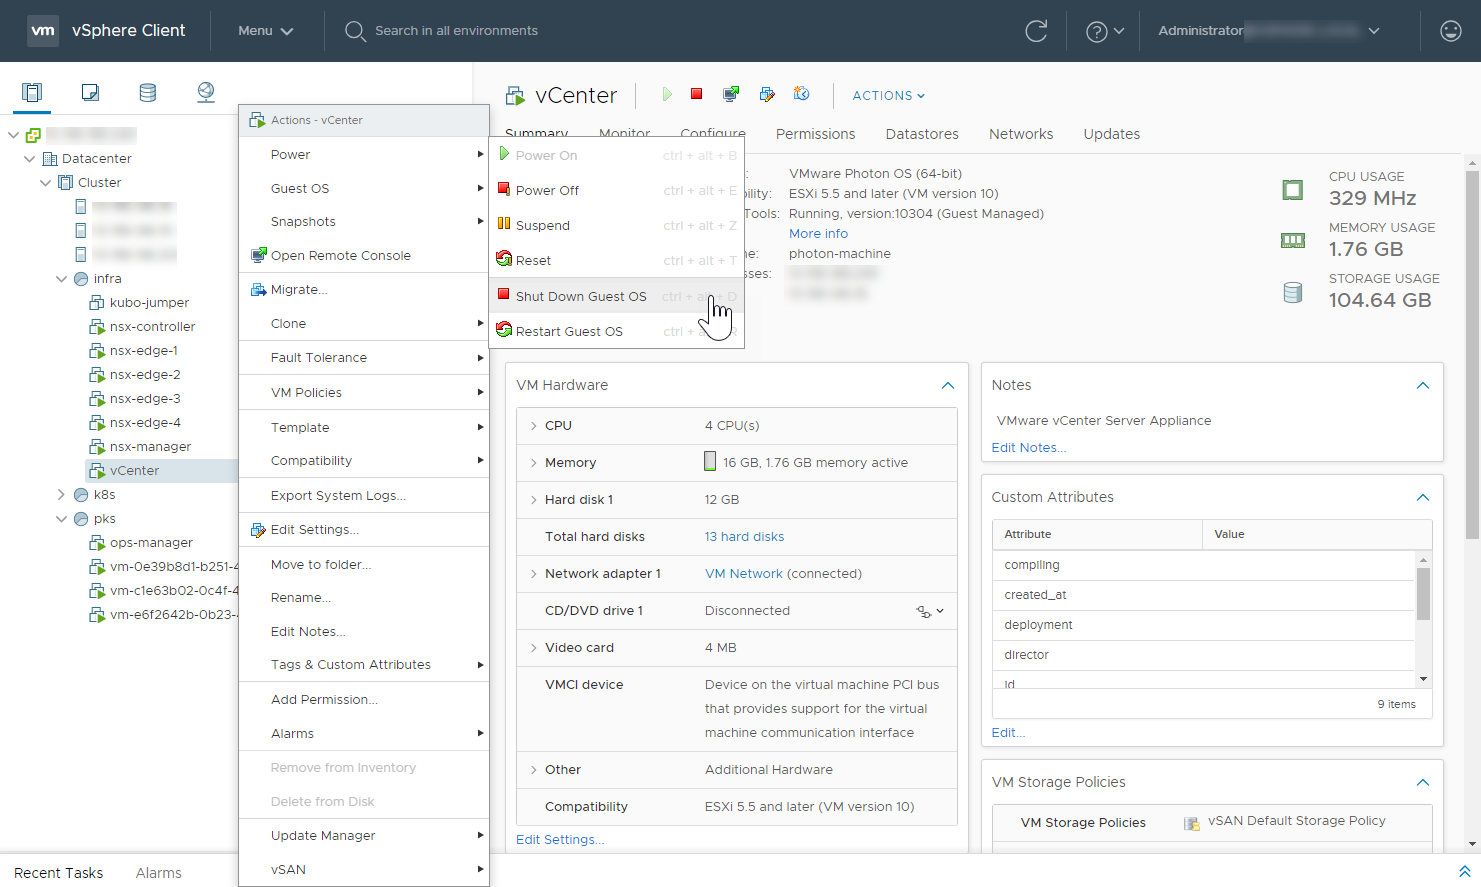
Using your IaaS dashboard, shut down all Kubernetes node VMs. To do this, perform the following steps:
- Verify the node type by checking the “job” name in the Custom Attributes pane.
-
Perform a graceful shutdown by right-clicking the target VM and selecting Power > Shut Down Guest OS.

Step 5: Stop the TKGI Control Plane
To shut down the TKGI control plane, stop and shut down the TKGI API and TKGI Database VMs as follows:
Stop TKGI Control Plane Processes
To stop Tanzu Kubernetes Grid Integrated Edition control plane processes and services, do the following:
-
Using the BOSH CLI, retrieve the BOSH deployment ID of your Tanzu Kubernetes Grid Integrated Edition deployment by running the following command:
bosh deploymentsThe Tanzu Kubernetes Grid Integrated Edition deployment ID is
pivotal-container-service-followed by a unique BOSH-generated hash. -
Stop the TKGI control plane VM by running the following command:
bosh -d pivotal-container-service-DEPLOYMENT-ID stopWhere
DEPLOYMENT-IDis the BOSH-generated ID of your Tanzu Kubernetes Grid Integrated Edition deployment.For example:
$ bosh -d pivotal-container-service-1bf7b02738056cdc37e6 stop
Shut Down the TKGI API and Database VMs
To shut down the TKGI API and TKGI Database VMs, do the following:
-
Run the
bosh vmscommand to list your Tanzu Kubernetes Grid Integrated Edition control plane VMs.bosh -d pivotal-container-service-DEPLOYMENT-ID vmsWhere
DEPLOYMENT-IDis the BOSH-generated ID of your Tanzu Kubernetes Grid Integrated Edition deployment.For example:
$ bosh -d pivotal-container-service-1bf7b02738056cdc37e6 vms -
Review the
bosh vmsoutput:- Record the TKGI API VM name, listed under Instances as
pivotal-container-service/followed by a unique BOSH-generated hash. - Record the TKGI Database VM name(s), listed under Instances as
pks-db/followed by a unique BOSH-generated hash.
- Record the TKGI API VM name, listed under Instances as
-
Using your IaaS dashboard, locate and gracefully shut down the TKGI control plane VMs:
- The TKGI API VMs.
- The TKGI Database VMs.

Step 6: Shut Down VMware Harbor Registry (vSphere Only)
To shut down the Harbor Registry VM, do the following:
-
Using the BOSH CLI, retrieve the BOSH deployment ID of your Harbor Registry deployment by running the following command:
bosh deploymentsHarbor Registry deployment names begin with
harbor-container-registryand include a unique BOSH-generated hash. -
Using the BOSH CLI, stop the Harbor Registry VM by running the following command:
bosh -d harbor-container-registry-DEPLOYMENT-ID stopWhere
DEPLOYMENT-IDis the BOSH-generated ID of your Harbor Registry deployment. For example:$ bosh -d harbor-container-registry-b4023f6857207b237399 stop -
Using vCenter, locate and gracefully shut down the Harbor Registry VM.
Step 7: Shut Down BOSH Director
Using your IaaS dashboard, locate and gracefully shut down the BOSH Director VM.
View a larger version of this image.
Step 8: Shut Down Ops Manager
Using your IaaS dashboard, locate and gracefully shut down the Ops Manager VM.
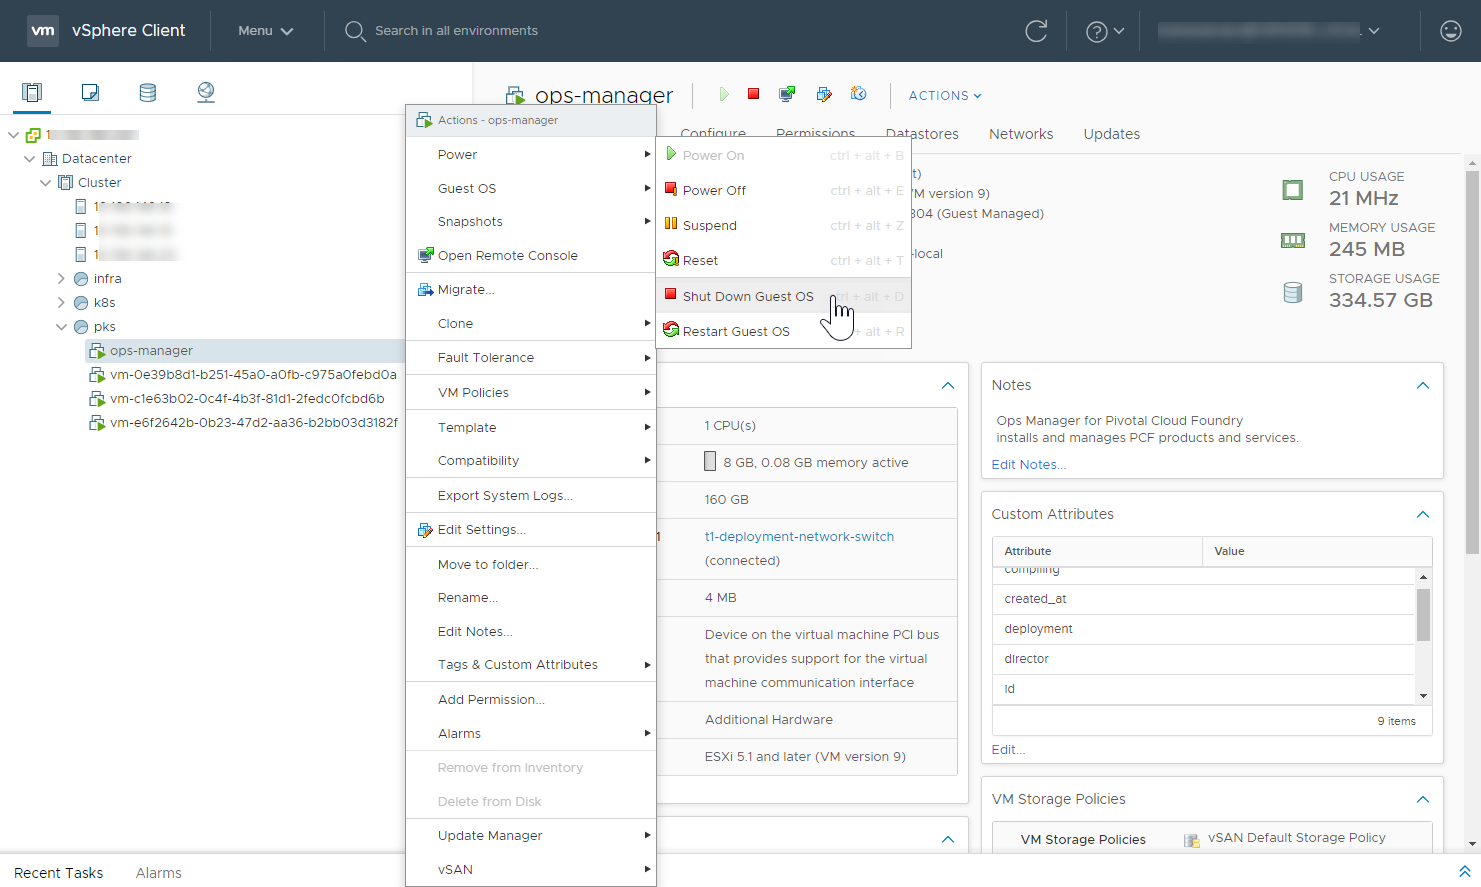
View a larger version of this image.
Step 9: Shut Down NSX Components (vSphere NSX Only)
Using vCenter, gracefully shut down all NSX VMs in the following order:
- NSX Manager
- NSX Controllers
- NSX Edge Nodes
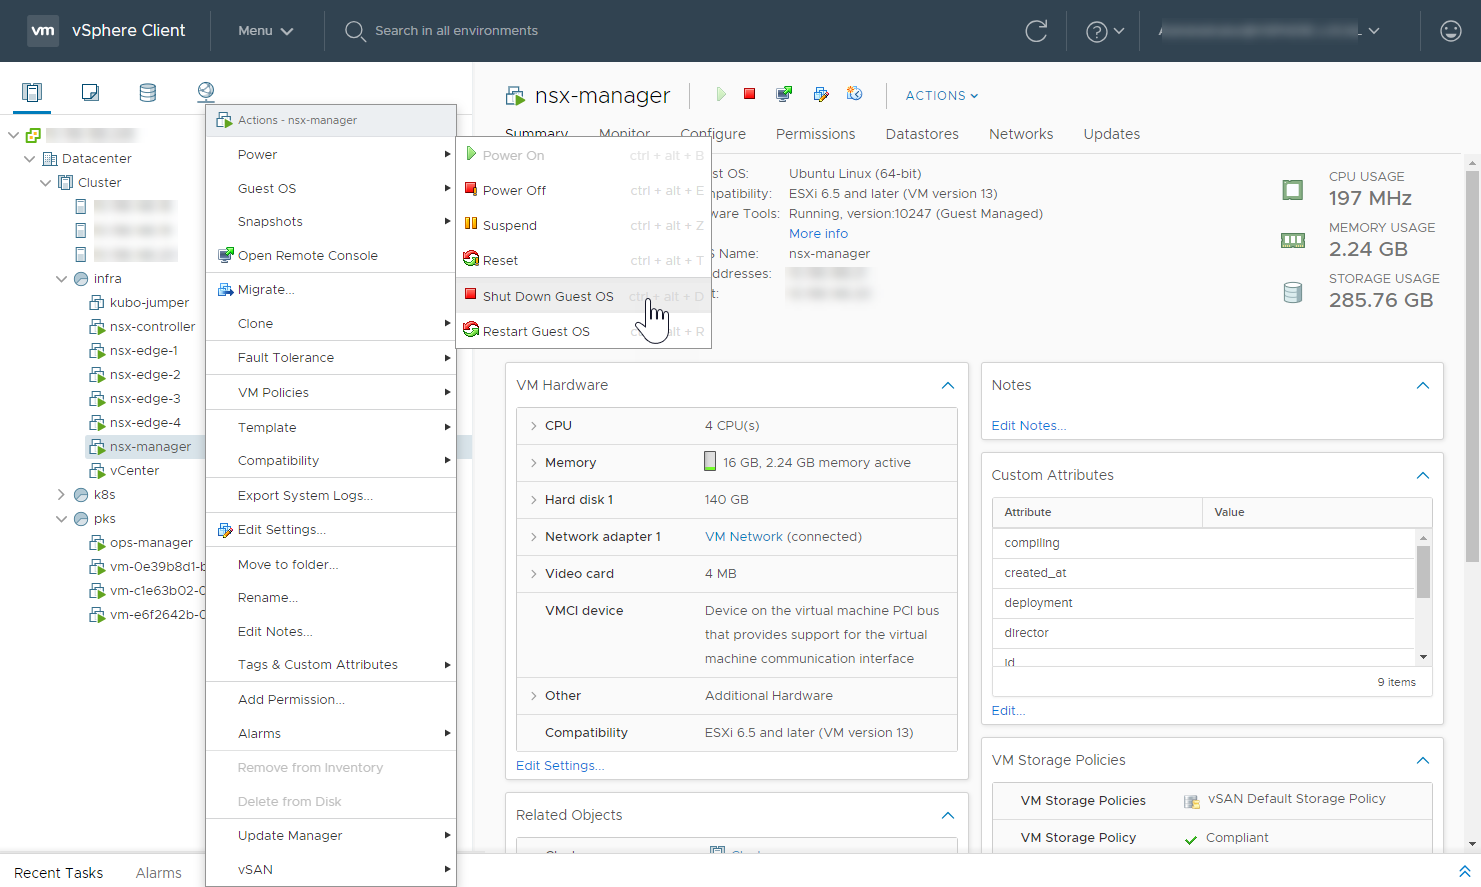
View a larger version of this image.
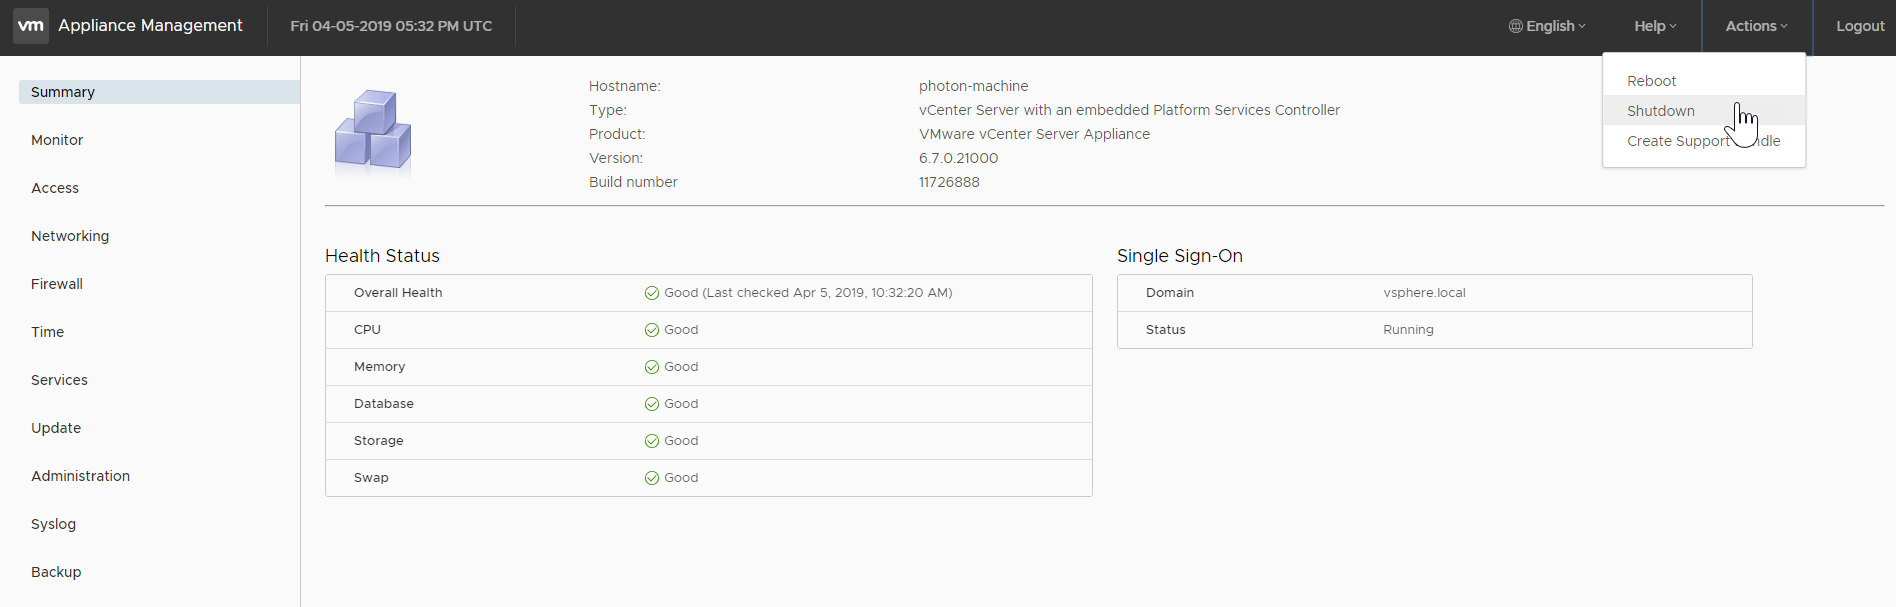
Step 10: Shut Down vCenter Server (vSphere Only)
To shut down the vCenter Server VM, do the following:
- Navigate to the vCenter Appliance Management Interface at
https://YOUR-VCENTER-HOSTNAME-OR-IP-ADDRESS>:5480, whereYOUR-VCENTER-HOSTNAME-OR-IP-ADDRESSis the hostname or IP address that you use to connect to vCenter through the vSphere Web Client. - Log in as root.
- Select Actions > Shutdown from the menu and confirm the operation.
For more information about how to shut down the vCenter Server VM, see Reboot or Shut Down the vCenter Server Appliance in the vSphere documentation and the How to stop, start, or restart vCenter Server 6.x services KB article.
Note: After you shut down this vCenter VM, the vSphere Web Client will not be available.
View a larger version of this image
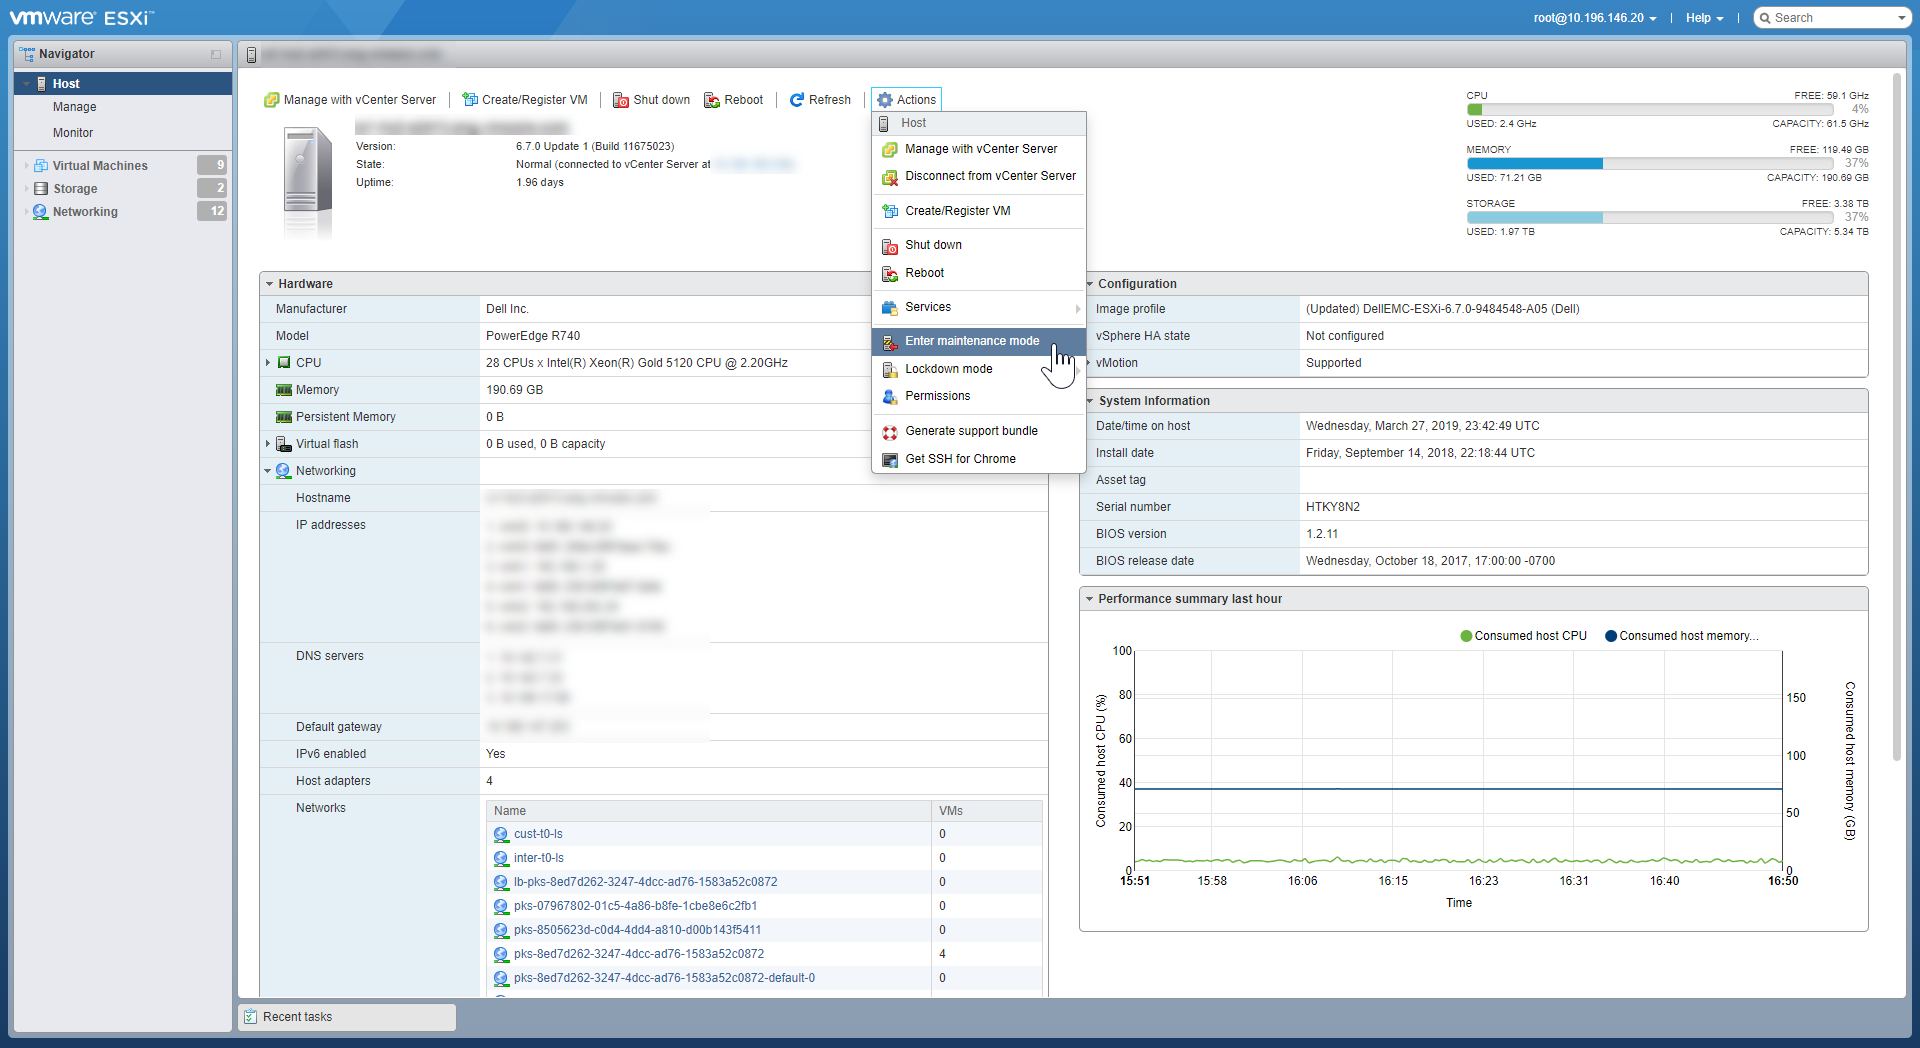
Step 11: Shut Down ESXi Hosts (vSphere NSX Only)
To shut down each ESXi host in the vSphere cluster, do the following:
-
Put the ESXi host into maintenance mode by doing the following:
- Using a browser, navigate to the HTTPS IP address of the ESXi host, for example: https://10.196.146.20/.
- Log in using vSphere administrative credentials.
- Put the ESXi host in maintenance mode by selecting Actions > Enter maintenance mode.
 View a larger version of this image.
-
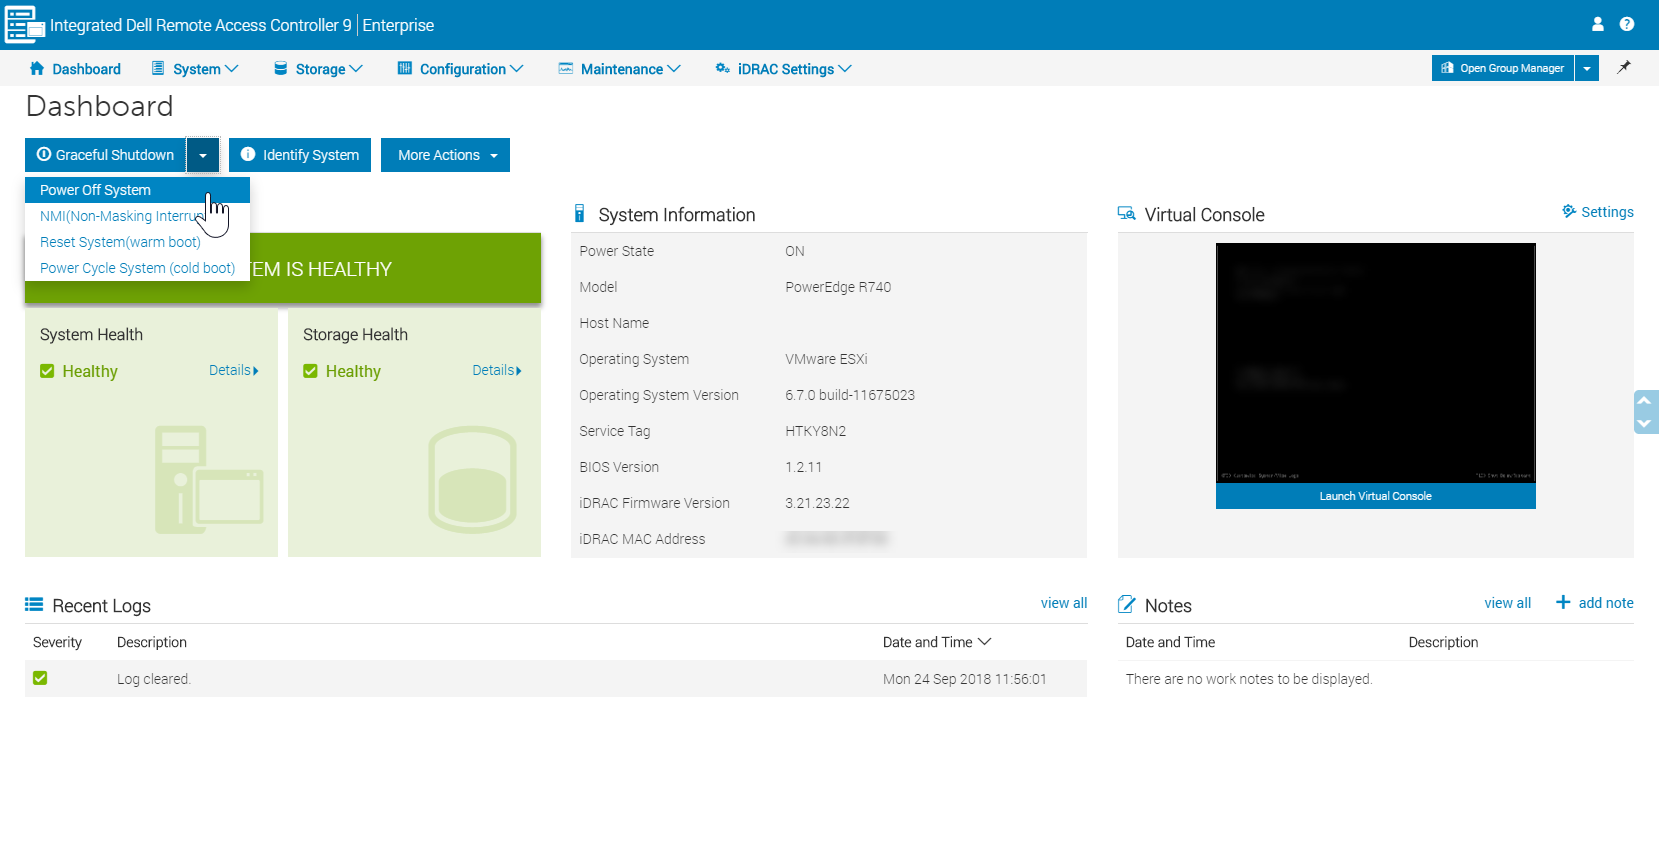
Power off the ESXi host. To do this, you have two options:
- Use the ESXi web interface and select Actions > Shut down.
- Use the remote management console for the host, such as Dell IDRAC or HP iLO.
 View a larger version of this image.
Startup Sequence and Tasks
To restart all Kubernetes, Tanzu Kubernetes Grid Integrated Edition, and infrastructure components, complete the following tasks in the sequence presented.
Step 1: Start ESXi Hosts (vSphere NSX Only)
To start the ESXi hosts, do the following:
- Using the remote management console, such as Dell IDRAC or HP iLO, power on each ESXi host.
- Connect to the web interface of each ESXi host and exit maintenance mode.
Step 2: Start vCenter (vSphere Only)
Connect to the web interface of the ESXi server that hosts the vCenter VM. Select the vCenter VM, and click Power On.
Step 3: Start NSX Components (vSphere NSX Only)
To start the NSX components, perform the following steps:
- Log into vCenter using the vSphere Client.
- Power on the following VMs in the following order:
- NSX Manager
- NSX Controllers
- NSX Edge Nodes
Step 4: Start Ops Manager
- Using your IaaS dashboard, power on the Ops Manager VM.
- Using a browser, go to the Ops Manager URL.
- Enter the Ops Manager passphrase.
- Log in to the Ops Manager UI.
Step 5: Start the BOSH Director
Using your IaaS dashboard, power on the BOSH Director VM.
Note: BOSH is aware that all the VMs under its control were stopped. BOSH does not attempt to resurrect any VMs, which is the desired behavior.
It might take approximately 90 minutes for BOSH to start properly.
To speed up the BOSH startup process:
- Obtain the BOSH Director VM Credentials from Ops Manager. For information about doing this, see Retrieving Credentials from Your Deployment in the Ops Manager documentation.
- SSH to the BOSH Director VM.
-
On the BOSH Director VM, run the following commands:
sudo -i monit summary -
If you see messages such as
Process uaa Connection failedandProcess credhub not monitored, then run the following command:monit restart uaa -
After a few minutes, run the following command again:
monit summaryConfirm that the
uaaandcredhubprocesses are now running, and that the BOSH Director is fully up and running.
Step 6: Start the TKGI Control Plane
To start the TKGI Control Plane, do the following:
-
Using your IaaS dashboard:
- Power on the TKGI Database VMs.
- Power on the TKGI API VMs.
-
Restart the TKGI Database deployments. The procedure to follow depends on whether the TKGI Database is scaled at
1or3:-
TKGI Database Scaled at
1:
To start the TKGI Database deployment:bosh -d DEPLOYMENT-ID start pks-dbWhere
DEPLOYMENT-IDis the BOSH-generated ID of the Tanzu Kubernetes Grid Integrated Edition deployment. -
TKGI Database Scaled at
3:Run the
bootstraperrand:bosh -d tkgi-db-DEPLOYMENT-ID run-errand bootstrapWhere
DEPLOYMENT-IDis the BOSH-generated ID of the Tanzu Kubernetes Grid Integrated Edition deployment.
Note: For more information about the
bootstraperrand, see Run the Bootstrap Errand in the VMware Tanzu SQL with MySQL for VMs documentation.
For more information on TKGI Database scaling, see Stop the TKGI Control Plane.
-
-
To restart the TKGI API deployment:
bosh -d DEPLOYMENT-ID start pivotal-container-serviceWhere
DEPLOYMENT-IDis the BOSH-generated ID of the Tanzu Kubernetes Grid Integrated Edition deployment.
Step 7: Start Harbor Registry (vSphere Only)
To start Harbor Registry, do the following:
- Using vCenter, power on the Harbor VM.
-
Using the BOSH CLI, start the Harbor process on the VM by running the following command:
bosh -d harbor-container-registry-DEPLOYMENT-ID startWhere
DEPLOYMENT-IDis the BOSH-generated ID of your Harbor Registry deployment. For example:$ bosh -d harbor-container-registry-b4023f6857207b237399 start
Step 8: Start the Kubernetes Clusters
For each Kubernetes cluster that you intend to start:
- Using your IaaS dashboard, power on the cluster VMs.
-
Follow the procedure appropriate for the number of control plane nodes in the cluster:
Start a Cluster with Three Control Plane Nodes
Use the BOSH CLI to run the commands below. For more information about the BOSH CLI, see the BOSH CLI Documentation.
-
Retrieve the BOSH deployment name of your Tanzu Kubernetes Grid Integrated Edition cluster:
bosh deploymentsTanzu Kubernetes Grid Integrated Edition cluster deployment names begin with
service-instance_followed by the BOSH deployment name. -
Start etcd on the
master/0node. A cluster with three members must have at least two members running to satisfy quorum, so you must first start one etcd instance.bosh -d DEPLOYMENT-NAME ssh master/0 "sudo monit start etcd"Where
DEPLOYMENT-NAMEis the BOSH deployment name retrieved in the previous step. -
View the status of etcd on the
master/0node:bosh -d DEPLOYMENT-NAME ssh master/0 "sudo monit summary"Where
DEPLOYMENT-NAMEis the BOSH deployment name retrieved in the previous step. Wait until etcd onmaster/0is running before executing the next step. -
Start the
master/1node:bosh -d DEPLOYMENT-NAME start master/1Where
DEPLOYMENT-NAMEis the BOSH deployment name retrieved in the previous step. Wait untilmaster/1has status Ready before executing the next step. -
Start the
master/2node:bosh -d DEPLOYMENT-NAME start master/2Where
DEPLOYMENT-NAMEis the BOSH deployment name retrieved in the previous step. Wait untilmaster/2has status Ready before executing the next step. -
Stop etcd on the
master/0node:bosh -d DEPLOYMENT-NAME ssh master/0 "sudo monit stop etcd"Wait until etcd on
master/0has stopped and has status not monitored before executing the next step. -
Start the
master/0node:bosh -d DEPLOYMENT-NAME start master/0Wait until
master/0has status Ready before executing the next step. -
Start the Kubernetes worker nodes:
bosh -d DEPLOYMENT-NAME start worker
Start a Cluster with Five Control Plane Nodes
Use the BOSH CLI to run the commands below. For more information about the BOSH CLI, see the BOSH CLI Documentation.
-
Retrieve the BOSH deployment name of your Tanzu Kubernetes Grid Integrated Edition cluster:
bosh deploymentsTanzu Kubernetes Grid Integrated Edition cluster deployment names begin with
service-instance_followed by the BOSH deployment name. -
Start etcd on the
master/0andmaster/1nodes. A cluster with five members must have at least three members running to satisfy quorum, so you must first start two etcd instance.bosh -d DEPLOYMENT-NAME ssh master/0 "sudo monit start etcd" bosh -d DEPLOYMENT-NAME ssh master/1 "sudo monit start etcd"Where
DEPLOYMENT-NAMEis the BOSH deployment name retrieved in the previous step. -
View the status of etcd on the
master/0andmaster/1nodes:bosh -d DEPLOYMENT-NAME ssh master/0 "sudo monit summary" bosh -d DEPLOYMENT-NAME ssh master/1 "sudo monit summary"Where
DEPLOYMENT-NAMEis the BOSH deployment name retrieved in the previous step. Wait until etcd onmaster/0andmaster/1is running before executing the next step. -
Start the
master/2node:bosh -d DEPLOYMENT-NAME start master/2Where
DEPLOYMENT-NAMEis the BOSH deployment name retrieved in the previous step. Wait untilmaster/2has status Ready before executing the next step. -
Start the
master/3node:bosh -d DEPLOYMENT-NAME start master/3Wait until
master/3has status Ready before executing the next step. -
Start the
master/4node:bosh -d DEPLOYMENT-NAME start master/4Wait until
master/4has status Ready before executing the next step. -
Stop etcd on the
master/1node:bosh -d DEPLOYMENT-NAME ssh master/1 "sudo monit stop etcd"Wait until etcd on
master/1has stopped and has status not monitored before executing the next step. -
Start the
master/1node:bosh -d DEPLOYMENT-NAME start master/1Wait until
master/1has status Ready before executing the next step. -
Stop etcd on the
master/0node:bosh -d DEPLOYMENT-NAME ssh master/0 "sudo monit stop etcd"Wait until etcd on
master/0has stopped and has status not monitored before executing the next step. -
Start the
master/0node:bosh -d DEPLOYMENT-NAME start master/0Wait until
master/0has status Ready before executing the next step. -
Start the Kubernetes worker nodes:
bosh -d DEPLOYMENT-NAME start worker
Step 9: Start Customer Apps
Start all apps running on the Tanzu Kubernetes Grid Integrated Edition-provisioned Kubernetes clusters.
Step 10: Restore All PodDisruptionBudgets
After you have restarted your apps, restore your PodDisruptionBudgets.
-
To restore your PodDisruptionBudgets, re-create each of the PodDisruptionBudgets you backed up before stopping your apps.
To re-create a single PodDisruptionBudget:kubectl apply -f PDB-CONFIG-NAMEWhere
PDB-CONFIG-NAMEis the name of one of the backup PodDisruptionBudget YAML configuration files that you created before stopping your apps.
Step 11: Re-enable BOSH Resurrection
Turn BOSH resurrection back on by running the command bosh update-resurrection on.
