This topic describes how to use the VMware Tanzu Kubernetes Grid Integrated Edition Command Line Interface (TKGI CLI) to view details of an individual TKGI cluster.
-
On the command line, run the following command to log in:
tkgi login -a TKGI-API -u USERNAME -kWhere:
TKGI-APIis the domain name for the TKGI API that you entered in Ops Manager > Tanzu Kubernetes Grid Integrated Edition > TKGI API > API Hostname (FQDN). For example,api.tkgi.example.com.USERNAMEis your user name.
See Logging in to Tanzu Kubernetes Grid Integrated Edition for more information about thetkgi logincommand.Note: If your operator has configured Tanzu Kubernetes Grid Integrated Edition to use a SAML identity provider, you must include an additional SSO flag to use the above command. For information about the SSO flags, see the section for the above command in TKGI CLI. For information about configuring SAML, see Connecting Tanzu Kubernetes Grid Integrated Edition to a SAML Identity Provider
-
Run the following command to view the details of an individual cluster:
tkgi cluster CLUSTER-NAMEWhere
CLUSTER-NAMEis the unique name for your cluster. -
Run the following command to view additional details of an individual cluster, including NSX network details and Kubernetes settings details:
tkgi cluster CLUSTER-NAME --detailsWhere
CLUSTER-NAMEis the unique name for your cluster.For example:
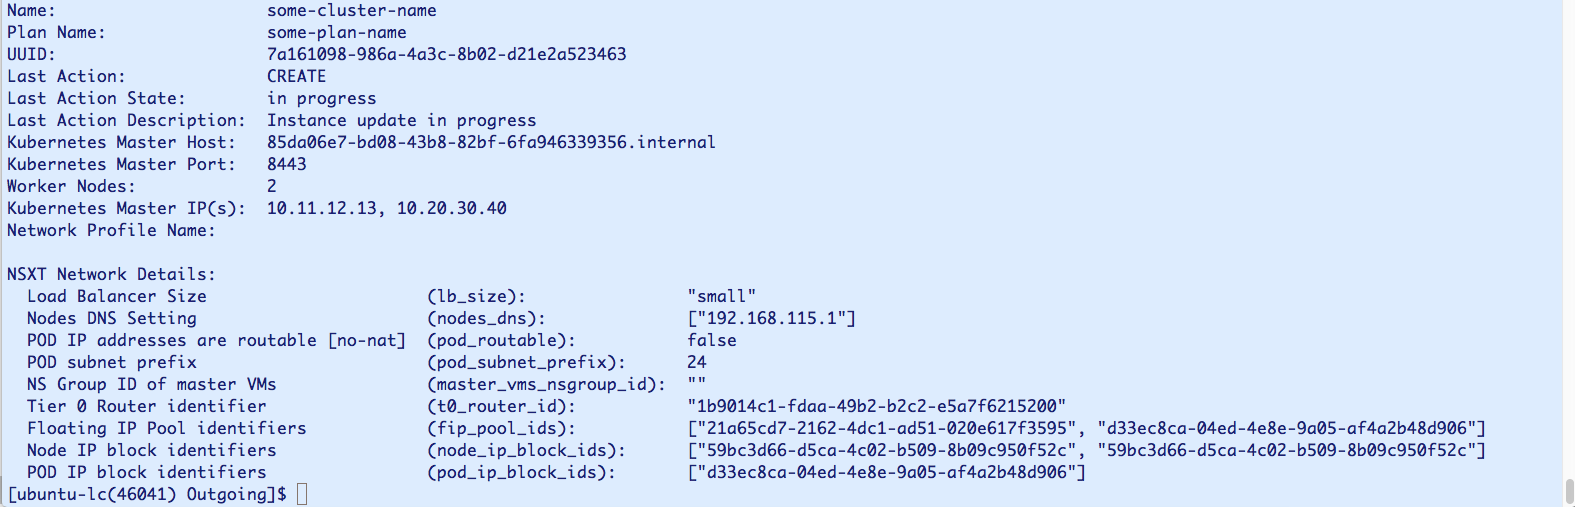
$ tkgi cluster my-cluster --details
TKGI Version:             1.18.3-build.12
Name:                     my-cluster
K8s Version:              1.27.15
Plan Name:                small
UUID:                     4b1a9b6d-3594-4cad-ad0f-22043fb26480
Last Action:              CREATE
Last Action State:        succeeded
Last Action Description:  Instance provisioning completed
Kubernetes Master Host:   example-hostname
Kubernetes Master Port:   8443
Worker Nodes:             3
Kubernetes Master IP(s):  10.197.100.130
Network Profile Name:

NSXT Network Details:
  Load Balancer Size                       (lb_size):                "small"
  Nodes DNS Setting                        (nodes_dns):              ["10.142.7.2"]
  Node IP addresses are routable [no-nat]  (node_routable):          false
  Nodes subnet prefix                      (node_subnet_prefix):     24
  POD IP addresses are routable [no-nat]   (pod_routable):           false
  PODs subnet prefix                       (pod_subnet_prefix):      24
  NS Group ID of master VMs                (master_vms_nsgroup_id):  ""
  Tier 0 Router identifier                 (t0_router_id):           "1e8371ac-1718-4617-8734-3975c6cd373b"
  Floating IP Pool identifiers             (fip_pool_ids):           ["901341c7-2e14-49d0-a3c1-66748664a062"]
  Node IP block identifiers                (node_ip_block_ids):      ["c5f0eb13-9691-4170-a9cd-c988f336ebd2"]
  POD IP block identifiers                 (pod_ip_block_ids):       ["fead2c9a-96e8-4c5f-98a3-e797f06bc8d4"]
Kubernetes Settings Details:
  Set by Plan:
  Kubelet Node Drain timeout (mins)          (kubelet-drain-timeout):            0
  Kubelet Node Drain grace-period (seconds)  (kubelet-drain-grace-period):       10
  Kubelet Node Drain force                   (kubelet-drain-force):              true
  Kubelet Node Drain force-node              (kubelet-drain-force-node):         false
  Kubelet Node Drain ignore-daemonsets       (kubelet-drain-ignore-daemonsets):  true
  Kubelet Node Drain delete-local-data       (kubelet-drain-delete-local-data):  true
The following image shows another example of
tkgi cluster CLUSTER-NAME --detailsoutput with NSX details: