This topic describes how to manage compute profiles in the VMware Tanzu Kubernetes Grid Integrated Edition Management Console (TKGI MC) on vSphere.
Overview
A compute profile enables cluster administrators, pks.clusters.admin, to override the default settings defined by a plan.
You can add, view and remove compute profiles using the TKGI Management Console:
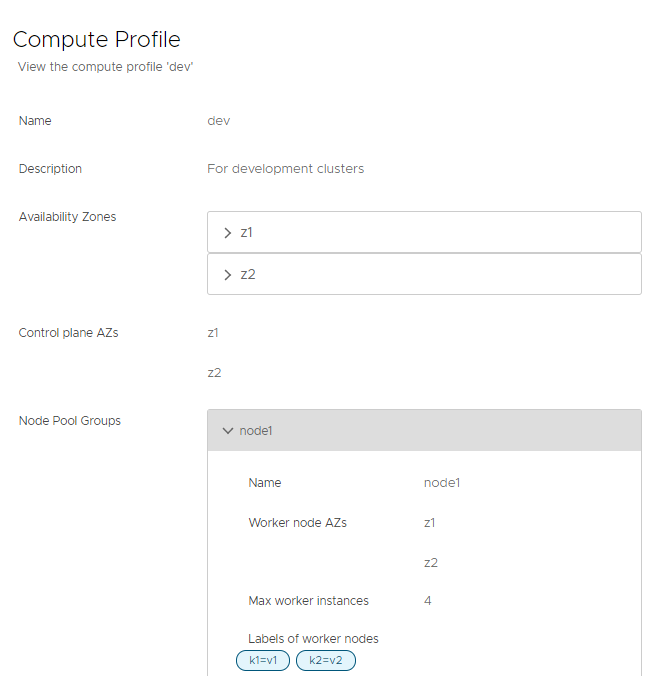
About Compute Profiles
Using a compute profile, cluster administrators can customize the following:
- Compute resources such as CPU, memory, ephemeral disk, and persistent disk for Kubernetes control plane and worker nodes
- vSphere resources for Kubernetes control plane and worker nodes
Note: A compute profile overrides only those CPU, memory, disk, and AZ settings that you define in the profile. If you do not define a setting in the profile, its configuration is inherited from the plan.
After you create a compute profile, cluster managers, pks.clusters.manage, can apply it to one or more Kubernetes clusters.
Note: If you use vSphere without NSX networking, creating Windows clusters with compute profiles is not supported.
For more information, see Compute Profiles vs. Plans.
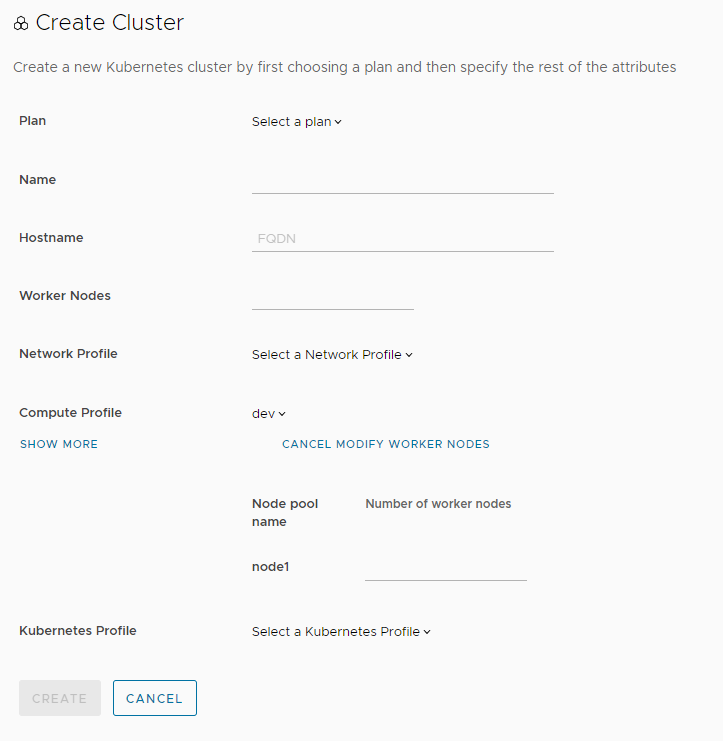
Create Cluster with Compute Profile
Use the Tanzu Kubernetes Grid Integrated Edition Management Console to create a cluster with an existing compute profile.
To create a cluster with a compute profile:
- Select TKG Integrated Edition > Clusters, and select Create Cluster.
- Use the Compute Profile drop-down menu to select the compute profile to use.
-
Click Show More to view the profile.
-
Click Modify Worker Nodes to increase or reduce the number of worker nodes.
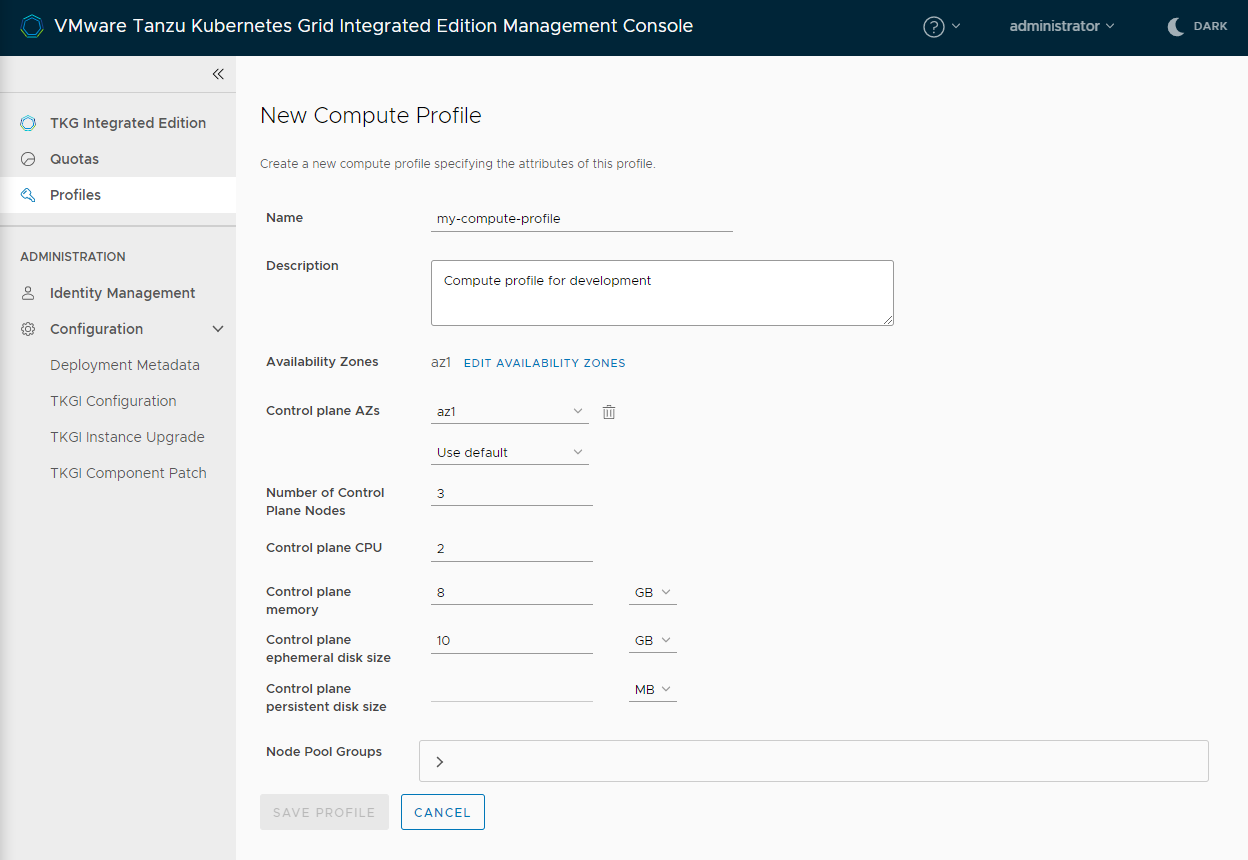
Define Compute Profile
Use the Tanzu Kubernetes Grid Integrated Edition Management Console to define a compute profile.
NOTE: You must be at the console home page to view the Compute Profiles tab.
To define a compute profile:
- Select Profiles and select the Compute tab.
- Click Create Profile.
- Enter a Name for the profile.
- Enter a suitable Description for the profile.
-
Click Add Availability Zones to create a new availability zone for the compute profile.
- Enter a name for the availability zone.
- Enter the name of an existing data center, cluster, resource pool, and host group.
- Click Add Cluster to add more clusters to the availability zone.
- Click Add Datacenter to add more data centers to the availability zone.
- Click Add Availability Zones to create more availability zones.
- Click Save Availability Zones.
-
For Control plane AZs, select the availability zone to use for the cluster control plane.
-
Configure the new profile as needed, to override the values set in plans for the resources that are allocated to control plane nodes:
- Number of Control Plane Nodes
- Control plane CPU
- Control plane memory
- Control plane ephemeral disk size
- Control plane persistent disk size
-
Select Node Pool Groups to optionally override the values set in plans for the resources that are allocated to worker nodes, and to optionally add labels and taints to the nodes.
-
Click Save Profile.


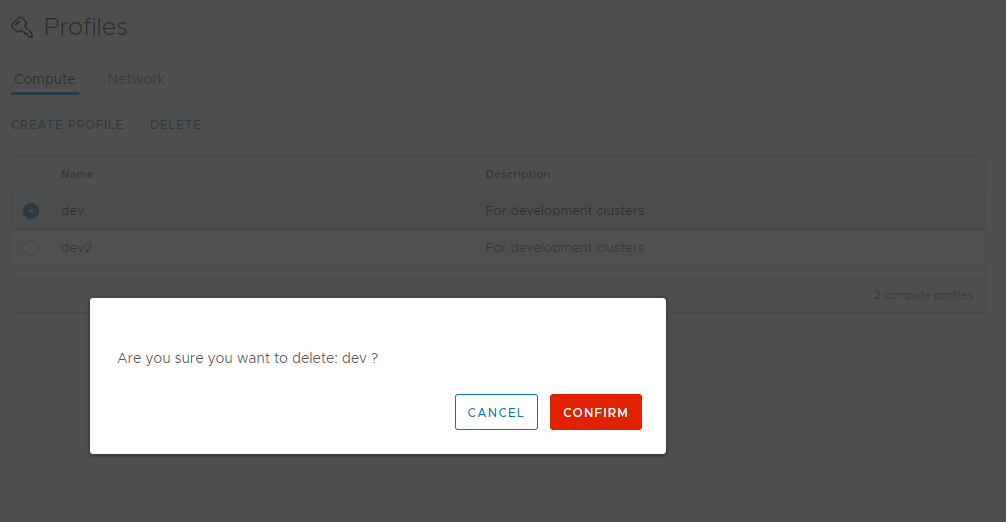
Delete Compute Profile
Use the Tanzu Kubernetes Grid Integrated Edition Management Console to delete compute profile.
NOTE: You cannot delete a compute profile that is in use by a cluster.
To delete a compute profile:
- Select Profiles and select the Compute tab.
- Select the compute profile to remove.
- Click Delete.
-
Confirm deletion.