


This topic describes how to install and configure an NSX Data Center v3 Management TLS Certificate for use with VMware Tanzu Kubernetes Grid Integrated Edition (TKGI) on vSphere.
Prerequisites
Before completing this section, make sure you have completed the following sections:
Generate and Register the NSX Management TLS Certificate and Private Key
An SSL certificate is automatically created for each NSX Manager. You can verify this by SSHing to one of the NSX Manager nodes and running the following command.
nsx-manager-1> get certificate cluster
You will see that Subject Alternative Name (SAN) listed in the certificate is the hostname of the appliance, for example SAN=nsx-manager-1. This means the cluster certificate is linked to a particular NSX Manager, in this case NSX Manager 1.
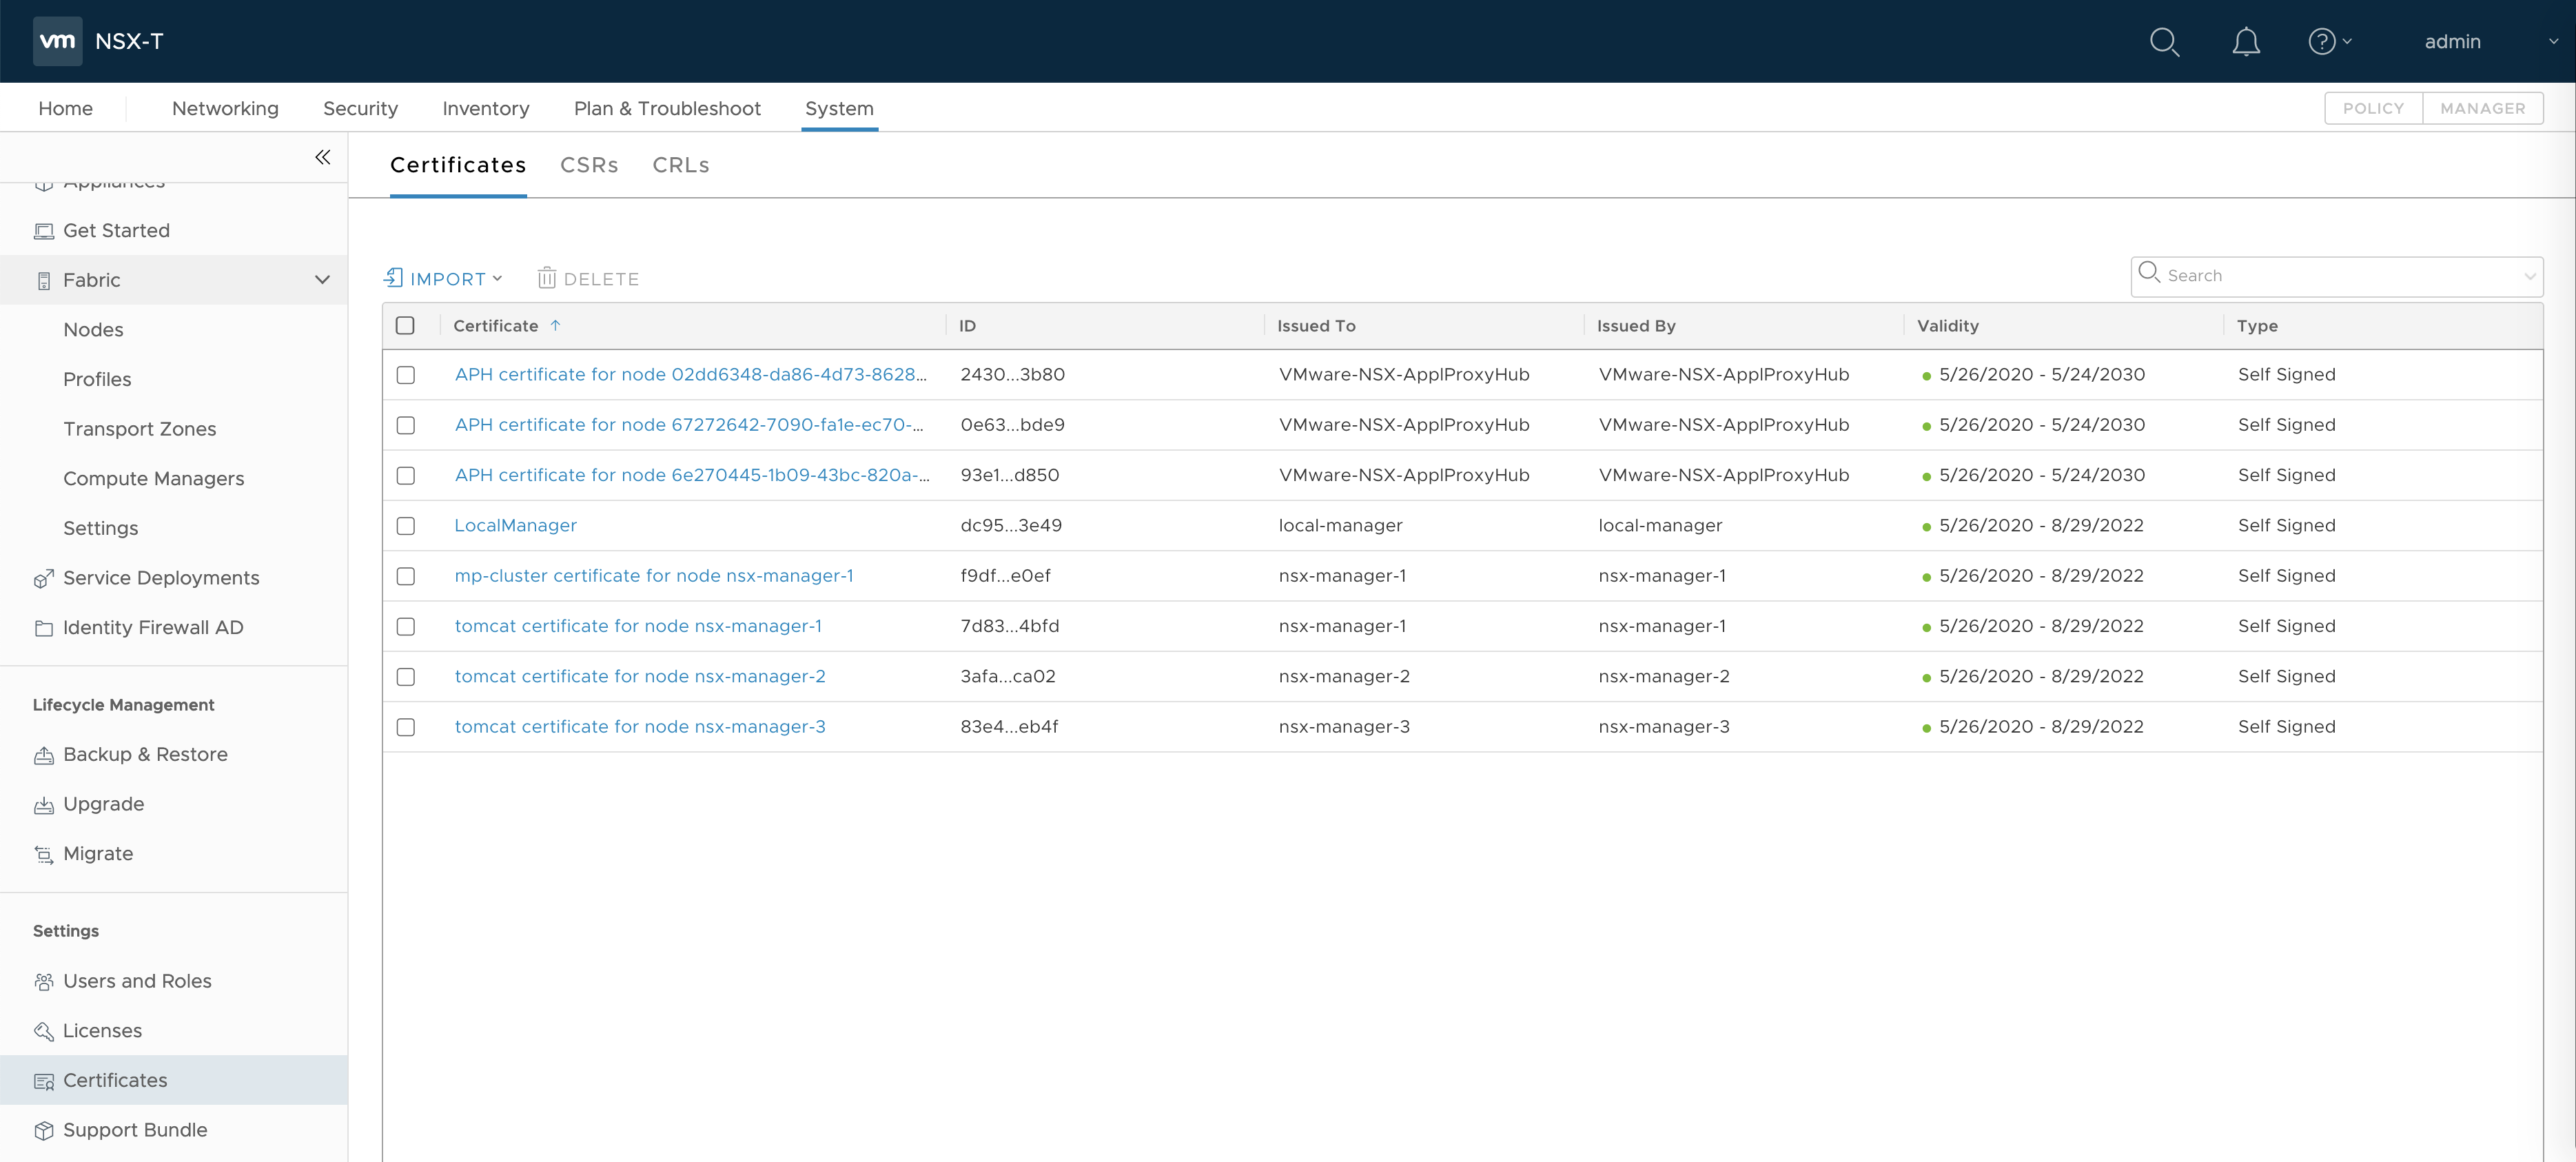
If you examine System > Certificates, you will see that the NSX manager VIP does not have a certificate. You must generate a new SSL certificate that uses the NSX Management VIP address so that the cluster certificate contains SAN=VIP-ADDRESS.
Complete the following steps to generate and register a SSL certificate and private key that uses the VIP address. The following steps assume that you are working on a Linux host where OpenSSL is installed.
Generate the SSL Certificate and Private Key
-
Create a certificate signing request file named
nsx-cert.cnfand populate it with the contents below.[ req ] default_bits = 2048 default_md = sha256 prompt = no distinguished_name = req_distinguished_name x509_extensions = v3_req req_extensions = v3_req [ req_distinguished_name ] countryName = US stateOrProvinceName = California localityName = CA organizationName = NSX commonName = VIP-ADDRESS #CAN ONLY USE IF SAN IS ALSO USED [ v3_req ] basicConstraints = critical,CA:false subjectKeyIdentifier = hash authorityKeyIdentifier=keyid:always,issuer:always subjectAltName = DNS:NSX-VIP-FQDN,IP:VIP-ADDRESS #MUST USEWhere:
NSX-VIP-FQDNis your NSX VIP FQDN.VIP-ADDRESSis the VIP address for the NSX Management cluster.
Note: At a minimum you must use the SAN field for identifying the NSX Management VIP. You can also use the CN field, as long as the SAN field is populated. If you use only the CN field, the certificate will not be valid for TKGI.
-
Copy the
nsx-cert.cnffile to a machine withopensslif yours does not have it. -
Use OpenSSL to generate the SSL certificate and private key.
openssl req -newkey rsa -nodes -days 1100 -x509 -config nsx-cert.cnf -keyout nsx.key -out nsx.crt -
Verify that you see the following:
Generating a 2048 bit RSA private key ...............+++ ................+++ writing new private key to 'nsx.key' -
Verify certificate and key generation by running the
lscommand.Confirm the signing request has created the certificate and the private key files, and that the initial signing request file is present.
nsx-cert.cnf nsx.crt nsx.key -
Run the following command to verify the certificate and private key.
openssl x509 -in nsx.crt -text -nooutConfirm that the Subject Alternative Name (SAN), and common name (CN) if used, are both the VIP address.
For example:
Subject: C=US, ST=California, L=CA, O=NSX, CN=myvip.mydomain.com
...
X509v3 extensions:
    X509v3 Subject Alternative Name:
        DNS:myvip.mydomain.com, IP Address:10.11.12.13
Import the SSL Certificate and Private Key to the NSX Management Console
Import certificate and private key to NSX by completing the following steps. These steps require populating the NSX Management Console fields with the certificate and private key. You can copy/paste the contents, or if you save the nsx.crt and nsx.key files to your local machine, you can import them.
- In the NSX Management Console, navigate to the System > Certificates page.
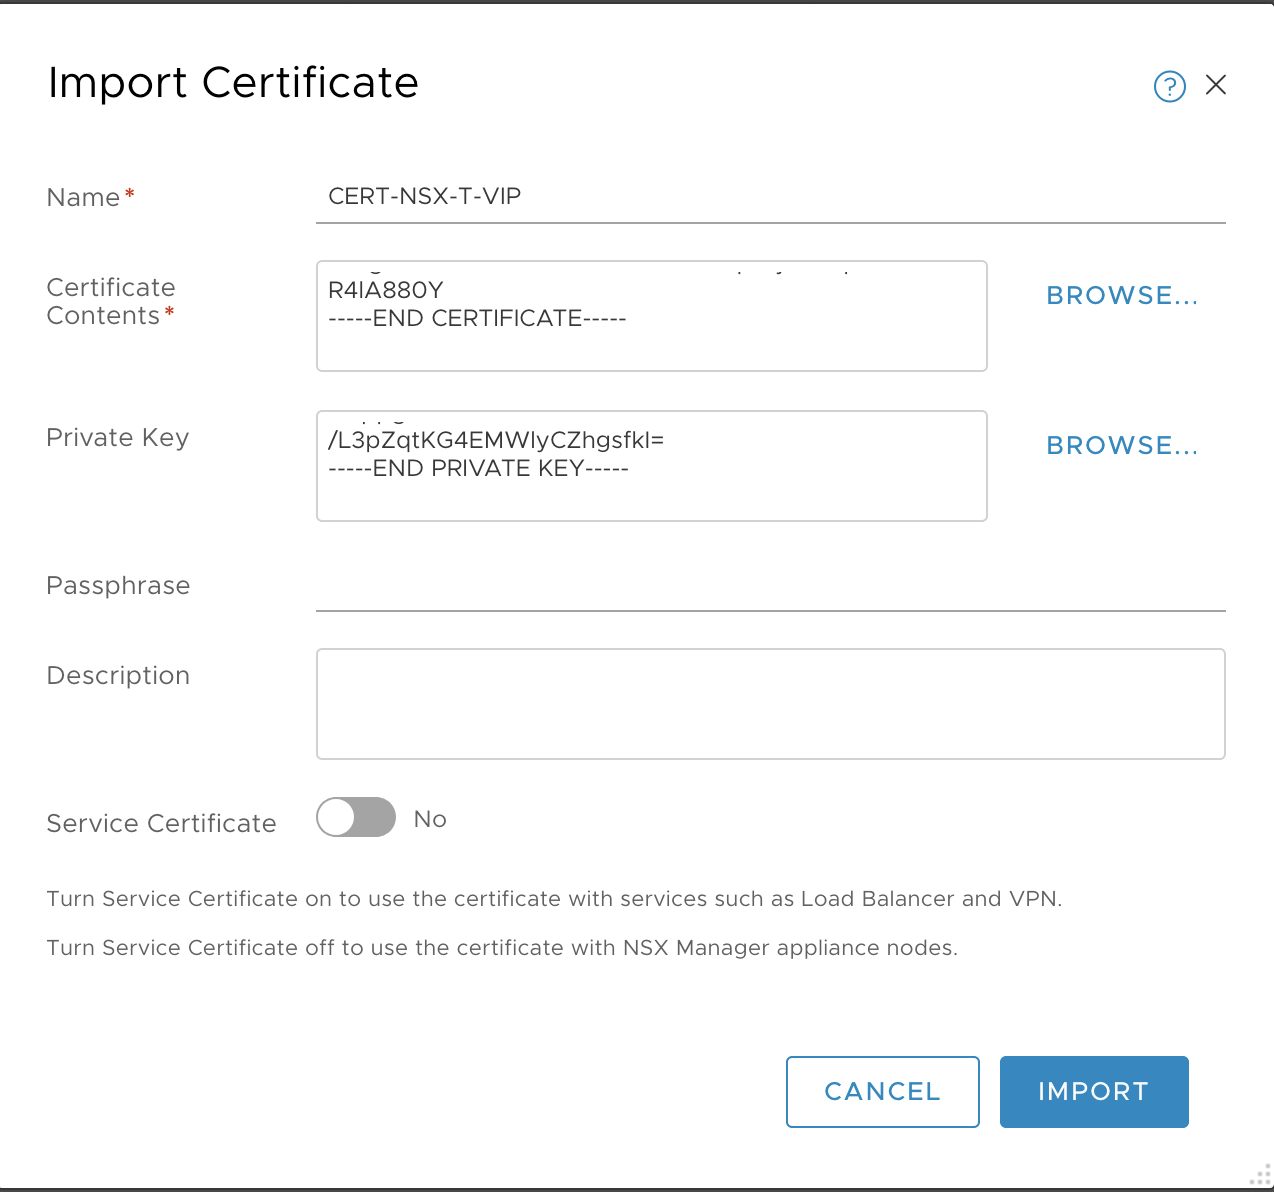
- Click Import > Import Certificate. The Import Certificate screen is displayed.
Note: Be sure to select Import Certificate and not Import CA Certificate.
- Enter a Name. For example,
CERT-NSX-VIP. - Copy and paste the Certificate Contents from the
nsx.crtfile. Or, import thensx.crtfile clicking Browse and selecting it. - Copy and paste the Private Key from the
nsx.keyfile. Or, import thensx.keyfile by clicking Browse and selecting it. - For the Service Certificate option, make sure to select No.
- Click Import.
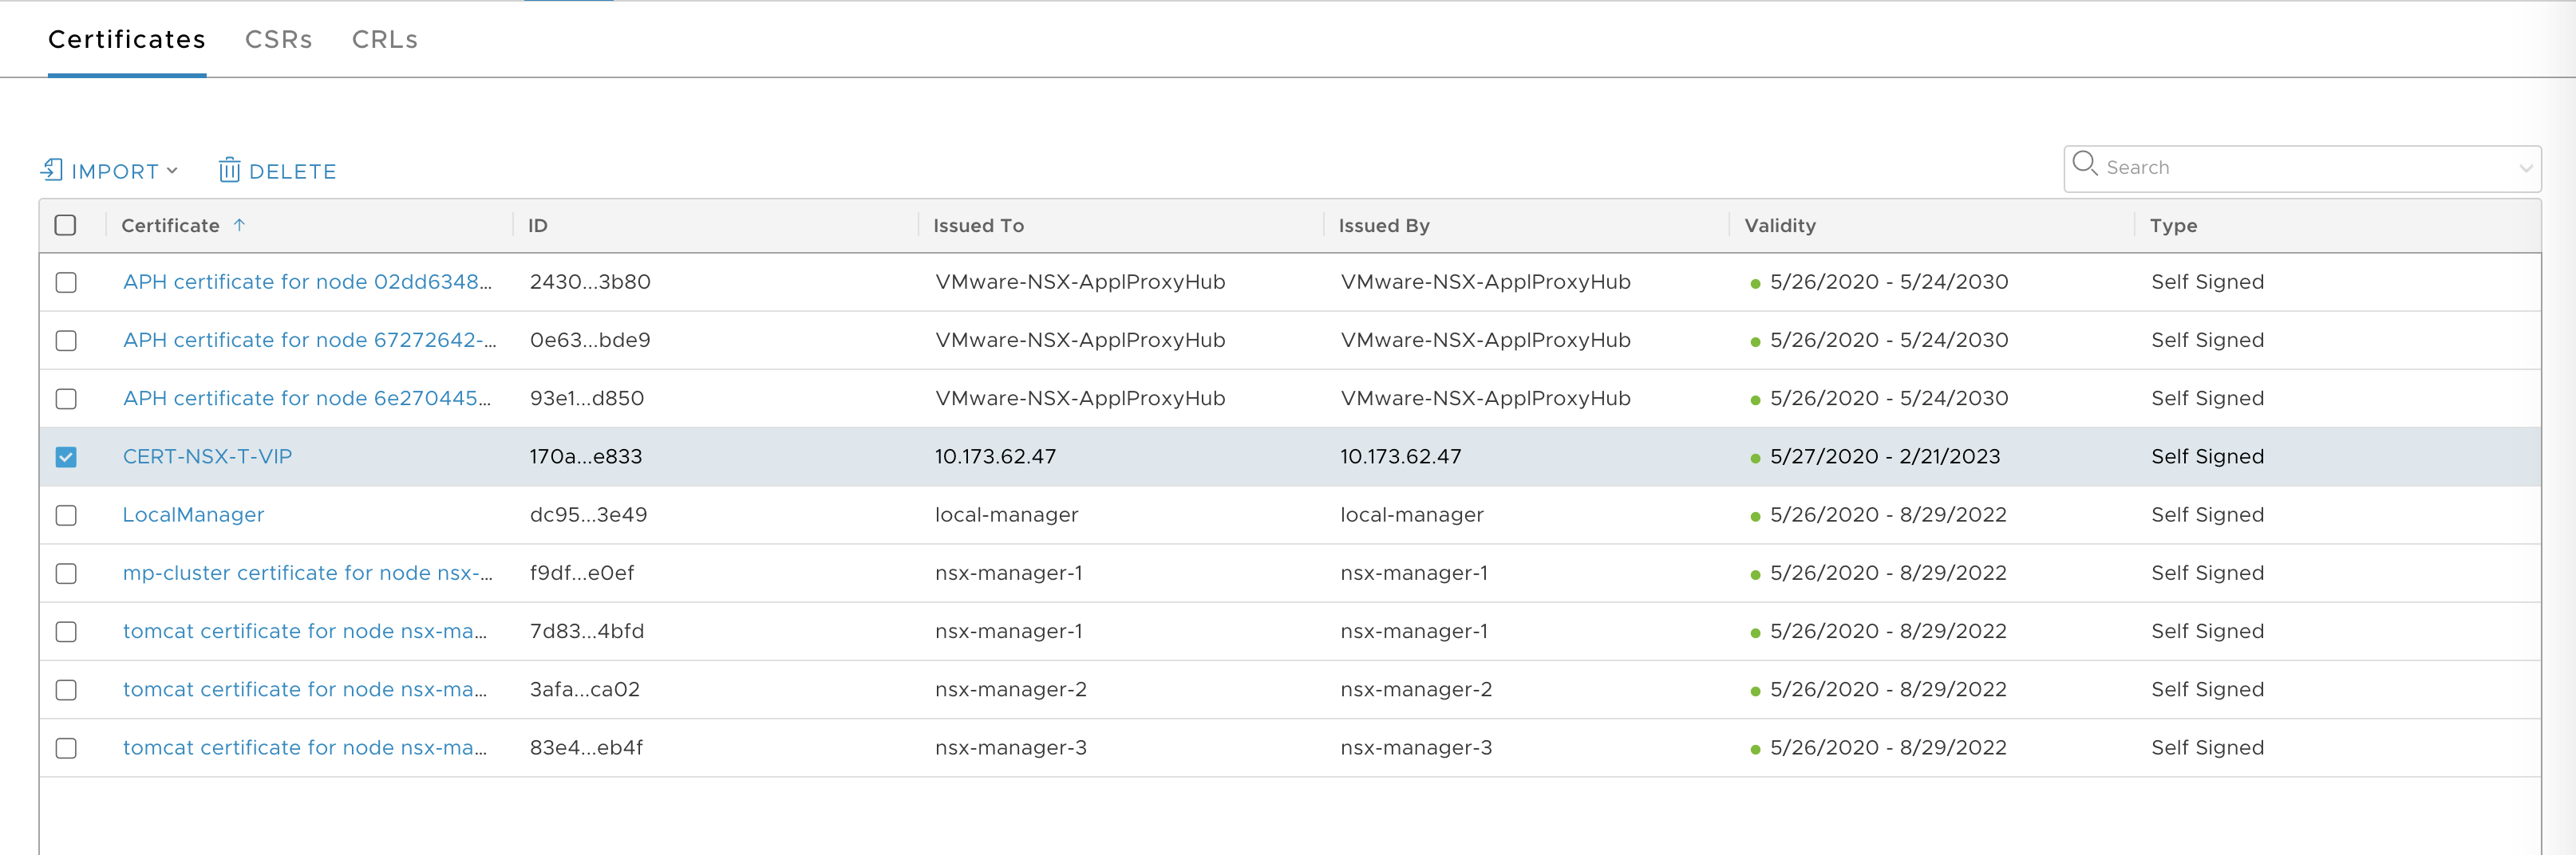
- Verify that you see the certificate in the list of Certificates.
Register the SSL Certificate and Private Key with the NSX API Server
To register the imported VIP certificate with the NSX Management Cluster Certificate API, complete the following steps:
- In the NSX Management Console, navigate to the System > Certificates page.
- View the UUID of the certificate from the NSX Management Console > Certificates screen.
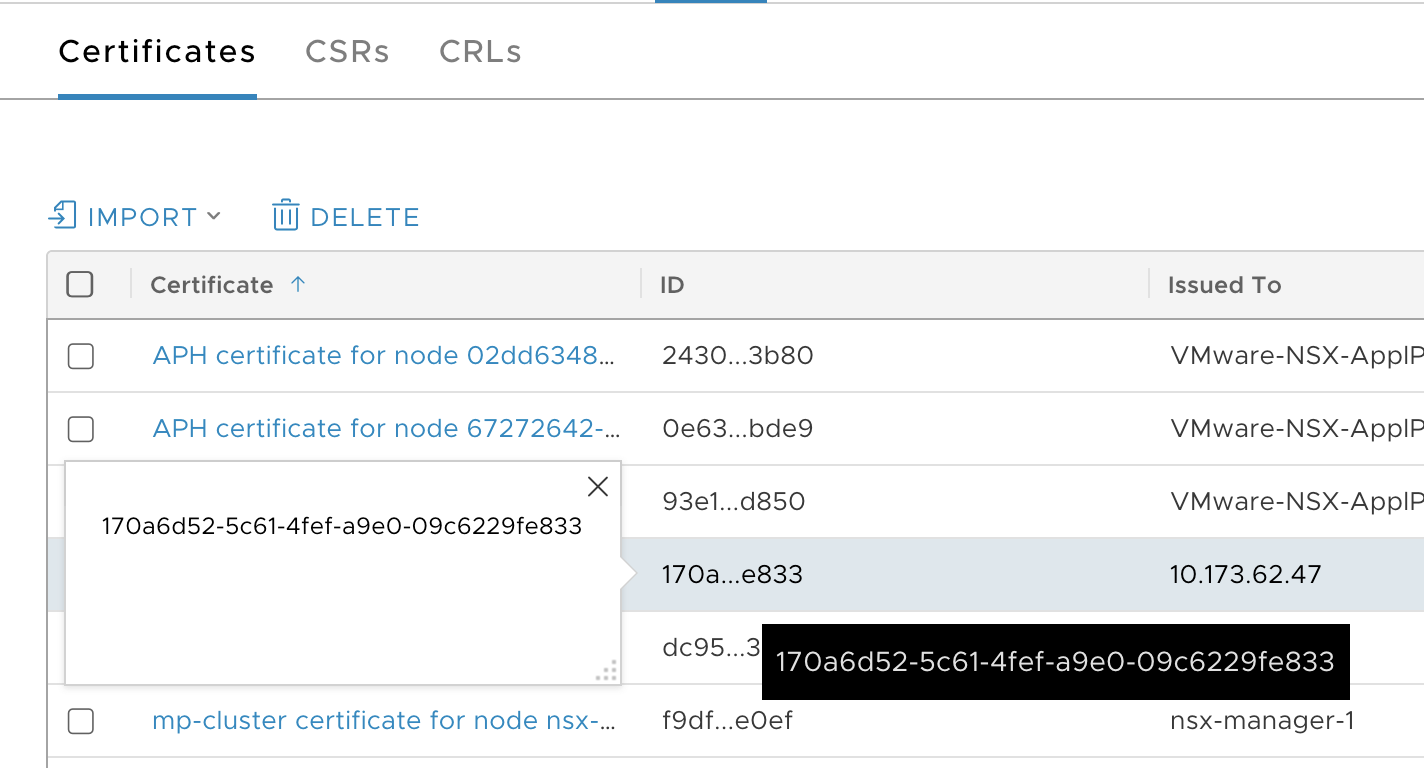
- Copy the UUID to the clipboard. For example,
170a6d52-5c61-4fef-a9e0-09c6229fe833. -
Create the following environment variables. Replace the IP address with your VIP address and the UUID with the UUID of the imported certificate.
export NSX_MANAGER_IP_ADDRESS=10.173.62.47 export CERTIFICATE_ID=170a6d52-5c61-4fef-a9e0-09c6229fe833 -
Post the certificate to the NSX Manager API.
curl --insecure -u admin:'VMware1!VMware1!' -X POST "https://$NSX_MANAGER_IP_ADDRESS/api/v1/cluster/api-certificate?action=set_cluster_certificate&certificate_id=$CERTIFICATE_ID" { "certificate_id": "170a6d52-5c61-4fef-a9e0-09c6229fe833" } -
(Optional) If you are running TKGI in a test environment and you are not using a multi-node NSX Management cluster, then you must also post the certificate to the Nodes API.
curl --insecure -u admin:'VMware1!VMware1!' -X POST https://$NSX_MANAGER_IP_ADDRESS/api/v1/node/services/http?action=apply_certificate&certificate_id=$CERTIFICATE_ID { "certificate_id": "170a6d52-5c61-4fef-a9e0-09c6229fe833" }Note: Using a single-node NSX Management cluster is an unsupported configuration.
-
Verify by SSHing to one of the NSX Management nodes and running the following command.
Confirm the returned certificate matches the generated one.
nsx-manager-1> get certificate cluster
