


Deploy an Offline Harbor Registry on vSphere
This topic describes how to install a private Harbor image registry from a downloaded OVA file, to provide the images needed to deploy Tanzu Kubernetes Grid (TKG) in an offline vSphere environment. The resulting Harbor registry runs alongside and separately from TKG to store and manage component images used by TKG.
Important
This VM-based Harbor deployment is only supported for hosting TKG system images in an internet-restricted or airgapped environment. To deploy a scalable and highly-available Harbor that can manage large numbers of images for hosted apps in a production environment, deploy the Harbor package to TKG clusters as described in Install Harbor for Service Registry in Creating and Managing TKG 2.4 Workload Clusters with the Tanzu CLI.
Notary and Chartmuseum are deprecated since Harbor v2.6 and are scheduled to be removed in a future release as noted in the Harbor v2.6.0 release notes. Switch to Sigstore Cosign for container signing and verification.
Prerequisites
- vSphere Client v7.0.2.00000
- Harbor OVA file for TKG 2.4.1, downloaded from the Tanzu Kubernetes Grid downloads page.
- Custom certificates (optional):
ca.crt,server.crt, andserver.keyfiles
Deploy Harbor
To deploy Harbor from an OVA file:
-
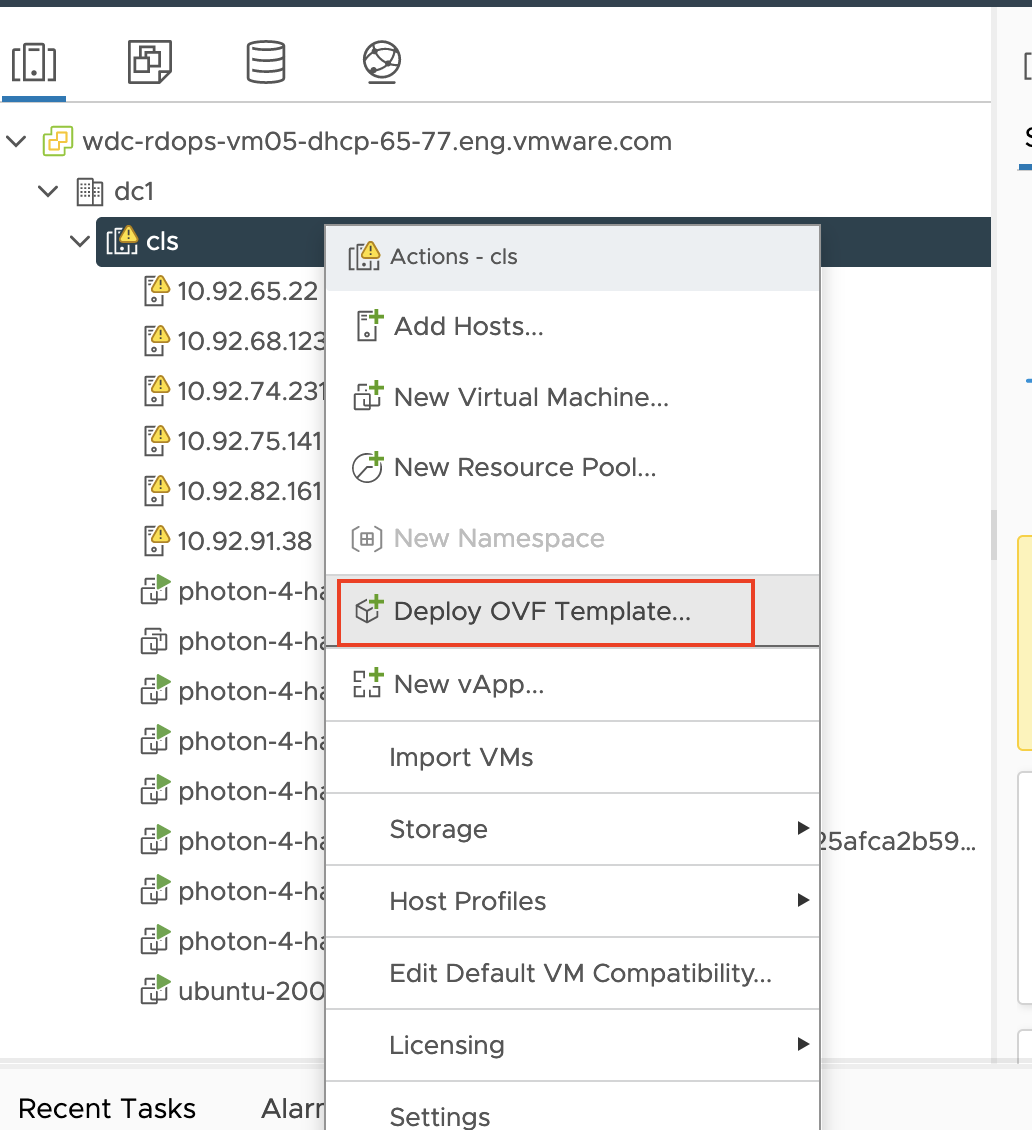
In vCenter, right-click on a vSphere cluster and choose Deploy OVF Template….
-
A Deploy OVF Template window appears. Select Local File and browse to the location of the downloaded Harbor OVA file.
-
Click NEXT on the bottom right. A series of configuration panes appears.
-
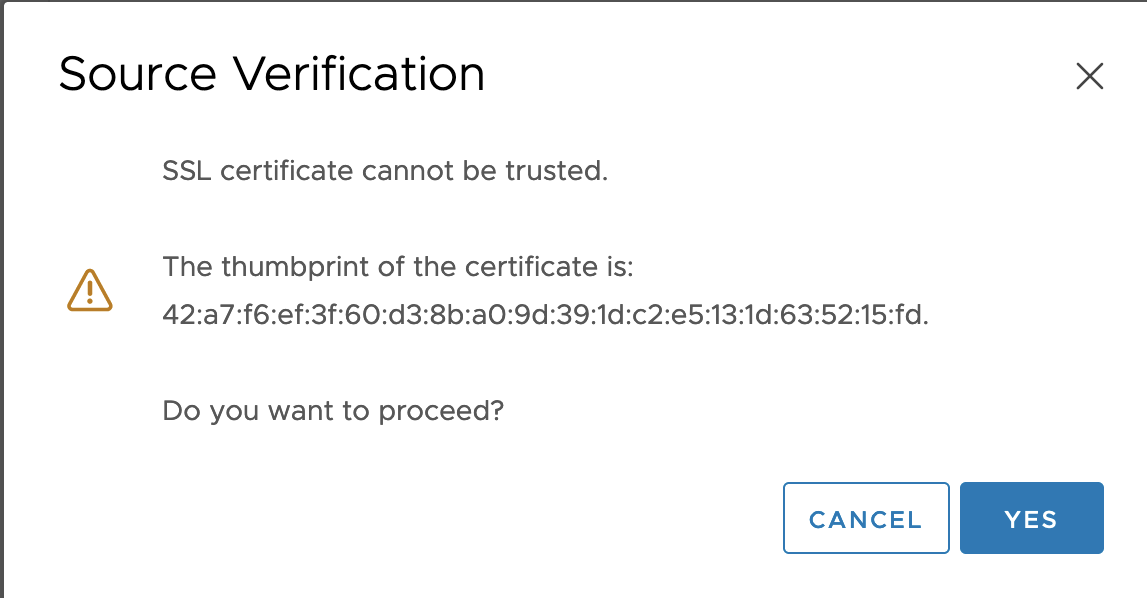
Source Verification: Click YES.
-
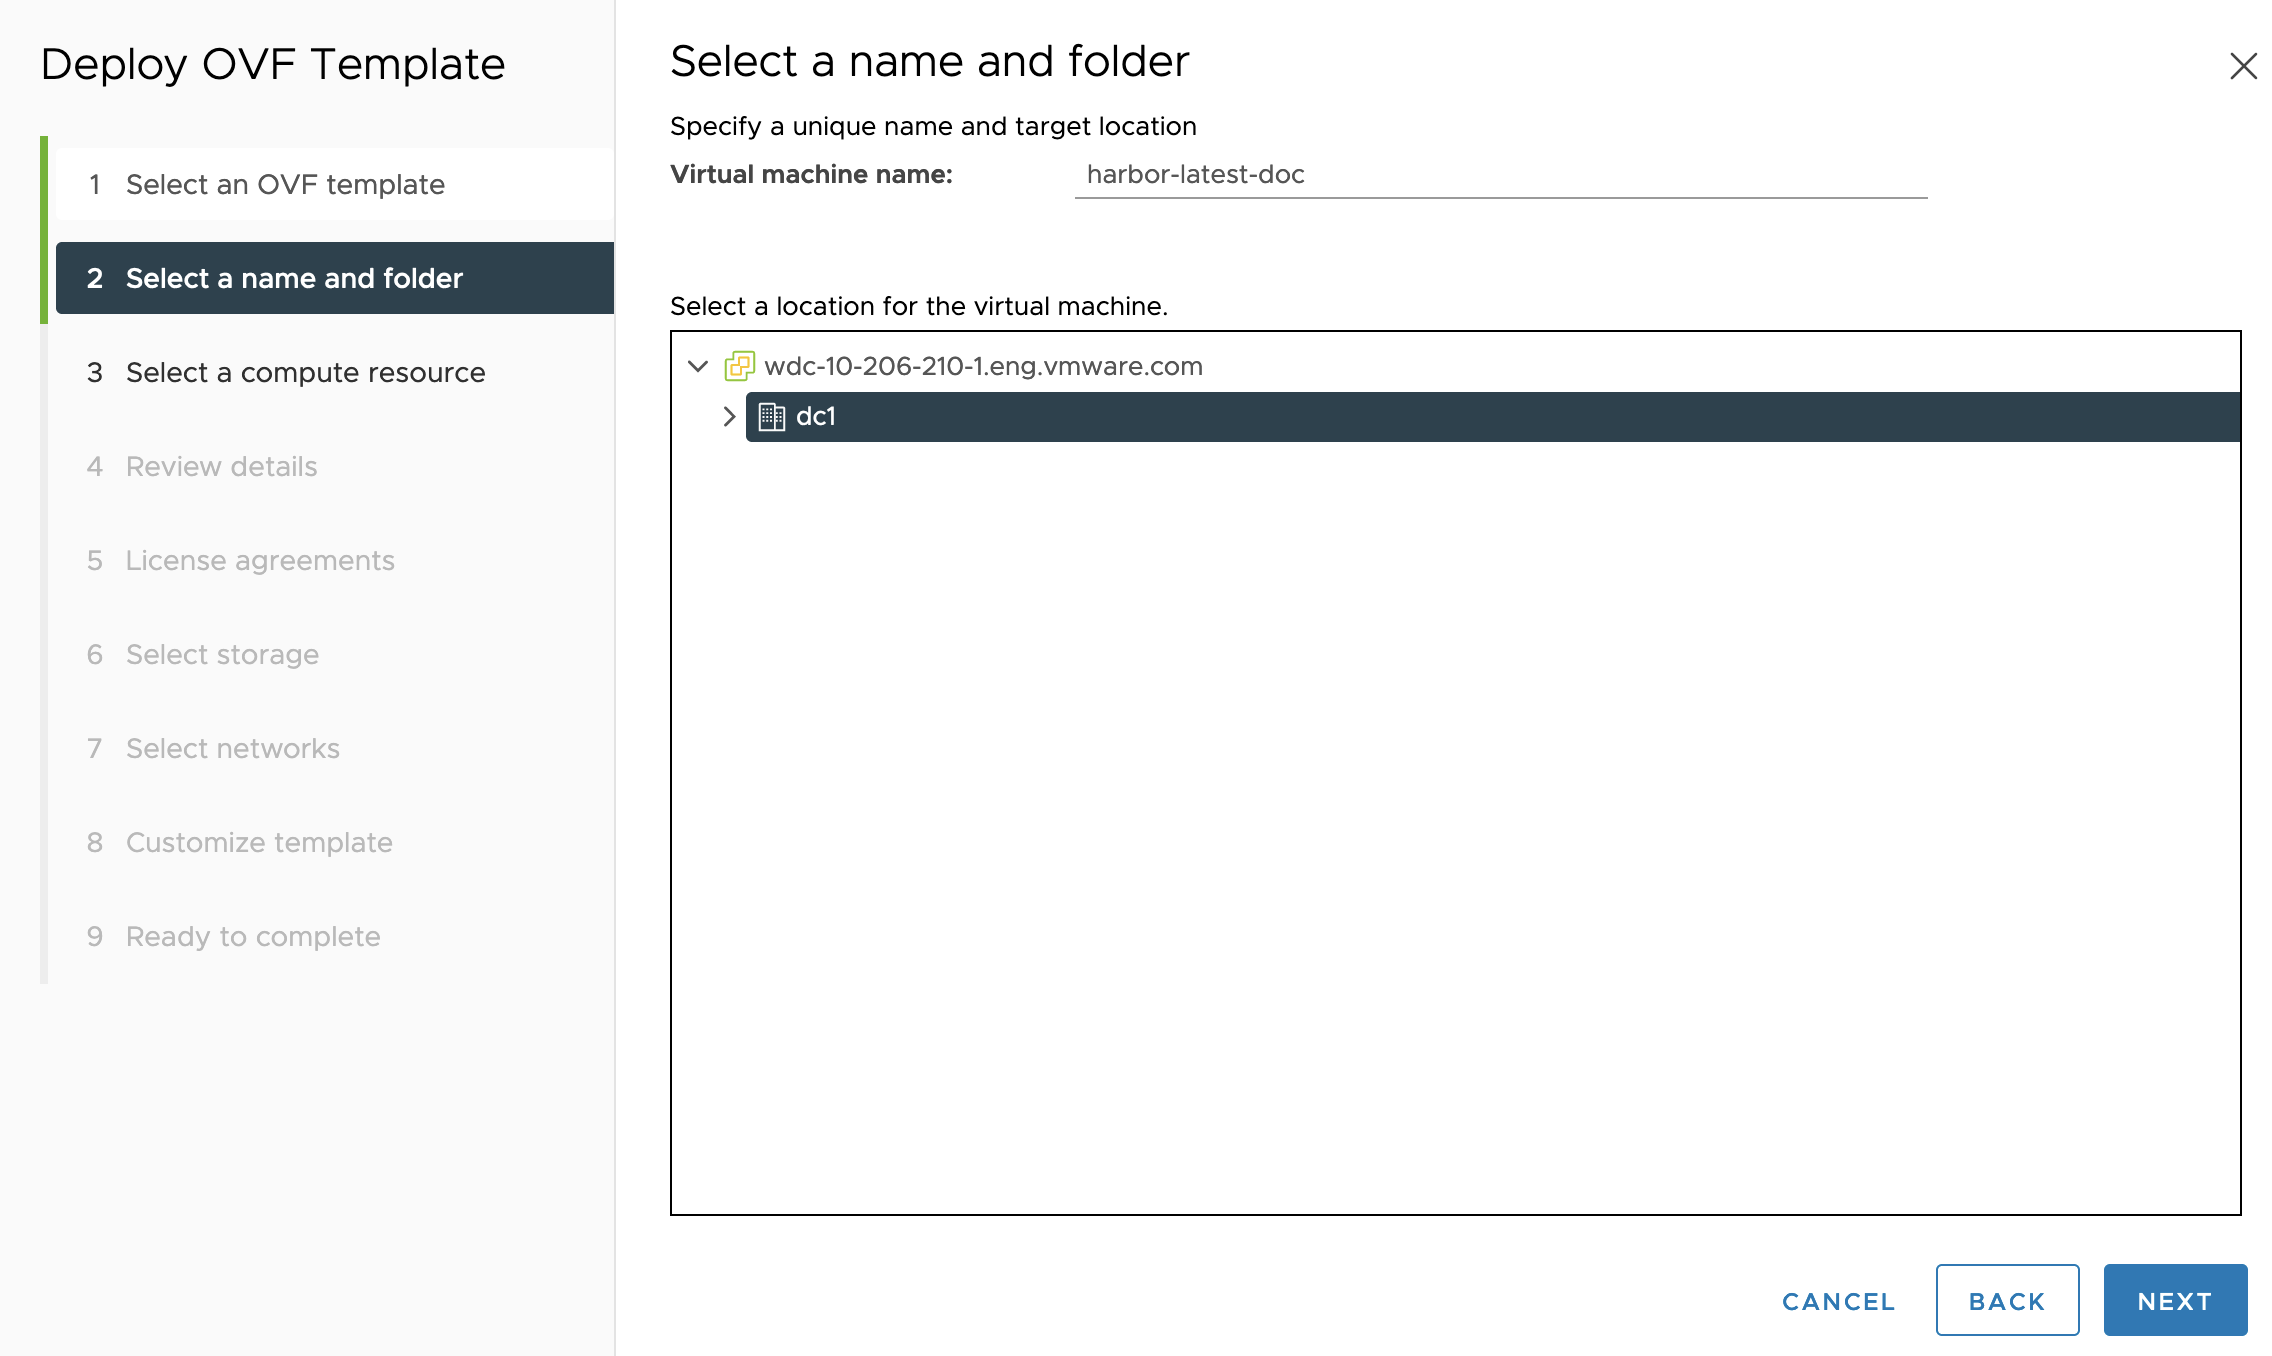
Virtual machine name: Enter a name that you choose for the virtual machine that runs the Harbor instance. Click NEXT.
-
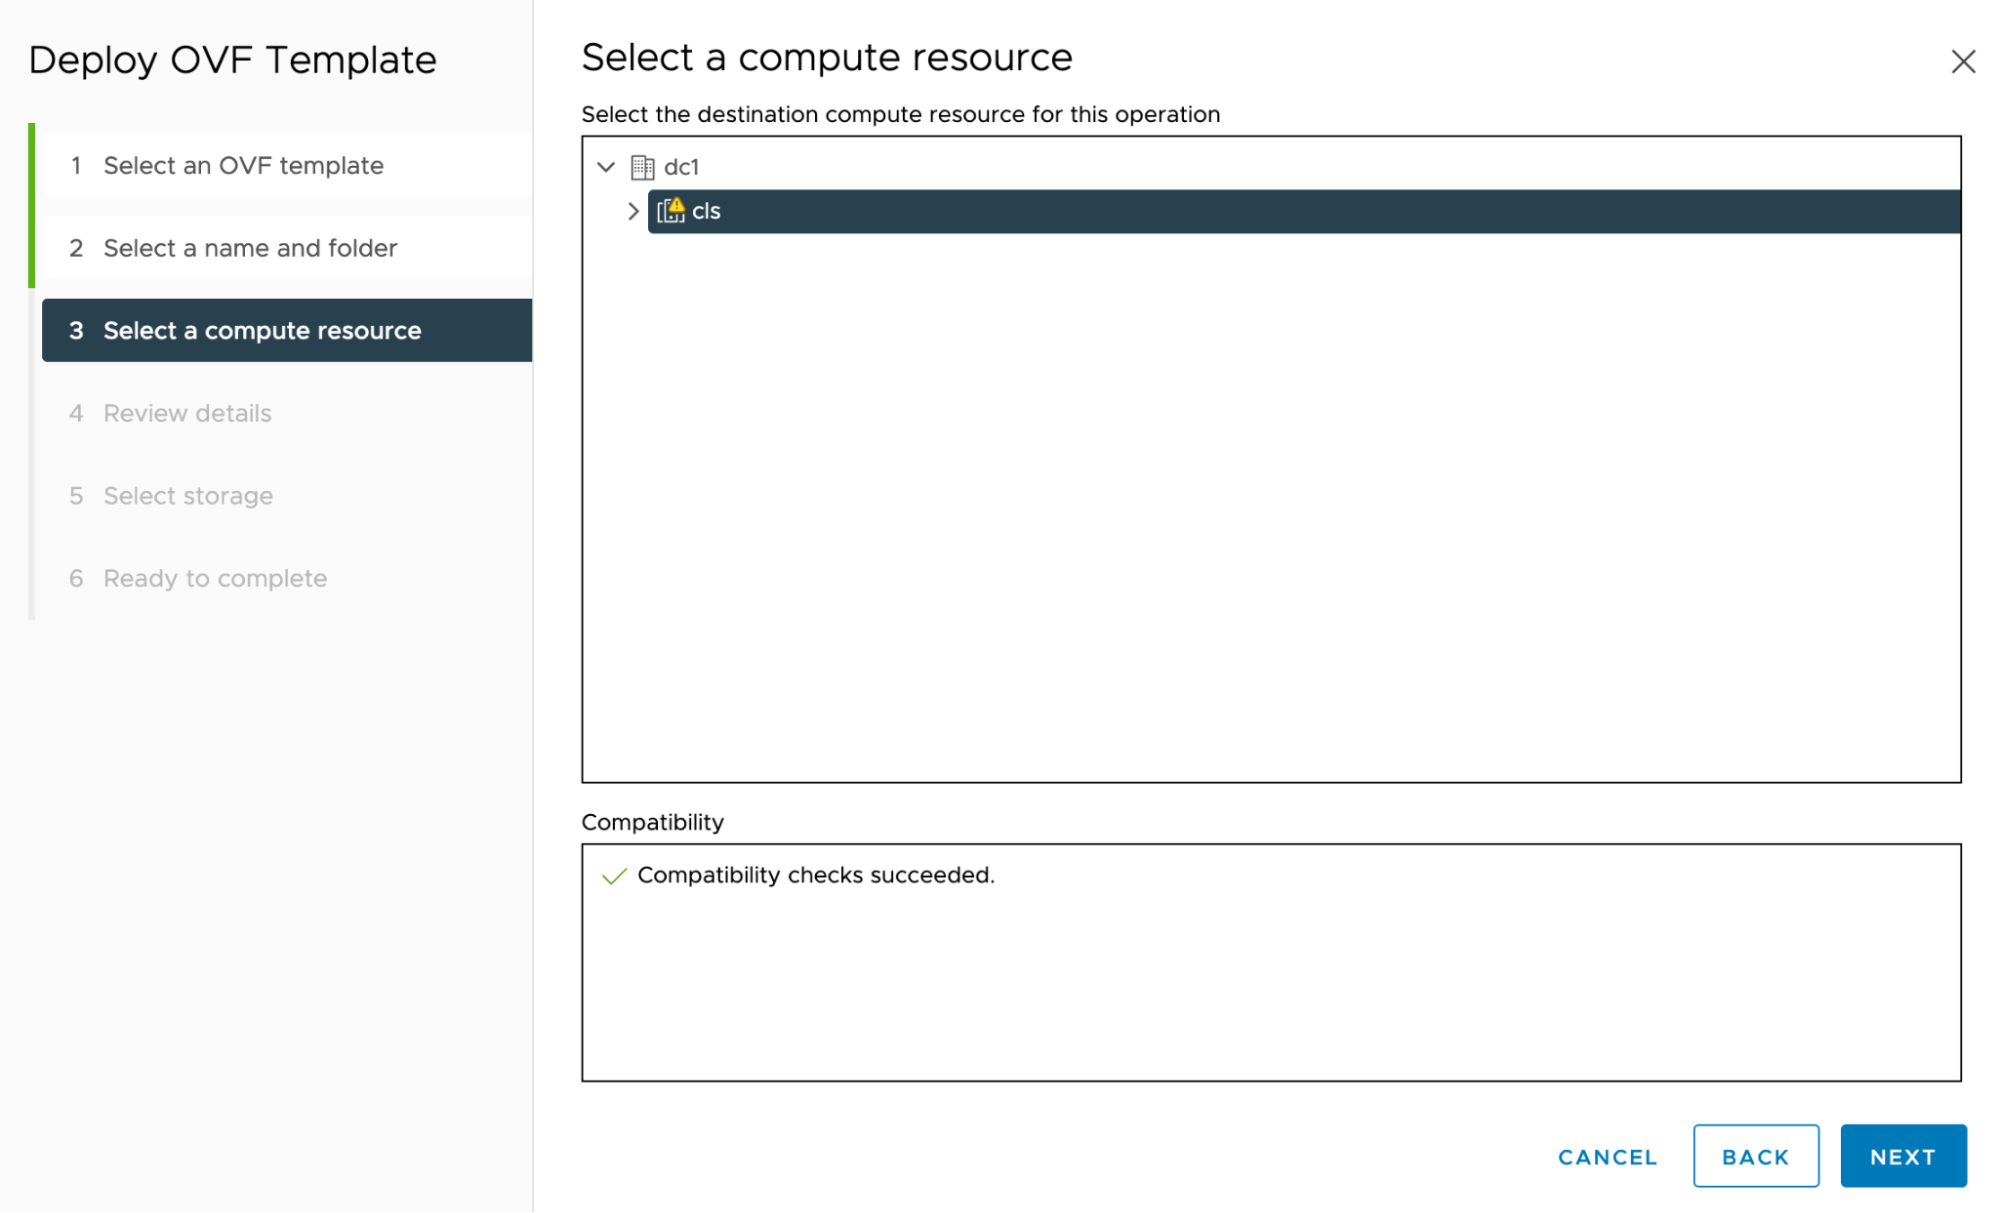
Select a compute resource: Leave the default choice and click NEXT.
This step may take a few minutes, as vSphere downloads and renders the OVF template.
-
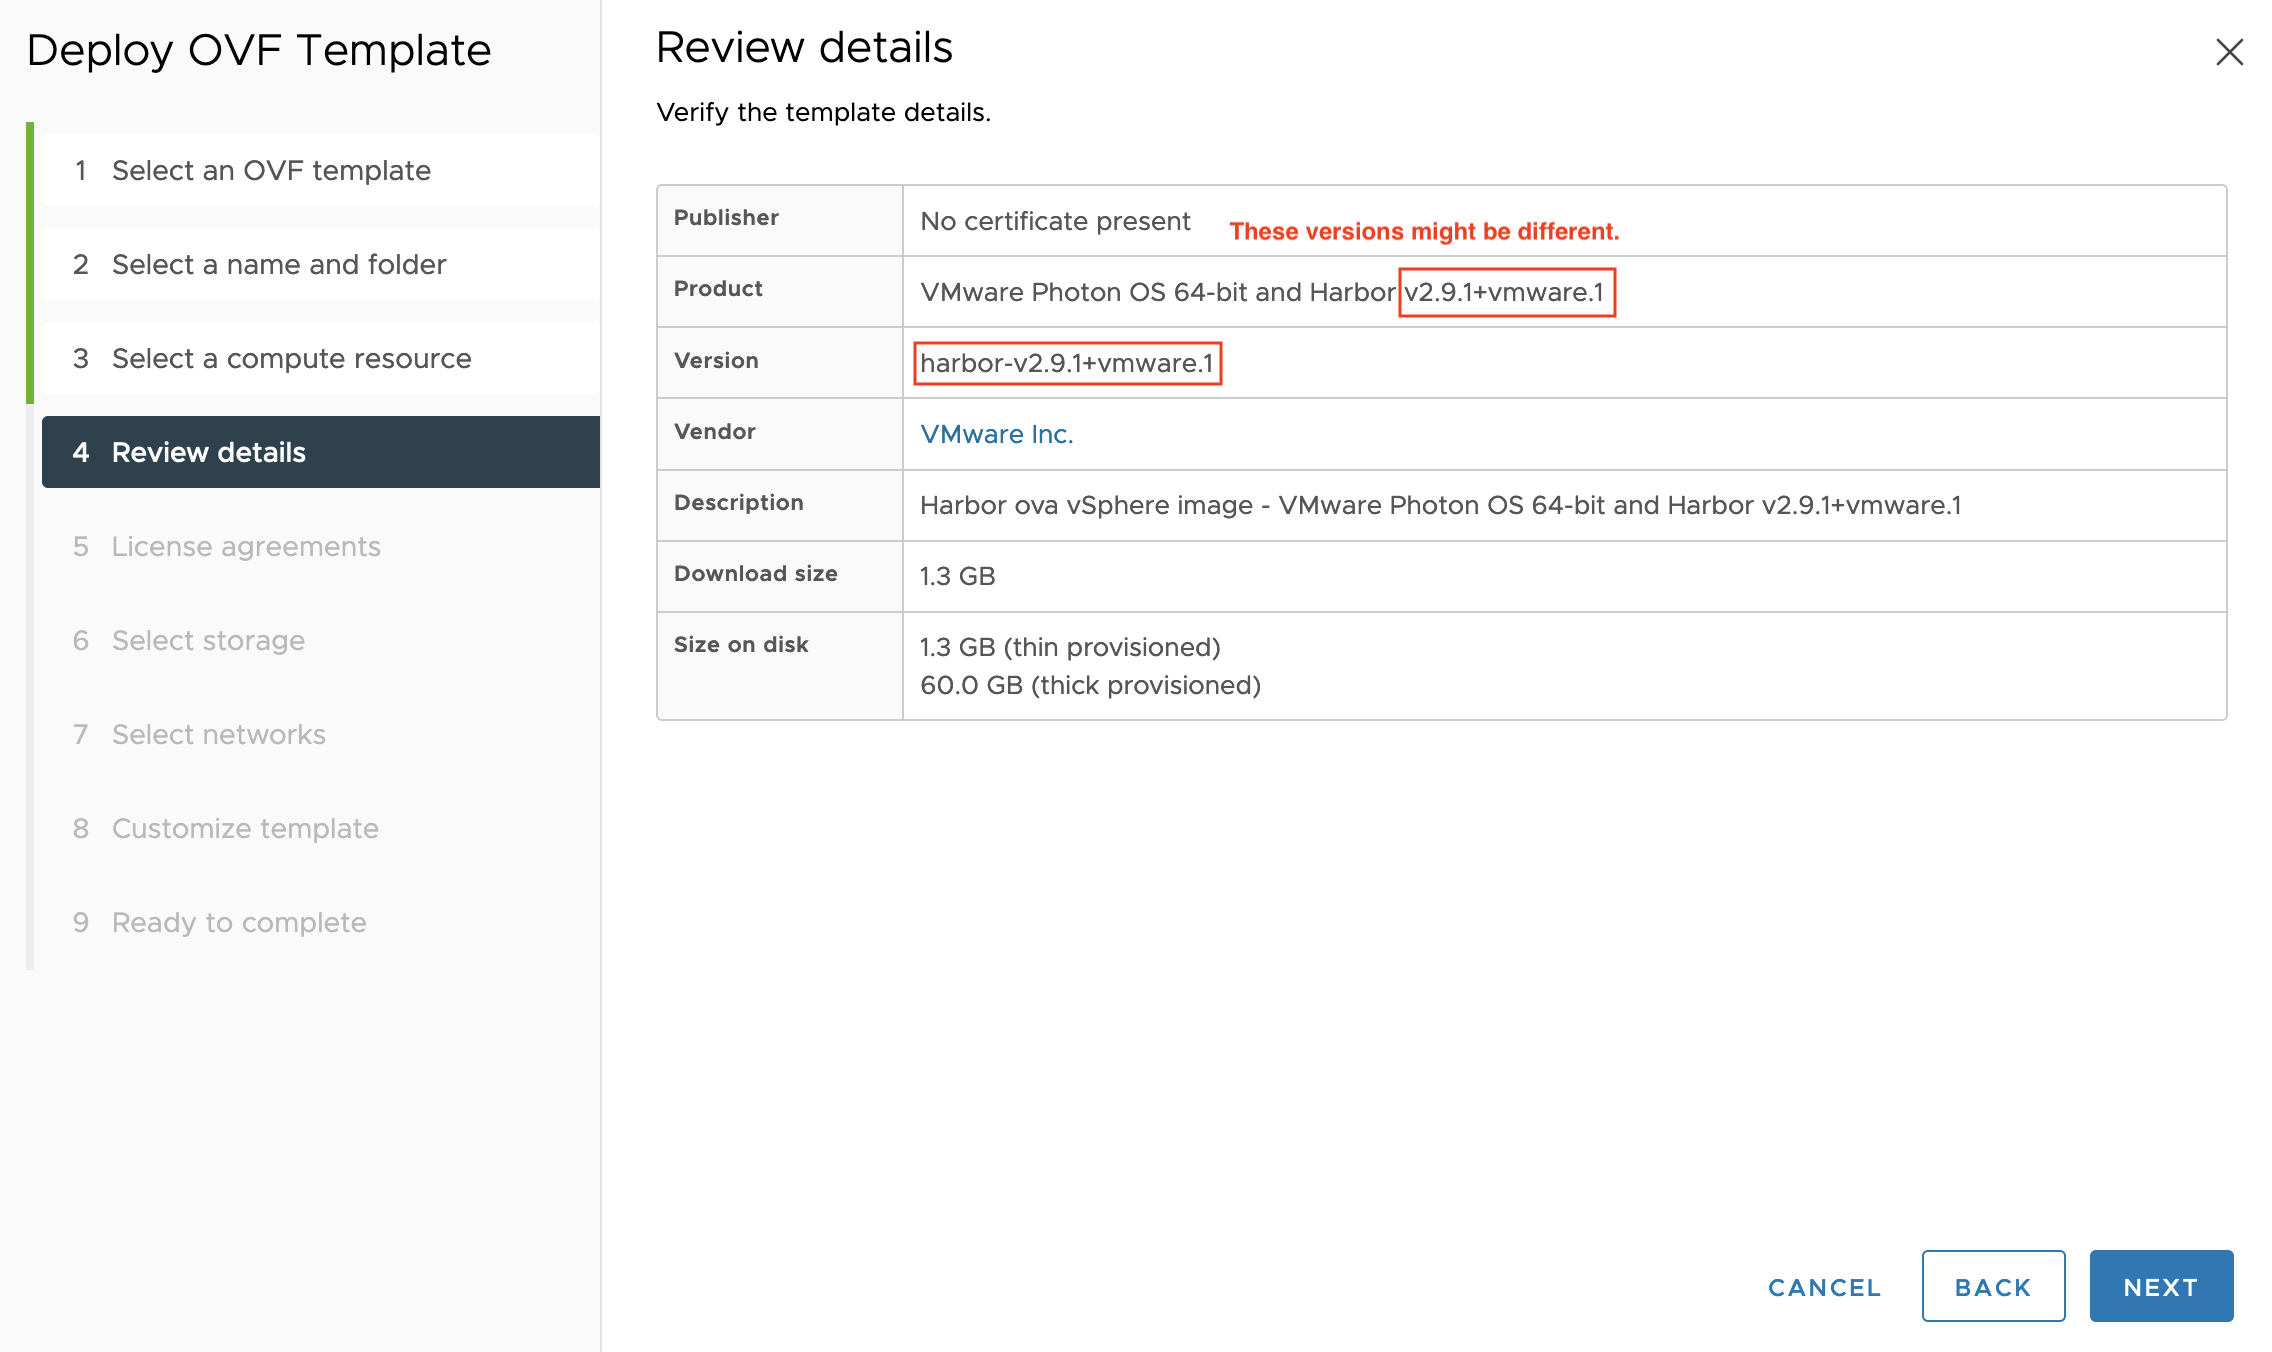
Review details: Click NEXT.
-
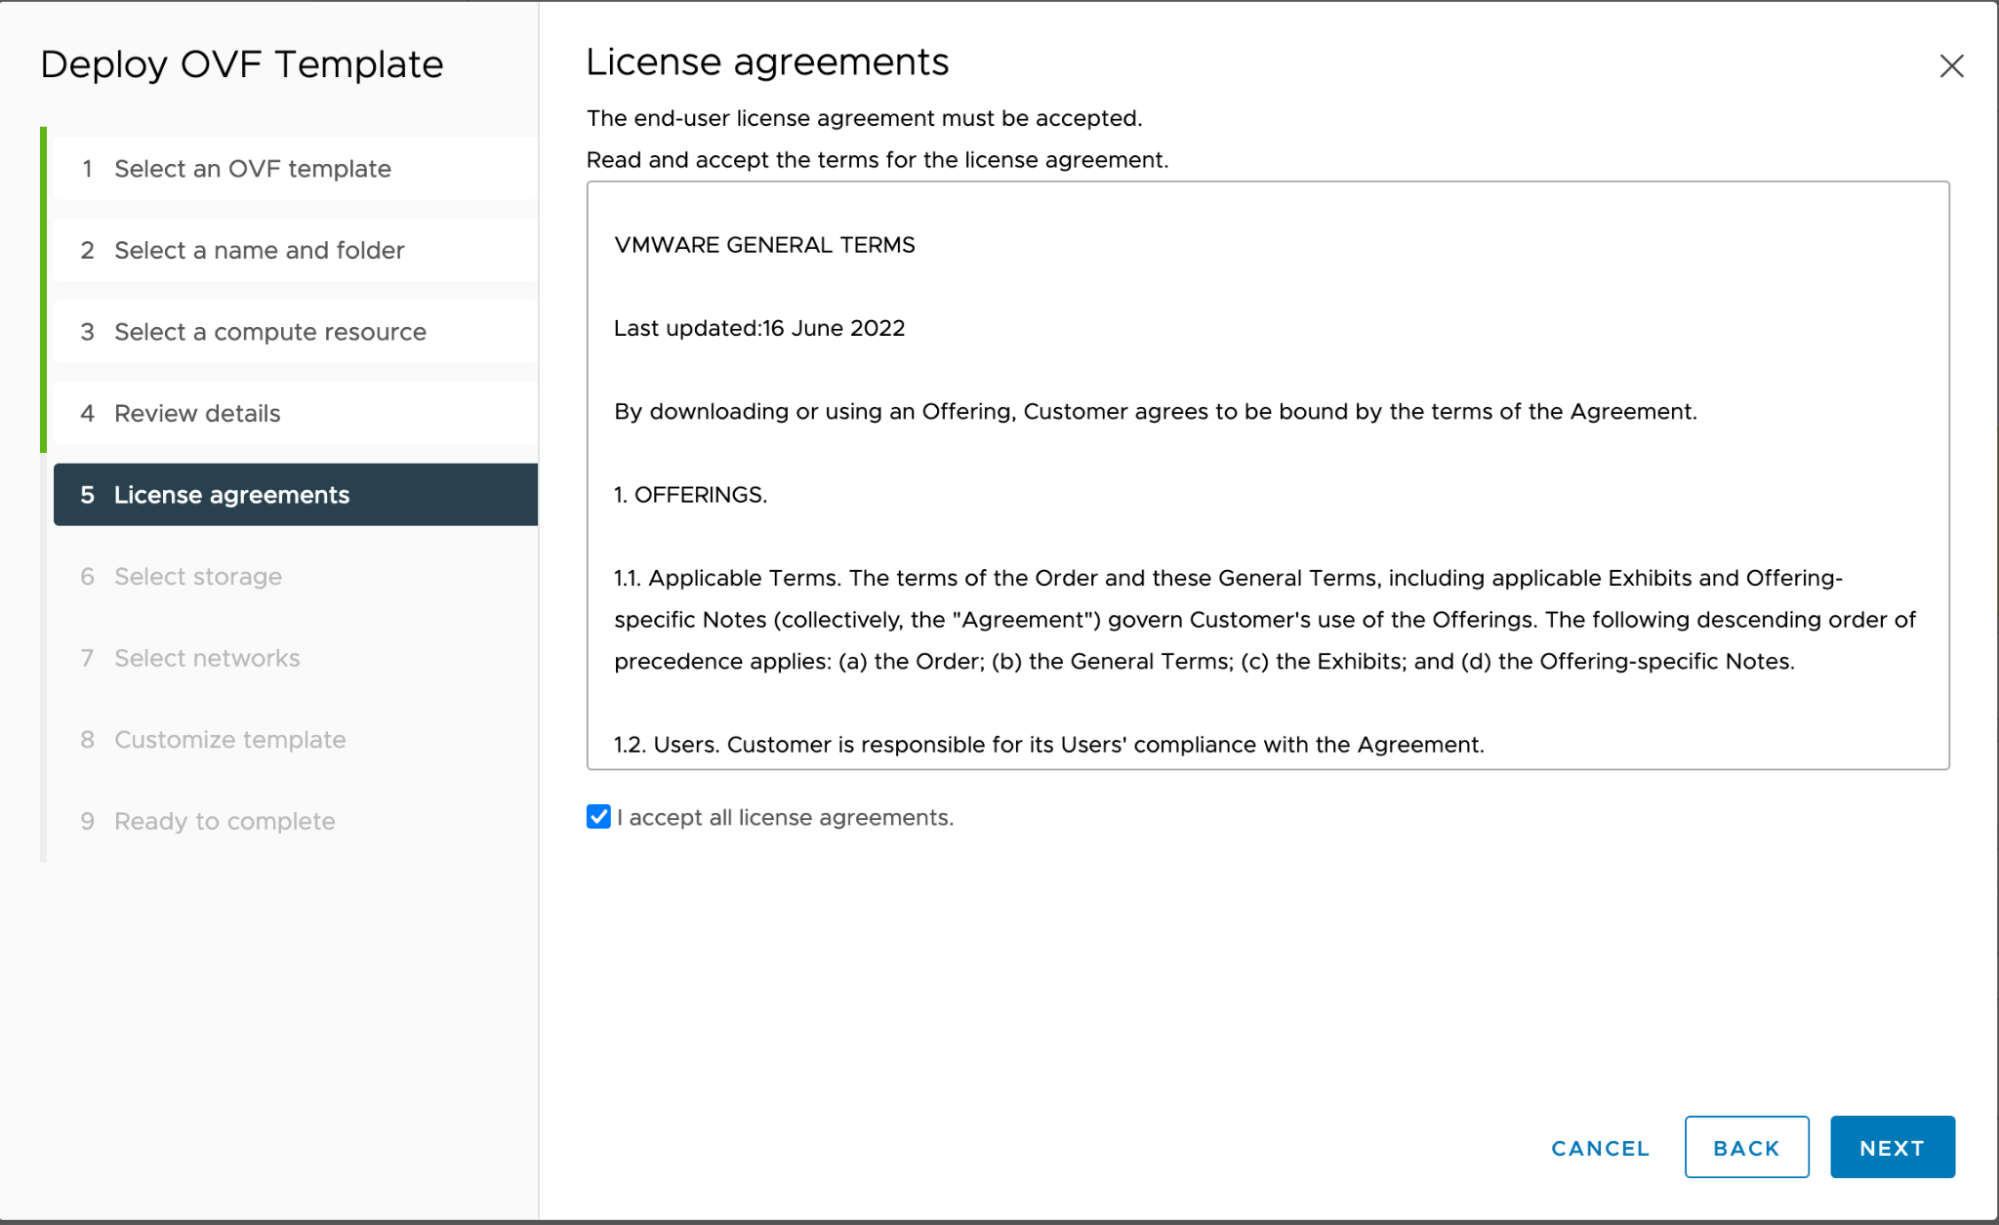
License agreements: Please accept the license and click NEXT.
-
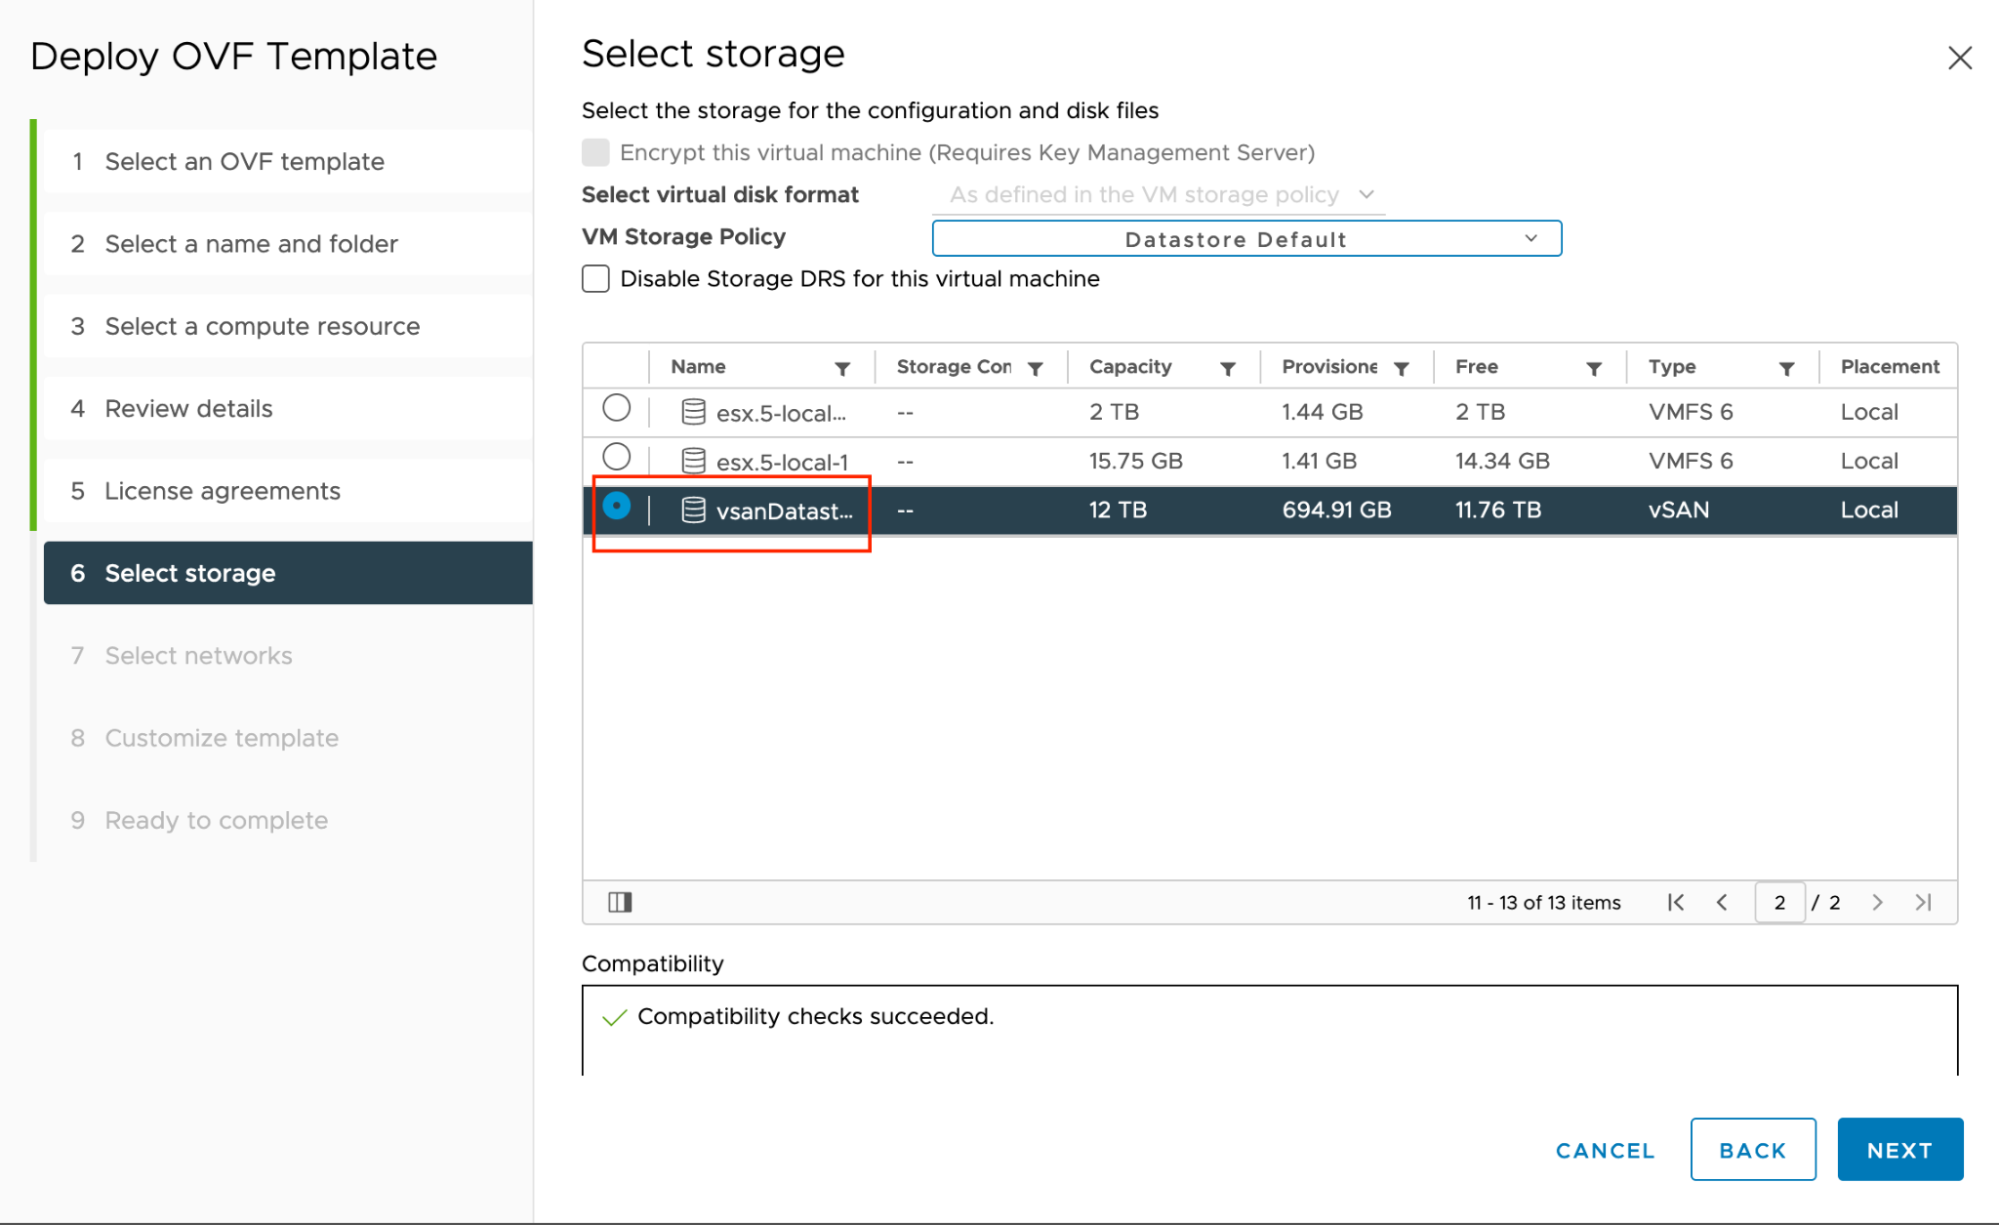
Select storage: Select vsanDatastore and click NEXT.
-
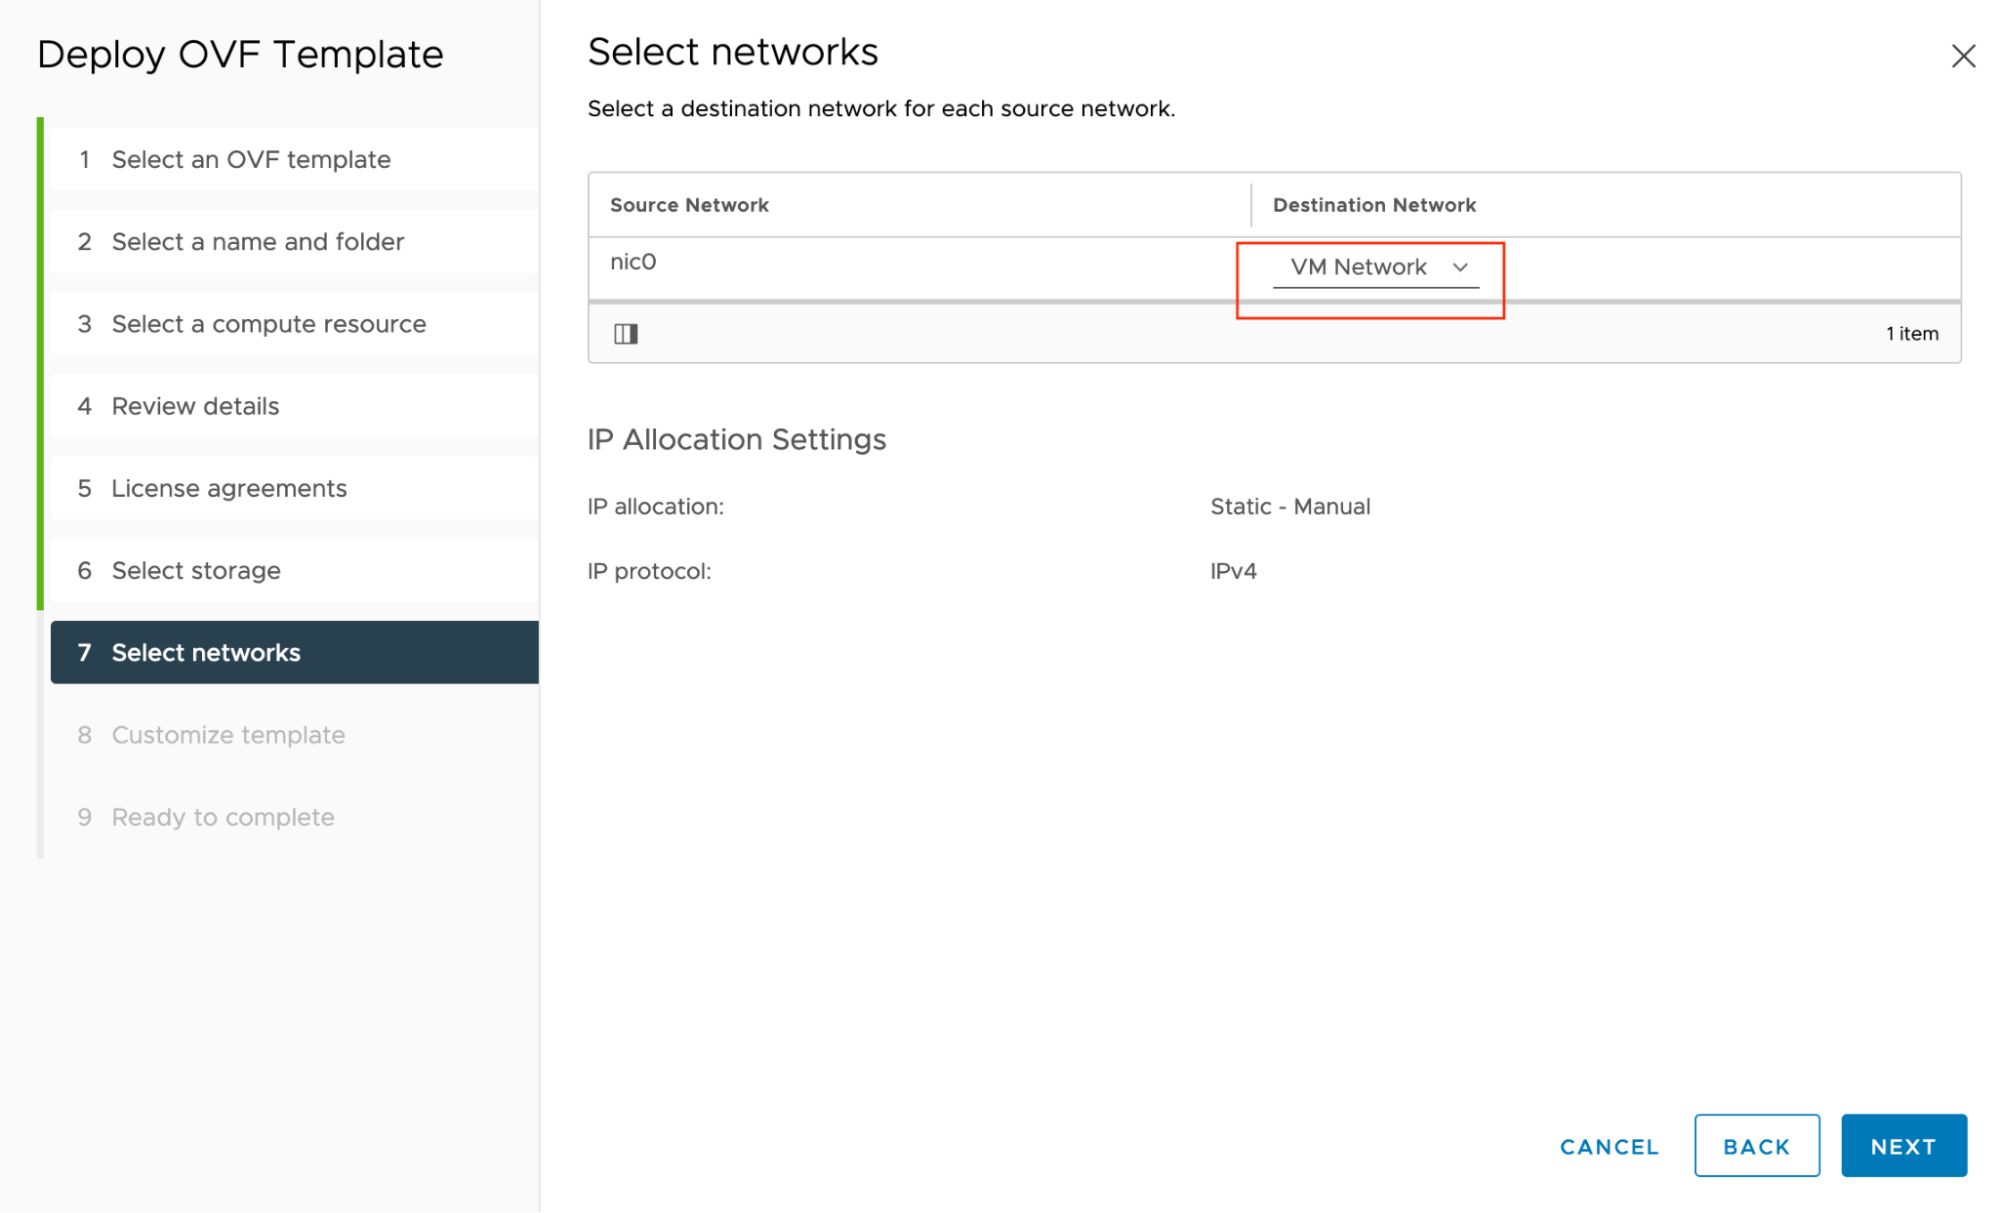
Select networks: Choose the default VM Network and click NEXT.
-
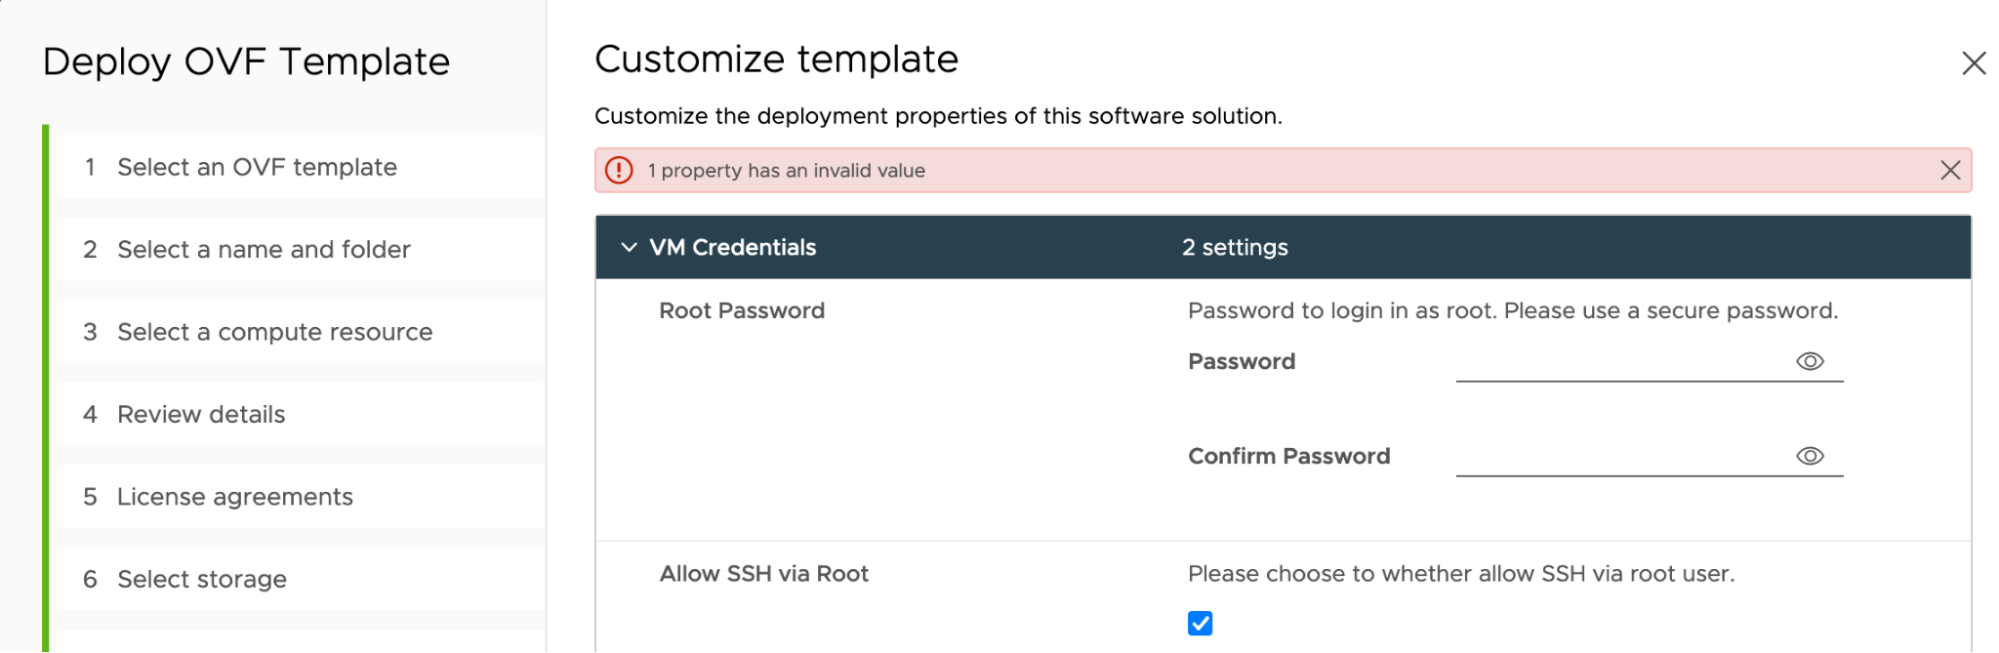
Customize template > VM Credentials:
-
Root Password (Required): Your preferred password for the
rootuser account on the VM, and it must be 8-128 characters long. -
Allow SSH via Root: Leave the default, enabled, to allow
sshaccess to the VM asrootuser.
-
-
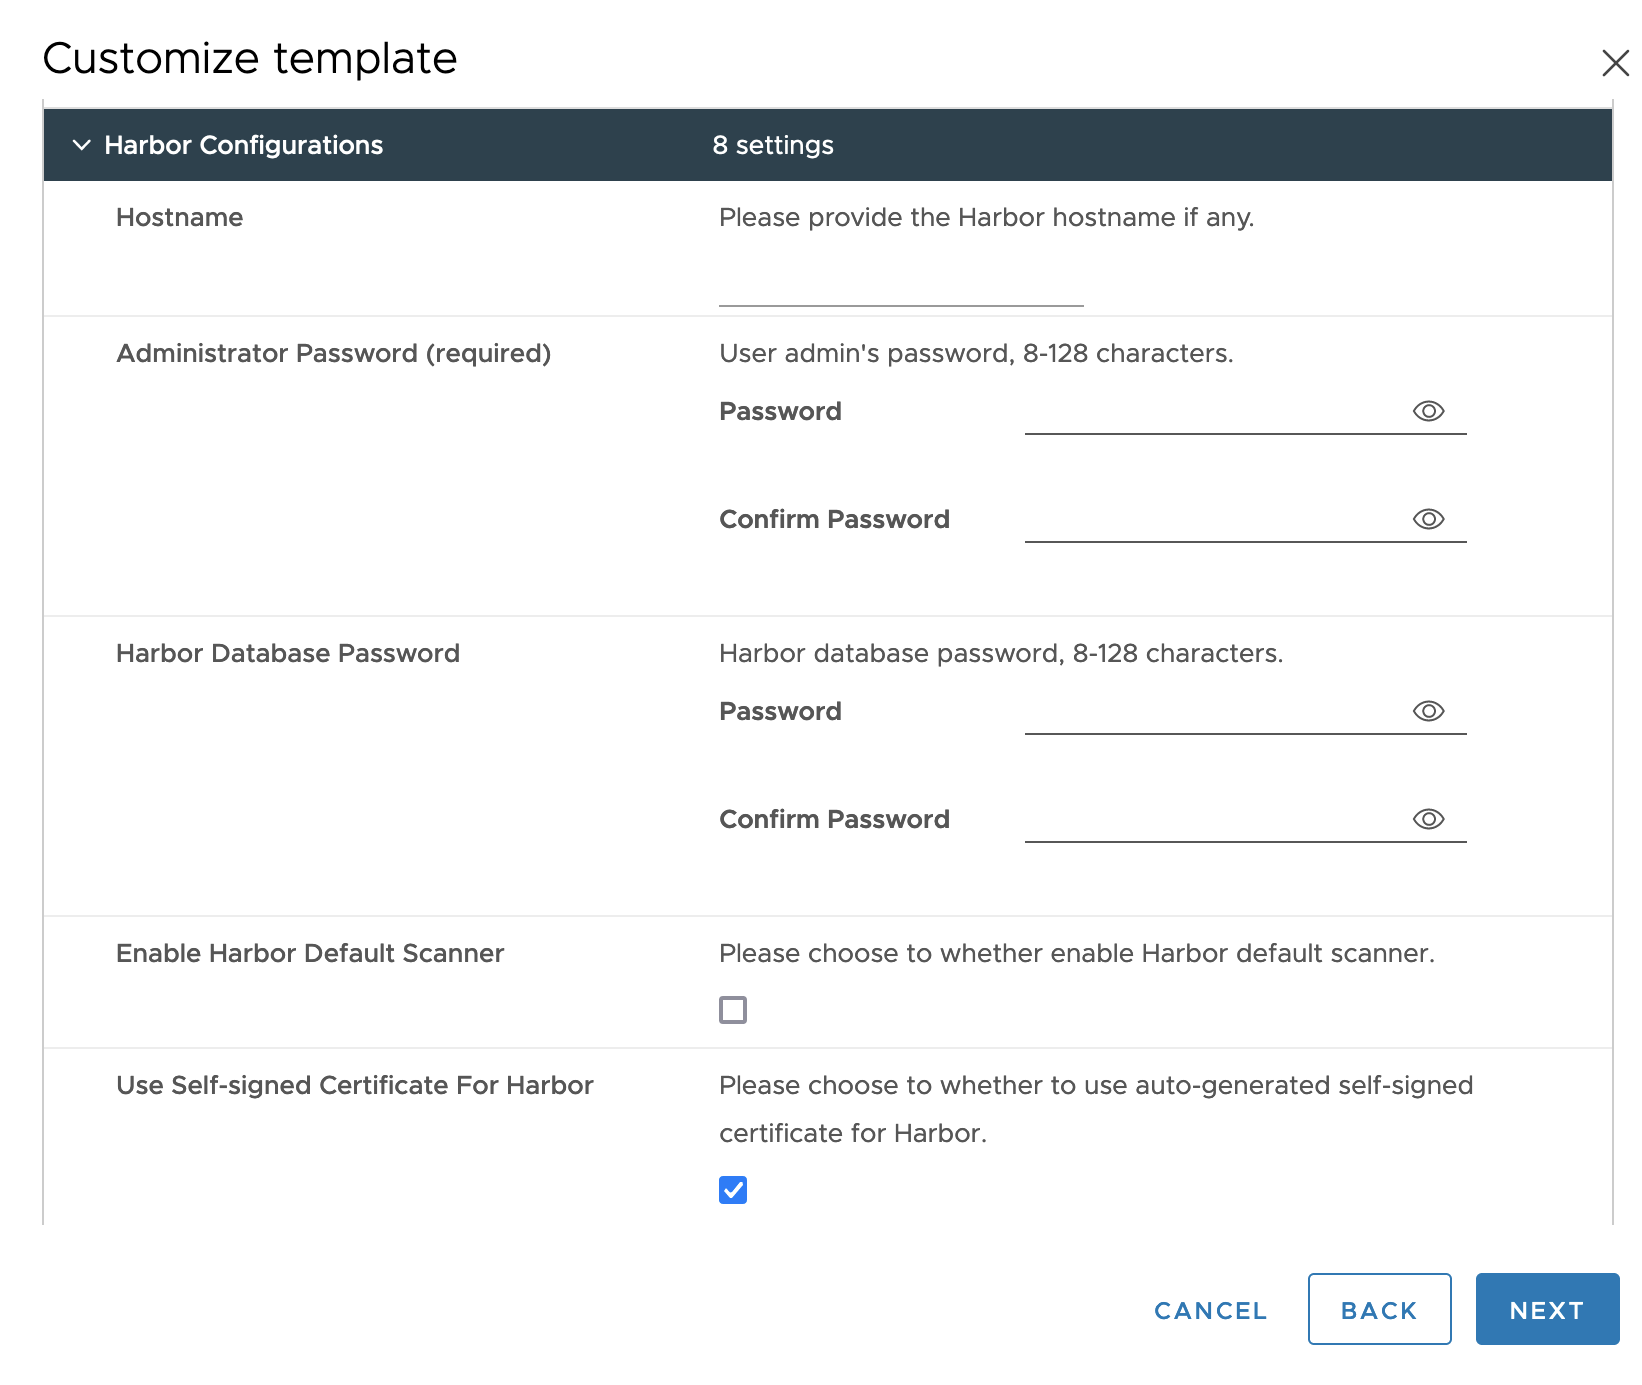
Customize template > Harbor Configurations:
-
Hostname (Optional): If provided, the Harbor hostname as an FQDN, such as
yourdomain.com. Cannot be an IP address orlocalhost.If you specify Hostname the SAN (Subject Alt Names) property contains only the DNS information; no IP information is provided.
If if you do not specify Hostname, the SAN property contains only the IP information, no DNS information is provided.
-
Administrator Password (Required): Password for Harbor
adminuser. Used by admins to access Harbor UI and by client containers to pull and push images. Must be 8 to 128 characters long. -
Harbor Database Password: Password for the Harbor internal database. If provided, should be 8 to 128 characters long.
-
Enable Harbor Default Scanner: Enable to install the Trivy scanner and activate it to scan images as they are uploaded to Harbor.
-
Use Self-signed Certificate For Harbor:
-
Enable to use self-signed certificates, and leave CA Certificate, Server Certificate, and Server Key blank.
-
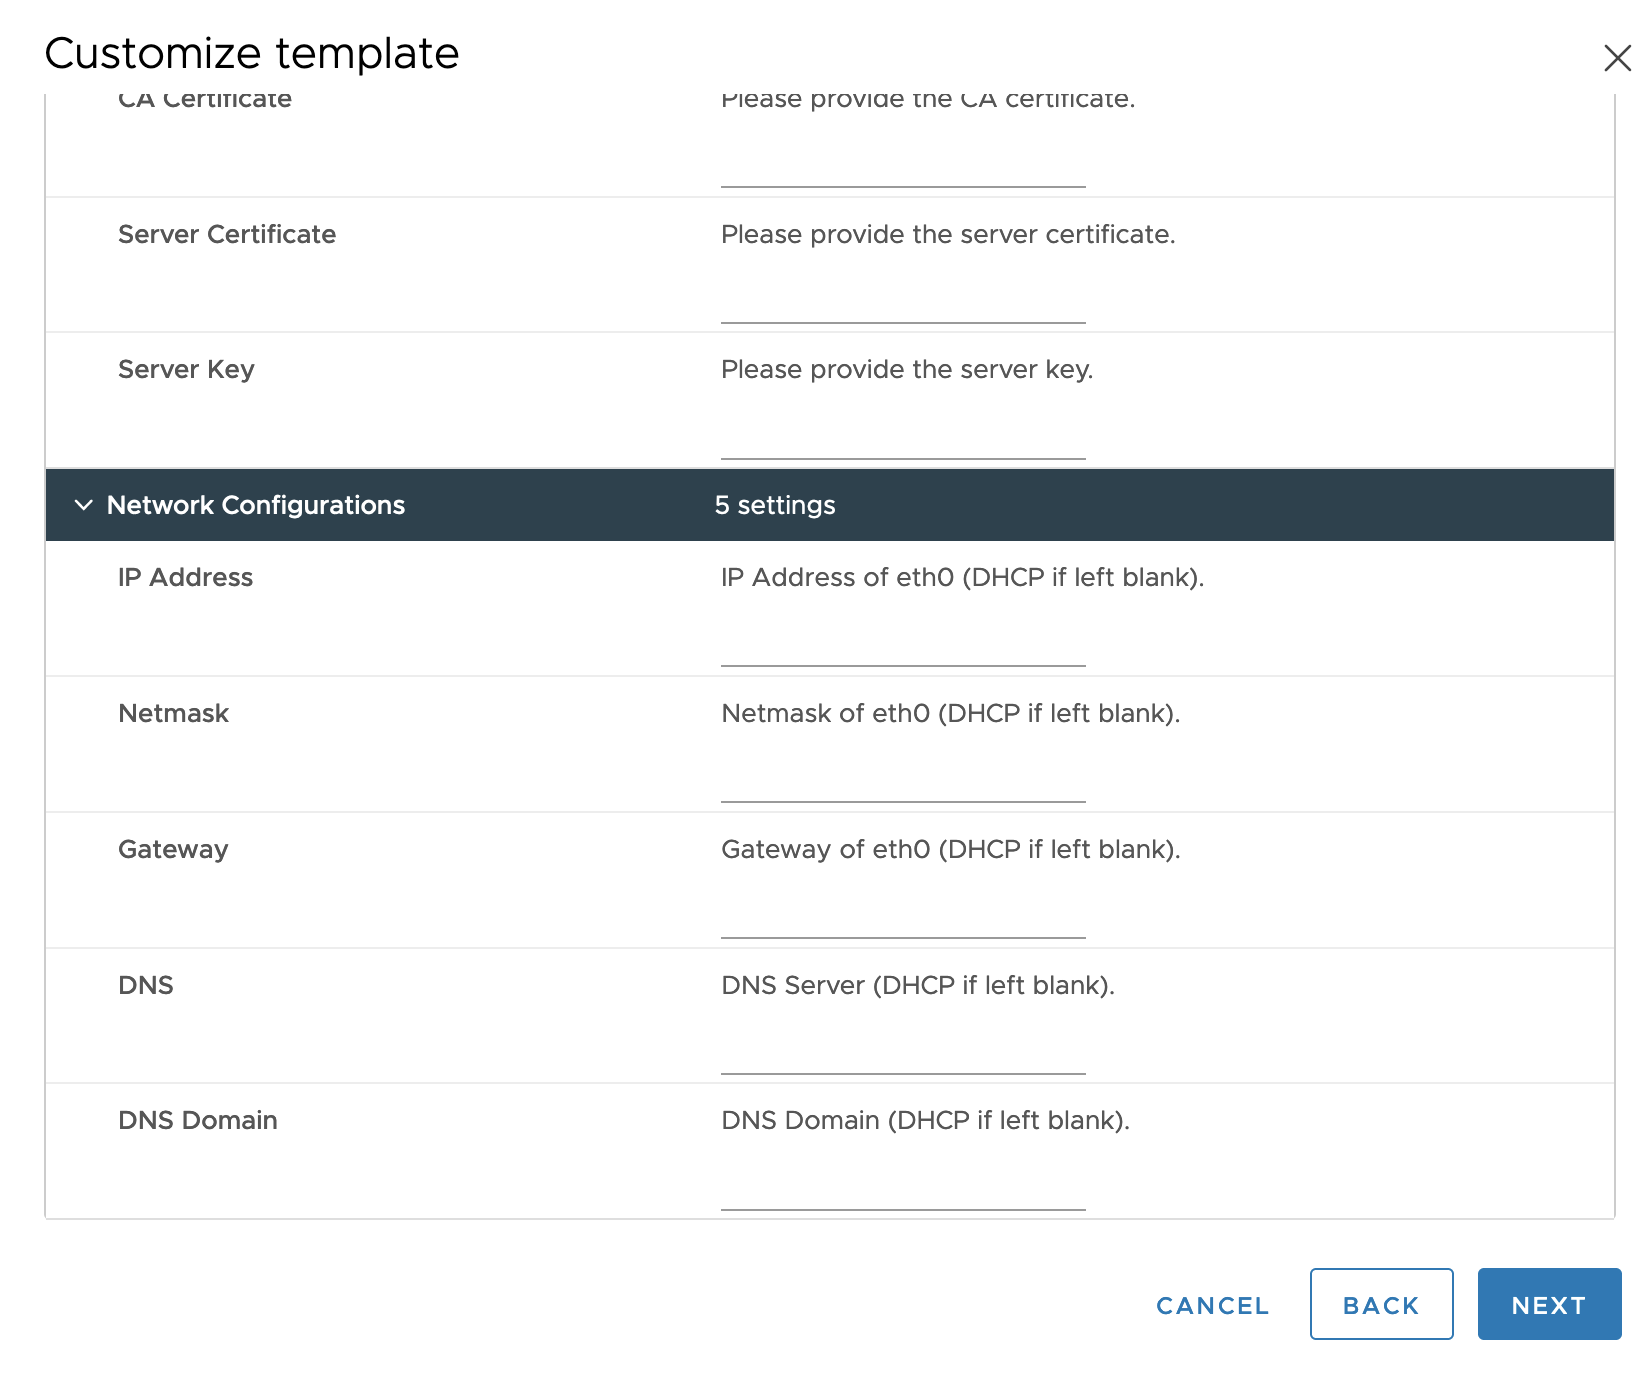
Otherwise, deactivate Use Self-signed Certificate For Harbor and paste in multi-line file contents for CA Certificate, Server Certificate, and Server Key. When you paste them into the form, the multi-line values turn to a one-line string with the space character as the delimiter.
-
-
-
Customize template > Networking Configurations:
-
IP Address, Netmask, and Gateway: A static IP address, netmask, and gateway for
eth0, if any. -
DNS, DNS Domain: DNS server and domain for the Harbor VM.
-
-
(Optional) Customize template > Docker Configurations:
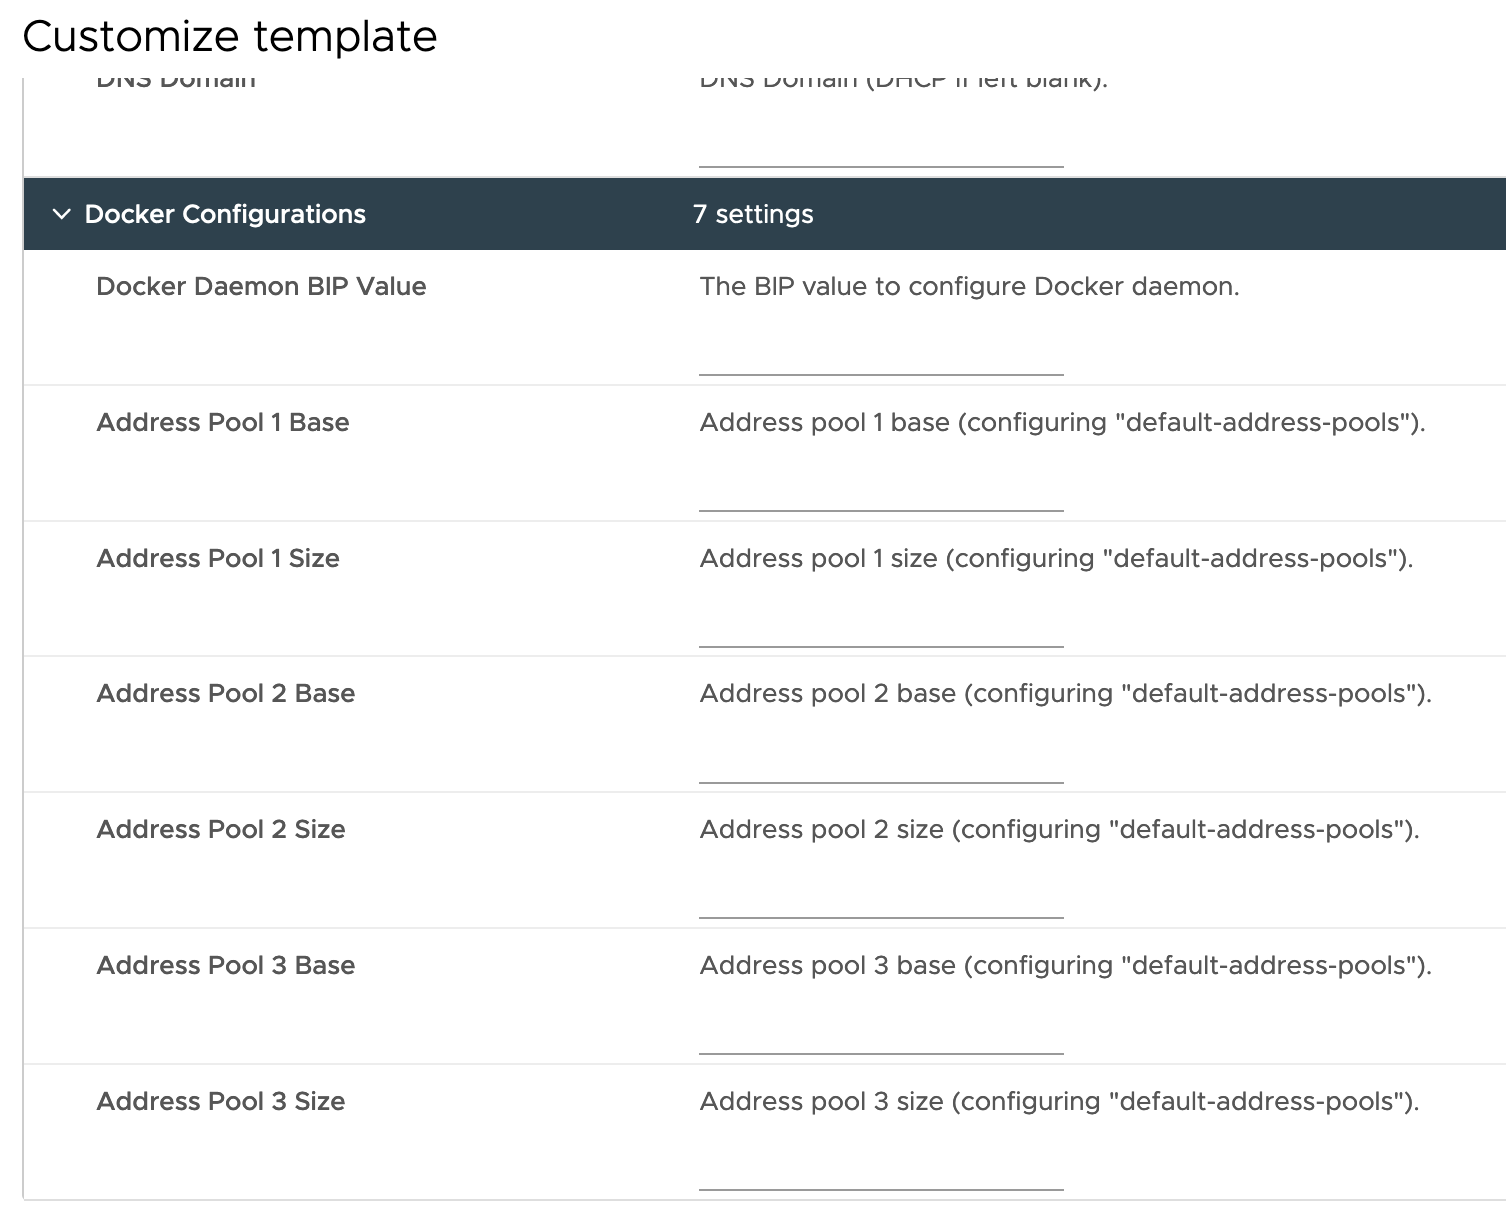
This configuration is optional and only available for OVAs with Harbor v2.8.x or later.
-
Docker Daemon BIP Value: A CIDR format value to configure the Docker daemon, for example: 198.18.251.1/24
-
Address Pool 1 Base, Address Pool 1 Size: Address pool base and address pool size should be configured in pairs if any. We allow at most three pairs of address pool base and address pool size. Also address pool base should be in CIDR format, for example 198.18.252.0/22; and address pool size should be an integer between 1 ~ 32.
-
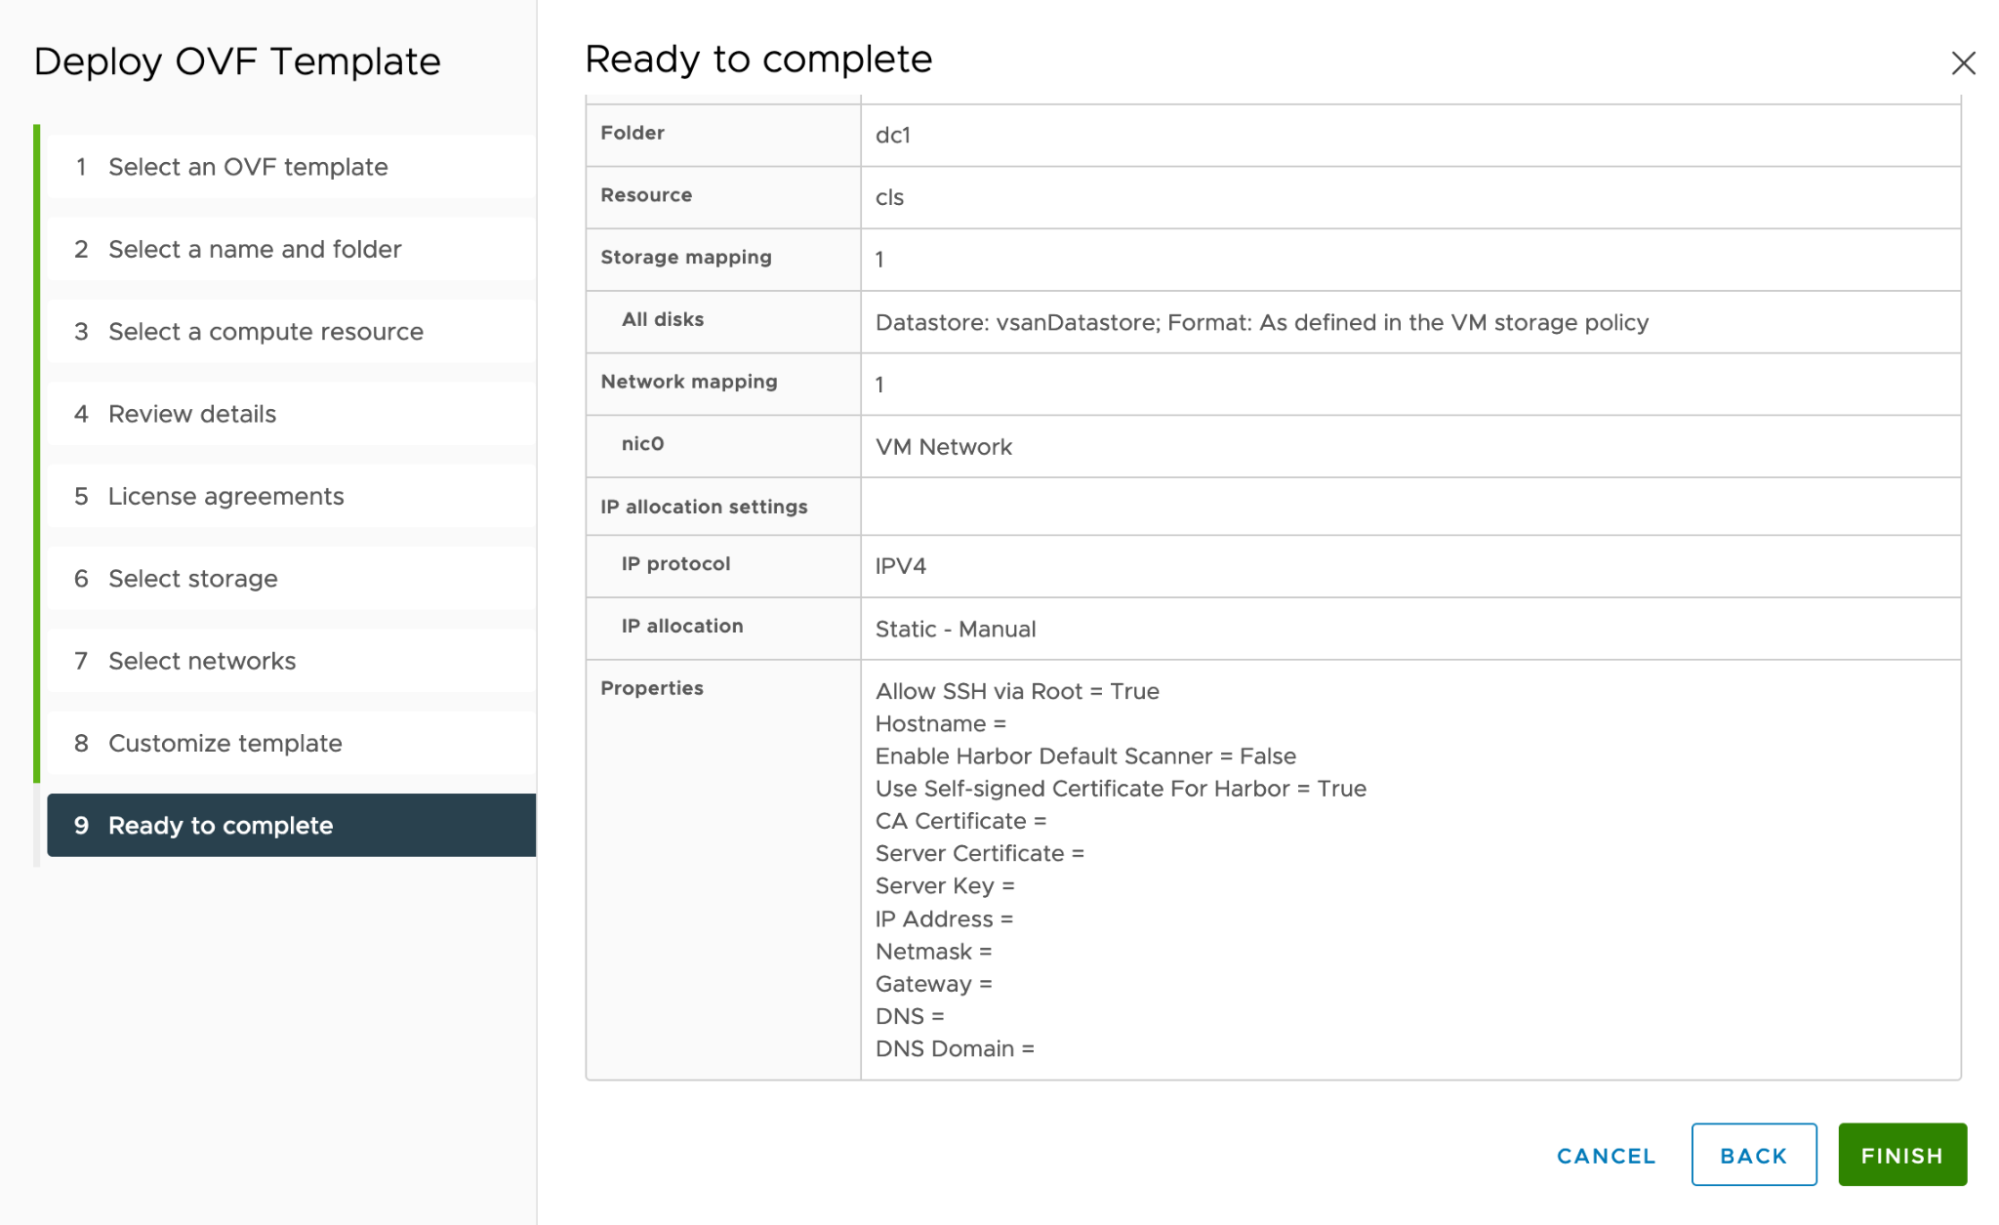
-
Ready to complete: Review the configuration and click FINISH.
Watch and Debug Deployment
Docker Deployment (Optional)
For OVAs with Harbor v2.8.x or later you can optionally set a Docker daemon configuration to run on the OVA, as configured under the Docker Configurations tab described above.
If you enter invalid arguments under Docker Configurations, both the firstboot systemd service and Docker will fail.
To verify Docker installation, ssh into the Harbor VM and run systemctl status firstboot and systemctl status docker. If the firstboot service status is listed as Active: failed then the deployment failed, but if it shows Active: inactive (dead) and firstboot.service: Succeeded and then docker service is listed as Active: active (running), then deployment succeeded.
To check the logs for more details, run journalctl -u firstboot and journalctl -u docker.
Harbor Deployment:
The first time you deploy a Harbor OVA, Harbor takes several minutes to load Docker images.
To watch the process and confirm that it is progressing, ssh in to the VM and run:
watch docker ps
If Harbor is not running after 5 minutes or so, retrieve the log file on the VM for debugging:
-
cd /etc/goharbor/harbor && ./harbor-support.sh --include-private -
Find and unzip the log file. It has a name like
/storage/log/harbor_appliance_logs_2022-11-30T09-39-12Z.tar.gz
Troubleshooting
Error: Unable to retrieve manifest or certificate file
-
If you see
Error: Unable to retrieve manifest or certificate fileas below, just try deploying the Harbor OVA again.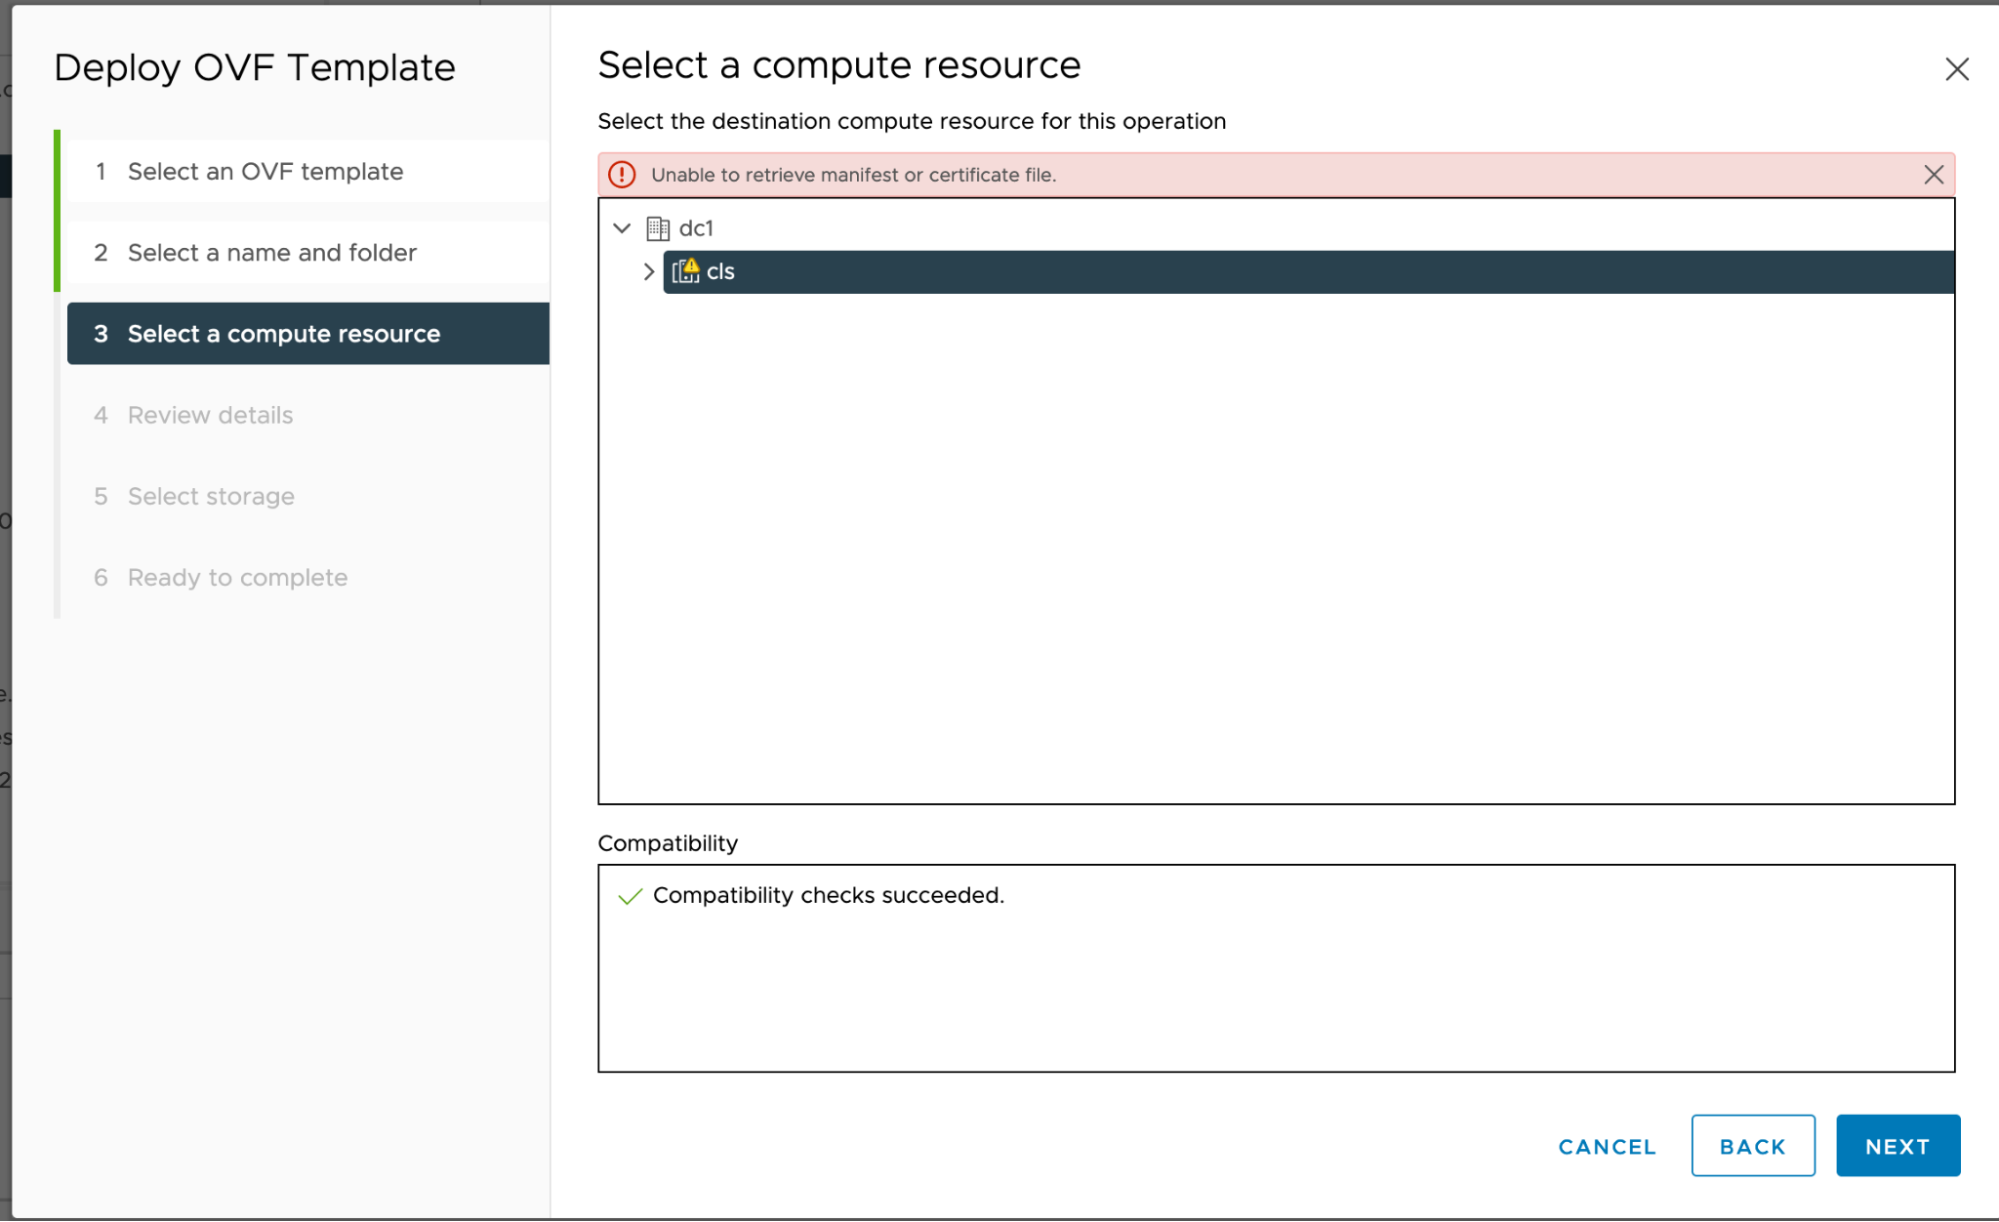
No Harbor Proxy Cache Support
You cannot use Harbor’s proxy cache feature for running Tanzu Kubernetes Grid v2.4 in an internet-restricted environment. You can still use a Harbor proxy cache to proxy images from prior versions of Tanzu Kubernetes Grid, and non-Tanzu images such as application images.
Reset the Root Password
If you lost the root password, recover it by following the procedure Resetting a Lost Root Password.
Expand Data Disk
A Harbor instance deployed from an OVA has two disks:
- Data disk: contains Harbor application data and certificate files; mounted as
/storage. - System disk: contains VM system data and Harbor bootstrap images, and runs the bootstrap images.
If you need to increase the size of Harbor’s data disk to accommodate requests you must temporarily power off the Harbor VM while you change settings. If the VM has a dynamic IP address, restarting the VM necessitates additional steps as described below.
To expand the data disk of your Harbor instance:
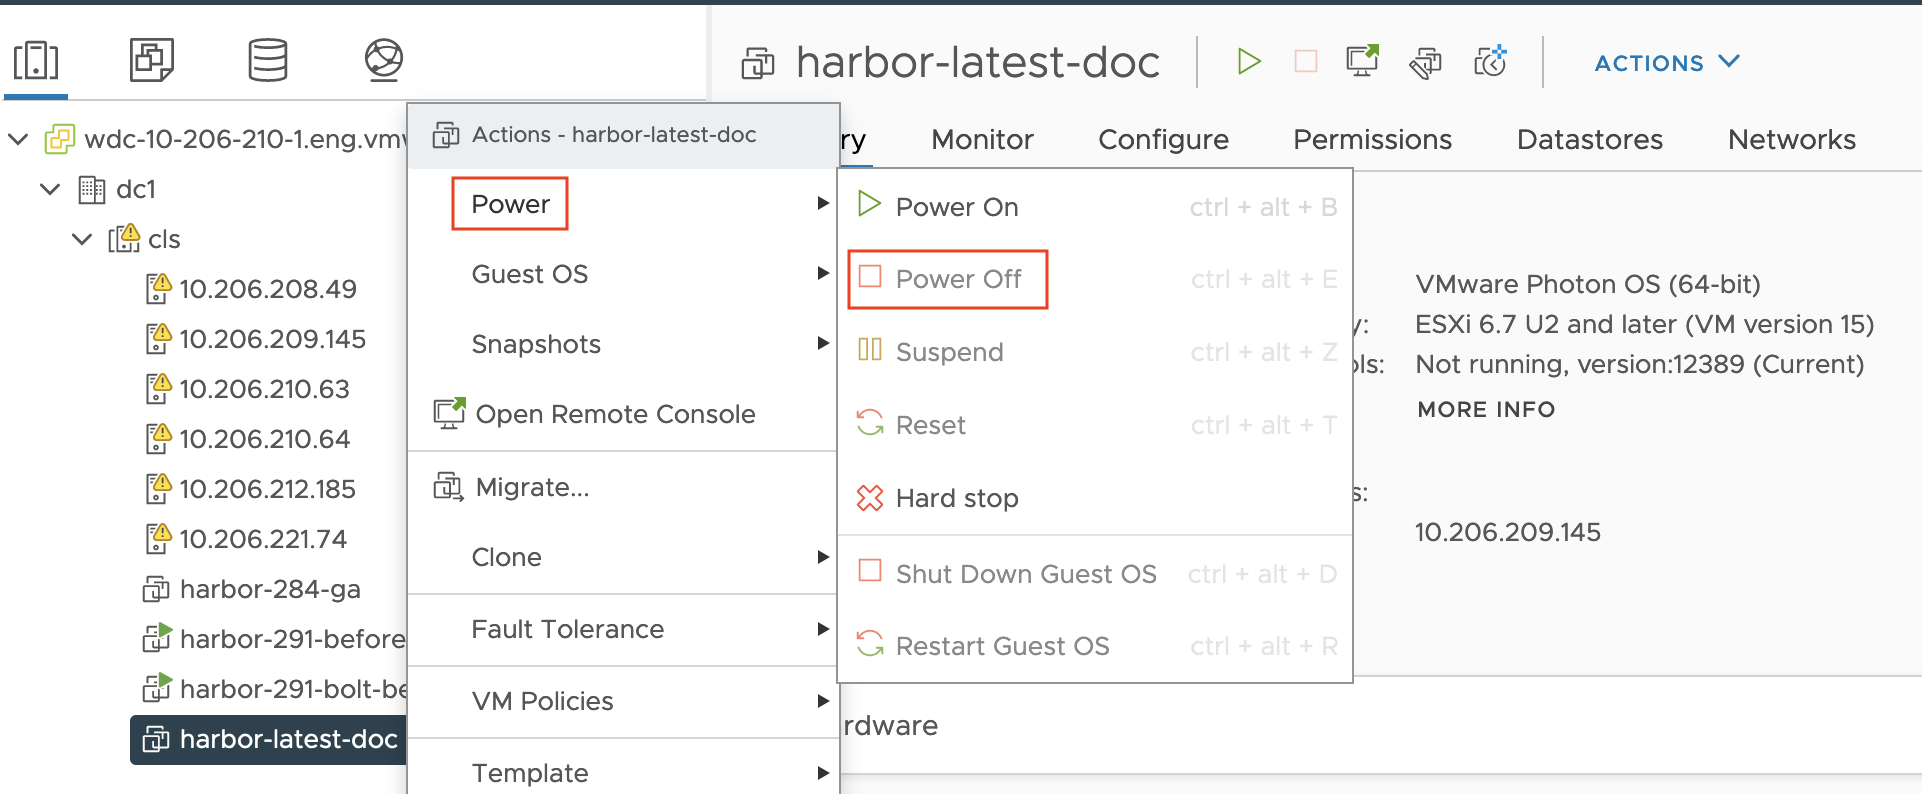
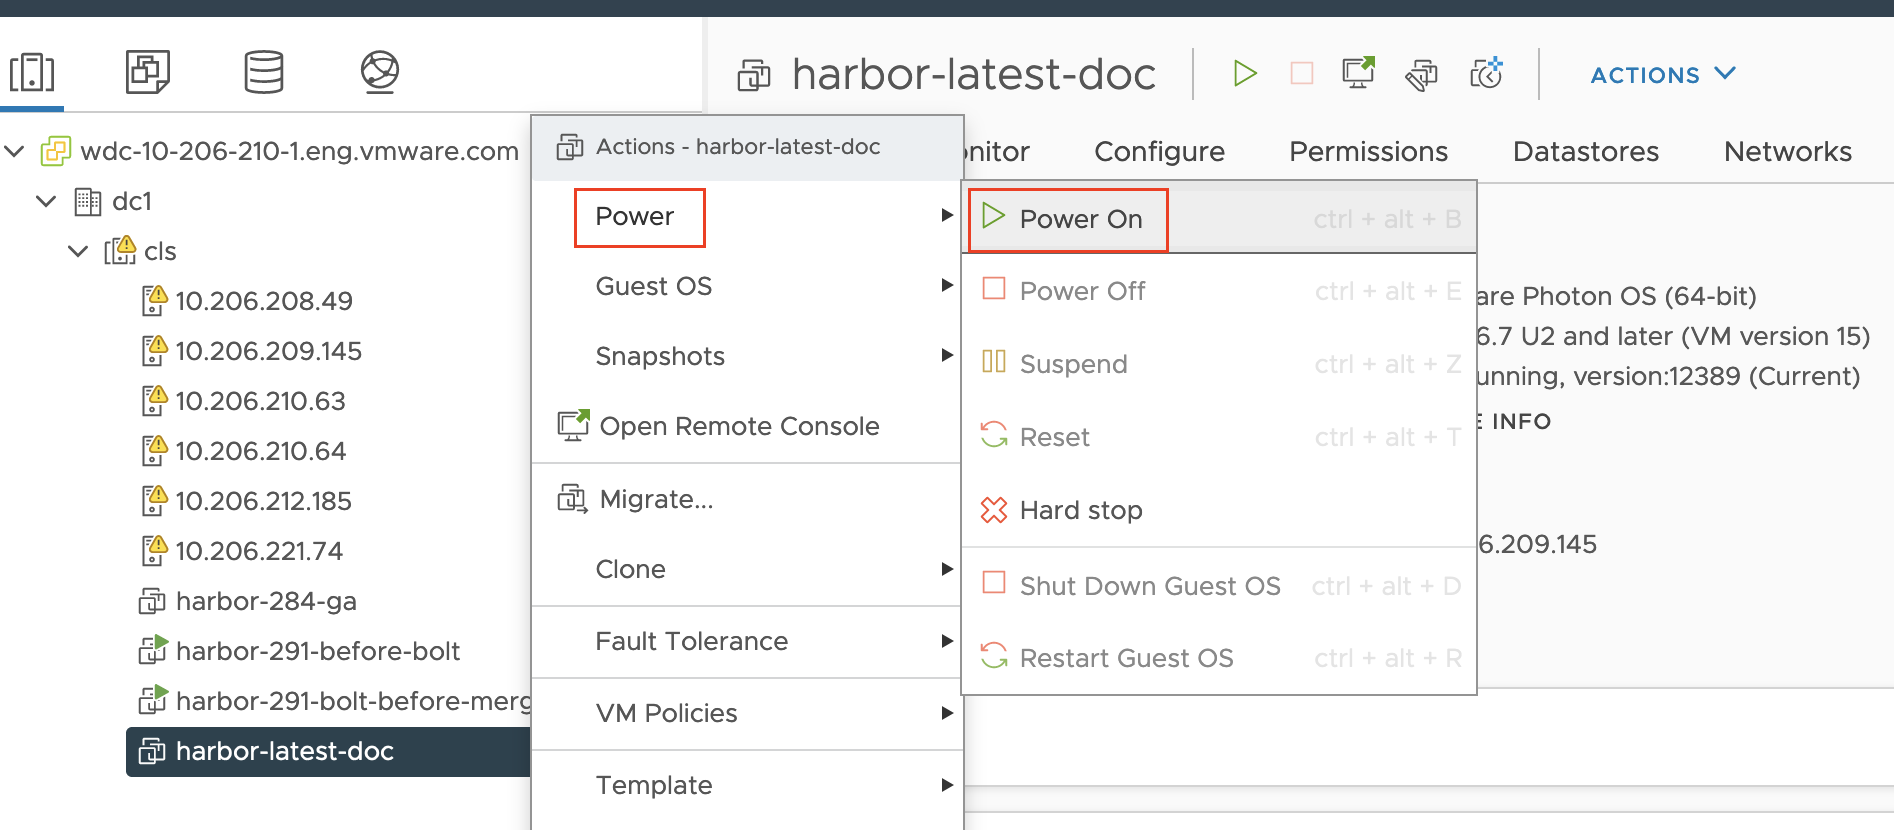
-
From vSphere Hosts and Clusters view, right-click the Harbor OVA VM and choose Power > Power Off:
-
Right-click the Harbor OVA VM again and choose Edit Settings:
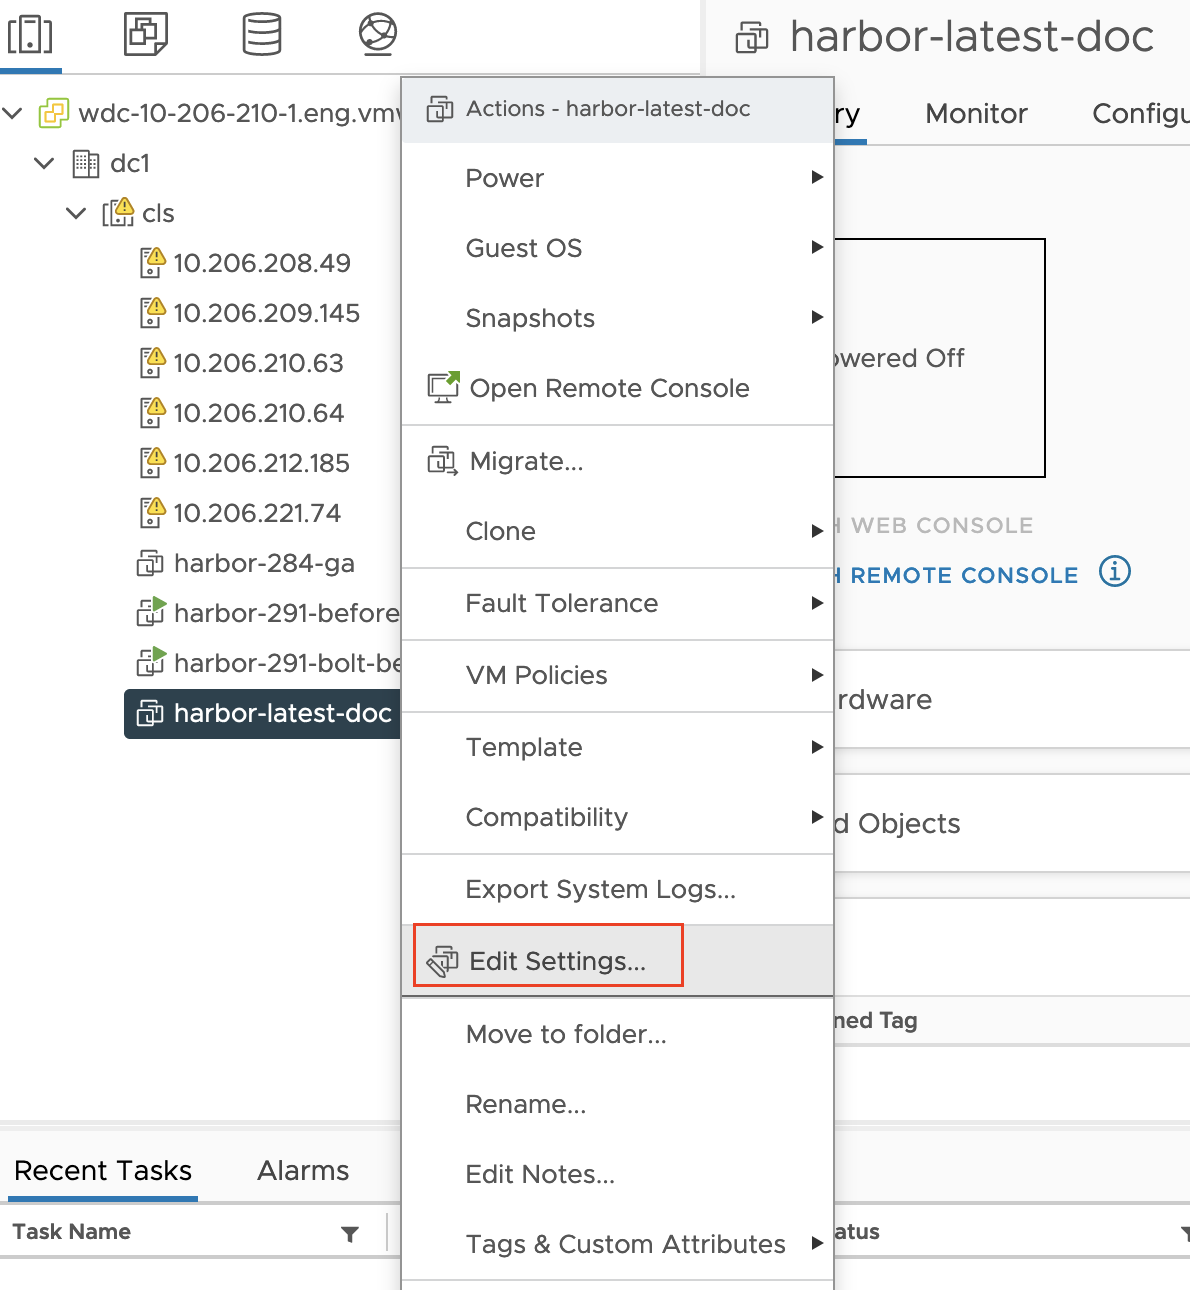
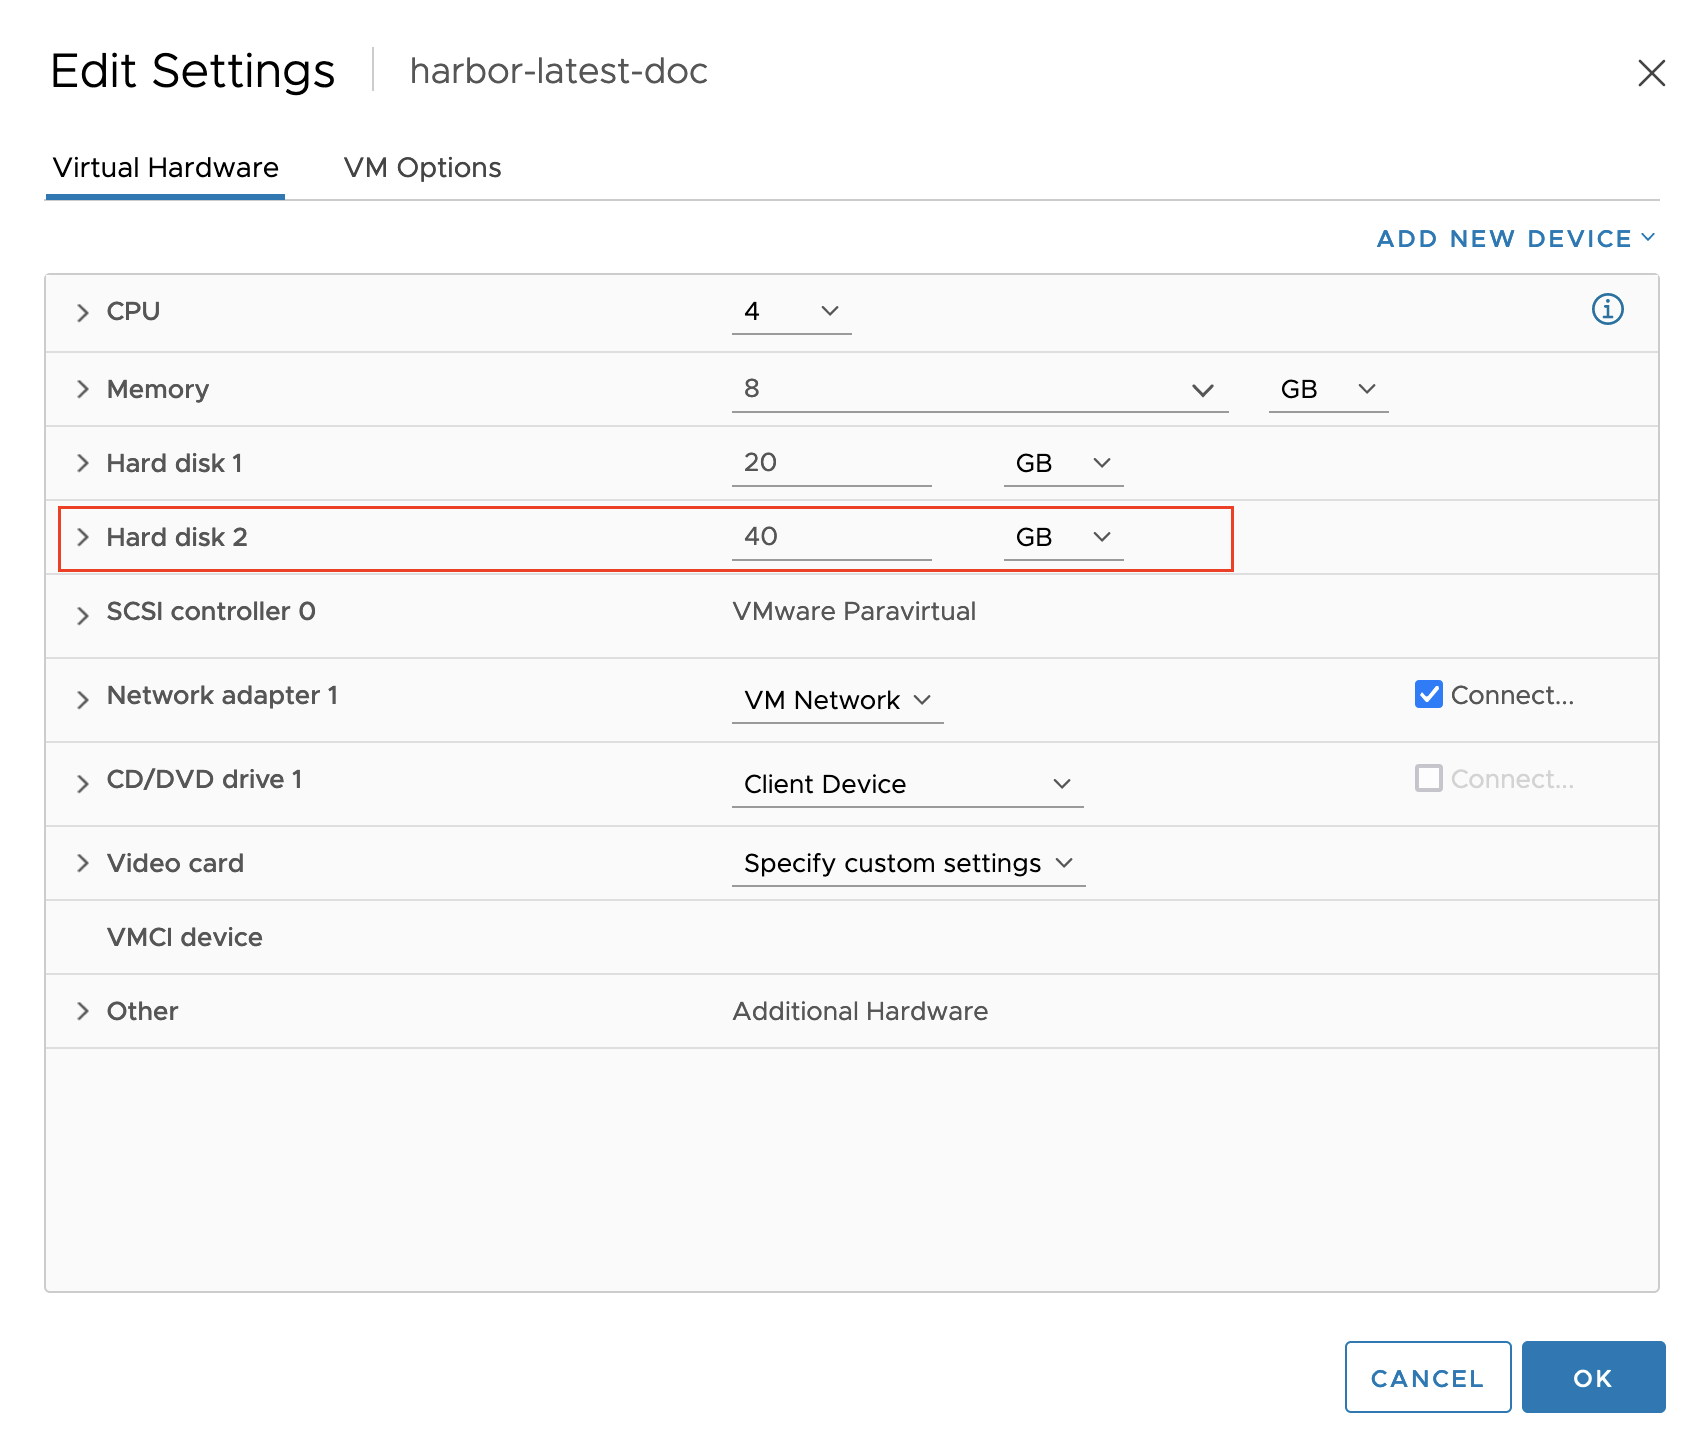
-
An Edit Settings window appears. Under Virtual Hardware, increase the Hard disk 2 setting to a capacity you prefer. Click OK.
-
Right-click the Harbor OVA VM again and choose Power > Power On to restart the VM.
-
Because you restarted the Harbor VM, you may need to perform additional steps depending on the VM’s host address configuration:
-
Static IP address: No additional steps.
-
Dynamic IP address: If the IP address of the Harbor VM has changed:
- Generate a certificate for the new IP address as described in the How to change existing expired harbor CA certificate with new one thread in the Harbor repository.
- Apply the new certificate to the VM as described in Rotate Certificates below.
-
FQDN: If the IP address of the Harbor VM has changed, update its address in the VM’s
/etc/hostsfile or in the DNS record.
Rotate Certificates
When the IP address of the Harbor VM has changed, rotate its certificate:
-
sshin to the VM. -
Stop the Harbor service:
systemctl stop harbor -
Back up the old certificate’s
server.crt,server.key,ca.crtfiles by moving or renaming them:server.crtis in/storage/data/secret/cert/server.crtserver.keyis in/storage/data/secret/cert/server.keyca.crtis in/storage/data/ca_download/ca.crt
-
Save the new certificate’s
server.crt,server.key,ca.crtto the locations above and set their file ownership and permissions to the same settings as the old files. -
Start the Harbor service:
systemctl start harbor
What to Do Next
After you use this Harbor registry to deploy a management cluster in an Internet-restricted environment, you can enable TKG workload clusters to use Harbor in one of two ways:
-
Use the external Harbor registry. If this registry uses a trusted CA certificate, connections between workload clusters and the registry are secure. If your central registry uses self-signed certificates, you can deactivate
TKG_CUSTOM_IMAGE_REPOSITORY_SKIP_TLS_VERIFYand specify theTKG_CUSTOM_IMAGE_REPOSITORY_CA_CERTIFICATEoption. Setting this option automatically injects your self-signed certificates into your workload clusters. -
Deploy a second instance of Harbor as a shared service within TKG. VMware recommends deploying the Harbor package as shared service managed by TKG. For more information, see Install Harbor for Service Registry.
On infrastructures with load balancing, VMware recommends installing the External DNS packaged service alongside the Harbor service, as described in Harbor Registry and External DNS.
