


VMware Tanzu RabbitMQ supports Warm Standby Replication, a strategy which replicates or copies data (continuous schema definitions and messages) from an upstream (primary) RabbitMQ cluster to a downstream (standby) cluster. In the event of a failure on the upstream (primary) cluster, an administrator can quickly start the recovery process, which means putting the downstream (standby) cluster into service as the new upstream (primary) cluster with minimal downtime or data loss. This information describes configuring Warm Standby Replication when using the Kubernetes Operators.
Note This feature is only supported in Tanzu RabbitMQ. It is not supported in the Open Source RabbitMQ product.
Topics
- Getting familiar with the Terminology
- Why use Warm Standby Replication
- What is Replicated/What is not?
- How Warm Standby Replication Works
- Requirements for Warm Standby Replication
- Setting up and Configuring Warm Standby Replication
- Setting up the Upstream and Downstream RabbitMQ Cluster
- Configuring Warm Standby Replication on the Upstream (Primary) Cluster
- Configuring Warm Standby Replication on the Downstream (Standby) Cluster
- Updating the Replication Configuration
- Deleting the Replication Configuration
- Optional: Configuring Warm Standby Replication with TLS
- Optional: Using Vault for Secrets
- Verifying Warm Standby Replication is Configured Correctly
- Promoting the Downstream (Standby) Cluster for Disaster Recovery
- Post Promotion
- Running Diagnostics
- Other Useful Replication Commands
- Troubleshooting Warm Standby Replication
- How to get a license
Getting familiar with the Terminology
- Upstream Cluster: The primary active cluster is most often called the “upstream” cluster. The “upstream” cluster reference is used in the configuration files, which you will come across when you are configuring the Warm Standby Replication feature. For the remainder of this documentation, it is referred to as the upstream (primary) cluster.
- Downstream Cluster: The standby remote cluster is most often called the “downstream” cluster. The “downstream” cluster reference is used in the configuration files, which you will come across when you are configuring the Warm Standby Replication feature. For the remainder of this documentation, it is referred to as the downstream (standby) cluster.
- Schema: Nodes and clusters store information that can be referred to as schema, metadata or topology. Users, vhosts, queues, exchanges, bindings, runtime parameters are all included in this category. This metadata is called definitions in RabbitMQ.
- Sync Request: A sync request carries a payload that allows the upstream (primary) side to compute the difference between the schemas on the upstream (primary) and downstream (standby) clusters.
- Sync Response: A sync response carries the difference plus all the definitions that are only present on the upstream (primary) side or conflict. The downstream (standby) side uses this information to apply the definitions. Any entities only present on the downstream are deleted, which ensures that downstreams follow their upstream's schema as closely as possible.
- Sync Operation: A sync operation is a request/response sequence that involves a sync request sent by the downstream (standby) cluster and a sync response that is sent back by the upstream (primary) cluster.
- Schema Replication: The automated process of continually replicating schema definitions from an upstream (primary) cluster to one or more downstream (standby) clusters.
- Message Replication: The automated process of continually replicating published messages from an upstream (primary) cluster to one or more downstream (standby) clusters.
- Loose Coupling: The upstream and its followers (downstreams) are loosely connected. If one end of the schema replication connection fails, the delta between clusters' schema will grow but neither will be affected in any other way. (This applies to the message replication connection as well.) If an upstream is under too much load to serve a definition request, or the sync plugin is unintentionally disabled, the downstream won't receive responses for sync requests for a period of time. If a downstream fails to apply definitions, the upstream is not affected and neither are its downstream peers. Therefore, availability of both sides are independent of each other. When multiple downstreams are syncing from a shared upstream, they do not interfere or coordinate with each other. Both sides have to do a little bit more work. On the upstream side, this load is shared between all cluster nodes. On the downstream side, the load should be minimal in practice, assuming that sync operations are applied successfully, so the delta does not accumulate.
- Downstream Promotion: Promoting the downstream (standby) cluster to the Upstream (primary) cluster.
Why use Warm Standby Replication
With the Warm Standby Replication feature, you get:
- A disaster recovery strategy that continually replicates or copies schema definitions and automatically replicates enqueued messages from the upstream (primary) cluster to the downstream (standby) cluster. If a disaster occurs on the upstream (primary) cluster, an administrator can quickly start the recovery process with minimal downtime or data loss.
- A way of transferring schema definitions in a compressed binary format which reduces bandwidth usage.
- Cluster co-dependencies are avoided because all communication between the sides is completely asynchronous. For example, a downstream (standby) cluster can run a different version of RabbitMQ.
- Links to other clusters are easy to configure, which is important for disaster recovery (for example, if you are setting up more than one downstream (standby) cluster).
What is Replicated/What is not?
Replicated
- Schema definitions such as vhosts, queues, users, exchanges, bindings, runtime parameters, and so on.
- Messages that are published to quorum queues, classic queues, and streams.
Not Replicated
Schema synchronization does not synchronize Kubernetes objects.
How Warm Standby Replication Works
The Warm Standby Replication process uses the following plugins:
Continuous Schema Replication (SchemaReplication) Plugin
The Continuous Schema Replication plugin connects the upstream (primary) cluster to the downstream (standby) cluster via a schema replication link. The downstream (standby) clusters connect to their upstream (primary) cluster and initiate sync operations. These operations synchronize the schema definition on the downstream side with the same schema definition of that which is on the upstream side. A node running in the downstream mode (a follower) can be converted to an upstream (leader) on the fly. This will make the node disconnect from its original source, therefore stopping all syncing. The node will then continue operating as a member of an independent cluster, no longer associated with its original upstream. Such conversion is called a downstream promotion and should be completed in case of a disaster recovery event.
Standby Message Replication Plugin
To ensure improved data safety and reduce the risk of data loss, it is not enough to automate the replication of RabbitMQ entities (schema objects). The Warm Standby Replication feature implements a hybrid replication model. In addition to schema definitions, it also manages the automated and continuous replication of enqueued messages from the upstream (primary) cluster. During the setup process, a replication policy is configured at the vhost level in the upstream (primary) cluster indicating the downstream queues that should be matched and targeted for message replication. Messages and relevant metrics from the upstream queues are then pushed to the downstream queues via a streaming log which the downstream(s) subscribe to. Currently, quorum queues, classic queues, and stream queues are supported for message replication.
Important **For quorum and classic queues, it is important to know that RabbitMQ clusters replicate messages in the queues to the downstream (standby) cluster, but these messages are not published into the queues in the downstream (standby) cluster until that downstream (standby) cluster is promoted to the upstream (primary) cluster.** Every 60 seconds (by default), the timestamp of the oldest message in each queue is sent to the downstream (standby) cluster, the promotion process uses the timestamp as a cutoff point for message recovery. So based on the timestamp of the oldest message, all messages from the "oldest" to the "current" timestamp are recovered when the promotion process happens. With this process, the probability of duplicate messages in a busy RabbitMQ cluster scenario is high because of the timestamp refresh interval and stale messages pushing the timestamp further into the past. However, it also brings the guarantee of not losing or missing any messages during the recovery process. Streams work differently, messages are replicated directly to streams on the downstream (standby) cluster. However, you cannot publish new messages to streams on the downstream (standby) cluster until the downstream (standby) cluster is promoted to the upstream (primary) cluster.
Requirements for Warm Standby Replication
- The Standby Replication Operator is installed on the Kubernetes cluster. Note, if the upstream (primary) cluster and the downstream (standby) cluster are on different Kubernetes clusters, then the Standby Replication Operator must be installed on both of these clusters. This operator is installed by default when the Tanzu RabbitMQ package is installed. The Standby Replication Operator is used to configure the Continuous Schema Replication and Standby Message Replication plugins.
- The Continuous Schema Replication (SchemaReplication) and Standby Message Replication (StandbyReplication) plugins are enabled. Run the following commands to check whether the plugins are enabled:
The following is an example of the output that is returned when the Continuous Schema Replication (SchemaReplication) plugin is enabled:rabbitmq-plugins list rabbitmq_schema_definition_sync rabbitmq-plugins list rabbitmq_standby_replicationrabbitmq [ ~ ]$ rabbitmq-plugins list rabbitmq_schema_definition_sync Listing plugins with pattern "rabbitmq_schema_definition_sync" ... Configured: E = explicitly enabled; e = implicitly enabled | Status: * = running on rabbit@6b4e8ac05412 |/ [E*] rabbitmq_schema_definition_sync - Know the credentials (username and password) that you want to use for Warm Standby Replication.
Setting up and Configuring Warm Standby Replication
Before continuing, ensure that all Requirements for Warm Standby Replication are in place.
Note There can be multiple downstream (standby) clusters linked to one upstream (primary) cluster. This setup describes one upstream cluster and one downstream cluster.
ImportantBefore you begin, it is useful to know that Warm Standby Replication uses stream queues to log/copy changes. As a result, the number of messages can grow to be very large but because RabbitMQ streams can store large amounts of data efficiently, there is minimal memory used.
Setting up the Upstream and Downstream RabbitMQ Clusters
ImportantIf it is not specified, the cluster size (
initial-cluster-size) should always be set to a minimum value of 3.
Set up the upstream (primary) and downstream (standby) clusters with the required plugins: Continuous Schema Replication (SchemaReplication) and Standby Message Replication by using the following yaml syntax.
The following is an example of an upstream (primary) RabbitmqCluster cluster configuration which you can use:
apiVersion: rabbitmq.com/v1beta1
kind: RabbitmqCluster
metadata:
  name: upstream-rabbit
spec:
...
  rabbitmq:
    additionalPlugins:
      - rabbitmq_stream
      - rabbitmq_schema_definition_sync
      - rabbitmq_schema_definition_sync_prometheus # optional
      - rabbitmq_standby_replication
    additionalConfig: |
      schema_definition_sync.operating_mode = upstream
      standby.replication.operating_mode = upstream
      # message stream retention limit (can either be size or time based)
      standby.replication.retention.size_limit.messages = 5000000000
      # standby.replication.retention.time_limit.messages = 12h
The following is an example of a downstream (standby) RabbitmqCluster cluster configuration which you can use.
For the downstream (standby) node, there is an optional sync operation interval setting
(schema_definition_sync.downstream.minimum_sync_interval) that can be configured. This interval is in seconds and controls how often the downstream (standby) node initiates the schema to be synchronized. There is no interval for message synchronization because messages are synchronized continuously.apiVersion: rabbitmq.com/v1beta1 kind: RabbitmqCluster metadata: name: downstream-rabbit spec: ... rabbitmq: additionalPlugins: - rabbitmq_stream - rabbitmq_schema_definition_sync - rabbitmq_schema_definition_sync_prometheus - rabbitmq_standby_replication additionalConfig: | schema_definition_sync.operating_mode = downstream # initiate sync operations every 30 seconds schema_definition_sync.downstream.minimum_sync_interval = 30 standby.replication.operating_mode = downstream schema_definition_sync.downstream.locals.users = ^default_user_ schema_definition_sync.downstream.locals.global_parameters = ^standby # message stream retention limit (can either be size or time based) standby.replication.retention.size_limit.messages = 5000000000 # standby.replication.retention.time_limit.messages = 12hOptional (This part of the step is important if you want to exclude certain entities): The downstream (standby) node can be configured to exclude certain entities (queues, exchanges, users, and so on) from the synchronisation process. For example, you can filter the user
local-adminfrom the synchronisation process; this can be useful if you want to include certain entities in the downstream (standby), even if they do not exist in the upstream (primary). Keep in mind that any entity not present in the upstream (primary) will be deleted by the downstream (standby) synchronisation process.# to filter users using regex schema_definition_sync.downstream.locals.users = ^my-user$ # to filter vhosts using regex schema_definition_sync.downstream.locals.vhosts = ^vhost-test.* # to filter policies using regex schema_definition_sync.downstream.locals.policies = ^example$ # to filter global parameters schema_definition_sync.downstream.locals.global_parameters = ^some-param # to filter parameters schema_definition_sync.downstream.locals.parameters = example$ # to filter queues schema_definition_sync.downstream.locals.queues = ^leave-this-q$ # to filter exchanges schema_definition_sync.downstream.locals.exchanges = ^important-exchange-[a-z]+Check the status of the upstream (primary) and downstream (standby) RabbitmqClusters, ensure that the pods for these clusters are running before continuing with the next steps below. To check the pods in the upstream (primary) and downstream (standby) clusters are running, run the following command.
Note
rbtmq-clusterin the following command is the name of an example namespace.kubectl get pod -n rbtmq-clusterOutput similiar to the following should be returned:
NAME READY STATUS RESTARTS AGE
downstream-rabbit-server-0 1/1 Running 1 28d
downstream-rabbit-server-1 1/1 Running 1 28d
downstream-rabbit-server-2 1/1 Running 1 28d
upstream-rabbit-server-0 1/1 Running 1 28d
upstream-rabbit-server-1 1/1 Running 1 28d
upstream-rabbit-server-2 1/1 Running 1 28d
You can also check the upstream (primary) and downstream (standby) services are created properly by running this command:
kubectl get svc -n rbtmq-clusterOutput similar to the following should be returned:
NAME TYPE CLUSTER-IP EXTERNAL-IP PORT(S) AGE
downstream-rabbit NodePort 10.100.198.3 <none> 5672:31414/TCP,15672:30479/TCP,5552:30399/TCP,15692:32563/TCP 28d
downstream-rabbit-nodes ClusterIP None <none> 4369/TCP,25672/TCP 28d
upstream-rabbit NodePort 10.100.153.24 <none> 5672:32516/TCP,15672:31792/TCP,5552:30702/TCP,15692:31009/TCP 28d
upstream-rabbit-nodes ClusterIP None <none> 4369/TCP,25672/TCP 28d
Configuring Warm Standby Replication on the Upstream (Primary) Cluster
To use the Warm Standby Replication feature, you must now configure the Continuous Schema Replication (SchemaReplication) and Standby Message Replication plugins using the Standby Replication Operator.
To configure the Continuous Schema Replication plugin for the upstream cluster, complete the following steps:
Configure a secret to contain a replication-schema user and the user's credentials.
This user will be used from the downstream (standby) cluster to establish a connection and manage the replication.The following Standby Replication Operator yaml code provides an example of how to configure the user and secret.
apiVersion: v1
kind: Secret
metadata:
  name: upstream-secret
type: Opaque
stringData:
  username: test-user
  password: test-password
---
apiVersion: rabbitmq.com/v1beta1
kind: User
metadata:
  name: rabbitmq-replicator
spec:
  rabbitmqClusterReference:
    name:  upstream-rabbit # the upstream RabbitMQ cluster name. It must be in the same namespace and it is a mandatory value.
  importCredentialsSecret:
    name: upstream-secret
Add the
write,configure, andreadpermissions for the user on therabbitmq_schema_definition_syncvhost. These permissions are required to ensure the Continuous Schema Replication (SchemaReplication) plugin operates correctly. The following yaml code provides an example of how to configure these permissions on therabbitmq_schema_definition_syncvhost.apiVersion: rabbitmq.com/v1beta1 kind: Permission metadata: name: rabbitmq-replicator.rabbitmq-schema-definition-sync.all spec: vhost: "rabbitmq_schema_definition_sync" # name of a vhost userReference: name: rabbitmq-replicator permissions: write: ".*" configure: ".*" read: ".*" rabbitmqClusterReference: name: upstream-rabbit # the upstream RabbitMQ cluster name. It must be in the same namespace and it is a mandatory value.Configure the
SchemaReplicationobject using the following yaml example code. Note, the endpoint is the service external IP of the upstream (primary) cluster. If you are securing Warm Standby Replication with TLS (refer to Optional: Configuring Warm Standby Replication with TLS), the port in the endpoint is5671instead of5672below.apiVersion: rabbitmq.com/v1beta1 kind: SchemaReplication metadata: name: upstream namespace: upstream spec: endpoints: "UPSTREAM_EXTERNAL_IP:5672" upstreamSecret: name: upstream-secret rabbitmqClusterReference: name: upstream-rabbit # the upstream RabbitMQ cluster name. It must be in the same namespace and it is a mandatory value.Configure the Standby Message Replication plugin using the following yaml example code, ensure
kindis set toStandbyReplicationwhich directs the Standby Replication Operator to configure Warm Standby Replication.
You can use the Standby Replication Operator to configure which queues that the plugin should collect messages for.In the following example, the schema definition sync plugin is configured to collect messages for all queues in vhost
test:apiVersion: rabbitmq.tanzu.vmware.com/v1beta1 kind: StandbyReplication metadata: name: upstream-configuration spec: operatingMode: "upstream" # has to be "upstream" to configure an upstream RabbitMQ cluster; required value upstreamModeConfiguration: # list of policies that Operator will create replicationPolicies: - name: test-policy # policy name; required value pattern: "^.*" # any regex expression that will be used to match queues name; required value vhost: "test" # vhost name; must be an existing vhost; required value rabbitmqClusterReference: name: upstream-rabbit # the upstream RabbitMQ cluster name. It must be in the same namespace and it is a mandatory value.Note The
spec.operatingModefield must be set toupstreamto provide upstream related configurations.Note
spec.upstreamModeConfiguration.replicationPoliciesis a list, andname,pattern,vhostare the required values for the operator policies.Note vhost
testmust be an existing vhost, which can be created with our topology operator also.apiVersion: rabbitmq.com/v1beta1 kind: Vhost metadata: name: default spec: name: "test" # vhost name tags: ["standby_replication"] rabbitmqClusterReference: name: upstream-rabbit # the upstream RabbitMQ cluster name. It must be in the same namespace and it is a mandatory value.Note The
"standby_replication"tag and the permissions are used by the plugin to select the vhost to replicate.apiVersion: rabbitmq.com/v1beta1 kind: Permission metadata: name: rabbitmq-replicator.defaultvhost.all spec: vhost: "test" # name of a vhost userReference: name: rabbitmq-replicator permissions: write: ".*" configure: ".*" read: ".*" rabbitmqClusterReference: name: upstream-rabbit # the upstream RabbitMQ cluster name. It must be in the same namespace and it is a mandatory value.
Configuring Warm Standby Replication on the Downstream (Standby) Cluster
To use the Warm Standby Replication feature, as well as configuring the Continuous Schema Replication (SchemaReplication) and Standby Message Replication plugins on the upstream (primary) cluster, you must also configure them on the downstream (standby) cluster using the Standby Replication Operator. Before continuing with these steps, ensure you have configured the plugins on the upstream (primary) cluster first, refer to Configuring Warm Standby Replication on the Upstream (Primary) Cluster for more information.
To configure the Continuous Schema Replication plugin for the downstream cluster, complete the following steps:
Configure a secret to contain a replication-schema user and the user's credentials. The following yaml code provides an example of how to configure the user and secret.
apiVersion: v1
kind: Secret
metadata:
  name: upstream-secret
type: Opaque
stringData:
  username: test-user
  password: test-password
---
apiVersion: rabbitmq.com/v1beta1
kind: User
metadata:
  name: rabbitmq-replicator
spec:
  rabbitmqClusterReference:
    name:  downstream-rabbit # the downstream RabbitMQ cluster name. It must be in the same namespace and it is a mandatory value.
  importCredentialsSecret:
    name: upstream-secret
Add the
write,configure, andreadpermissions for the user on therabbitmq_schema_definition_syncvhost. These permissions are required to ensure the Continuous Schema Replication (SchemaReplication) operates correctly.The following yaml code provides an example of how to configure these permissions on the
rabbitmq_schema_definition_syncvhost.apiVersion: rabbitmq.com/v1beta1 kind: Permission metadata: name: rabbitmq-replicator.rabbitmq-schema-definition-sync.all spec: vhost: "rabbitmq_schema_definition_sync" # name of a vhost userReference: name: rabbitmq-replicator permissions: write: ".*" configure: ".*" read: ".*" rabbitmqClusterReference: name: downstream-rabbit # the downstream RabbitMQ cluster name. It must be in the same namespace and it is a mandatory value.Configure the
SchemaReplicationobject using the following yaml example code. Note, the endpoint is the service external IP of the upstream cluster.apiVersion: rabbitmq.com/v1beta1 kind: SchemaReplication metadata: name: downstream spec: endpoints: "UPSTREAM_EXTERNAL_IP:5672" upstreamSecret: name: upstream-secret rabbitmqClusterReference: name: downstream-rabbit # the downstream RabbitMQ cluster name. It must be in the same namespace and it is a mandatory value.Configure the Standby Message Replication plugin using the following yaml example code, ensure
kindis set toStandbyReplicationwhich directs the Standby Replication Operator to configure Warm Standby Replication.
You can use Standby Replication Operator to configure a downstream (standby) RabbiMQ cluster to connect to a specific RabbitMQ. The operator takes the endpoints and credentials that are provided to set thestandby_replication_upstreamglobal parameter in the downstream (standby) RabbitMQ cluster.The following example connects the RabbitMQ cluster
downstream-rabbitto the RabbitMQ cluster at theUPSTREAM_EXTERNAL_IP:5552endpoint. Note, the use of the RabbitMQ Stream Protocol port:5552.--- apiVersion: rabbitmq.tanzu.vmware.com/v1beta1 kind: StandbyReplication metadata: name: downstream-configuration spec: operatingMode: "downstream" # has to be "downstream" to configure an downstream RabbitMQ cluster downstreamModeConfiguration: endpoints: "UPSTREAM_EXTERNAL_IP:5552" # comma separated list of endpoints to the upstream RabbitMQ upstreamSecret: name: upstream-secret # an existing Kubernetes secret; required value rabbitmqClusterReference: name: downstream-rabbit # the downstream RabbitMQ cluster name. It must be in the same namespace and it is a mandatory value.Note The
spec.operatingModefield must be set todownstreamto provide downstream related configurations.Note
spec.downstreamModeConfiguration.endpointsis a comma separated list containing endpoints to connect to the upstream RabbitMQ. Endpoints must be reachable from this downstream cluster with the stream protocol port. If you are securing Warm Standby Replication with TLS, the stream protocol port is5551instead of5552.Note
spec.downstreamModeConfiguration.upstreamSecretis the name of an exising Kubernetes secret in the same namespace. This secret must contain the `username` and `password` keys. It is used as credentials to connect to the upstream RabbitMQ. For example:--- apiVersion: v1 kind: Secret metadata: name: upstream-secret type: Opaque stringData: username: test-user # upstream cluster username password: test-password # upstream cluster password
Updating the Replication Configuration
You can update the replication configurations on the upstream (primary) and downstream (standby) clusters after the StandbyReplication custom resources are created on these clusters.
Important Notes:
- Update operations such as updating the policy name, vhost, patterns, and adding a new policy are supported.
- Updating the
spec.upstreamModeConfiguration.replicationPoliciesfield is not fully supported so when you remove the definition of an existing policy from the yaml file, the existing policy will not be removed when you update the configuration, it still exists in the RabbitMQ definition. However, if you add a new policy to the yaml file, it creates the new policy in RabbitMQ. The Standby Replication Operator won't clean up removed policies from the list. - The
spec.operatingModeandspec.rabbitmqClusterReferencefields cannot be changed. If you need to update these fields, then you must delete the Warm Standby Replication custom resources on the upstream (primary) and downstream (standby) clusters, and then complete the previous sections again to configure them. - If you update the user credentials, the Standby Replication Operator does not monitor these updates on the Kubernetes secret object. For these updates to be implemented, you can force the Standby Replication Operator to update by adding a temporary label or annotation to the custom resource.
Deleting the Replication Configuration
You can remove upstream (primary) and downstream (standby) configurations by deleting the StandbyReplication custom resource.
- To delete an upstream configuration, the Standby Replication Operator removes all replication policies set in
spec.upstreamModeConfiguration.replicationPoliciesfrom the RabbitMQ. - To delete a downstream configuration, the Standby Replication Operator removes the
standby_replication_upstreamglobal parameter.
Optional: Configuring Warm Standby Replication with TLS
You can configure the upstream (primary) and downstream (standby) clusters to complete replication over TLS, which secures communications between the clusters.
Complete the following steps:
- Configure your clusters with secrets containing TLS certificates by following this TLS Example.
- You can then use these certificates by including the
ssl_optionsconfiguration parameters in the configuration file. Include these parameters in the same format as thessl_options, which are detailed in Enabling TLS Support in RabbitMQ. First, configure your clusters with secrets containing TLS certificates by following this TLS Example.
On the upstream cluster, set the parameters under schema_definition_sync.ssl_options:
apiVersion: rabbitmq.com/v1beta1
kind: RabbitmqCluster
metadata:
   name: upstream-rabbit
spec:
...
  tls:
    secretName: tls-secret
  rabbitmq:
    additionalPlugins:
    - rabbitmq_stream
    - rabbitmq_schema_definition_sync
    - rabbitmq_schema_definition_sync_prometheus
    - rabbitmq_standby_replication
    additionalConfig: |
       schema_definition_sync.operating_mode = upstream
       standby.replication.operating_mode = upstream
       standby.replication.retention.size_limit.messages = 5000000000
       schema_definition_sync.ssl_options.certfile              = /etc/rabbitmq-tls/tls.crt
       schema_definition_sync.ssl_options.keyfile               = /etc/rabbitmq-tls/tls.key
       schema_definition_sync.ssl_options.verify                = verify_none
       schema_definition_sync.ssl_options.fail_if_no_peer_cert  = false
On the downstream cluster, set the parameters under schema_definition_sync.ssl_options and standby.replication.downstream.ssl_options:
apiVersion: rabbitmq.com/v1beta1
kind: RabbitmqCluster
metadata:
   name: downstream-rabbit
spec:
...
  tls:
    secretName: tls-secret
  rabbitmq:
    additionalPlugins:
    - rabbitmq_stream
    - rabbitmq_schema_definition_sync
    - rabbitmq_schema_definition_sync_prometheus
    - rabbitmq_standby_replication
    additionalConfig: |
       schema_definition_sync.operating_mode = downstream
       standby.replication.operating_mode = downstream
       schema_definition_sync.downstream.locals.users = ^default_user_
       schema_definition_sync.downstream.locals.global_parameters = ^standby
       standby.replication.retention.size_limit.messages = 5000000000
       schema_definition_sync.ssl_options.certfile              = /etc/rabbitmq-tls/tls.crt
       schema_definition_sync.ssl_options.keyfile               = /etc/rabbitmq-tls/tls.key
       schema_definition_sync.ssl_options.verify                = verify_none
       schema_definition_sync.ssl_options.fail_if_no_peer_cert  = false
       standby.replication.downstream.ssl_options.certfile              = /etc/rabbitmq-tls/tls.crt
       standby.replication.downstream.ssl_options.keyfile               = /etc/rabbitmq-tls/tls.key
       standby.replication.downstream.ssl_options.verify                = verify_none
       standby.replication.downstream.ssl_options.fail_if_no_peer_cert  = false
Important Peer verification (normally configured by setting ssl_options.verify to verify_peer) is not supported for Warm Standby Replication. schema_definition_sync.ssl_options.verify and standby.replication.downstream.ssl_options.verify must be set to verify_none.
Optional: Using Vault for Secrets
Operator supports fetching RabbitMQ credentials from HashiCorp Vault. If you use Vault to store your RabbitMQ user credentials, you can provide a path to read credentials from Vault instead of providing a Kubernetes secrets. The credentials must have been written to Vault already before referencing them in custom resources. The Vault secret must have fields username and password.
The following example shows how to configure SchemaReplication custom resource to get credentials from Vault:
---
apiVersion: rabbitmq.com/v1beta1
kind: SchemaReplication
metadata:
  name: downstream
spec:
  secretBackend:
    vault:
      secretPath: path/to/rabbitmq/creds # instead of spec.upstreamSecret
  ...
The following example shows how to configure StandbyReplication custom resource to get credentials from Vault:
---
apiVersion: rabbitmq.tanzu.vmware.com/v1beta1
kind: StandbyReplication
metadata:
  name: downstream
spec:
  operatingMode: "downstream"
  downstreamModeConfiguration:
    secretBackend:
      vault:
        secretPath: path/to/rabbitmq/creds # instead of spec.downstreamModeConfiguration.upstreamSecret
  ...
Verifying Warm Standby Replication is Configured Correctly
You can complete the following steps to verify that Warm Standby Replication is configured correctly.
To check the status of the Continuous Schema Replication (SchemaReplication) and Standby Message Replication (StandbyReplication) plugins, run:
rabbitmqctl schema_replication_status
rabbitmqctl standby_replication_status
Check if the topology objects are replicated in the downstream (standby) RabbitMQ cluster. You can do this in two ways either by logging into the RabbitMQ management UI for that specific cluster or by running the
rabbitmqctlcommand with kubectl exec from the command line. After using either method, your upstream RabbitMQ topology (vhosts, users, queues, exchanges, policies, and so) should be returned and listed in the downstream cluster. If you don't see these topology objects, you can check the Standby Replication Operator, upstream (primary), and downstream (standby) RabbitMQ clusters logs to investigate the issue is.Pod exec to downstream RabbitMQ pods one by one and run the following command to list the vhosts with local data to recover. This list should contain all vhosts that you tagged with "standby_replication":
rabbitmqctl list_vhosts_available_for_standby_replication_recoveryIf you published messages to classic queues or quorum queues in the vhosts that are tagged with "standby_replication", and covered by replication policies (refer to Configuring Warm Standby Replication on the Upstream (Primary) Cluster, step 4), you can list the number of messages replicated for each virtual host, exchange, and routing key. You can do this in two ways either by logging into the RabbitMQ Management UI (go to Admin and open the replication and promotion tabs) or running the following command. This operation (using either way) returns the number of replicated messages that can be published to a specific exchange with a specific routing key. If the exchange is empty or missing, it means that the message was published to the default exchange. It is important to note that the routing key might not be the same as the name of the queue. If does not return messages per queue. The routing of messages to their destination queue and the consumption of these messages does happen until promotion is initiated which must be taken into consideration when you are interpreting these numbers. If you set up replication a short time ago, the number of available messages should be small so this operation (using either way) should run quickly. If the amount of available data is substantial, this operation can take longer.
Method 1
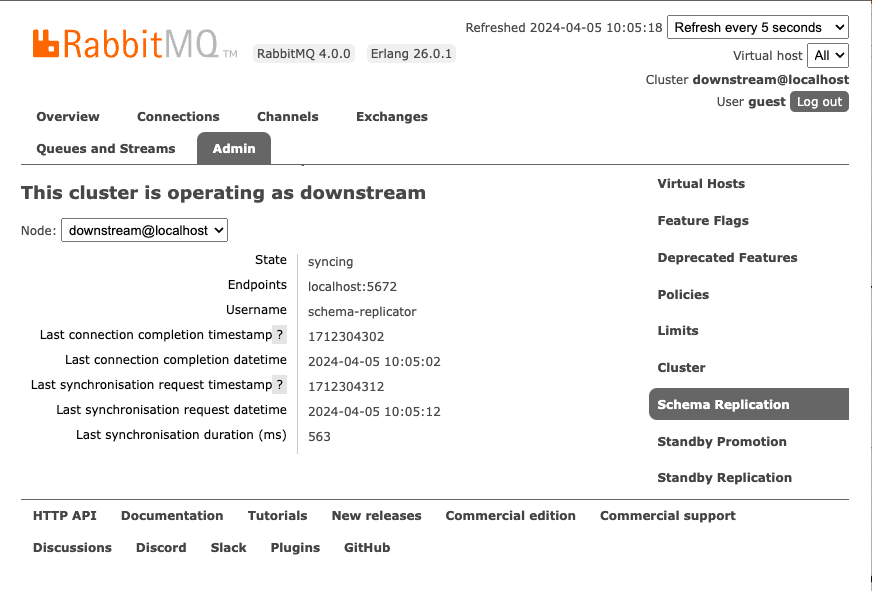
Access the RabbitMQ Management UI to visualise the replication information. A link to the RabbitMQ management interface can be found on the details page for your hosted RabbitMQ solution. If you have RabbitMQ installed on localhost, go to http://localhost:15672/ to find the management page.
Select the Admin tab, you can then access the Schema Replication, Standby Replication, and Standby Promotion tabs in the Admin section. The following figure displays the Schema Replication tab.
Method 2
Run the following command:
rabbitmq-diagnostics inspect_local_data_available_for_standby_replication_recoveryIf you published messages to streams in the vhosts that are tagged with "standby_replication", and covered by replication policies (refer to Configuring Warm Standby Replication on the Upstream (Primary) Cluster, step 4), you can list the number of messages replicated for each virtual host and stream. Again, you can do this in two ways, either by logging into the RabbitMQ Management UI and following the instructions in the previous Method 1 or running the following command:
rabbitmq-diagnostics inspect_local_stream_data_available_for_standby_replication_recoveryIf you just want the list of streams available for Standby Replication recovery, run the following command:
rabbitmqctl list_streams_available_for_standby_replication_recovery [--vhost <vhost>]
Promoting the Downstream (Standby) Cluster for Disaster Recovery
Note Promotion and reconfiguration happen on the fly, and do not involve RabbitMQ node restarts or redeployment.
A downstream (standby) cluster with synchronised schema and messages is only useful if it can be turned into a new upstream (primary) cluster in case of a disaster event. This process is known as “downstream promotion”.
In the case of a disaster event, the recovery process involves several steps:
- The downstream (standby) cluster is promoted to an upstream (primary) cluster by the service operator. When this happens, all upstream links are closed and for every virtual host, unacknowledged messages are re-published to their original destination queues. This just applies to messages belonging to classic and quorum queues, streams are already stored in the target stream on the downstream (standby) cluster.
- Applications are redeployed or reconfigured to connect to the newly promoted upstream (primary) cluster.
- Other downstream (standby) clusters must be reconfigured to follow the new promoted cluster.
When “downstream promotion” happens, a promoted downstream (standby) cluster is detached from its original upstream (primary) cluster. It then operates as an independent cluster which can be used as an upstream (primary) cluster. It does not sync from its original upstream but can be configured to collect messages for offsite replication to another datacenter.
Notes:
The downstream promotion process takes time. The amount of time it takes is proportional to the retention period used. This operation is only CPU and disk I/O intensive when queues are used. It is not for streams because streams are just restarted, messages are already stored in the target streams.
Every downstream node is responsible for recovering the virtual hosts it "owns", which helps distribute the load between cluster members. To list virtual hosts available for downstream promotion, that is, have local data to recover, run the following command:
rabbitmqctl list_vhosts_available_for_standby_replication_recovery
ImportantThe easiest way to promote a downstream (standby) cluster is to use the HTTP API. The API does not accept any arguments. It is a HTTP POST request to
http://<i>{node-hostname}</i>:15672/api/tanzu/osr/downstream/promote. Other ways to complete the promotion process include running one of the following commands. If you have existing deployments that use therabbitmqctl promote_standby_replication_downstream_clustercommand, then continue using this command, and then complete the steps in the following Post Promotion section. Alternatively, if you have new deployments, you can run therabbitmqctl promote_warm_standbycommand, which completes all promotion tasks in one step. You do not need to complete the post promotion steps after running this command apart from the step to erase the replicated data on the old downstream (standby) cluster but completing this step is optional. The--start-from-scratch, --all-available, and --exclude-virtual-hostsarguments are applicable to both commands for quorum and classic queues.
To promote a downstream (standby) cluster, that is, start the disaster recovery process, run the following command:
rabbitmqctl promote_standby_replication_downstream_cluster [--start-from-scratch][--all-available] [--exclude-virtual-hosts \"<vhost1>,<vhost2>,<...>\"]
Alternatively, you can run the this command to complete the promotion:
rabbitmqctl promote_warm_standby
[--start-from-scratch][--all-available] [--exclude-virtual-hosts \"<vhost1>,<vhost2>,<...>\"]
Where:
--start-from-scratchrecovers messages from the earliest available data instead of the last timestamp recovered previously, even if information about the last recovery is available.--all-availableforces the recovery of all messages that are available if neither the last cutoff nor the last recovery information is available.--exclude-virtual-hostsvirtual hosts can be excluded from promotion with this flag.
The --start-from-scratch, --all-available, and --exclude-virtual-hosts arguments do not apply to streams because messages are replicated automatically to the streams on the downstream cluster. So if you are replicating from streams only, you only need to run the rabbitmqctl promote_standby_replication_downstream_cluster command to complete the promotion.
To display the promotion summary (in case a promotion was attempted), run the following command:
rabbitmqctl display_standby_promotion_summary
The recovery process stores a summary on disk indicating the last timestamp that was recovered. Earlier messages are skipped when there are subsequent recoveries, which prevents duplicate recovered messages. The --start-from-scratch option skips this check, and always recovers everything.
During promotion of the downstream cluster, Warm Standby Replication does not support the recovery of messages that are routed to target queues by the AMQP 0.9.1 BCC header.
After the recovery process completes, the cluster can be used as usual.
Post Promotion
Complete the following steps if you need to after promoting the downstream (standby) cluster to be the upstream (primary) cluster for disaster recovery.
After the downstream (standby) cluster is promoted, if you need to restart the promoted cluster, you must change the
operatingMode: "downstream"tooperatingMode: "upstream"because this modification does not happen automatically when the cluster is restarted. If you don't change it, the promoted downstream (standby) cluster (which is now the upstream (primary) cluster) will run in the downstream mode because it is still a downstream cluster in its definition file .What happens to the original upstream (primary) cluster that experienced a disaster event? It can be brought back as a downstream (standby) cluster for the newly promoted upstream (primary) cluster, it can be promoted back as the upstream (primary) cluster, or it may not be used at all.
After promotion, the replicated data on the old downstream (which is effectively the new promoted upstream) can be erased from disk. To explain this point in more detail, an example is: a cluster in Dublin is the upstream (primary) cluster, a cluster in London is the downstream (standby) cluster. The cluster in London gets promoted to be the upstream (primary) cluster. After promotion, you can now remove previous downstream-related data from the cluster in London (as it is now promoted and running as the upstream (primary) cluster) by running the following command:
rabbitmqctl delete_all_data_on_standby_replication_cluster
Running Diagnostics
Important Running diagnostics is a very time consuming operation as it reads and parses all data on disk, it should be used with care. This operation can take a substantial time to run even for medium data sizes.
When using classic queues or quorum queues, you can inspect the number of messages replicated for each virtual host, exchange, and routing key from the RabbitMQ Management UI, refer to Method 1 in the Verifying Warm Standby Replication is Configured Correctly section for details.
Alternatively, you can access the same information by running the following command:
rabbitmq-diagnostics inspect_local_data_available_for_standby_replication_recovery
The same applies to streams, access replication information from the RabbitMQ Management UI, refer to Method 1 in the Verifying Warm Standby Replication is Configured Correctly section for details or alternatively, run the following command:
rabbitmq-diagnostics inspect_local_stream_data_available_for_standby_replication_recovery
Other Useful Replication Commands
To start, stop, or restart the replication in both the Schema Replication (SchemaReplication) and Standby Replication (StandbyReplication) plugins at the same time, run the following commands as required:
rabbitmqctl enable_warm_standby
rabbitmqctl disable_warm_standby
rabbitmqctl restart_warm_standby
If the cluster size changes, the virtual hosts "owned" by every node might change. To delete the data for the virtual hosts that nodes no longer own, run the following command:
rabbitmqctl delete_orphaned_data_on_standby_replication_downstream_clusterTo delete the internal streams on the upstream (primary) cluster, run the following command:
rabbitmqctl delete_internal_streams_on_standby_replication_upstream_clusterTo inspect the size of the data replicated, run the following command:
rabbitmqctl display_disk_space_used_by_standby_replication_dataTo disconnect the downstream to stop message replication, run the following command:
rabbitmqctl disconnect_standby_replication_downstreamTo (re)connect the downstream, to start/resume message replication, run:
rabbitmqctl connect_standby_replication_downstreamAfter promotion, replicated data on the old downstream (standby) cluster (which is now effectively the newly promoted upstream (primary) cluster) can be erased from disk with:
rabbitmqctl delete_all_data_on_standby_replication_clusterIf the previous command is run on an active downstream (standby) cluster, it deletes all transferred data until the time of deletion, it might also stop the replication process. To ensure it continues, the downstream must be disconnected and connected again using the commands listed above.
Troubleshooting Warm Standby Replication
Learn how to isolate and resolve problems with Warm Standby Replication using the following information.
Deleting a Pod waits on Terminating state for a Long Time
Problem
Example: The prestop hook runs the rabbitmq-upgrade await_online_quorum_plus_one -t 604800 command, which causes the Pod termination to stop until this command succeeds.
Solution
In a 3 node cluster, RabbitMQ must have two nodes available and all queues/streams must be in-sync to safely shutdown a Pod. If any queue does not have sufficient in-sync replicas, it is not safe to delete the pod. Inspect the RabbitMQ Management UI to identify what queues do not have enough available synchronised replicas. If the number of total replicas is not equal to the cluster size (initial-cluster-size), or 3 if the cluster size is greater than 3, then grow the quorum queue or add replicas to a stream. In the example of a 3 node cluster, consider growing/adding replicas to any quorum queue/stream which has less than 3 replicas.
To prevent this problem occuring in the future, the cluster size (initial-cluster-size) should always be set to a minimum value of 3.
Messages are collected in the Upstream (Primary) Cluster but are not delivered to the Downstream (Standby) Cluster
Messages and message acknowledgements are continually stored in the upstream (primary) cluster. The downstream (standby) cluster connects to the upstream (primary) cluster. The downstream (standby) cluster reads from the internal stream on the upstream (primary) cluster where the messages are stored, and then stores these messages in an internal stream in the downstream (standby) cluster. Messages transferred to the downstream (standby) cluster for streams are visible in RabbitMQ Management UI automatically (before promotion). You can also see them by running the rabbitmqctl list_queues command.
To inspect the information about the stored messages in the downstream (standby) cluster, run the following command:
rabbitmq-diagnostics inspect_standby_downstream_metrics
# Inspecting standby downstream metrics related to recovery...
# queue	timestamp	vhost
# ha.qq	1668785252768	/
If the previous command returns the name of a queue called example, it means that the downstream (standby) cluster has messages for queue example ready to be re-published, in the event of Promoting the Downstream (Standby) Cluster for Disaster Recovery.
If the queue you are searching for is not displayed in the list, verify the following items in the upstream (primary) cluster:
Does the effective policy for the queue have the definition
remote-dc-replicate: true?Is the queue type
QuorumorClassic?Can the replicator user for Warm Standby Replication authenticate? Run the following command to verify:
rabbitmqctl authenticate_user some-user some-password
If previous checks are correct, next, check the downstream (standby) cluster RabbitMQ logs for any related errors.
Verify that the Downstream (Standby) Cluster has received the Replicated Messages before Promotion
ImportantAccessing the replication information can be resource intensive. The following operations can take a long time to complete when the amount of data to be recovered is substantial.
Before running the promotion command (for more information, refer to Promoting the Downstream (Standby) Cluster for Disaster Recovery), it is possible to verify what queues have messages and acknowledgements recovered. The exact number of messages that are collected can also be verified.
To verify which classic and quorum queues have messages available for recovery, run the following command in the downstream (standby) cluster:
rabbitmq-diagnostics inspect_standby_downstream_metrics
# Inspecting standby downstream metrics related to recovery...
# queue	timestamp	vhost
# ha.qq	1668785252768	/
For quorum and classic queues, you can inspect the number of messages, their routing key, and the vhost from the RabbitMQ Management UI, refer to Method 1 in the Verifying Warm Standby Replication is Configured Correctly section for details.
Alternatively, you can access the same information by running the following command in the downstream (standby) cluster:
rabbitmq-diagnostics inspect_local_data_available_for_standby_replication_recovery
# Inspecting local data replicated for multi-DC recovery
# exchange	messages	routing_key	vhost
# myexchange	2	demo	/
# 	2	ha.qq	/
The previous operation (using either method) reports how many messages can be published to a specific exchange, with a specific routing key. If the exchange is empty or missing, it means that the message was published to the default exchange. It is important to note that the routing key might not be the same as the name of the queue.
The same applies to streams, you can inspect the number of messages, the stream, and the vhost from the RabbitMQ Management UI, refer to Method 1 in the Verifying Warm Standby Replication is Configured Correctly section for details or alternatively, run the following command in the downstream (standby) cluster:
rabbitmq-diagnostics inspect_local_stream_data_available_for_standby_replication_recovery
# Inspecting local stream data replicated for multi-DC recovery
# messages	name    	vhost
#        7	stream.1	/
How to get a License
To get a license for Tanzu RabbitMQ products, fill out the Tanzu RabbitMQ support contact form and we will get back to you with a tailored quote.
