


This topic explains how to enable service-gateway access.
Overview
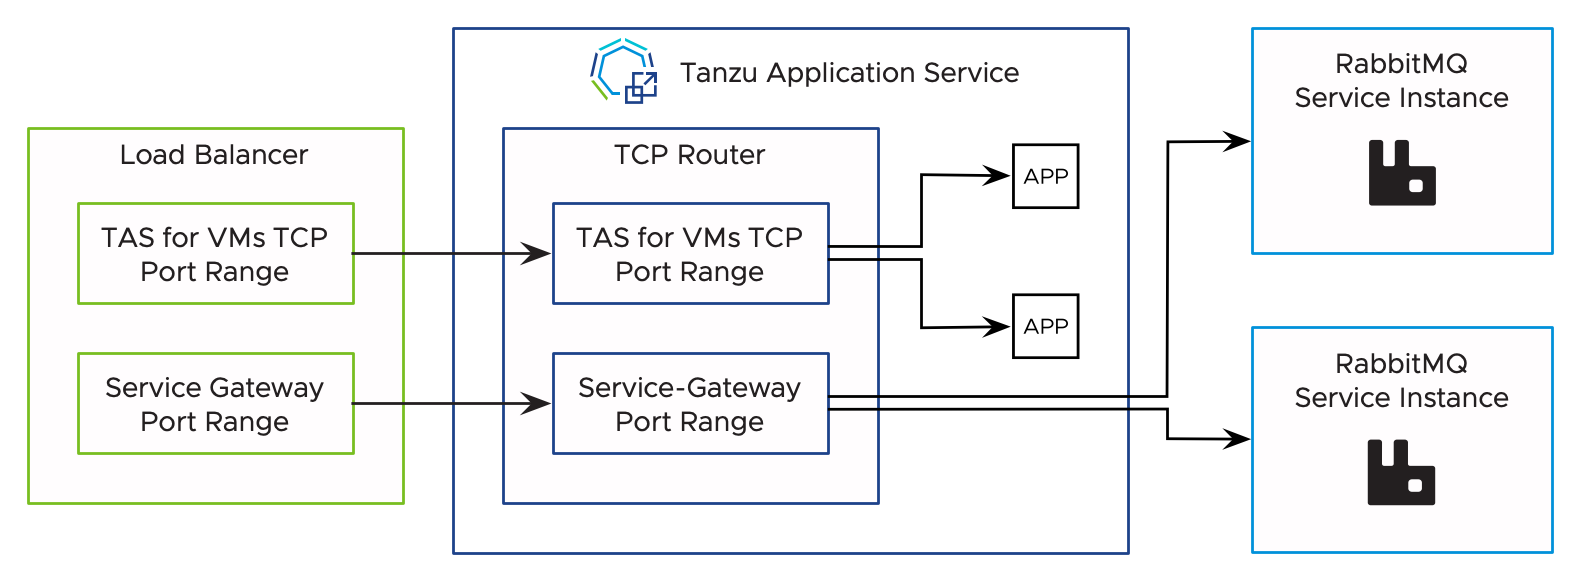
Service-gateway access enables a VMware Tanzu RabbitMQ for Tanzu Application Service on-demand service instance to connect to external components that are not on the same foundation as the service instance.
For a more detailed overview, see Service-Gateway Access.
To enable service-gateway access for an on-demand offering:
- Enable TCP routing using the TAS for VMs tile
- Configure the firewall to allow incoming traffic to the TCP router
- Configure the load balancer in the IaaS to redirect traffic to the TCP router
- Create a DNS record that maps to the load balancer
- Configure a service-gateway-enabled plan
Caution VMware recommends that you configure Transport Layer Security (TLS) alongside service-gateway access to prevent man-in-the-middle attacks. For instructions on how to configure TLS, see Configure Security.
Enable TCP Routing Using the TAS for VMs Tile
TCP routing is deactivated by default. To enable TCP routing:
- Go to the Networking pane of the TAS for VMs tile.
- Under Enable TCP requests to apps through specific ports on the TCP router, select Enable TCP routing.
- For TCP routing ports, enter one or more ports to which the load balancer forwards requests. For example,
1024for a single port or1024–1123for a range of ports. - Apply changes in Ops Manager for the TAS for VMs tile to create the TCP router.
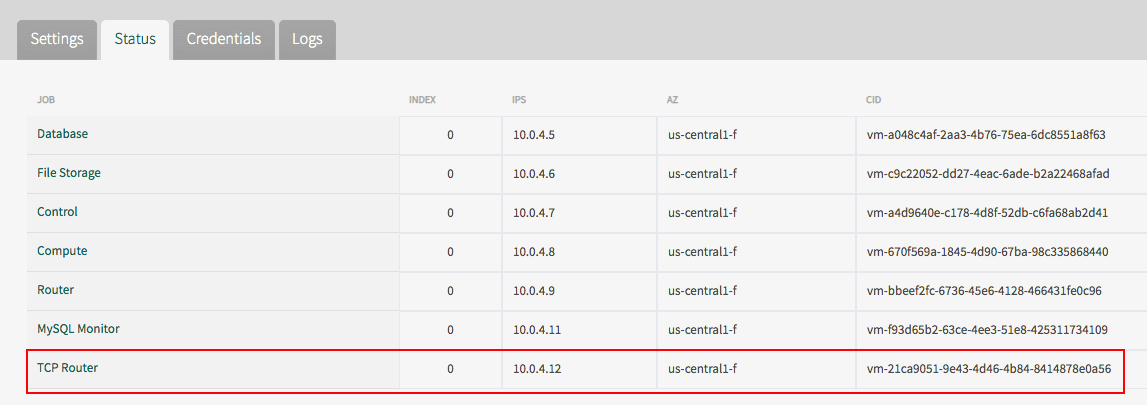
-
From the status tab of the TAS for VMs tile, record the cloud identity (CID) of the TCP router.
Configure the Firewall to Allow Incoming Traffic to the TCP Router
- Allow incoming traffic to the TCP router VM created in Enable TCP Routing Using the TAS for VMs Tile above. For information about how to do so, see the documentation for your IaaS.
Configure the Load Balancer in the IaaS to Redirect Traffic to the TCP Router
To configure the load balancer:
- Use the IaaS console and the CID that you recorded earlier to find the VM that runs the TCP router.
- Create an external TCP load balancer that points to the VM running the TCP router.
-
Configure a distinct external port range that does not overlap with any of the following:
- The port range configured for service-gateway access for other service tiles, such as VMware Tanzu SQL with MySQL for VMs.
- The TCP networking port or port range that you configured in Enable TCP Routing Using the TAS for VMs Tile above.
For example, if your TCP routing port range is
1024-1123, then your load balancer port range for service gateway must not overlap1024-1123.Note Each Tanzu RabbitMQ for Tanzu Application Service service instance using service-gateway access requires a unique port. Ensure that the port range configured above has enough capacity to accommodate all the service instances that you need. The start port and the end port are both inclusive.
- Record this port range.
Create a DNS Record That Maps to the Load Balancer
To create a DNS record and prepare to map it:
- Following the documentation for your IaaS, create a new DNS record of type A that maps to the external IP address of the load balancer created in Configure the Load Balancer in the IaaS to Redirect Traffic to the TCP Router above.
- Record the domain used for this DNS record.
Configure a Service-Gateway-Enabled Plan
To configure a service-gateway-enabled plan:
-
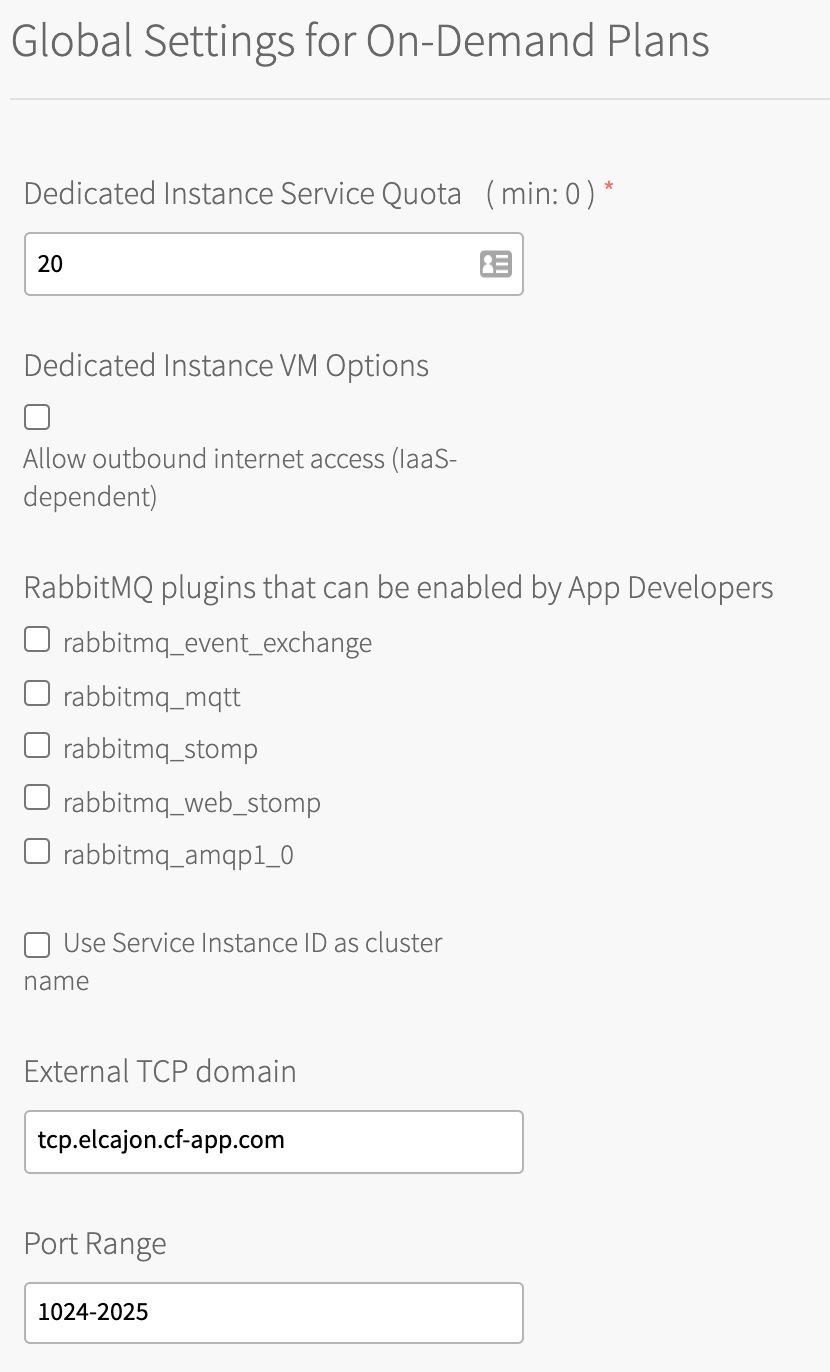
In the Global Settings for On-Demand Plans pane in the RMQ tile, fill in the following fields:
- External TCP domain: This must correspond to the DNS entry for the external load balancer, recorded in Create a DNS Record That Maps to the Load Balancer above.
- Port Range: This is the range of ports you configured for the external load balancer for Tanzu RabbitMQ for Tanzu Application Service service instances in Configure the Load Balancer in the IaaS to Redirect Traffic to the TCP Router above.
Caution If you already have service instances using service-gateway, any modifications to this range must include ports that are already assigned to these service instances. If the port range does not contain the ports already assigned to service instances, the upgrades for the service instances fail. For example, if service-gateway access has the port range
1000-1005, and there are service instances that correspond to ports1000,1001, and1002, then the new port range must have ports1000,1001, and1002. -
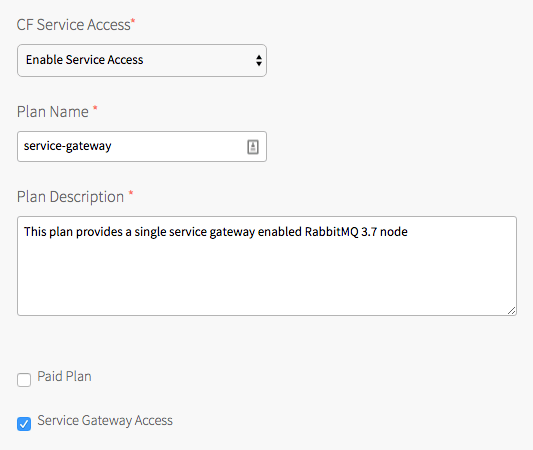
Navigate to the service plan that you want to use and select the Service-Gateway Access checkbox.
Note VMware recommends that you change the name or the description of the plan to indicate that service-gateway access is enabled for that plan.
Note If service-gateway access is deactivated and then re-activated, app developers must create new service keys to obtain a new set of credentials for service-gateway access.
-
Go back to Ops Manager Installation Dashboard > Review Pending Changes.
-
Click Apply Changes to apply the changes to the Tanzu RabbitMQ for Tanzu Application Service tile.
Deactivate Service-Gateway Access
Note If service-gateway access is deactivated and then re-enabled, app developers must create new service keys to obtain a new set of credentials for service-gateway access.
To deactivate service-gateway access:
-
Navigate to the service plan that you want to deactivate service-gateway access for and clear the Service-Gateway Access checkbox.
Note VMware recommends that you change the name or the description of the plan to indicate that service-gateway access is deactivated for that plan.
-
Go back to Ops Manager Installation Dashboard > Review Pending Changes.
-
Click Apply Changes to apply the changes to the Tanzu RabbitMQ for Tanzu Application Service tile.
Developer Workflow
For instructions for app developers, see Create a Service Instance with Service-Gateway Access.
