How do I remediate advisories
After completing an initial assessment, you can then remediate the advisories that were detected in the assessment.
Before you begin
Tanzu Salt triggers nodes to receive the latest advisories from an operating system. Windows nodes in particular can receive these updates in one of two ways:
- Windows Update Agent (WUA) - By default, Windows nodes connect directly to Microsoft using the WUA, which is automatically installed on all Windows nodes. The WUA supports automated patch delivery and installation. It scans nodes to determine which security updates are not installed and then searches for and downloads the updates from Microsoft’s update websites.
- Windows Server Update Services (WSUS) - A WSUS server acts as an intermediary between Microsoft and the minion. WSUS servers allow IT administrators to deploy updates to a network strategically to minimize down time and disruptions. See Windows Server Update Services (WSUS) in the official Microsoft documentation for more information.
Before using Tanzu Salt on Windows nodes, verify which of these two methods your environment is currently using. If your environment is using the WSUS server method, you must:
- Ensure that the WSUS is enabled and running. If needed, you can configure the Windows minion to connect to a WSUS using a Salt state file provided by Tanzu Salt. After running this state file, verify that your minion is successfully connecting to the WSUS server and is receiving updates.
- Approve updates related to advisories from Microsoft on the WSUS server. When the WSUS server receives updates from Microsoft, the WSUS administrator must review and approve those updates in order to deploy the updates in the environment. In order for Tanzu Salt to detect and remediate advisories, any updates that contain advisories must be approved.
If either of these two prerequisites are not met, Tanzu Salt cannot accurately scan and remediate advisories for Windows nodes. For systems that receive Microsoft updates through a WSUS server, assessments could return false positives that indicate Windows minions are secure from all CVEs even though they may not actually be secure.
Remediate supported advisories

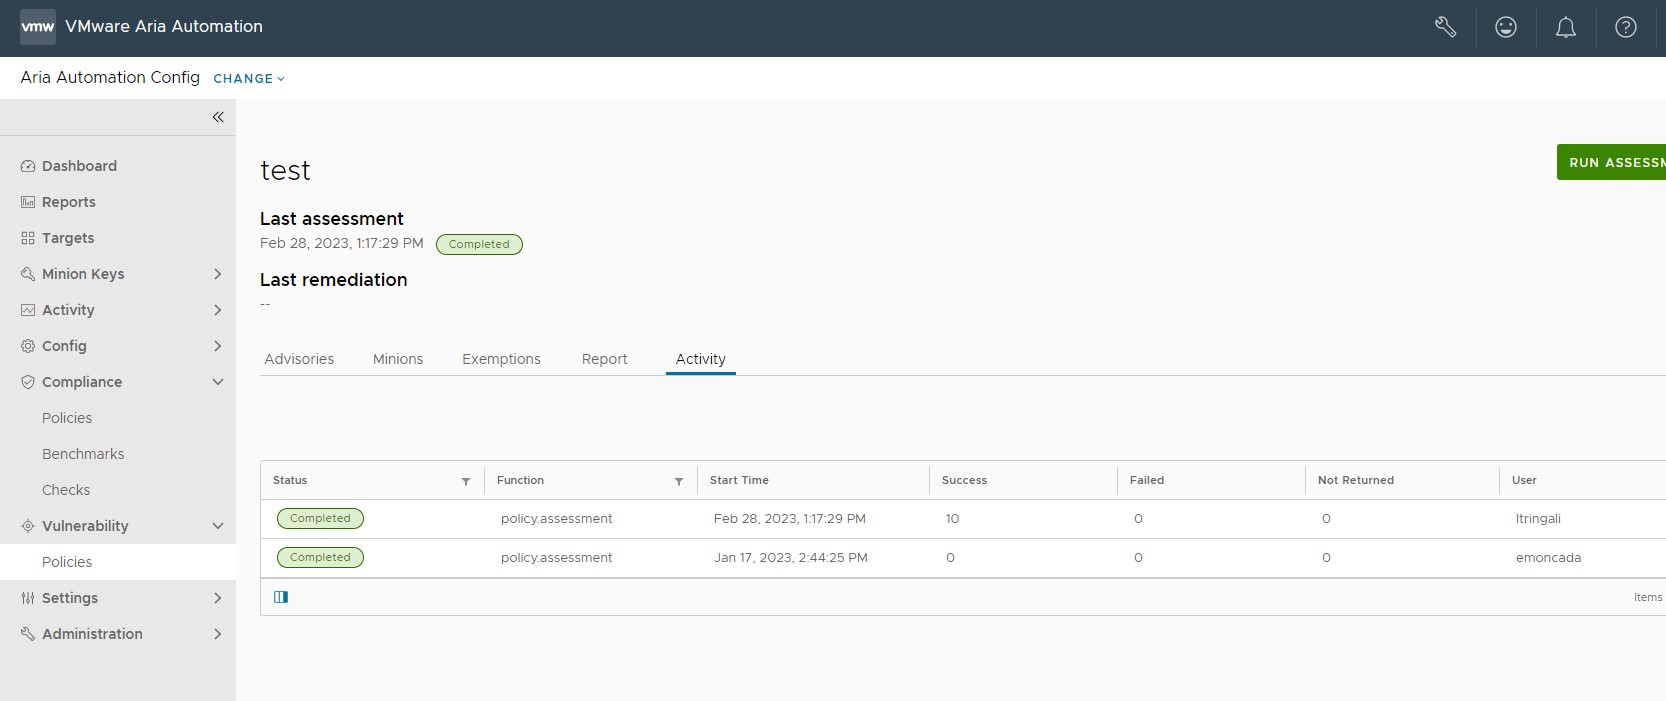
On the policy home page, the Activity tab shows a list of completed or in-progress assessments and remediations and their statuses:
| Status | Description |
|---|---|
| Queued | The operation is ready to run but the minions have not started the operation. |
| Completed | The operation is finished running. |
| Partial | The operation is still waiting for some minions to return, although the operation has finished running. |
| Failed | The operation failed to complete. |
During the remediation, all packages that are part of that advisory are applied to the selected nodes. You can remediate all advisories at once or you can remediate a specific advisory, a specific minion, or set of minions as needed. You may also select state files to apply as both pre and post-remediation actions to guarantee dependencies or ensure a service or system restarts after being patched.
Tanzu Salt always installs the latest available version that is available from a vendor, even if the advisory was fixed by an earlier version.
After remediating an advisory, you must run another assessment to verify the remediation was successful.
You can choose which advisories or nodes to remediate as needed. These options include:
- Remediating all advisories at once
- Remediating a specific minion
- Remediating a set of minions
From the policy dashboard, when you run Remediate all, Tanzu Salt remediates all advisories on all minions in your policy, which may result in long processing times.
-
In the Vulnerability workspace, click a policy to open the policy’s dashboard.
-
From the policy’s dashboard:
a. To remediate by advisory, click the checkbox next to all advisories you want to remediate.
b. To remediate by minion, select the Minions tab, click a minion, and select all advisories you want to remediate for the active minion.
c. To remediate by both advisory and minion, click an advisory ID and click the checkbox next to all minions you want to remediate for the active advisory.
-
To run pre or post remediation actions:
a. Click the Optional pre/post actions toggle.
b. Select an environment.
c. Choose state files to apply before and/or after the remediation.
-
Click Remediate.
Your vulnerability advisories are remediated. Occasionally, remediation might require a full system or minion reboot. If you’re aware of this in advance, you can configure a reboot in state file to run as a post-remediation action. Otherwise, see How do I reboot a minion as part of remediation.
Custom remediation
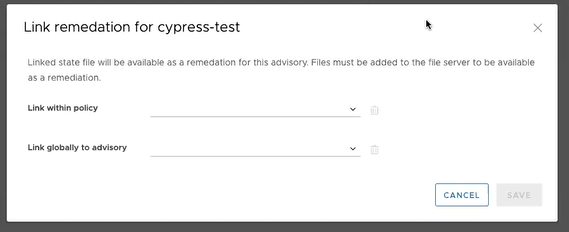
If you imported a vendor scan from a third-party, you may have unsupported advisories that you need to remediate. To remediate unsupported advisories, you must add your own custom remediation file by selecting Add file from the unsupported advisories policy page and linking the custom state file within policy or linking the custom state file globally.
- Link within policy - The remediation file is only used to remediate the specified advisory in the current policy. For example, if a duplicate policy was created with the same the unsupported advisory, the remediation file will only remediate the advisory in the first policy and not in the duplicate.
- Link globally to advisory - The remediation file is used to remediate the specified advisory across all policies.
Note:
When an advisory in a policy has a remediation file linked both within the policy and globally, Automation for Secure Hosts uses the file linked within the policy. If the file linked within the policy is deleted, Automation for Secure Hosts uses the globally linked file by default. Review the file preview in the Link Remediation window to verify that the desired file is selected to remediate the advisory.

What to read next
See How do I reboot a minion as part of remediation for more information.