To scale the microservices in your application inside a global namespace, you can create the autoscaling policies through the Tanzu Service Mesh Console UI.
The use of the autoscaler is based on the assumption that resources are available for it to continue to scale out instances. If the cluster becomes resource-constrained, the cluster administrator must handle underlying cluster expansion manually or automatically through additional automation.
Procedure
- In the navigation panel on the left, select .
Alternatively, you can create the autoscaling policy by navigating to the panel on the left and selecting . In the upper-right corner of the Autoscaling Policy page, click New Policy.
- In the New Autoscaling window, provide a name for the autoscaler that is not already in use. Optionally add a description.
- Select a global namespace from the GNS Scope drop –down menu.
- Select a target service from the Target Service drop –down menu.
- Select a service version from the Service Version drop –down menu.
You can configure only one autoscaling policy per service version.
- (Optional) Specify a label for the autoscaling policy.
- Select the Autoscaling Mode: Performance or Efficiency.
- If you choose to scale by the Performance mode, specify the following fields:
Autoscaling Metric. You can select from a range of metrics, such as a latency metric (p90), traffic (requests) or a compute resource metric (CPU and Memory usage). The Autoscaler metric triggers scaling out in performance mode. You can specify a metrics window period over which trigger metric must be monitored by the autoscaler. This value must be an integer between 60 to 3600 seconds.
Scale-up Condition. Specify when the scaling up of the instances should occur. The Scale Up Condition defines the maximum threshold value for the trigger metric beyond which the service will be scaled up.
Max. Instance Count. Specify the maximum number of instances that the autoscaler can set.
- If you choose to scale by Efficiency mode, specify the following fields:
Autoscaling Metric. You can select from a range of metrics, such as a latency metric (p90), traffic(requests) or a compute resource metric (CPU and Memory usage). The Autoscaler metric triggers scaling up and scaling down in efficiency mode. You can specify metrics window period over which trigger metric must be monitored by the autoscaler. This value must be an integer between 60 to 3600 seconds. The metrics window period specified here is used by the autoscaler as an aggregation window; that is, the metric specified here will be averaged over this window periodically and compared with the scale-up and scale-down threshold values. See details about scale-up and scale-down conditions below.
Scale-up Condition. Specify when the scaling up of the instances should occur. The Scale Up Condition defines the maximum threshold value for the trigger metric beyond which the service will be scaled up.
Max. Instance Count. Specify the maximum number of instances that the autoscaler can set.
Scale-down Condition. Specify when the scaling down of the instances occurs. The Scale-down Condition defines the minimum threshold value for the trigger metric below which the service will be scaled down.Specify the minimum amount of time that must pass before a scale-down action can be allowed after the last scale up or the last scale down. The value must be a positive integer greater than 0. The default value is 300 seconds.
Min. Instance Count. Specify the minimum number of instances that the autoscaler can set.
- Select a scaling method.
Note:
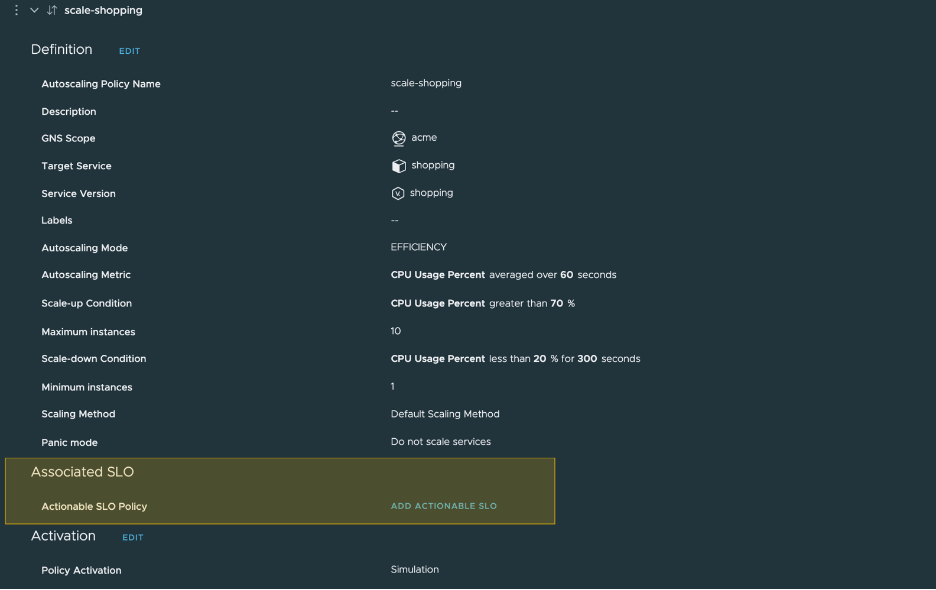
As an example, the following Autoscaler thresholds (CPU Usage) are configured:
This is the current service state:
After the autoscaling configuration is applied, this is the expected autoscaling outcome:
The autoscaler will now scale the service to 4 instances.
Scale Up (Performance and Efficiency autoscaling mode). The desired instance count will be incremented by this value from the current instance count.
Scale down (Efficiency Mode). The desired instance count will be decremented by this value from the current instance count.
- Set a Panic Mode.
There can be situations when service metrics are unavailable for some time, or there could be other error conditions that prevent the autoscaler from calculating a desired instances count. You can instruct the autoscaler on how to react to these conditions in one of the following ways:
Do Not Scale Services. Autoscaler will leave the services at their current instance count.
Scale to instances. Autoscaler will set the desired count to the specified number here if the current instance count is less than that.
- On the next page, select what happens when you save policy.
Activate Policy. The autoscaling policy will be enforced on the service immediately.
Simulation Mode Only. Autoscaling trigger metrics will be monitored, and the desired instance count will be calculated and displayed. However, the autoscaling policy will not be enforced.
- On the Summary page, review the autoscaling policy and click Save.
Results
The new autoscaling policy appears on the Autoscaling Policies page.
What to do next
To edit an existing autoscaling policy, perform these steps.
On the Autoscaling Policies page, click the vertical three dots to the right of the autoscaling policy.
On the menu, click Edit Configuration.
To advance through the configuration pages after making changes, click Next.
To delete an autoscaling policy that you no longer need, perform these steps.
Click the vertical three dots to the right of the autoscaling policy.
On the menu, click Delete.
Note:
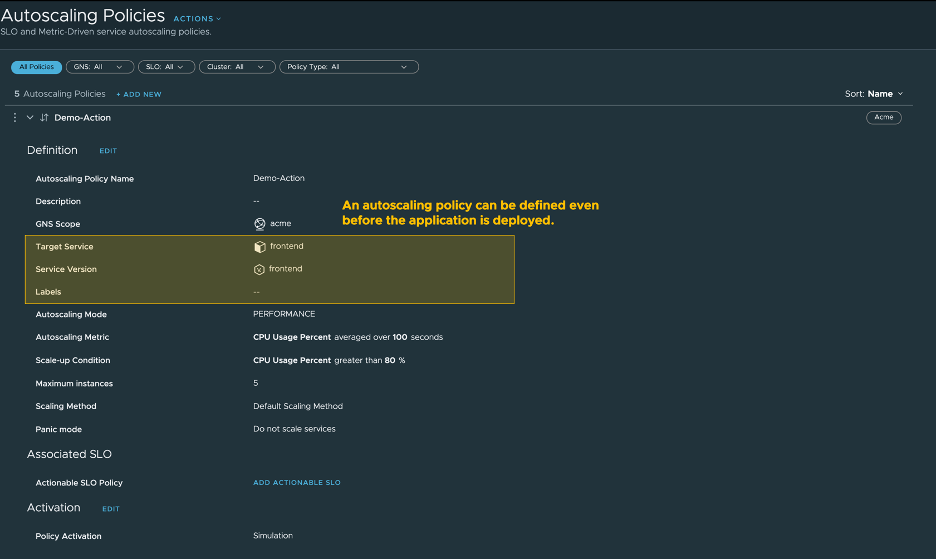
You can define an autoscaling policy through the Tanzu Service Mesh Console UI before an application is deployed.
To see autoscaling at work in the Tanzu Service Mesh Console UI, perform these steps.
In the navigation panel on the left, click Home.
On the Home page, click the GNS Overview tab.
Click the global namespace that contains the services being autoscaled.
In the service topology graph, click a microservice.
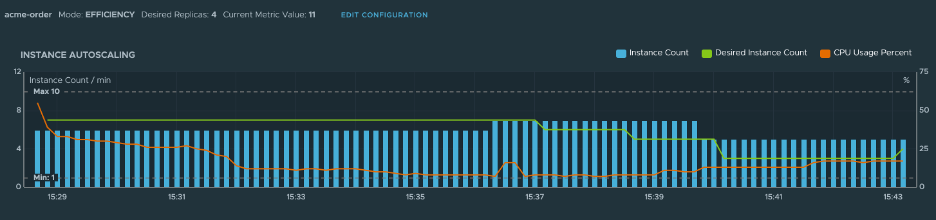
-
Click the
Performance tab to see the
Instance Autoscaling chart.
-
To find a specific autoscaling policy, use the highlighted filters on the
Autoscaling Policies page.

-
Edit an actionable SLO from the
Autoscaling Policies page, as shown in the following screenshot.