


You can set up Venafi accounts in Tanzu Service Mesh to integrate with the Venafi Trust Protection Platform as one of the external CA providers for automatic management of workload certificates enabling mTLS. All certificates will be protected and controlled for workloads, and this process will be transparent to the Tanzu Service Mesh Controller. This topic describes how to integrate Venafi Trust Protection Platform (TPP) as a Root of Trust for workload encryption in addition to the self-signed CA that Tanzu Service Mesh already supports.
In Tanzu Service Mesh, create a Venafi integration account using the following steps.
Prerequisites
You must have an access token for TPP Admin obtained from the TPP Admin URL.
A global namespace can only be created when the onboarded clusters are all under the same CA. The creation of the global namespace creation will fail or will not proceed if services from clusters with different CAs (for example, self-signed on one cluster and Venafi on the other) are selected. For more information, see step 7 in Onboard a Cluster to Tanzu Service Mesh
Procedure
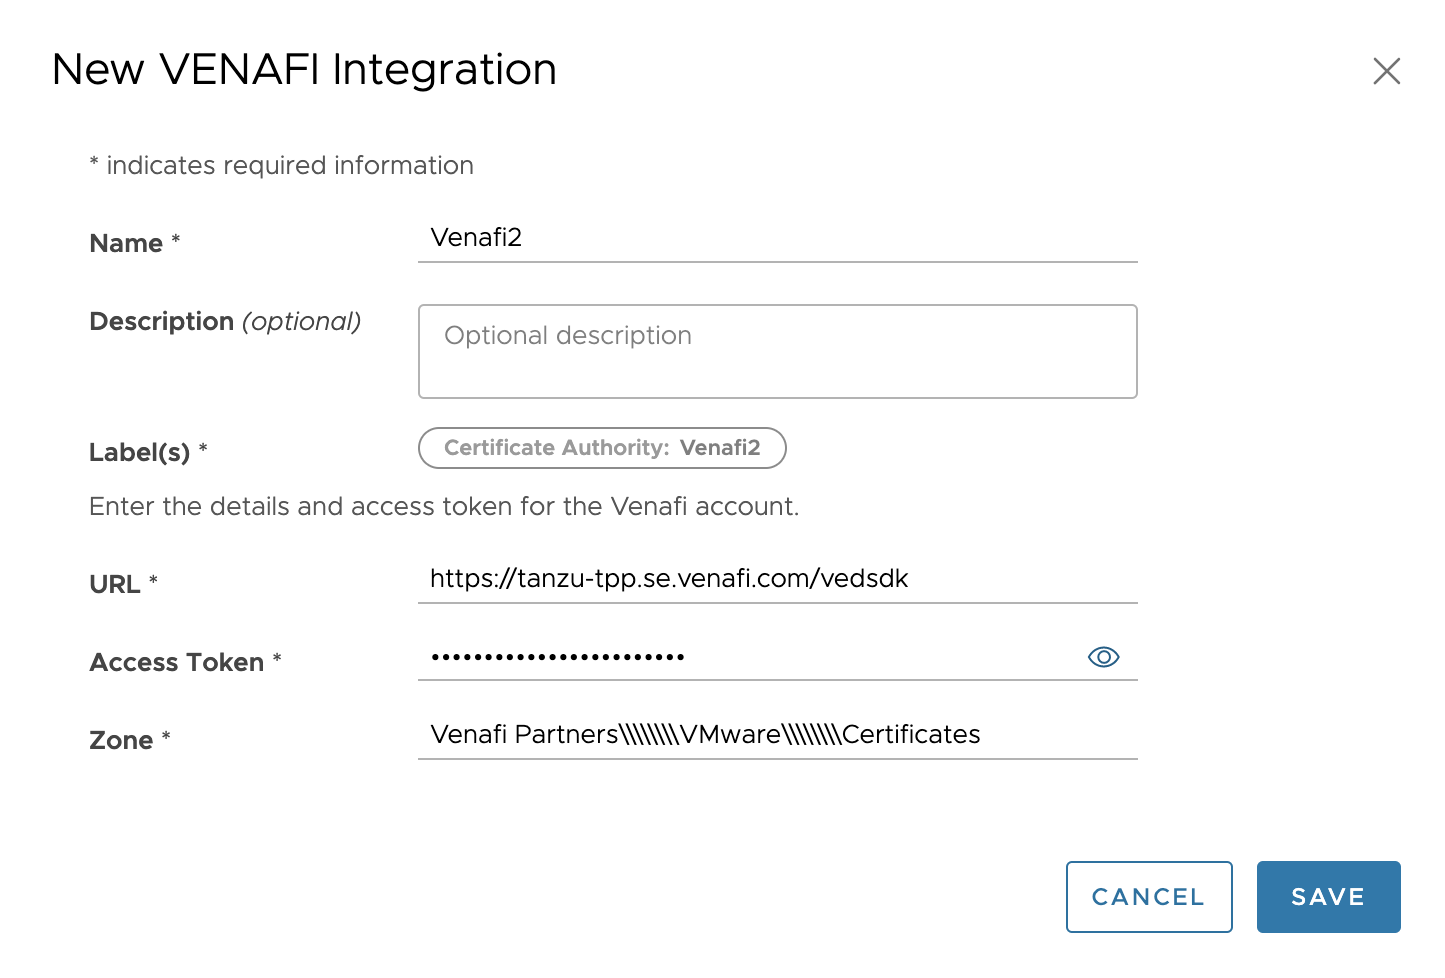
- In the New Venafi Integration dialog box, provide the following information.
Name. Enter a name for the account.
Description. (Optional) Give a brief description of the account.
Label(s). Label is created automatically with the syntax Certificate Authority: Name of the Venafi account. Label is assigned to the cluster to use the Venafi service during its onboarding. Refer to step 7 in Onboard a Cluster to Tanzu Service Mesh for more information.
URL. Enter the Venafi TPP admin URL.
Access Token. Enter the Access Token for authentication. Tanzu Service Mesh will use this token to access the Venafi site.
Zone. Enter the zone of the Venafi region.
- In the Trust Domain modal window, enter the following information and click Save.
Trust Domain. Enter the trust domain name. The trust domain corresponds to the trust root of a system and is part of a workload identity. A trust domain is required to onboard new clusters and create global namespaces.

You can view the Trust Domain list by clicking Admin> Project Configuration on the left navigation pane. The trust domains created for each project are listed here.
Important:It is essential for clusters to have a common root certificate and a shared trust domain to communicate with one another.
Do not edit trust domains, even though the UI doesn't restrict them. You need to off-board the cluster and then on-board it back with the new trust domain in order for this to work.
Results
The new account is added to the Venafi integration card on the Integrations page. To check the health status of the connected clusters, select:
On the Global Namespaces page, click the name of the global namespace that you created. The global namespace details page displays the summary information about the global namespace, including its overall health state. The status is Healthy if the configuration of the global namespace is synced and applied to the clusters that make up the global namespace. Verify that the CA connected status is displayed on each cluster within the global namespace by clicking the Healthy drop-down.
Note:To access the Global Namespaces page, in the navigation pane on the left, select .
On the Clusters tab, click the name of the desired cluster from the displayed table list. The cluster details page displays the summary information about the cluster, including its overall health state. Verify that the CA connected status is displayed on the selected cluster by clicking the Healthy drop-down.
Note:To access the Clusters page, in the navigation pane on the left, select and select the tab.
What to do next
To edit or delete the account, click Edit or Delete in the Venafi card. If you have more than one Venafi account, in the lower-left corner of the card, click <<number>> Accounts, click the name of the account, and then click Edit or Delete. The message "This integration will be deleted" must be confirmed if you are deleting an account.
