


This topic documents steps for how to instantiate testnf-du CNF.
Once the prerequisites are satisified, you can login to the TCA GUI and follow the steps below to instantiate testnf-du CNF.
Prerequisites
Prepare NAD file for multus networks.
The file name needs to be "testnf_nad.yaml", other file name is not supported.
apiVersion: "k8s.cni.cncf.io/v1"
kind: NetworkAttachmentDefinition
metadata:
  name: ipvlan
  annotations:
    k8s.v1.cni.cncf.io/resourceName: vlan1
spec:
  config: '{
      "cniVersion": "0.3.0",
      "name": "ipvlan",
      "plugins": [
        {

          "type": "ipvlan",
          "master": "vlan1",
          "ipam": {
            "type": "whereabouts",
            "datastore": "kubernetes",
            "kubernetes": { "kubeconfig": "/etc/cni/net.d/whereabouts.d/whereabouts.kubeconfig" },
            "range": "192.167.1.0/24",
            "exclude": [
              "192.167.1.0/28"
            ]
          }
        }
      ]
    }'
---
apiVersion: "k8s.cni.cncf.io/v1"
kind: NetworkAttachmentDefinition
metadata:
  name: macvlan
  annotations:
    k8s.v1.cni.cncf.io/resourceName: vlan2
spec:
  config: '{
      "cniVersion": "0.3.0",
      "name": "macvlan",
      "plugins": [
        {
          "type": "macvlan",
          "master": "vlan2",
          "ipam": {
            "type": "whereabouts",
            "datastore": "kubernetes",
            "kubernetes": { "kubeconfig": "/etc/cni/net.d/whereabouts.d/whereabouts.kubeconfig" },
            "range": "192.167.2.0/24",
            "exclude": [
              "192.167.2.0/28"
            ]
          }
        }
      ]
    }'
---
apiVersion: "k8s.cni.cncf.io/v1"
kind: NetworkAttachmentDefinition
metadata:
  name: sriov-pass
  annotations:
    k8s.v1.cni.cncf.io/resourceName: intel.com/sriovpass
spec:
  config: '{
      "cniVersion": "0.3.0",
      "name": "sriov-pass-network",
      "plugins": [
        {
          "type": "sriov",
          "ipam": {
            "type": "whereabouts",
            "datastore": "kubernetes",
            "kubernetes": { "kubeconfig": "/etc/cni/net.d/whereabouts.d/whereabouts.kubeconfig" },
            "range": "192.167.3.0/24",
            "exclude": [
              "192.167.3.0/28"
            ]
          }
        },
        {
          "type": "sbr"
        },
        {
           "type": "tuning",
           "sysctl": {
             "net.core.somaxconn": "500"
           },
           "promisc": true,
           "mtu": 1200
        }
      ]
    }'
(Optional) Prepare values.yaml
If you want to enable ipvlan and macvlan for the testnf pod, the following multus annotation needs to be specified.
annotations:
  k8s.v1.cni.cncf.io/networks:ipvlan,macvlan,sriov-pass
If there are multiple node pools which have the same configuration, you might need to specify nodeSelector explicitly as following:
nodeSelector:
  key1:value1
If you want to enable CAT feature, you might need to adjust the resource allocation for the POD. Here is one sample configuration:
resources:
  requests:
    intel.com/sriovigbuio: 1
    intel.com/sriovvfio: 0
    intel.com/sriovpass: 0
    hugepages-1Gi: 4Gi
    memory: 4Gi
    cpu: "6"
  limits:
    intel.com/sriovigbuio: 1
    intel.com/sriovvfio: 0
    intel.com/sriovpass: 0
    hugepages-1Gi: 4Gi
    memory: 4Gi
    cpu: "6"

replicaCount: 2
(Optional) Prepare harbor
There are two ways to specify the helm chart locations. To simplify the configuration, you can use https://vmwtec.jfrog.io/artifactory/helm-registry/ as the default URL. However, if you want to upload the testnf-du helm chart to your own harbor for airgap or some other cases, you might need to prepare harbor, upload testnf-du helm chart to harbor, associatiate harbor to workload cluster and consume harbo repo during network function instantiation.
Procedure
- Select testnf-du network function catalog
Figure 1. Select testnf-du Network Function Catalog 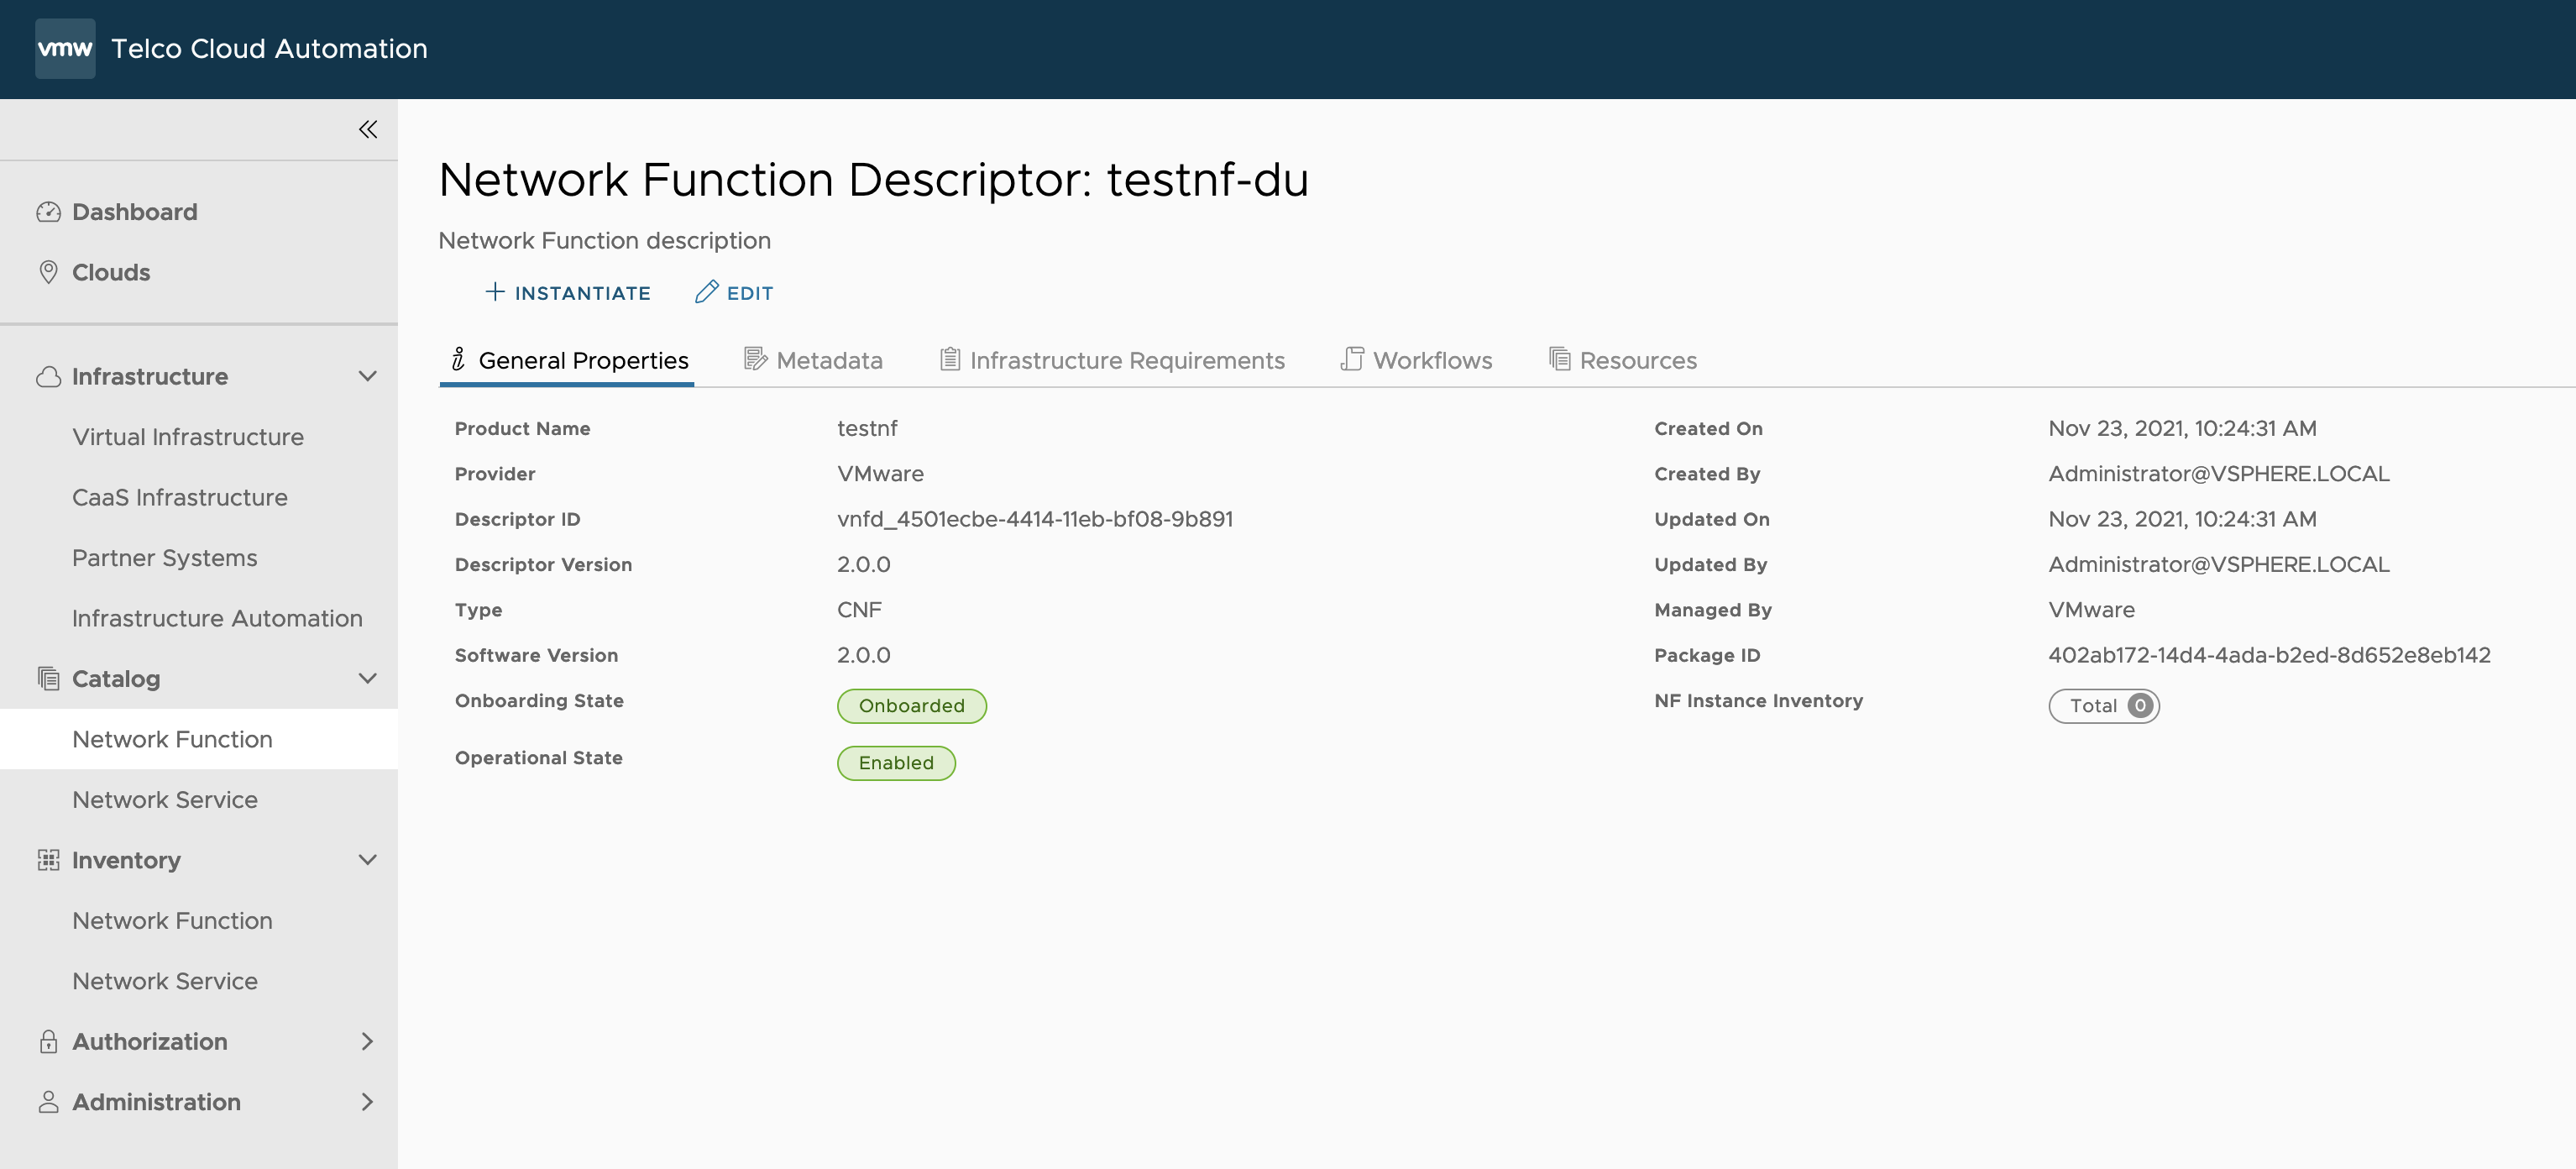
- Click INSTANTIATE to instantiate a network function instance
Figure 2. Create testnf-du Network Function Instance 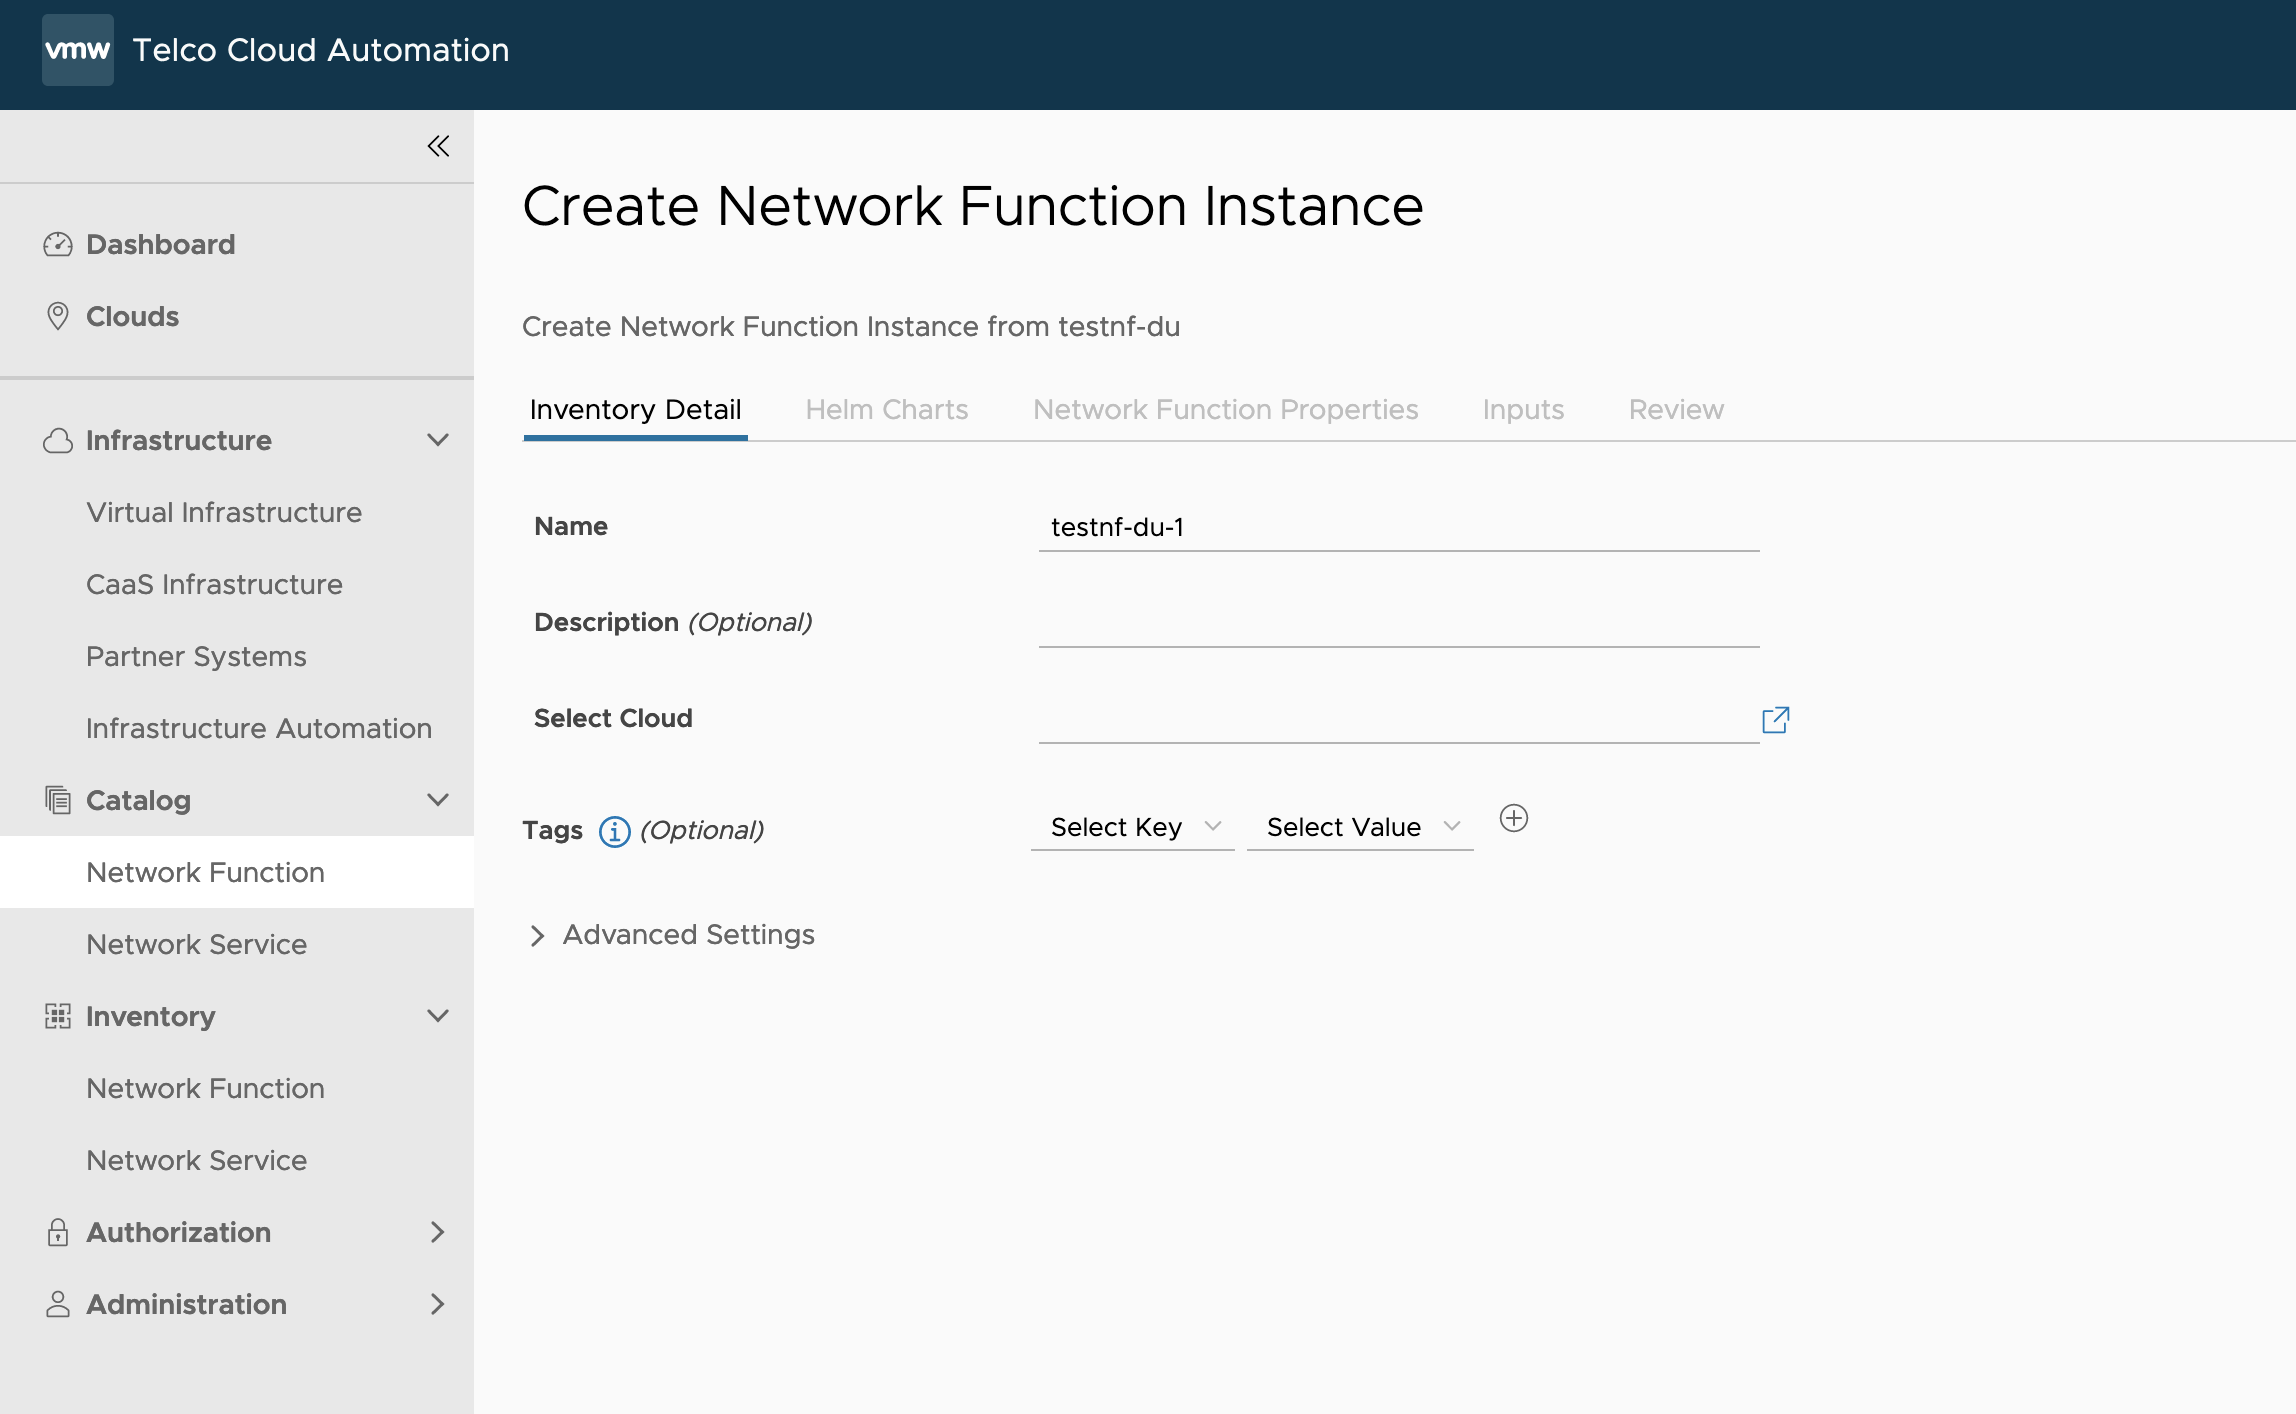
- Give a proper instance name, Select Cloud, Select a workload cluster, click NEXT, Select a node pool, click NEXT, Select a node pool, click NEXT, View Customization Required and Click OK.
Figure 3. Select node pool for testnf-du 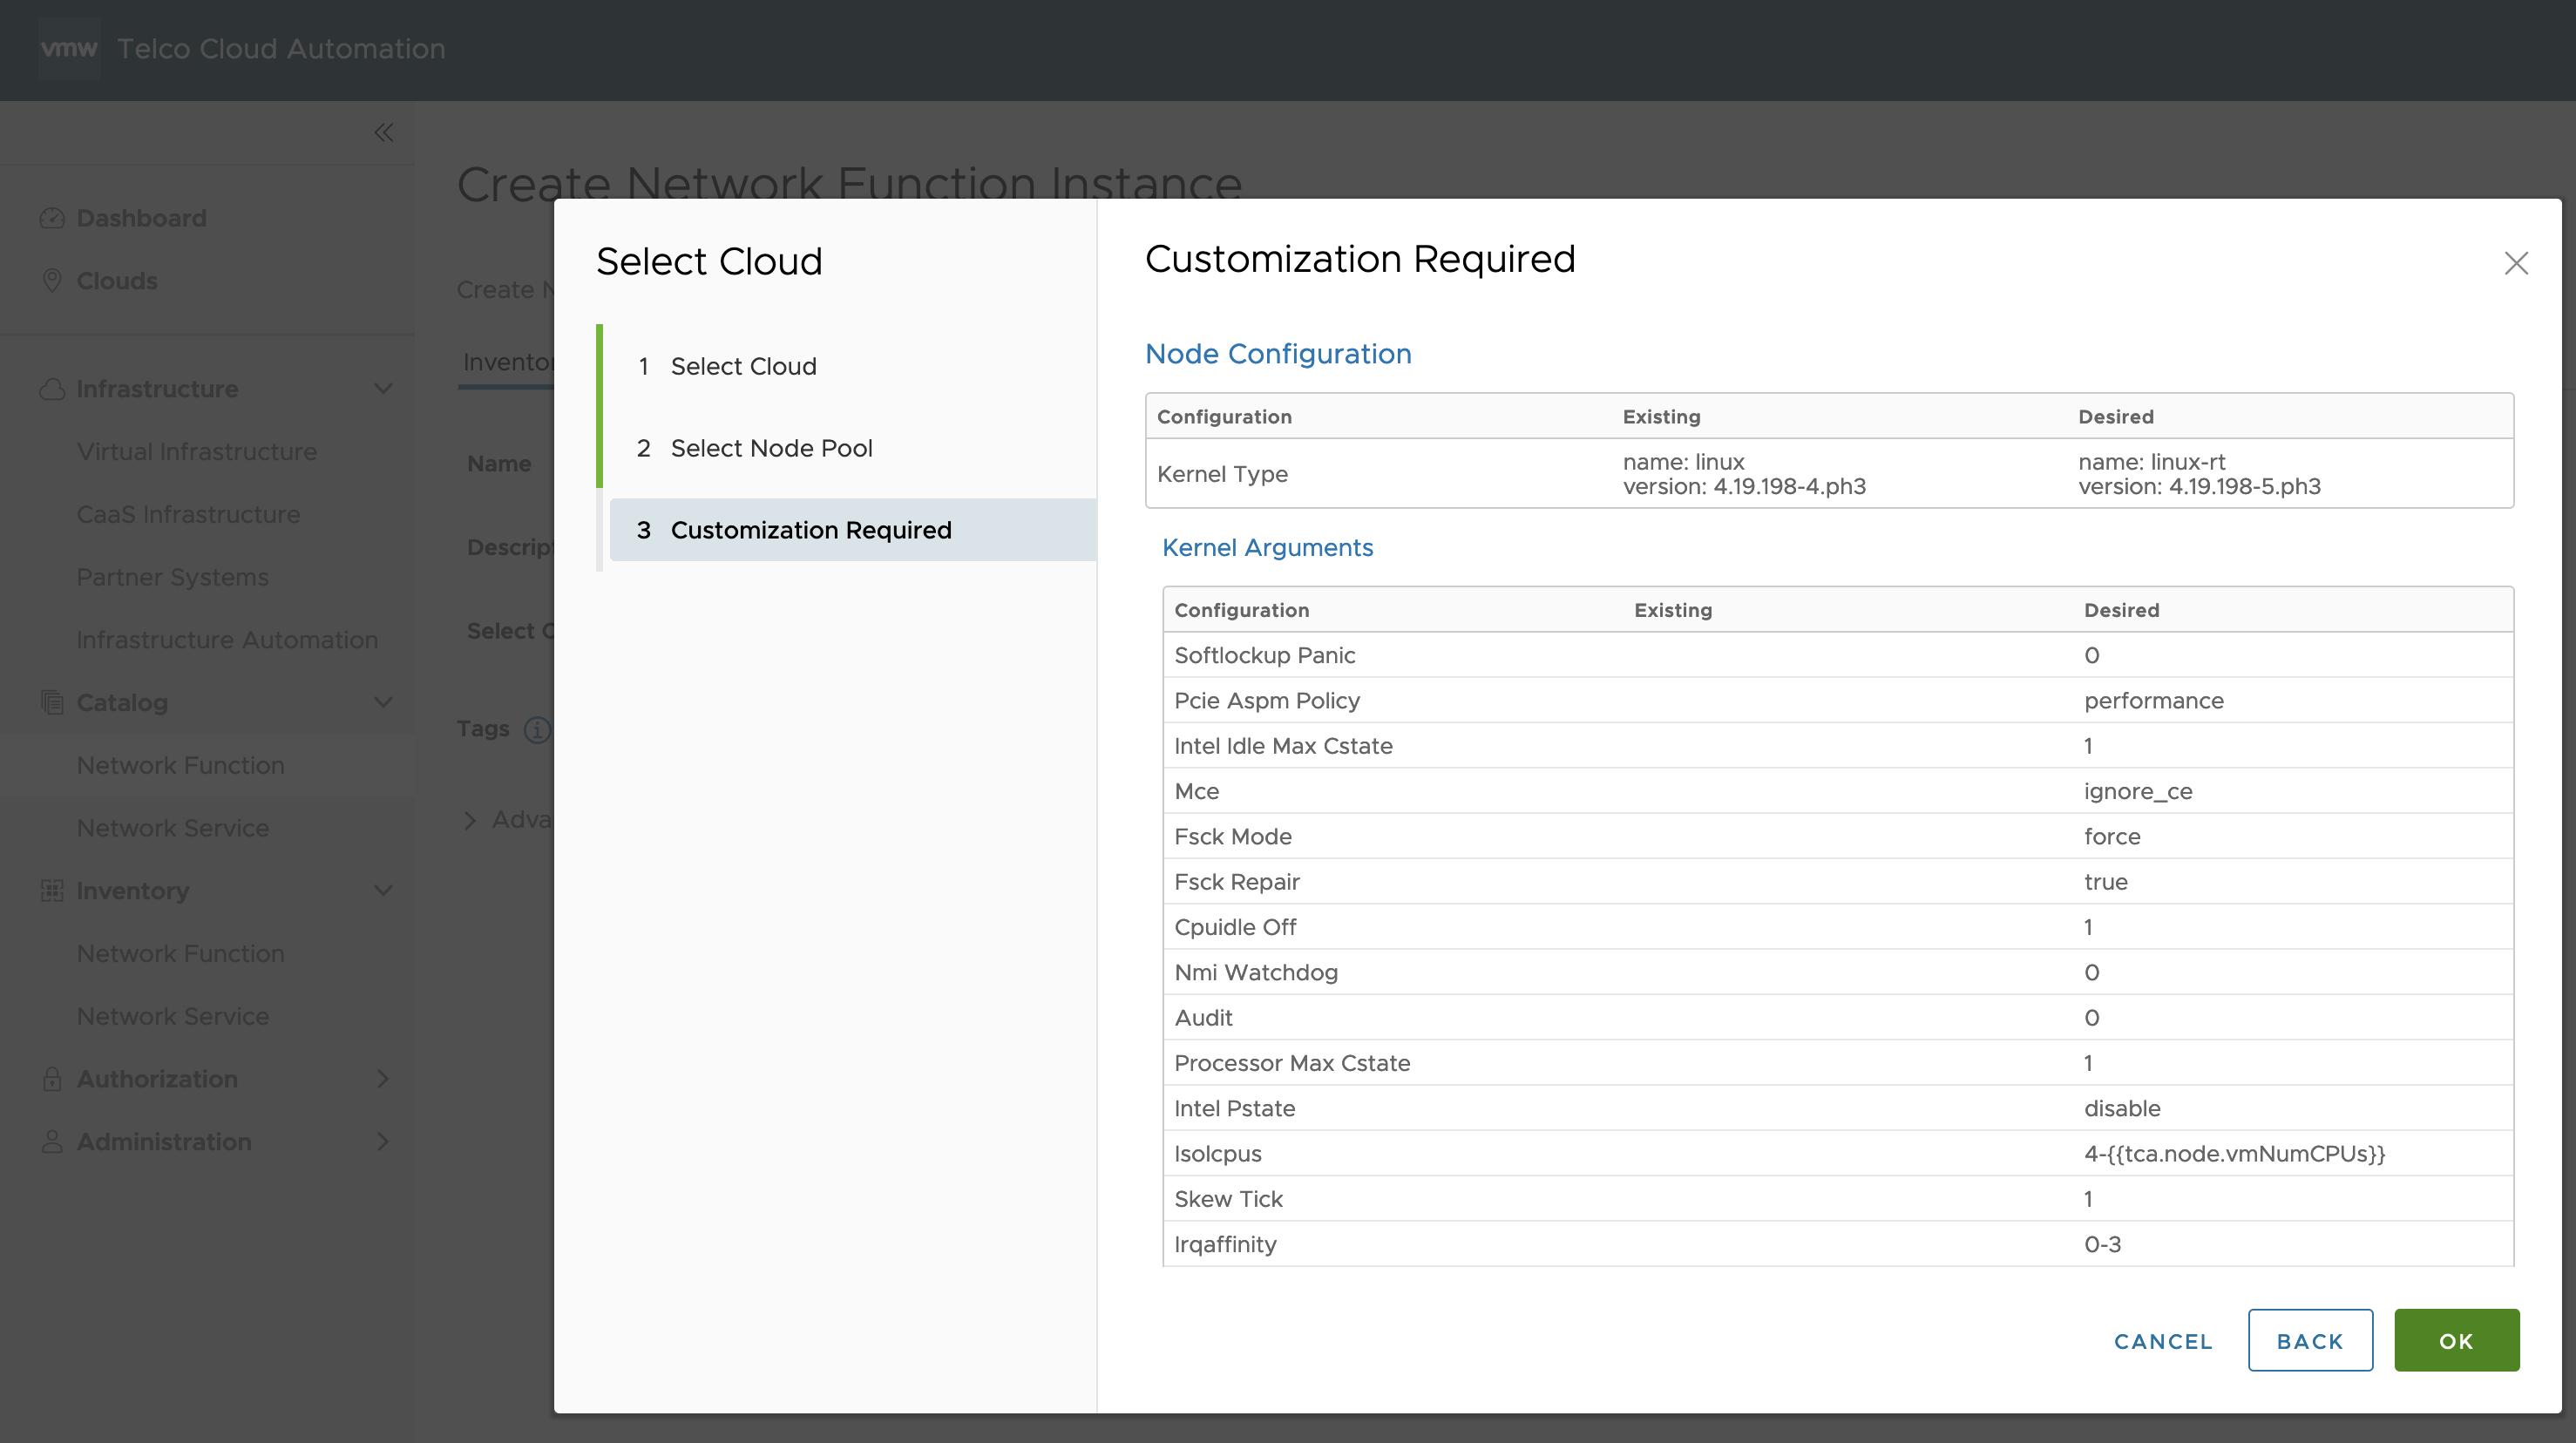
- In helm charts section, give a proper namespace, select repository URL which include testnf-du helm chart.
Figure 4. Select helm chart repo for testnf-du 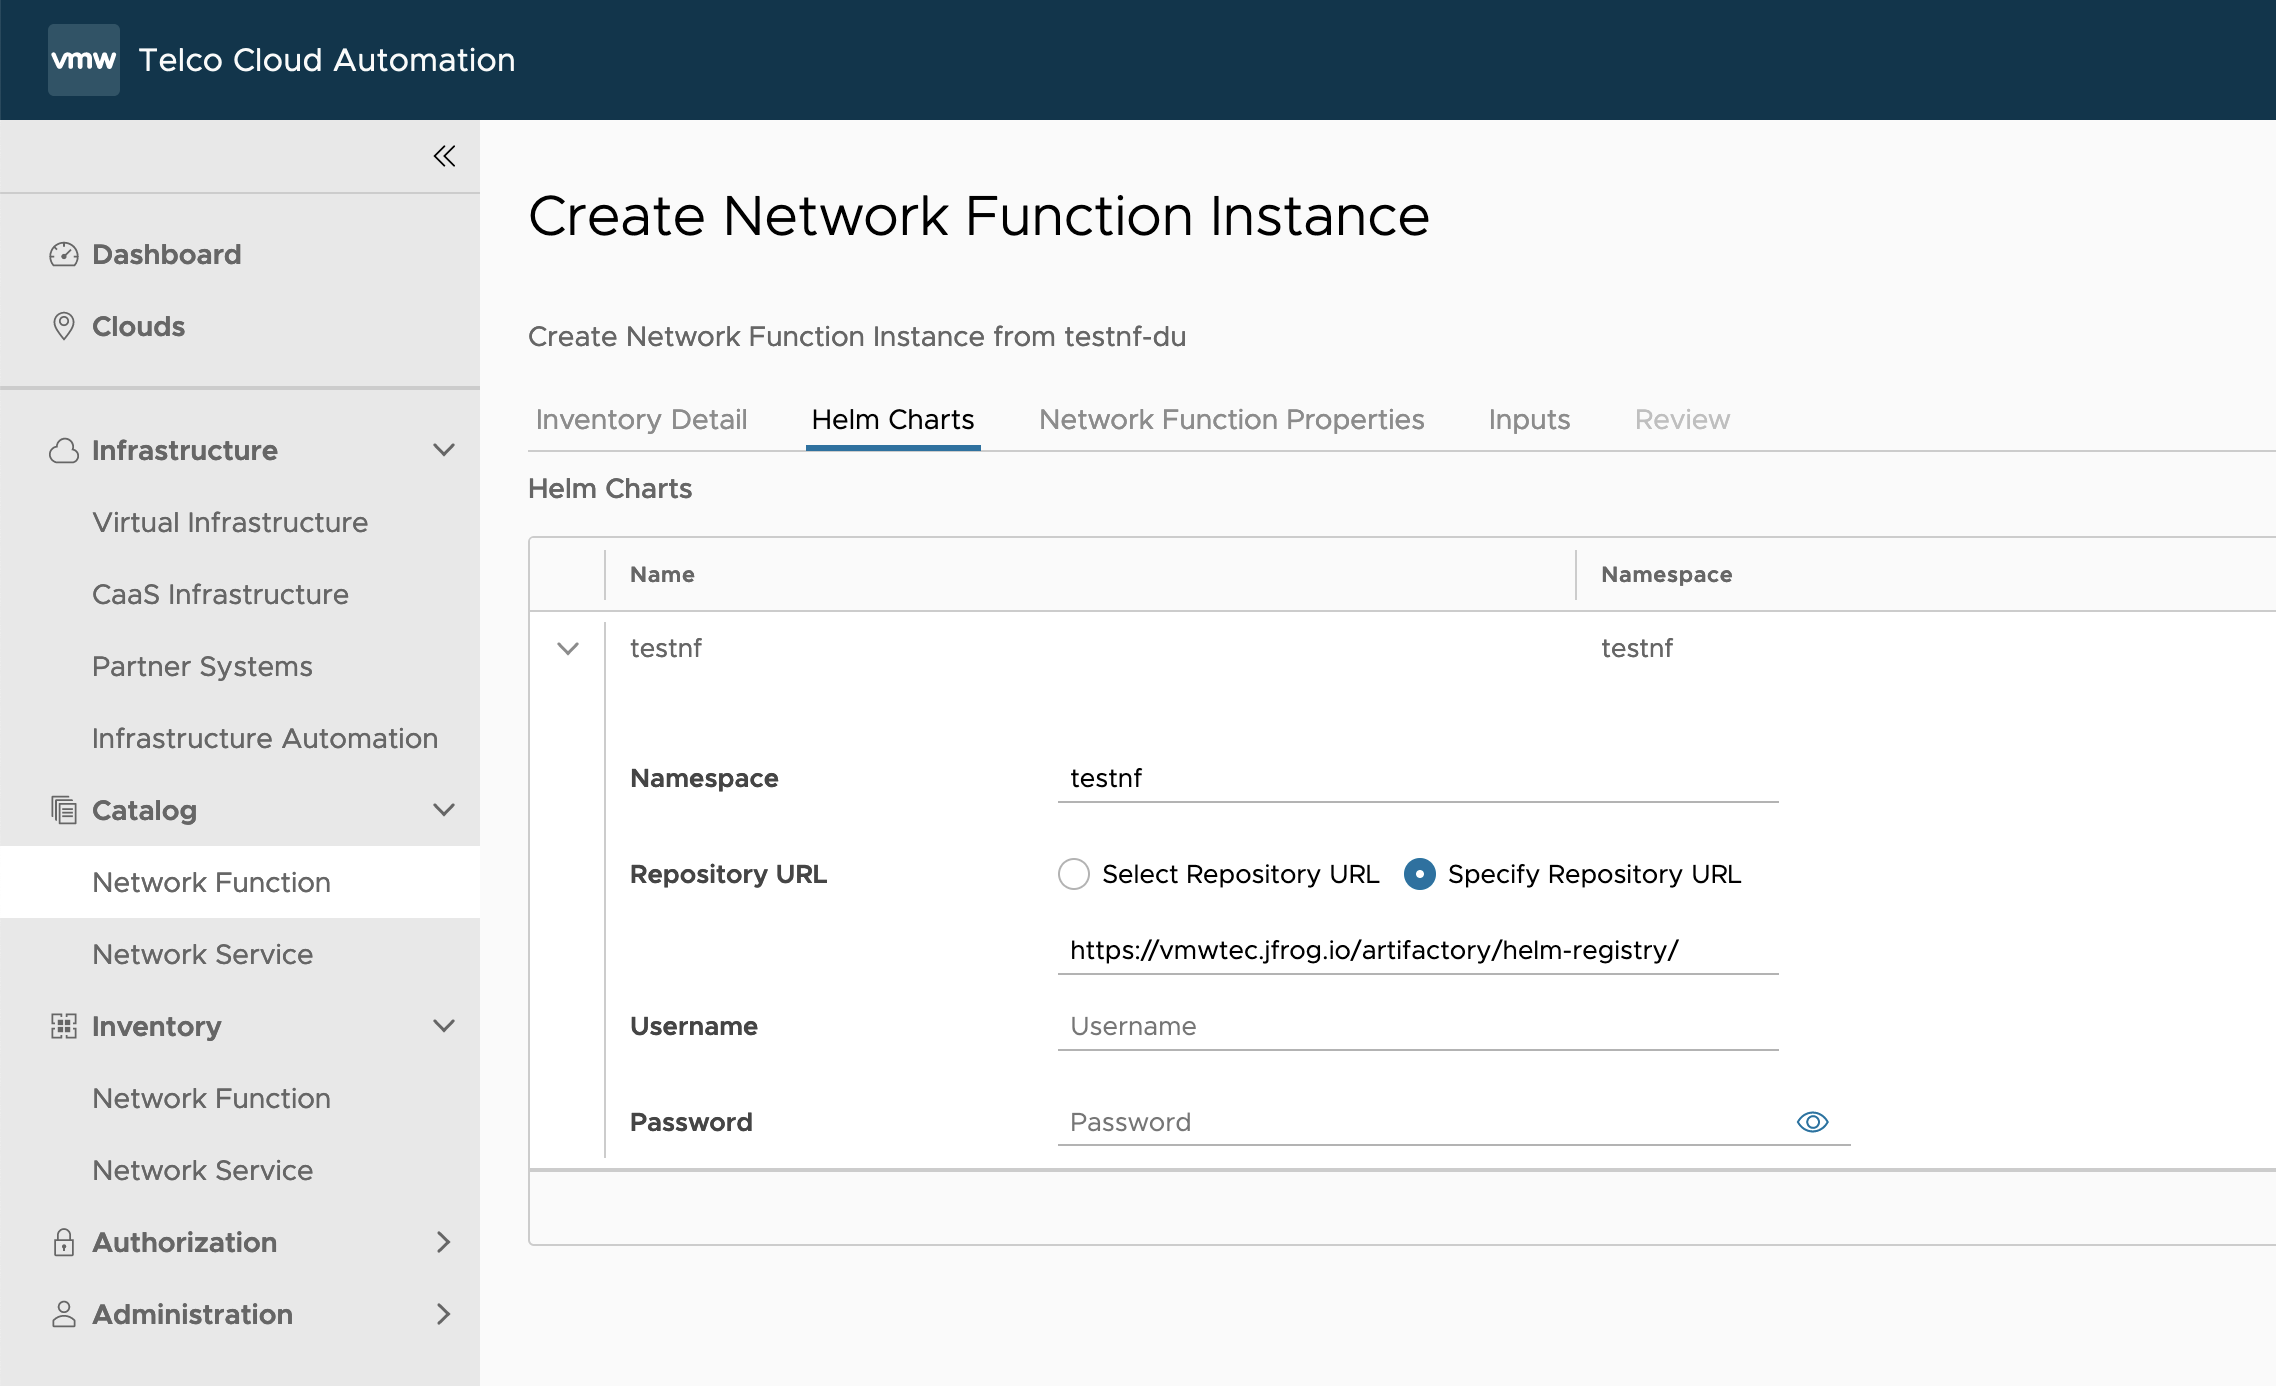
- In Inputs workflow section, input the same namespace in Pre-Instantiation Properties, provide NAD_FILE.
Figure 5. Input Pre-Instantiation Properties for testnf-du 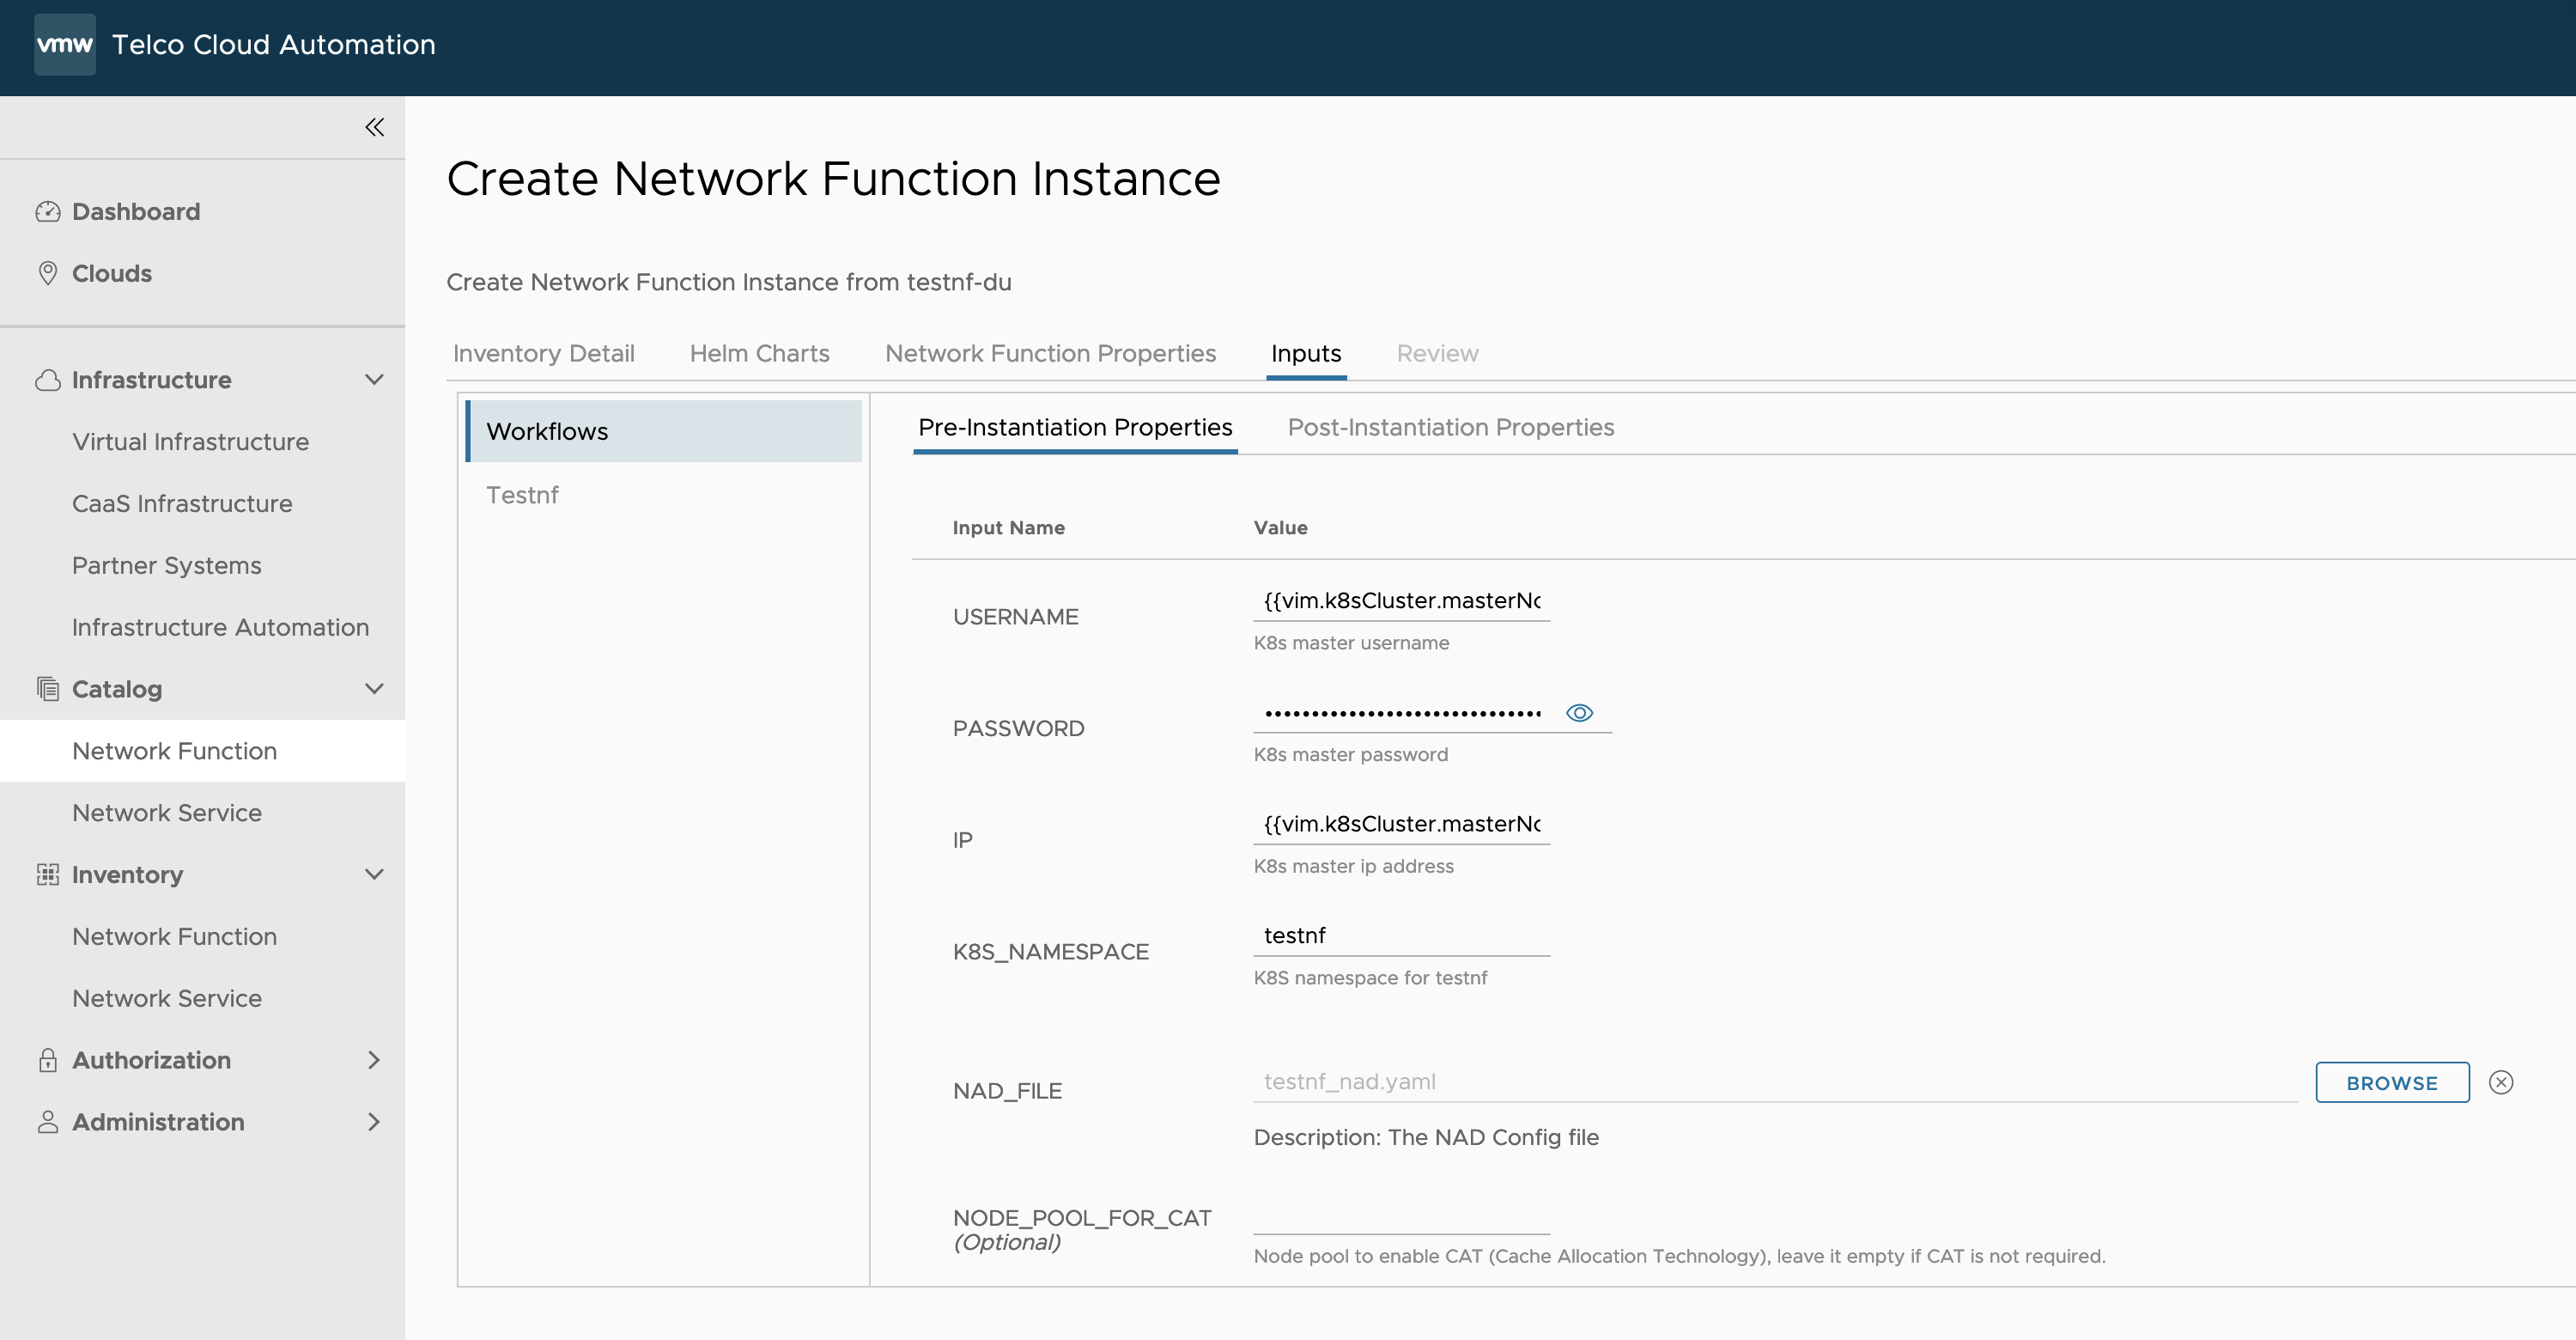
- Input the same namespace in Post-Instantiation Properties
Figure 6. Input Post-Instantiation Properties for testnf-du 
- In Inputs Testnf section, provide a proper values.yaml, give port groups which are associated with uplinks with SRIOV enabled.
Figure 7. Input helm chart values.yaml and sriov network adapters info for testnf-du 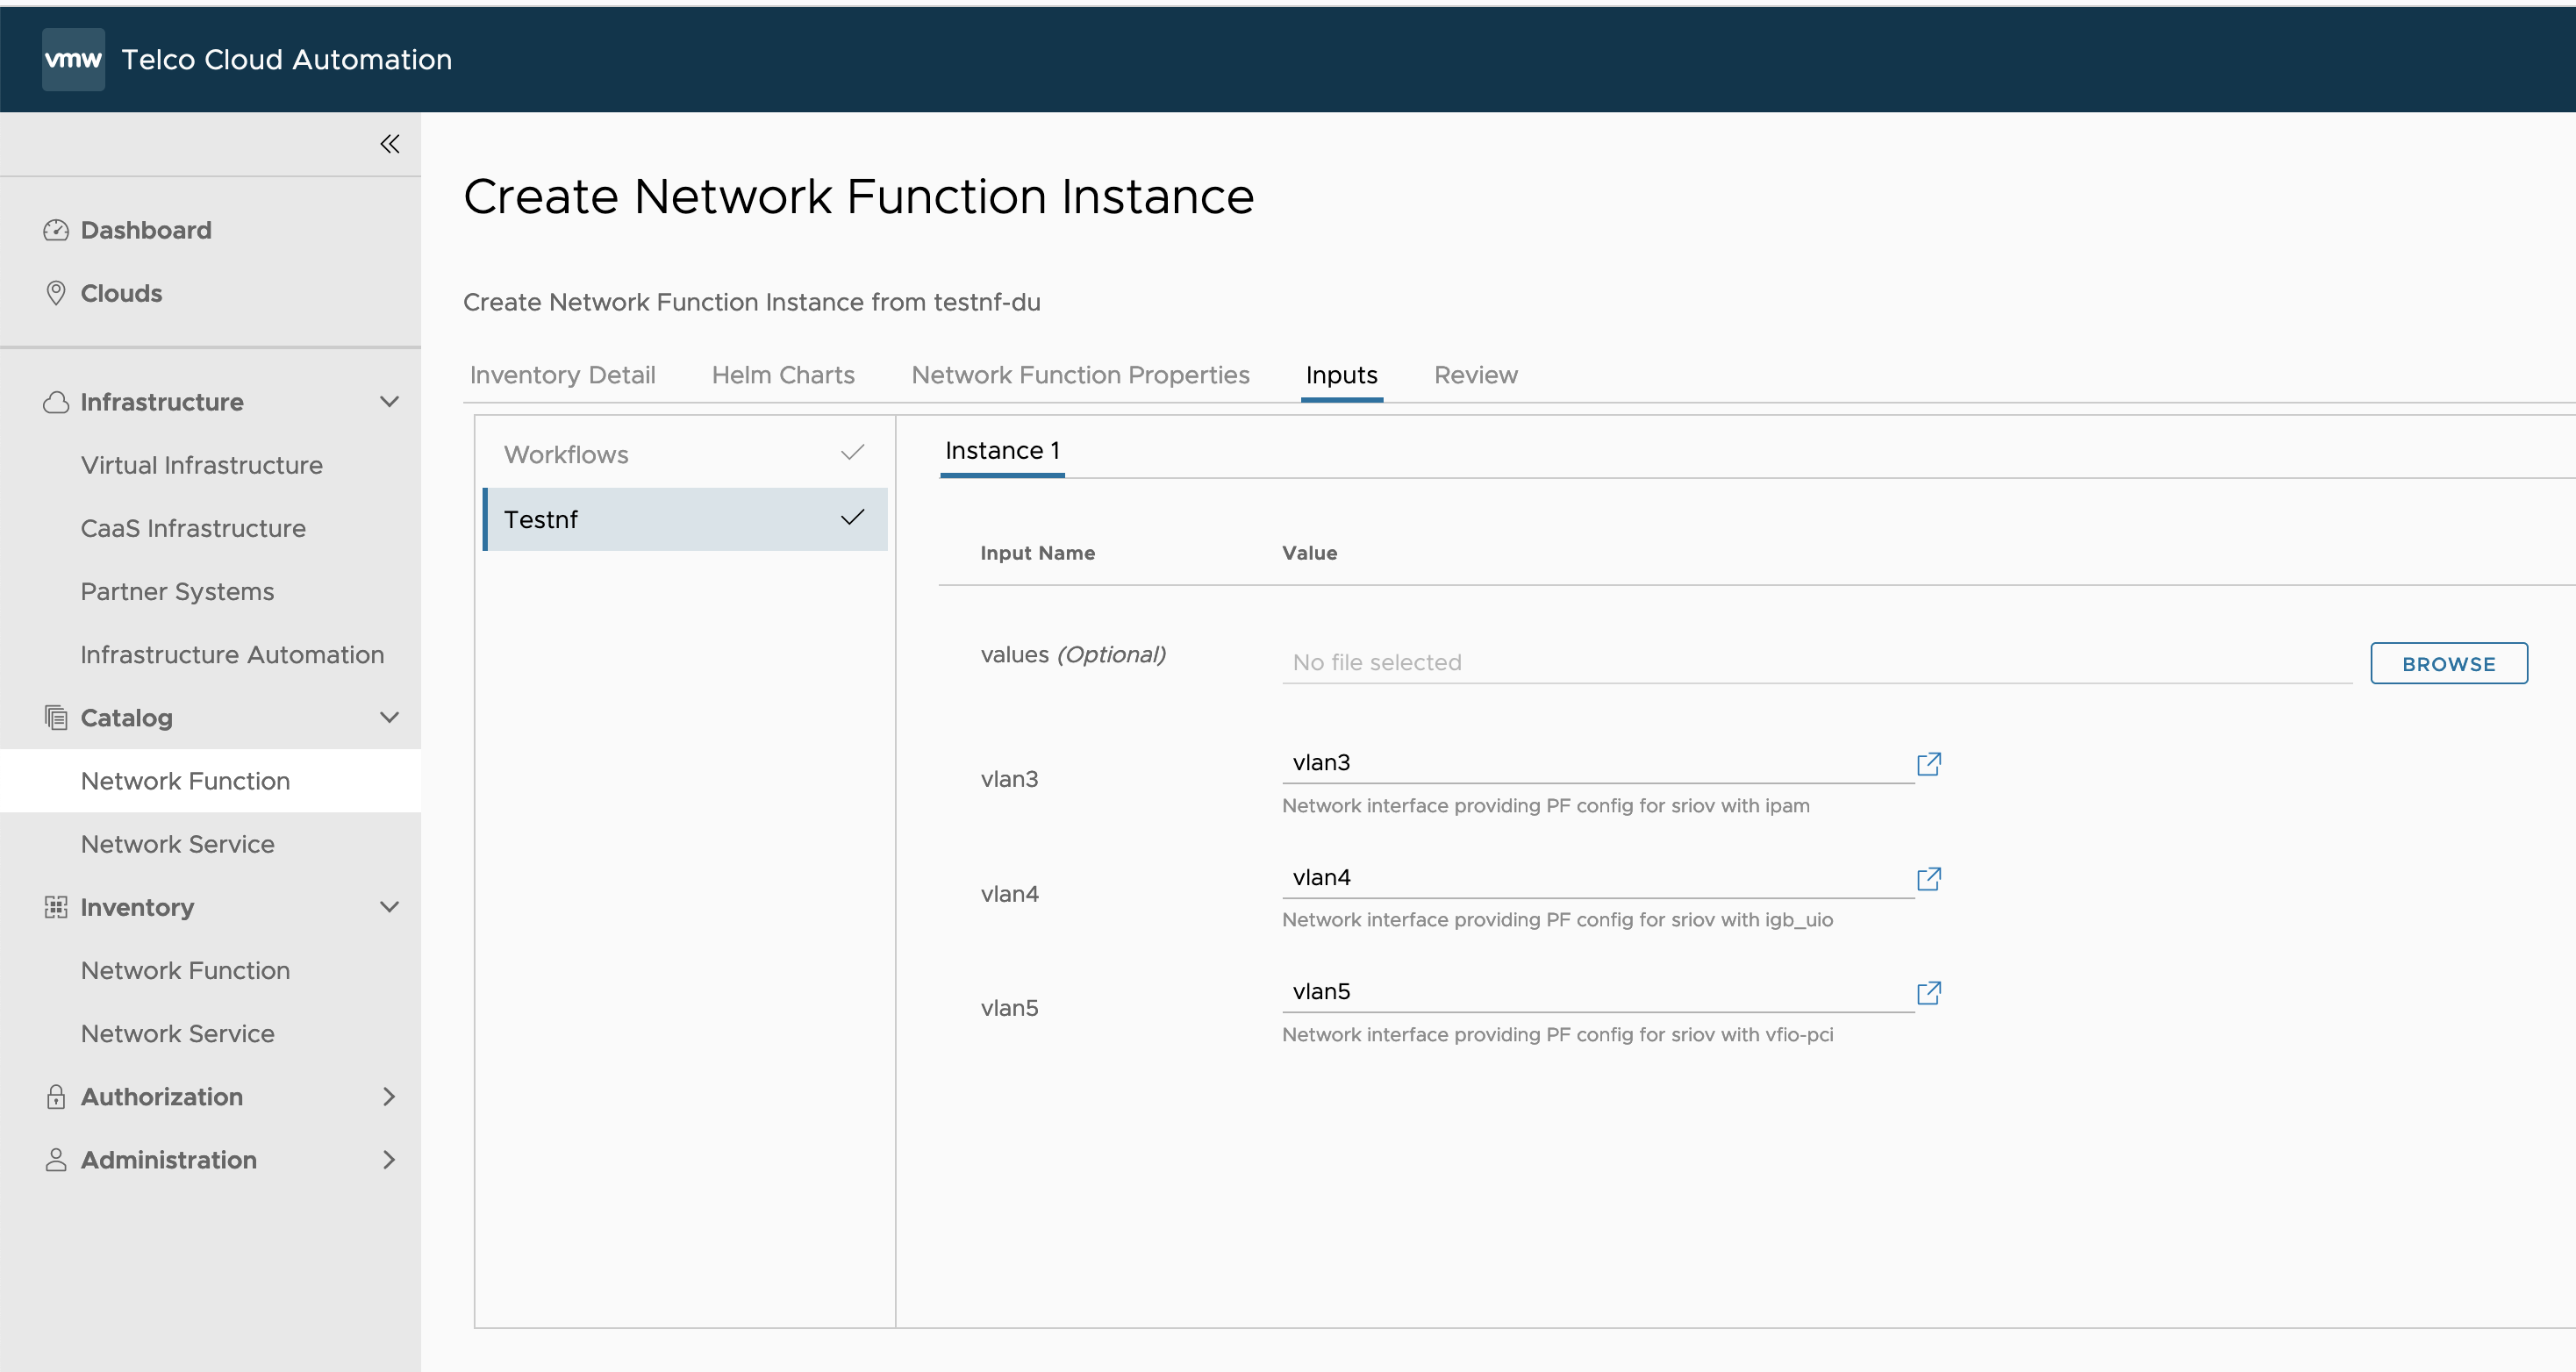
- Review the testnf-du instance creation parameters and click INSTANTIATE.
Figure 8. Review network function instance setting for testnf-du 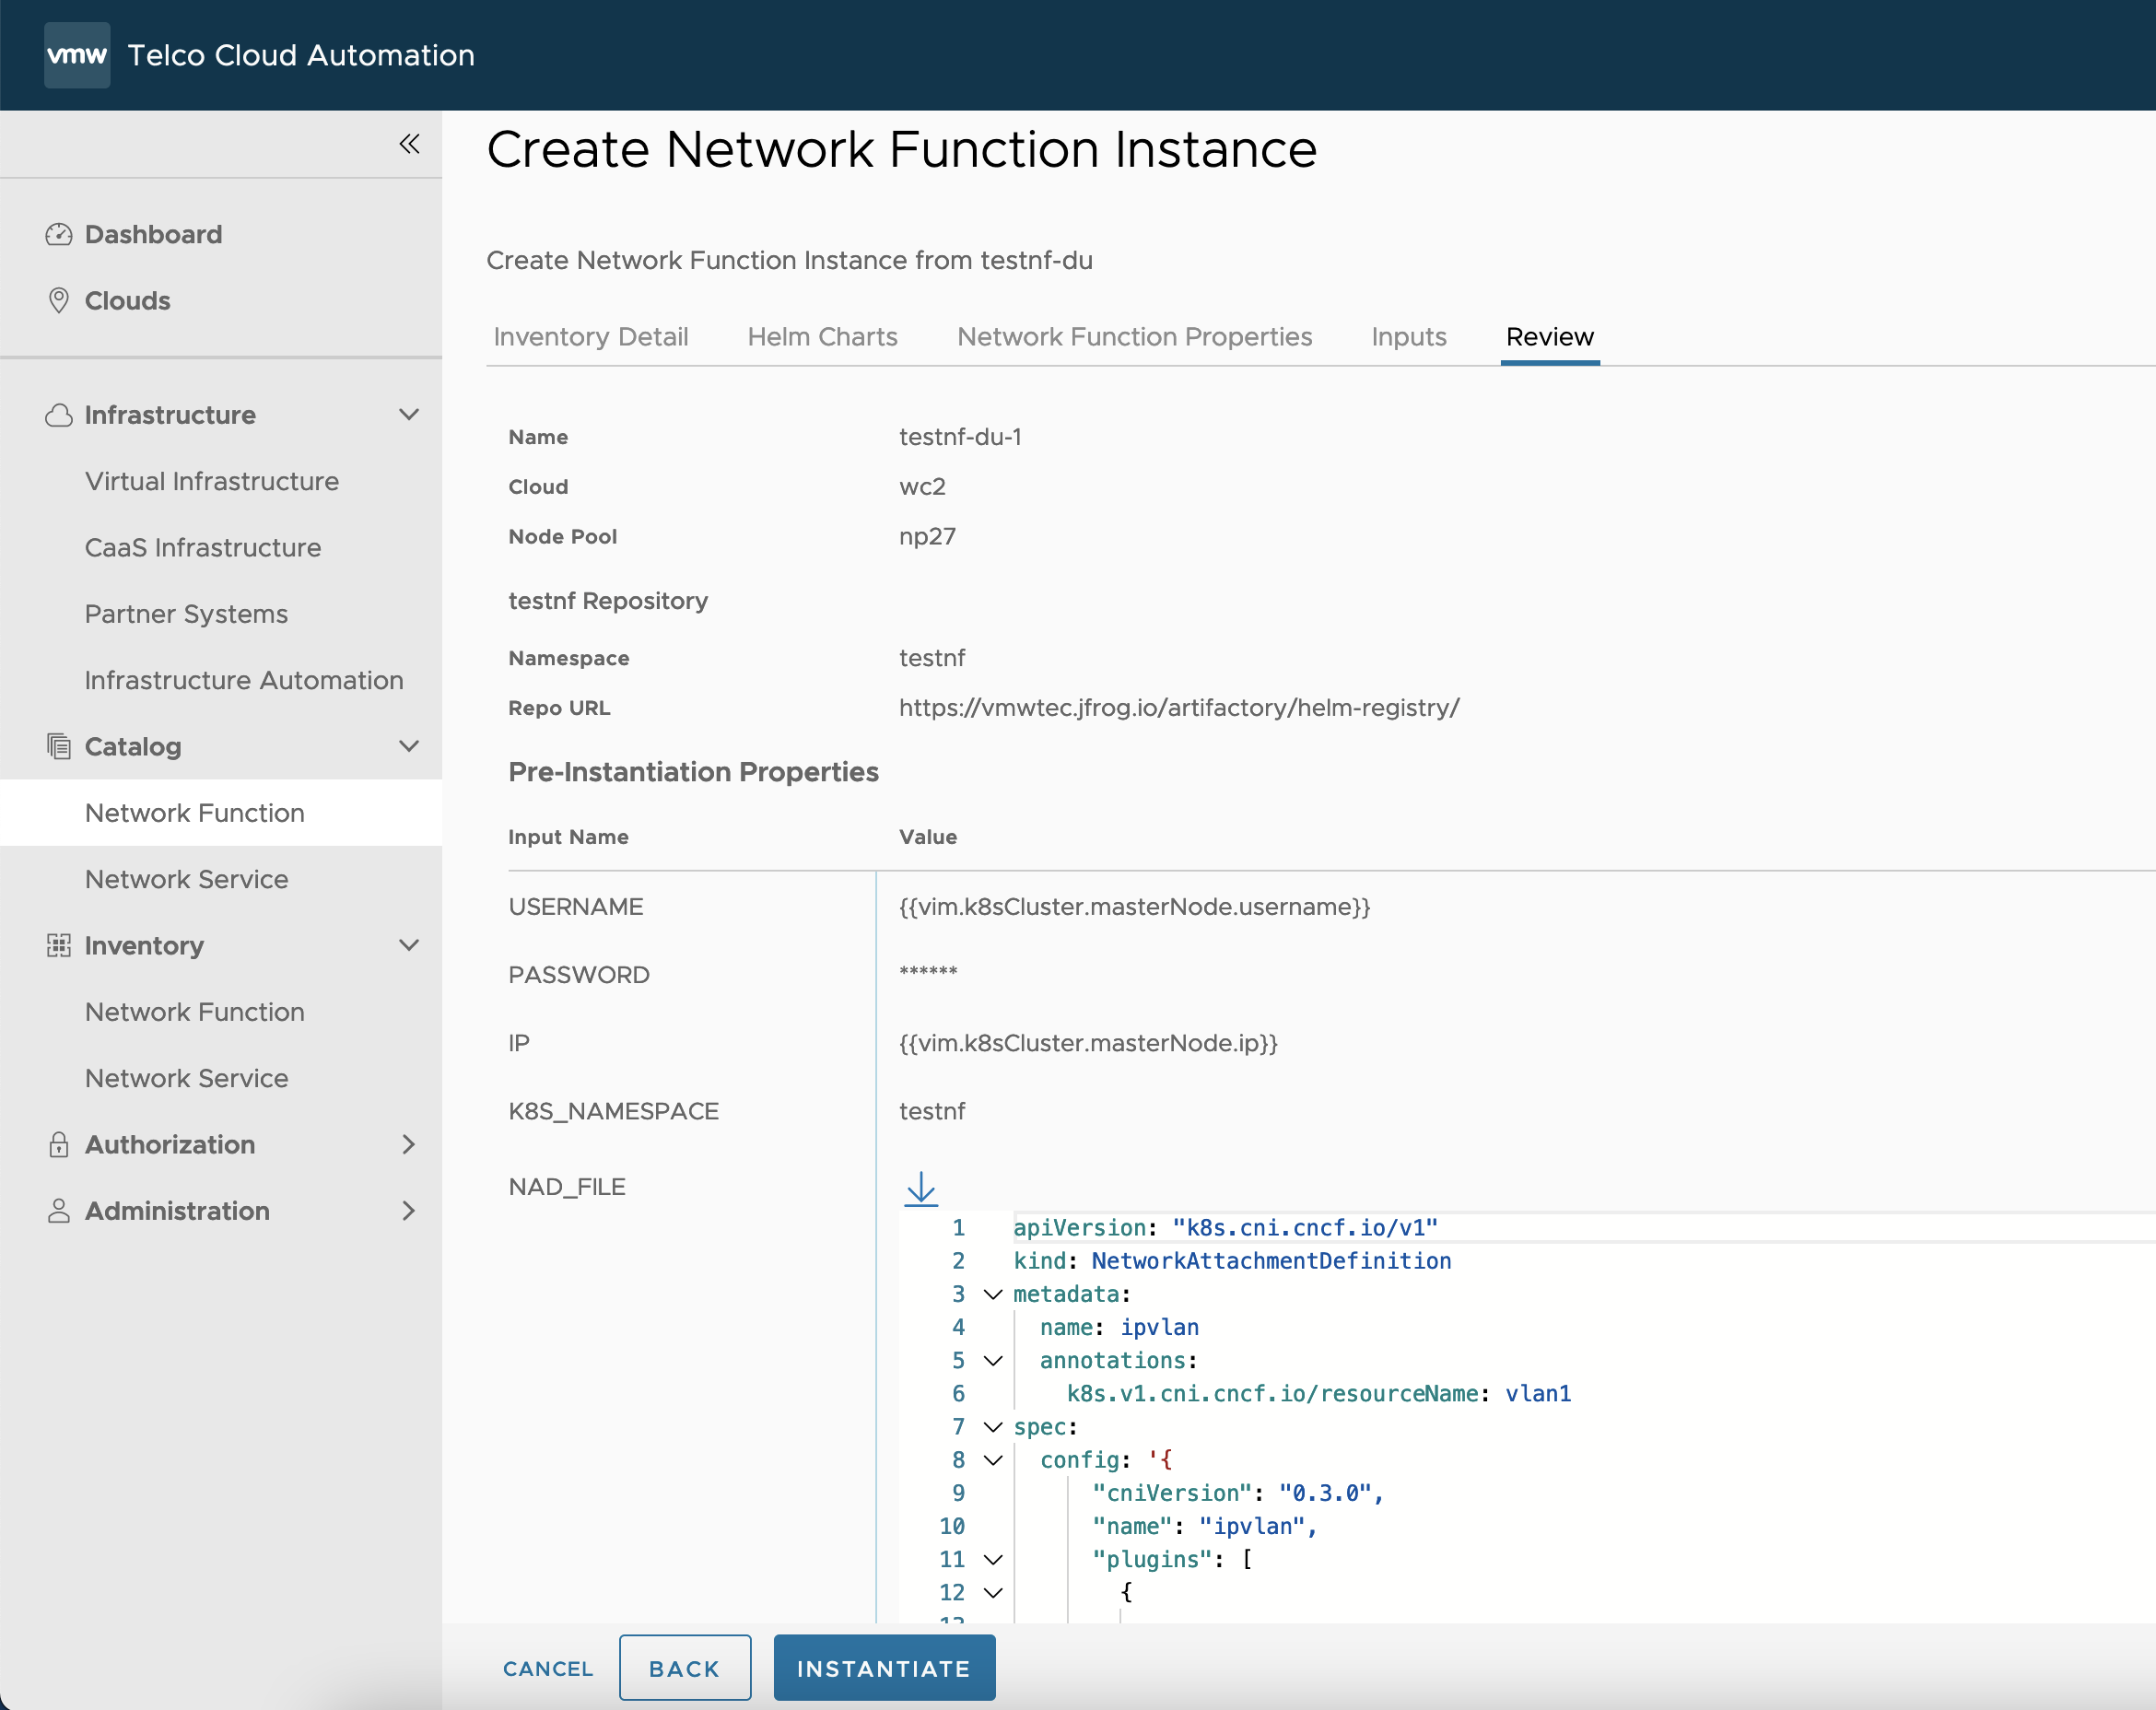
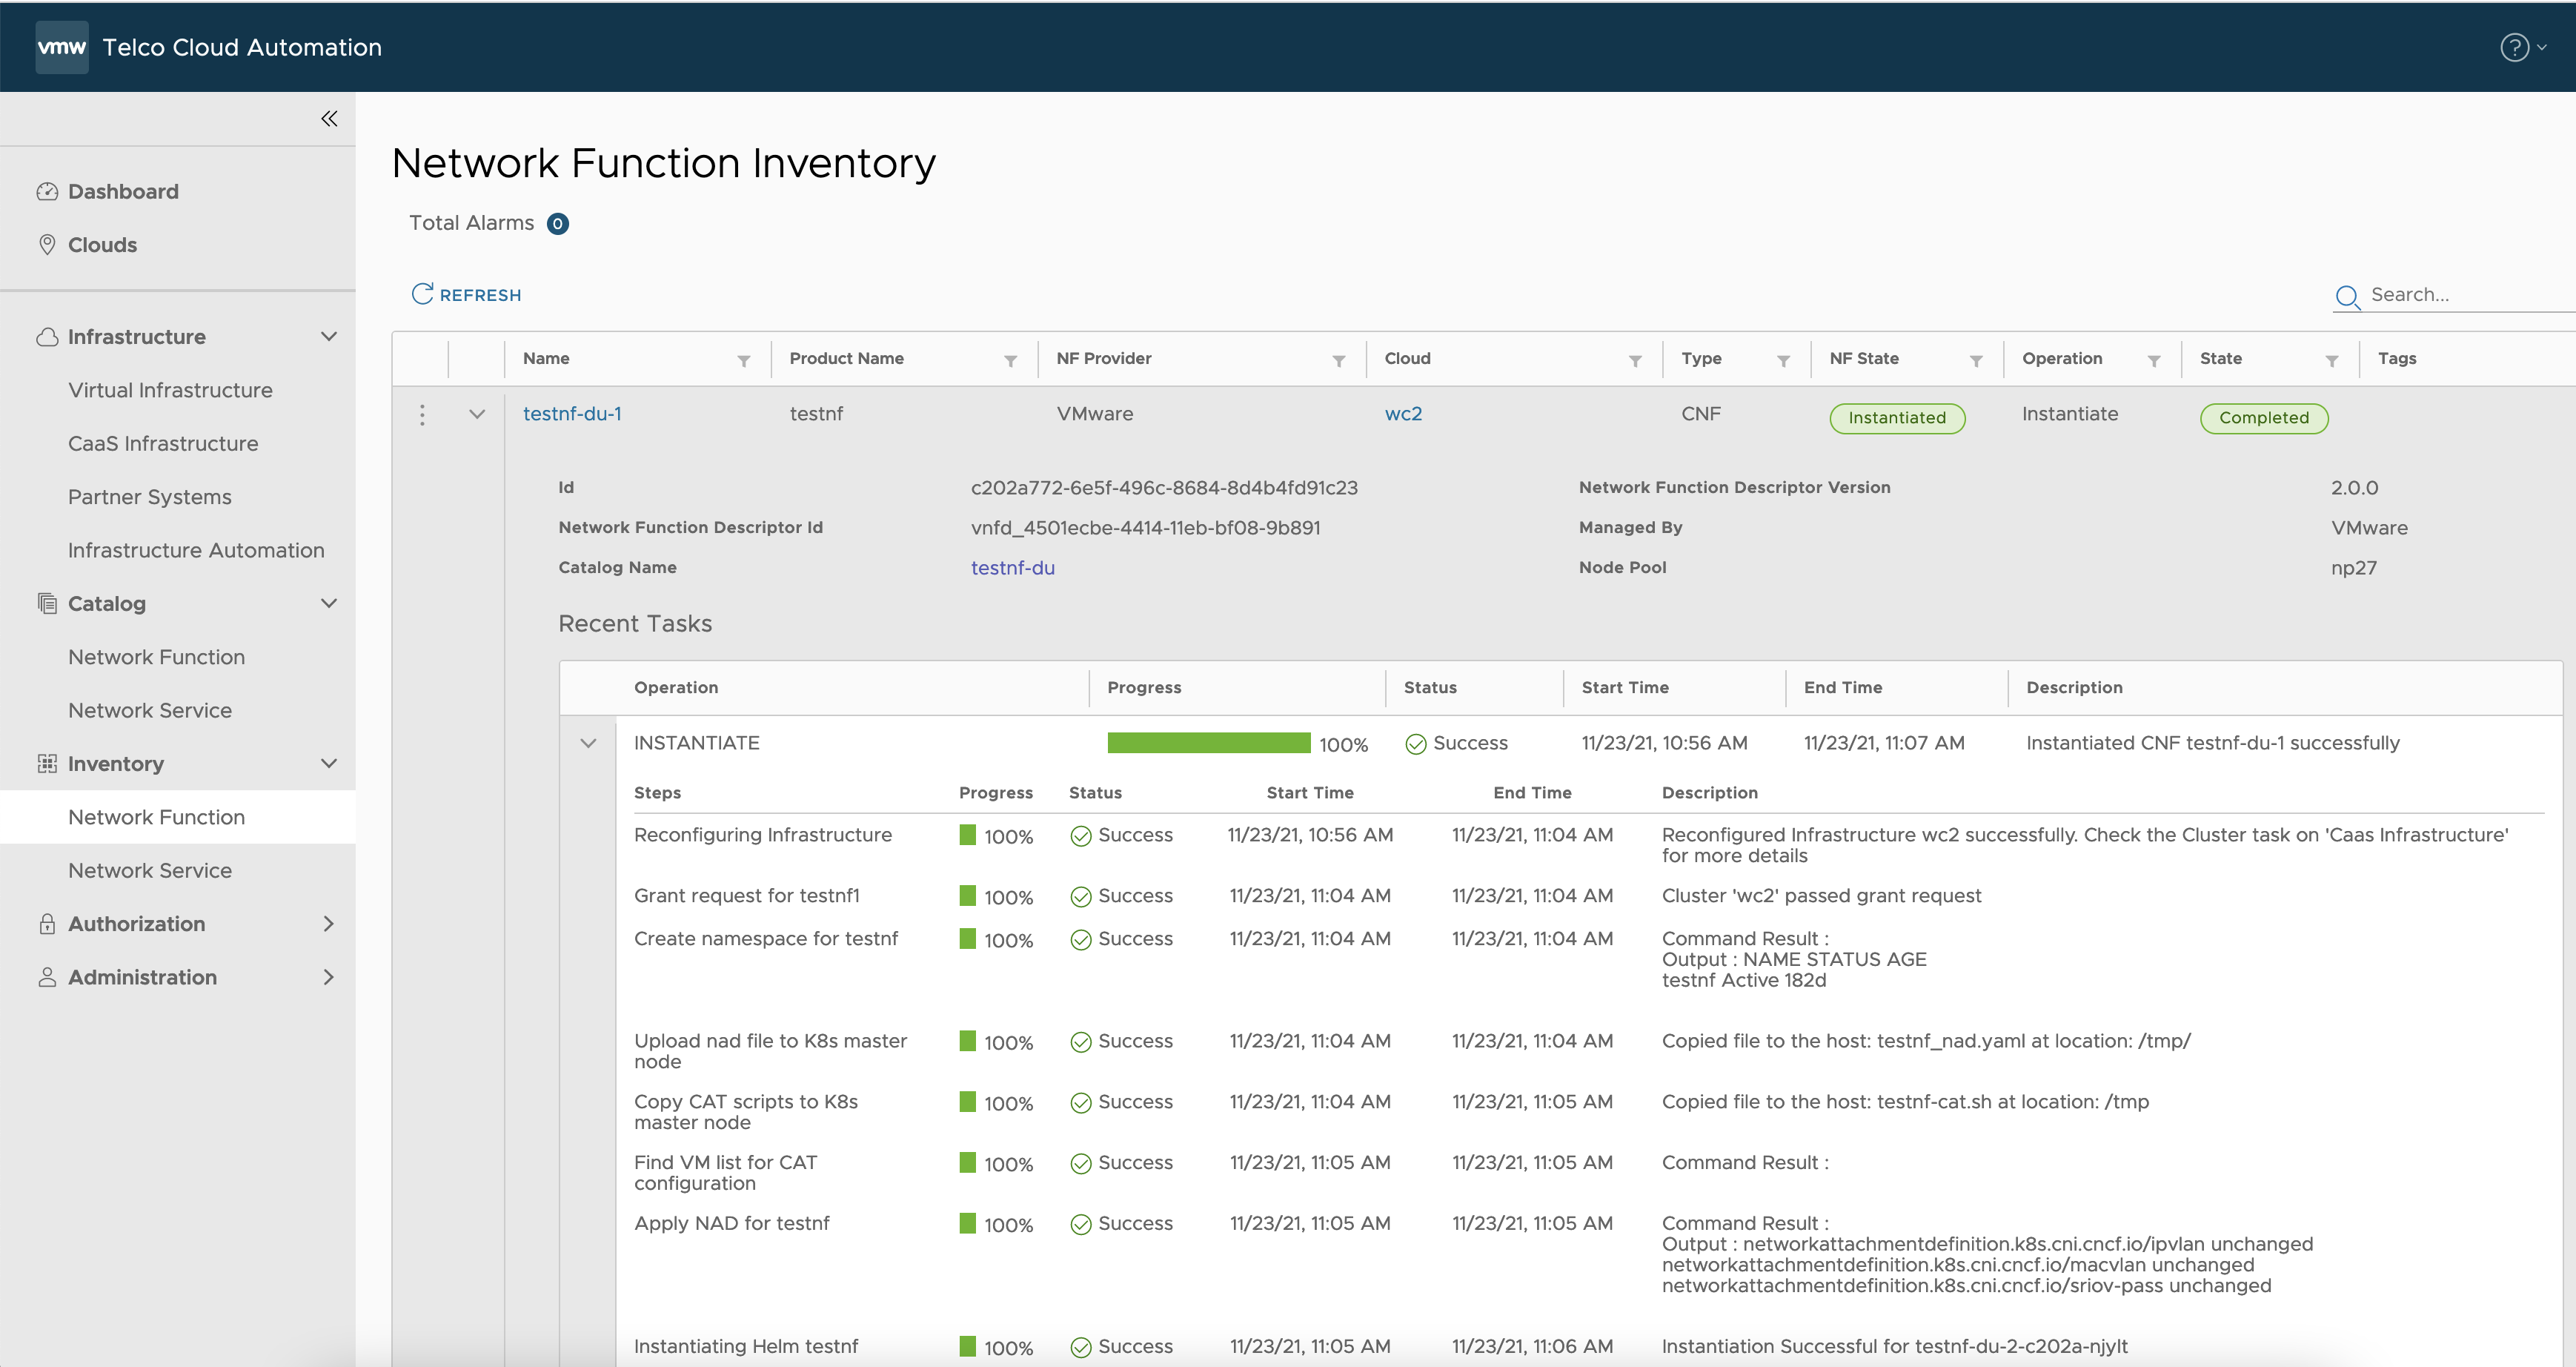
Results
Once the above steps were executed, the testnf-du can be instantiatied successfully with some post-instantiation workflows to ensure that the pod, node, vm customizations are realized.
What to do next
When testnf-du CNF is ready, you can bash to the testnf-du pod to run some dpdk apps such as testpmd, pktgen, performance tools such as iperf, for example:
capv@wc0-master-control-plane-xlwrz [ ~ ]$ POD_NS=testnf
capv@wc0-master-control-plane-xlwrz [ ~ ]$ POD_NAME=$(kubectl get pods --namespace $POD_NS -l "app.kubernetes.io/name=testnf-du" -o jsonpath="{.items[0].metadata.name}")
capv@wc0-master-control-plane-xlwrz [ ~ ]$ kubectl -n $POD_NS exec -it $POD_NAME -- bash

root [ / ]# testpmd
EAL: Detected 8 lcore(s)
EAL: Detected 1 NUMA nodes
EAL: Multi-process socket /var/run/dpdk/rte/mp_socket
EAL: Selected IOVA mode 'PA'
EAL: Probing VFIO support...
EAL: VFIO support initialized
...
