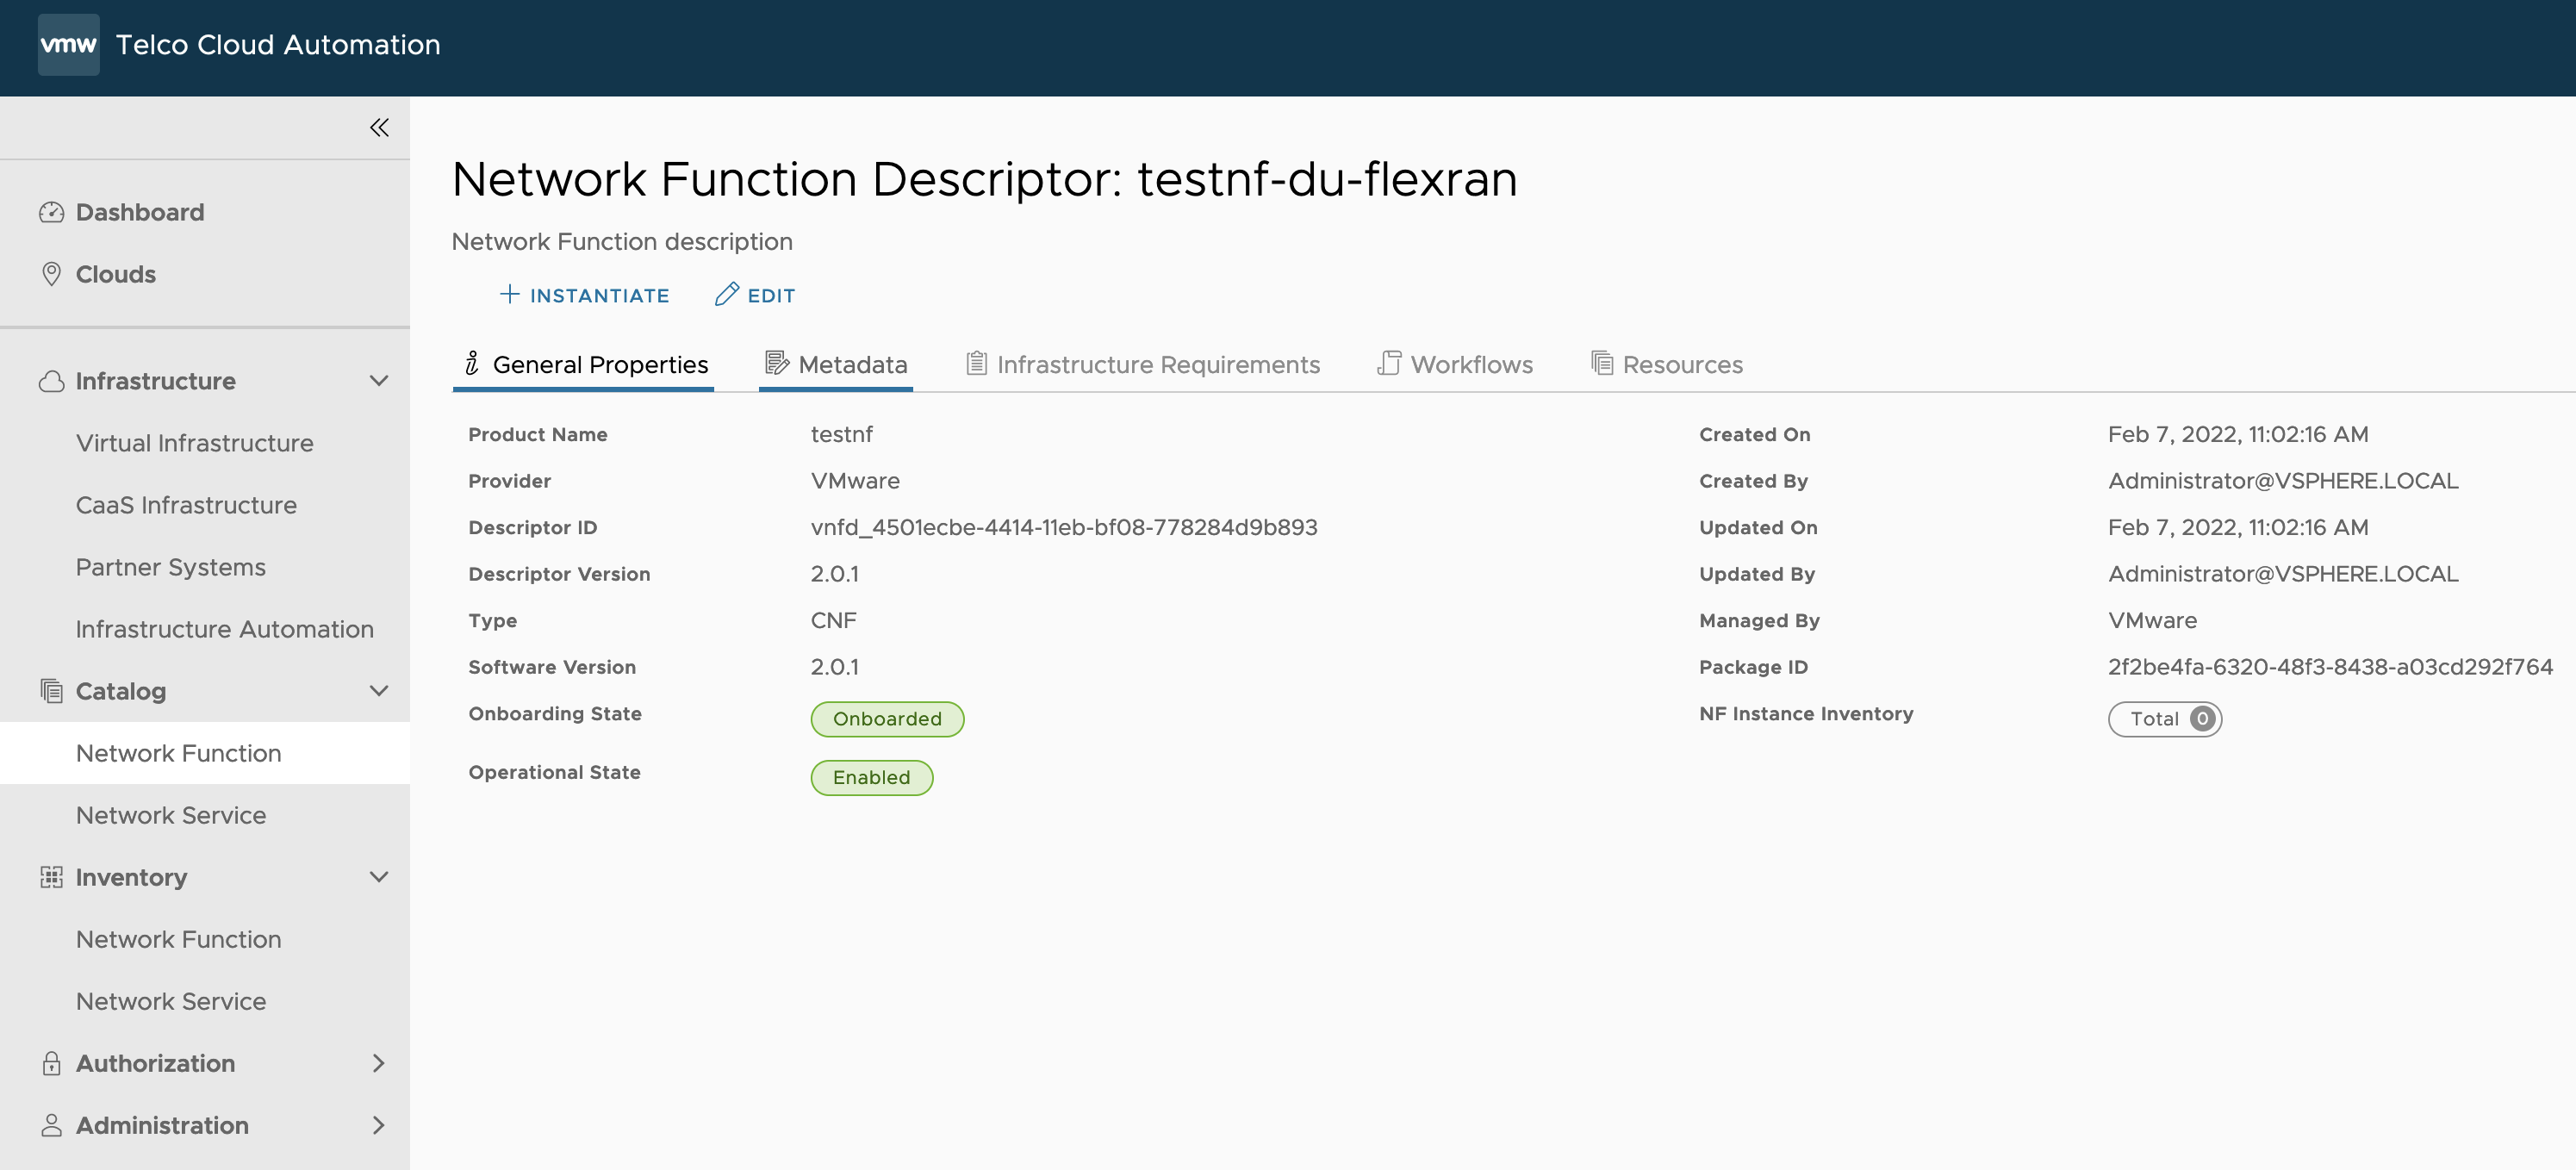
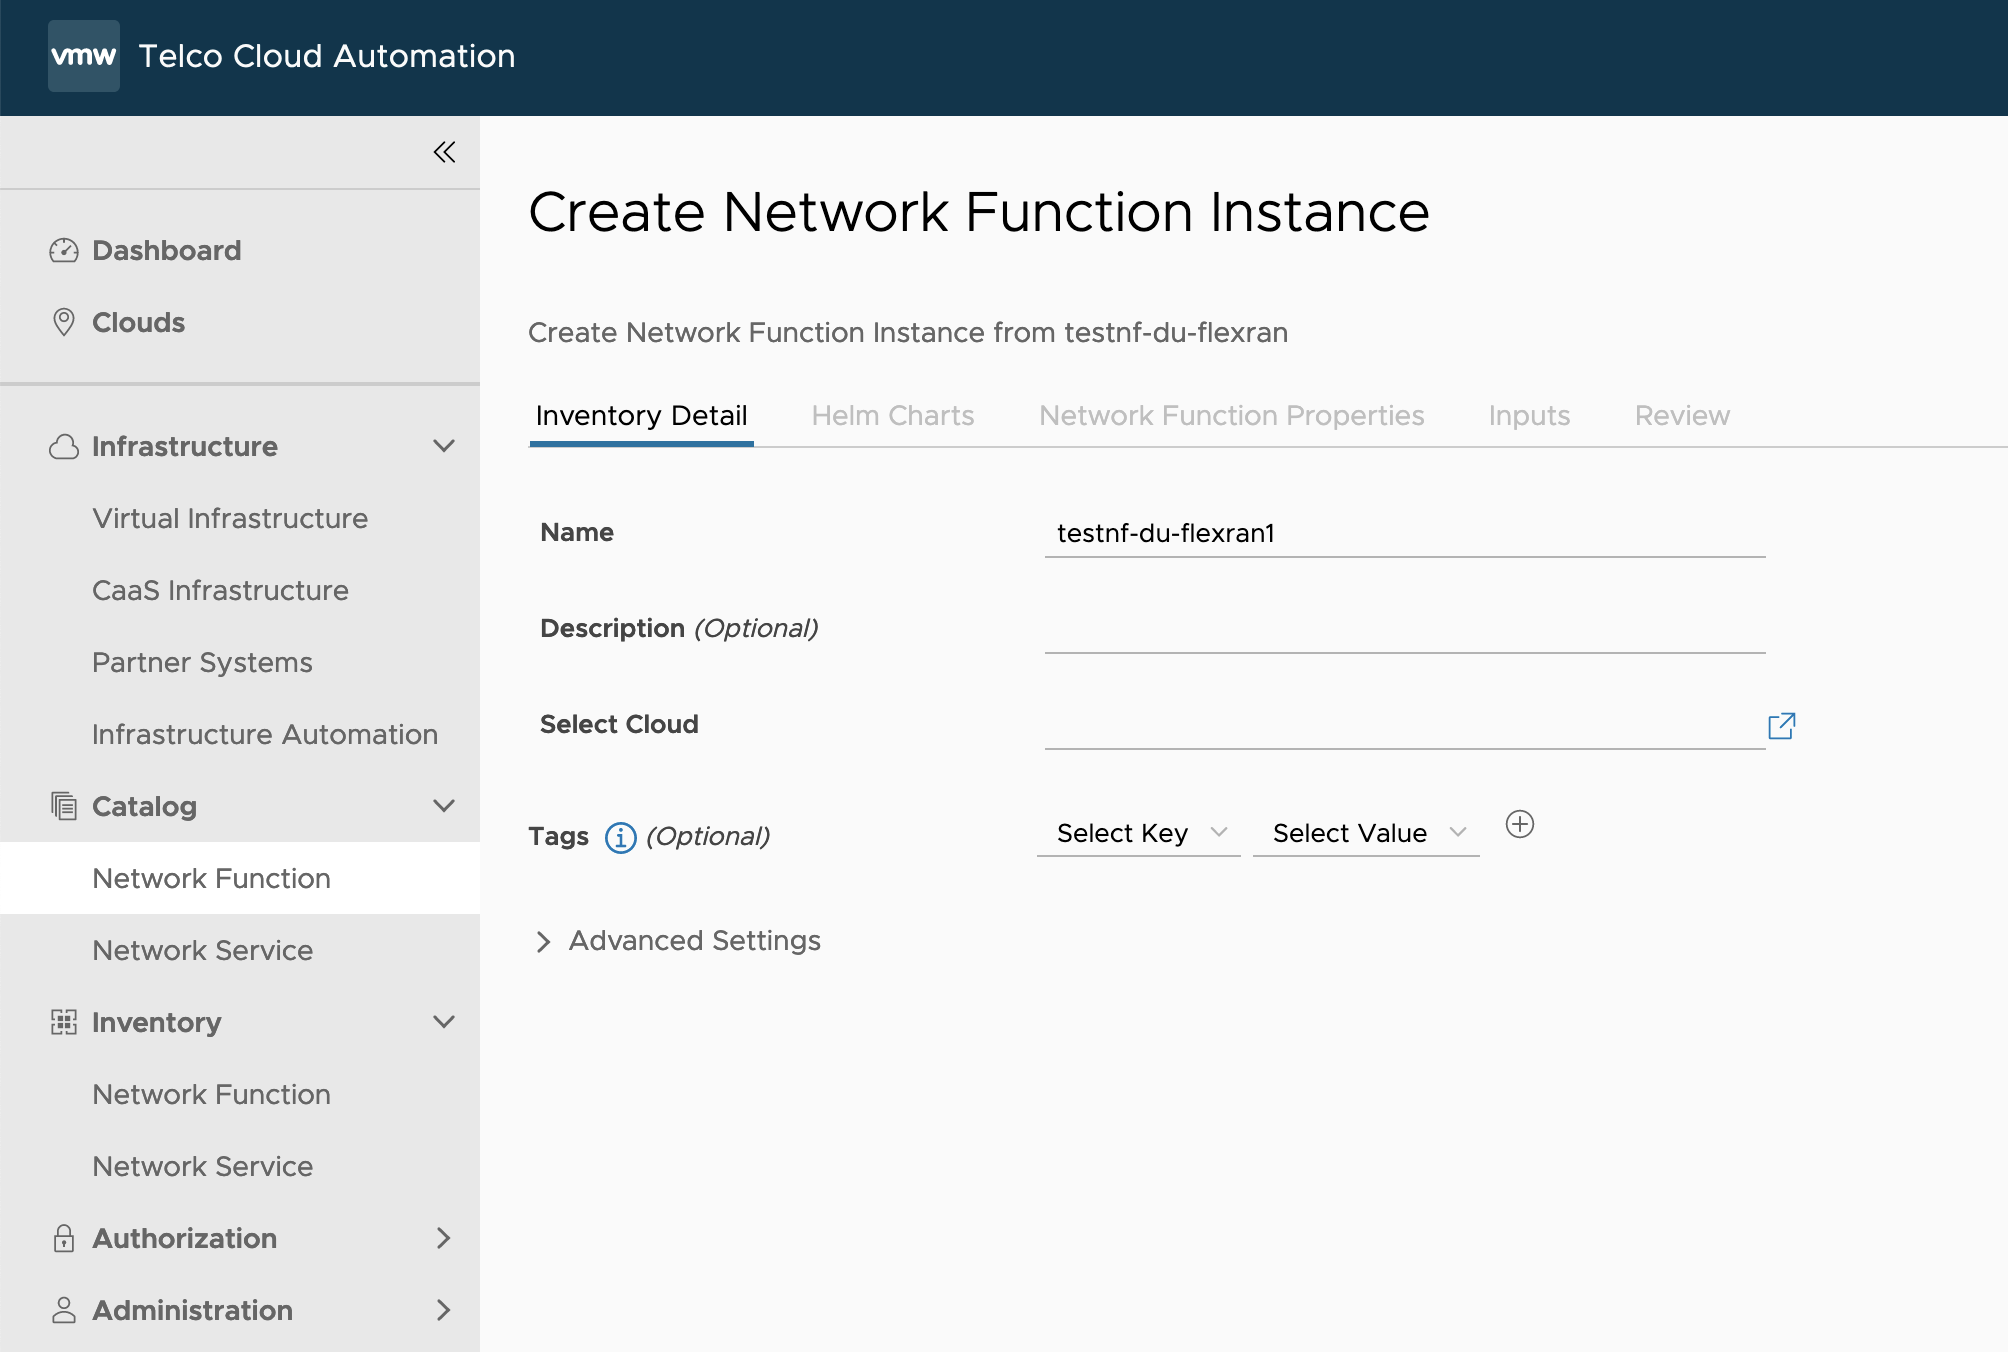
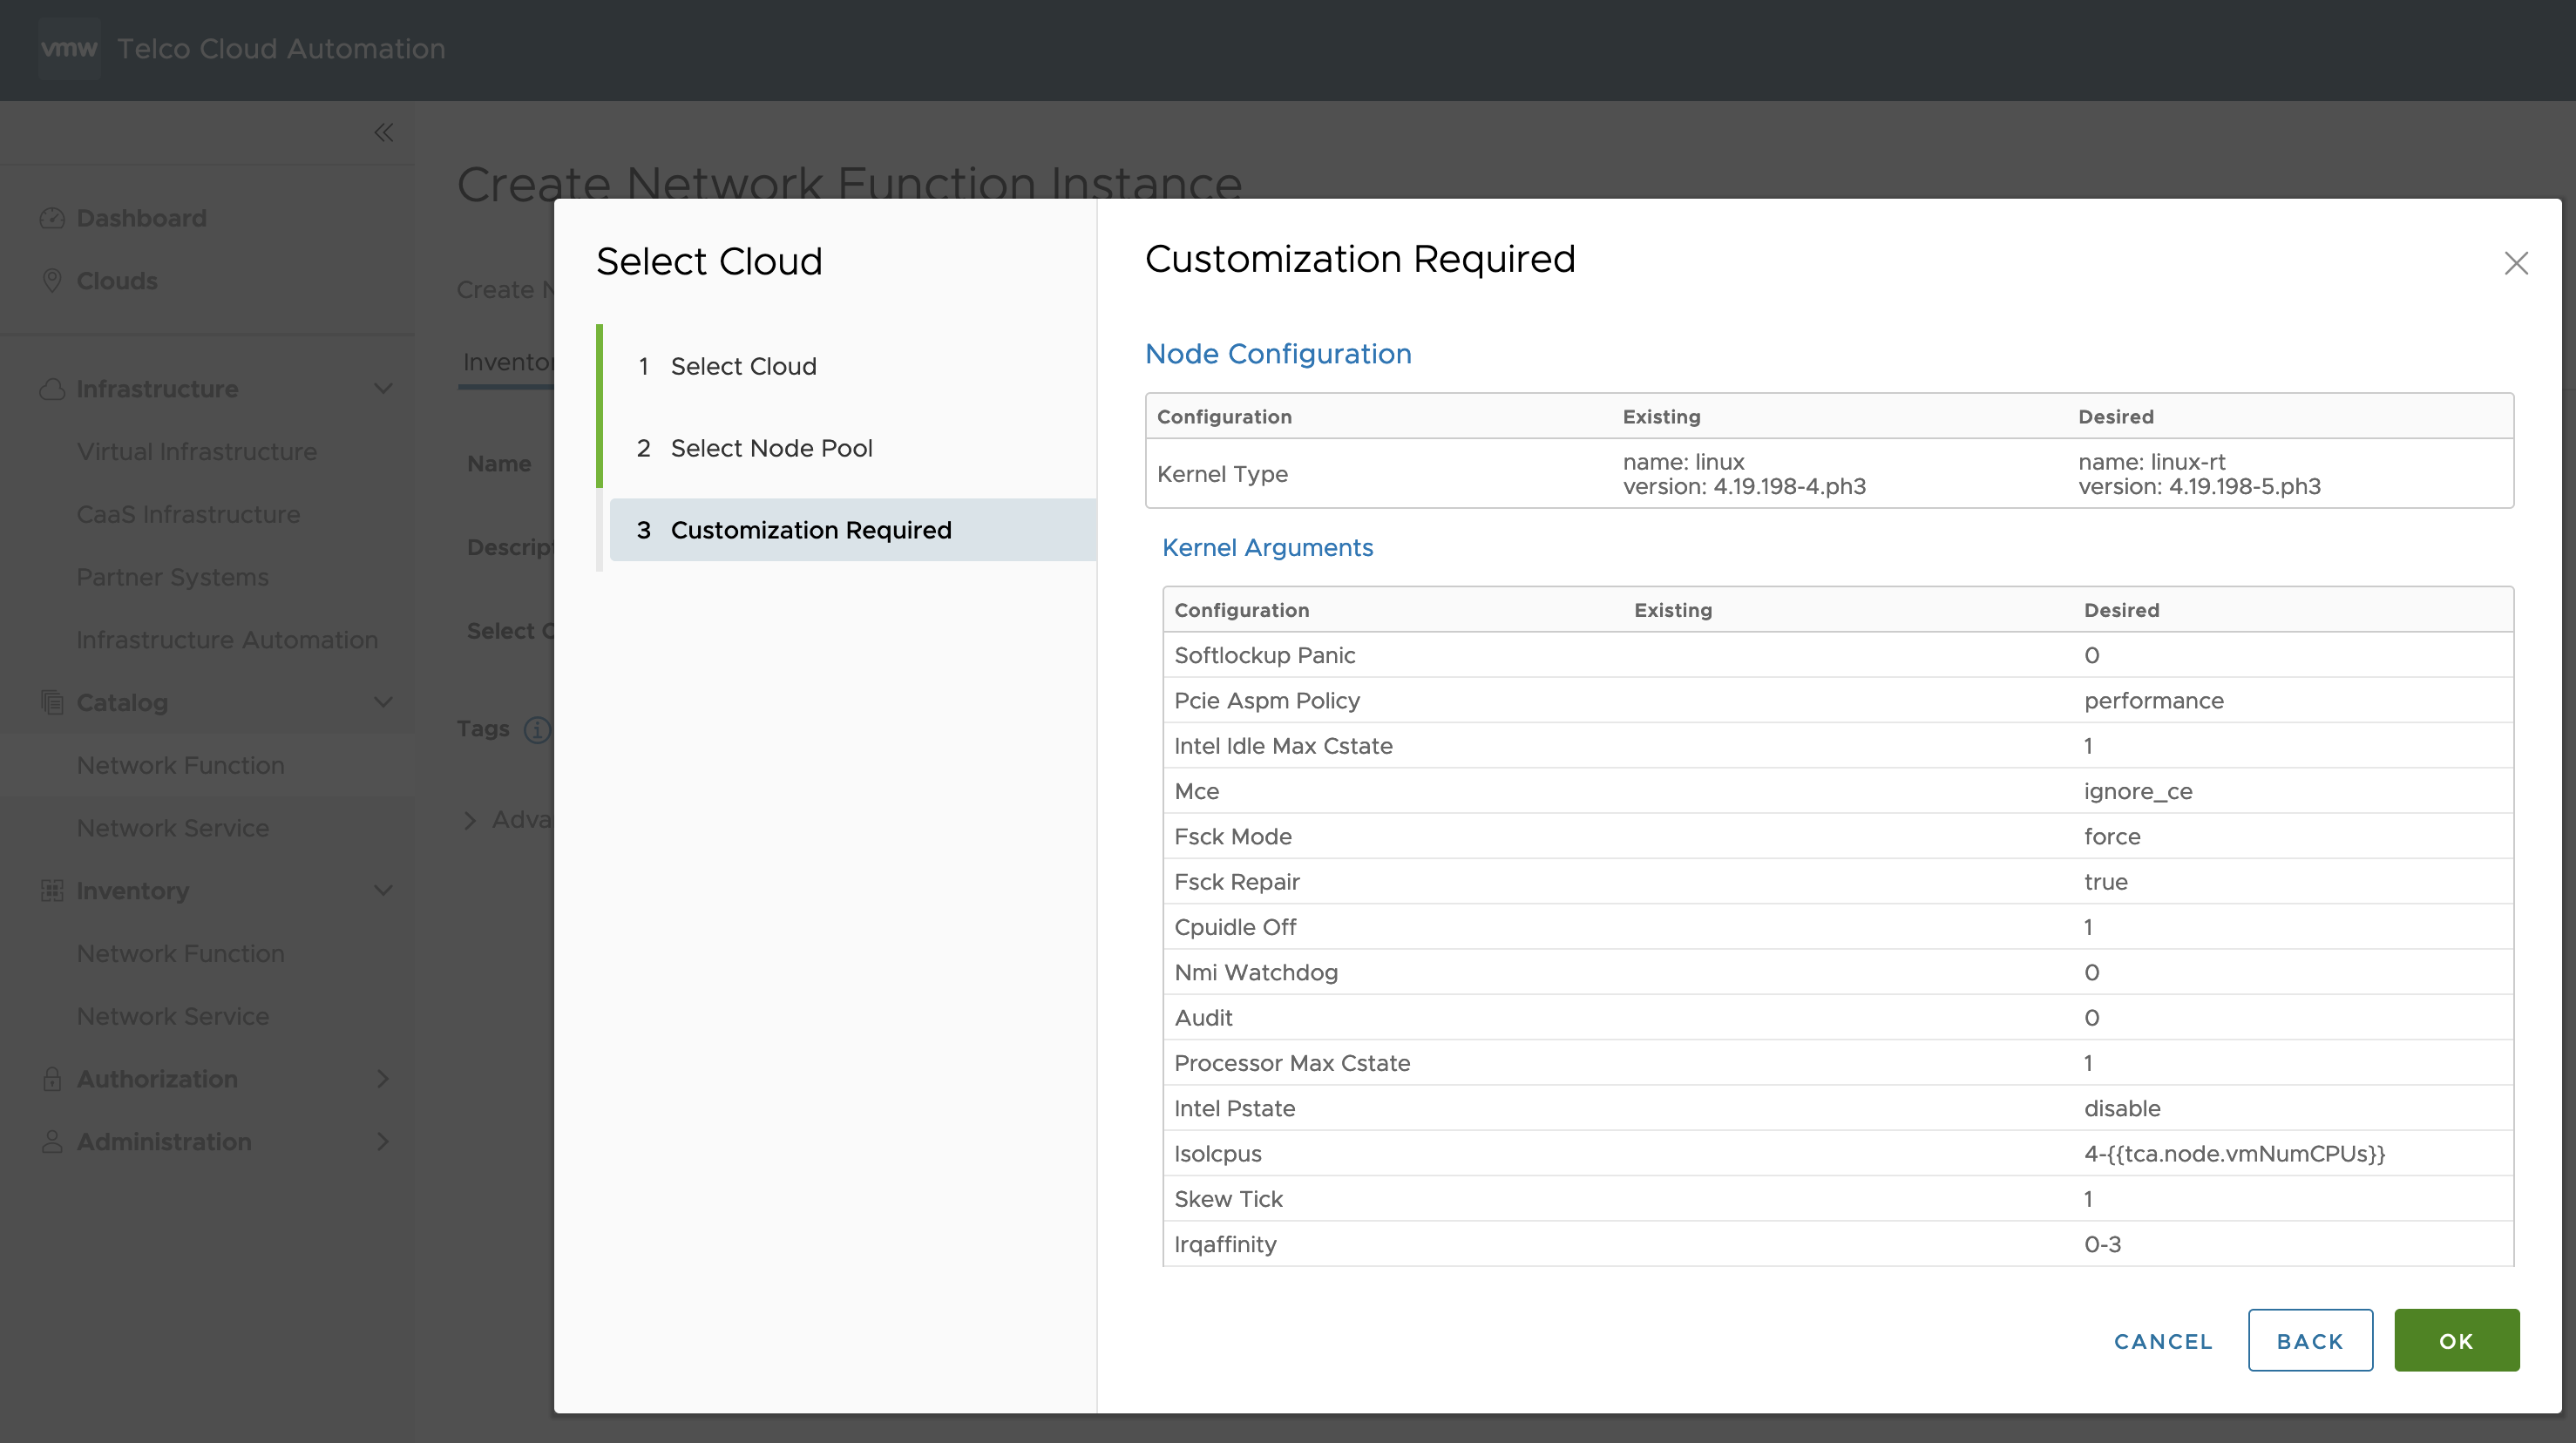
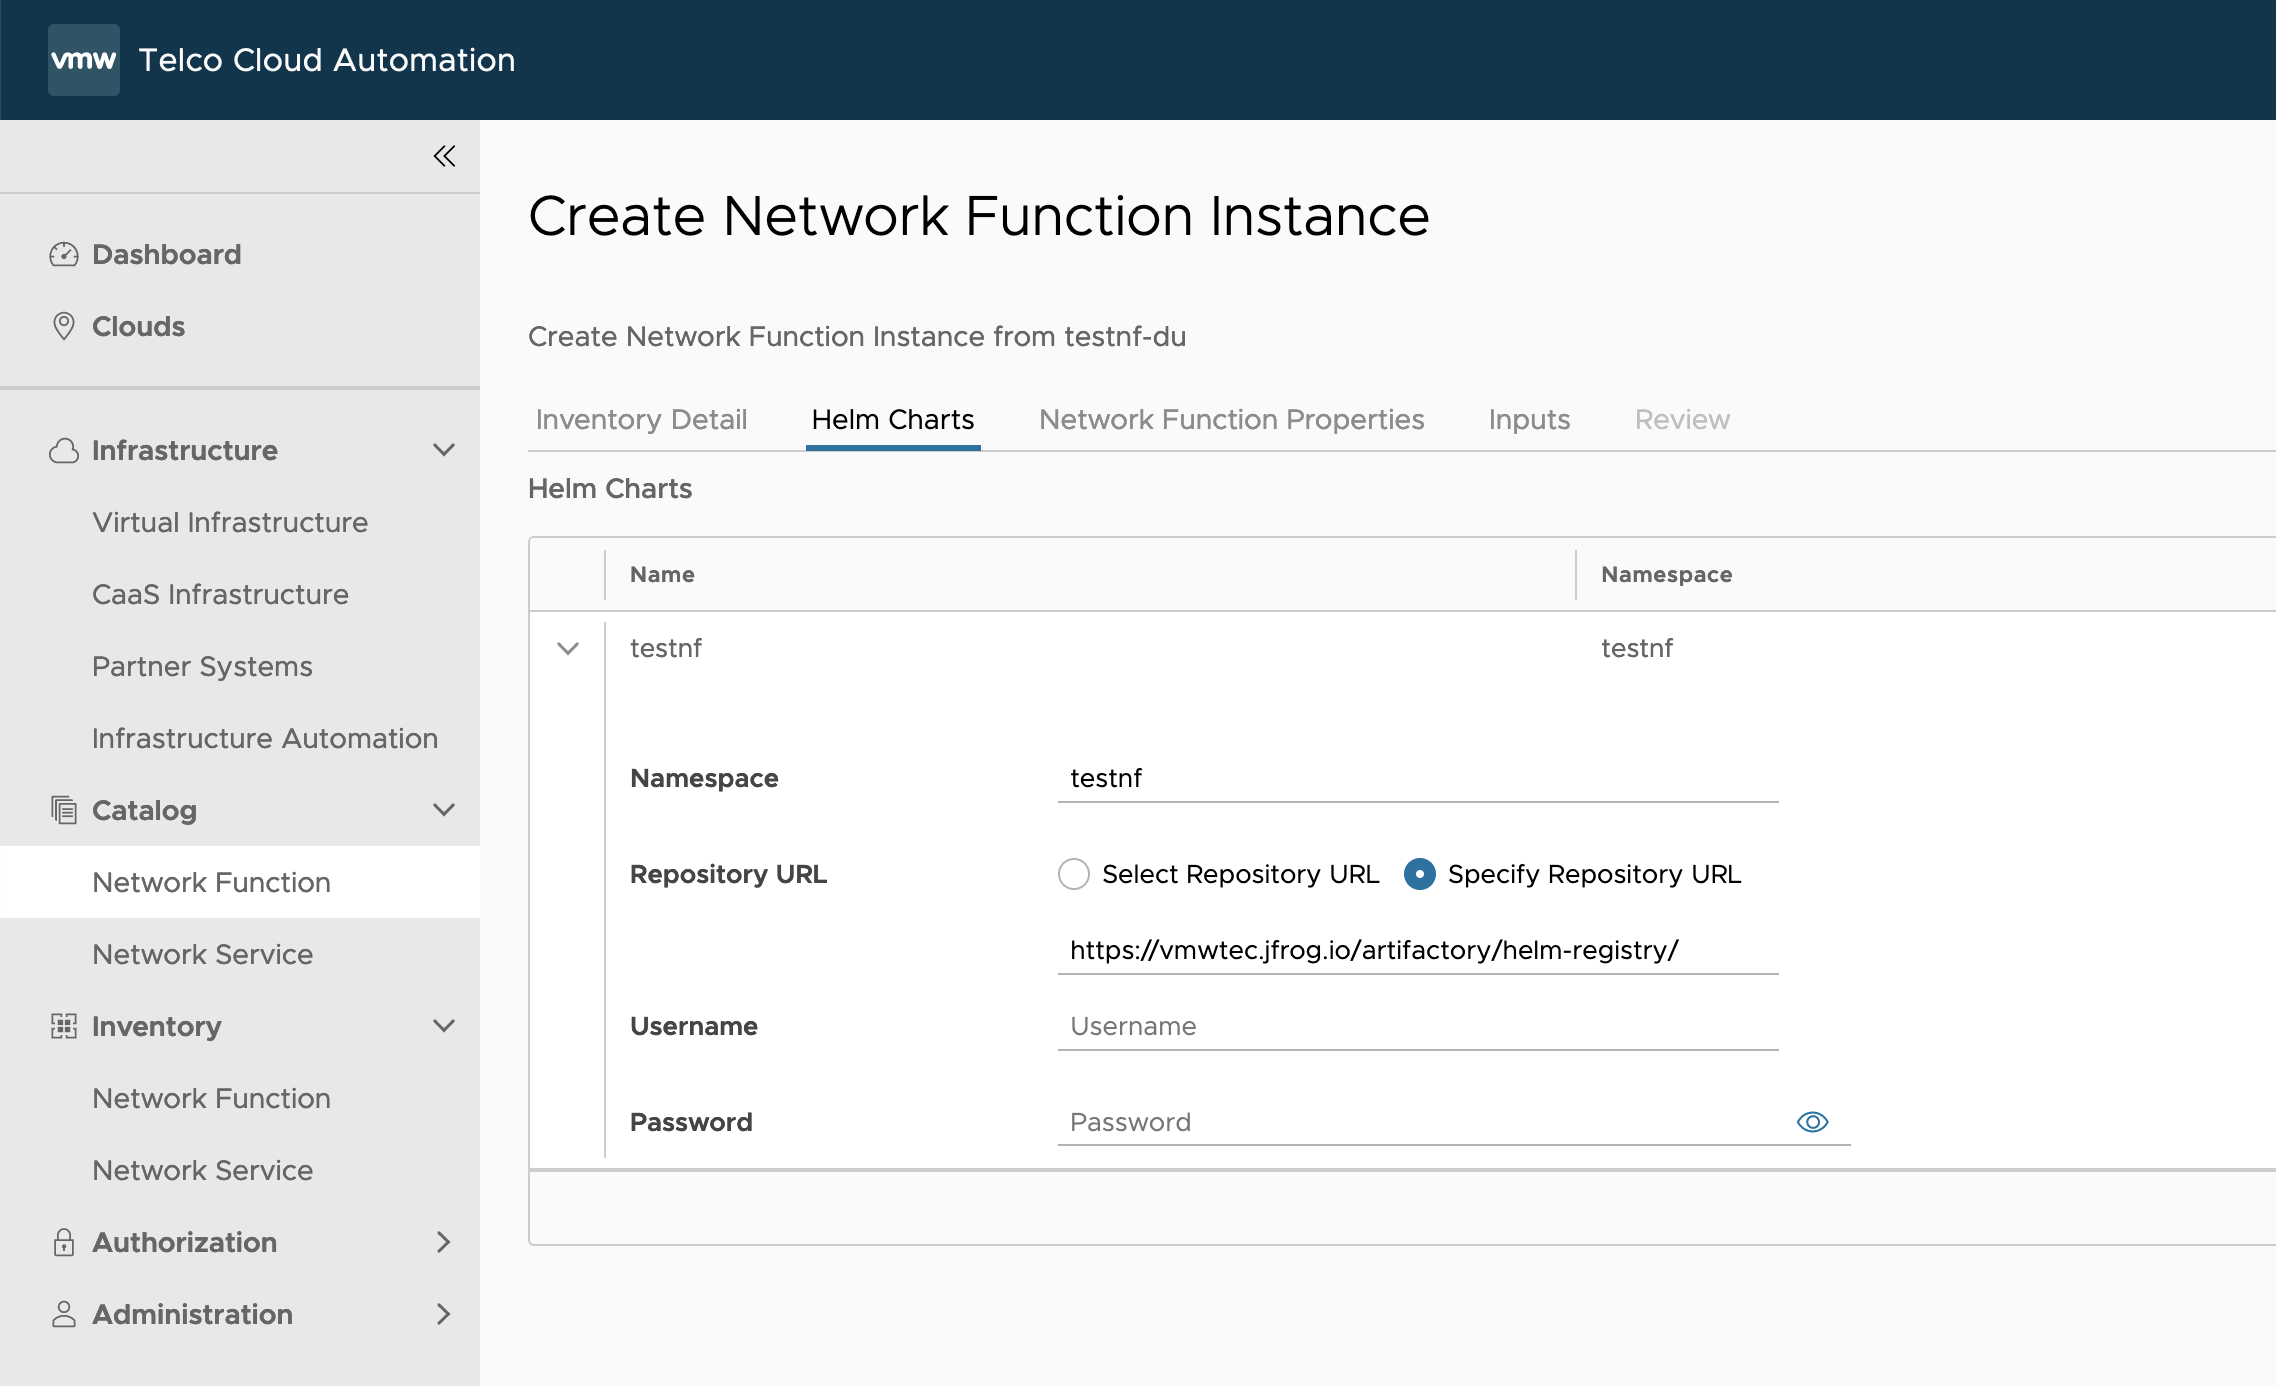
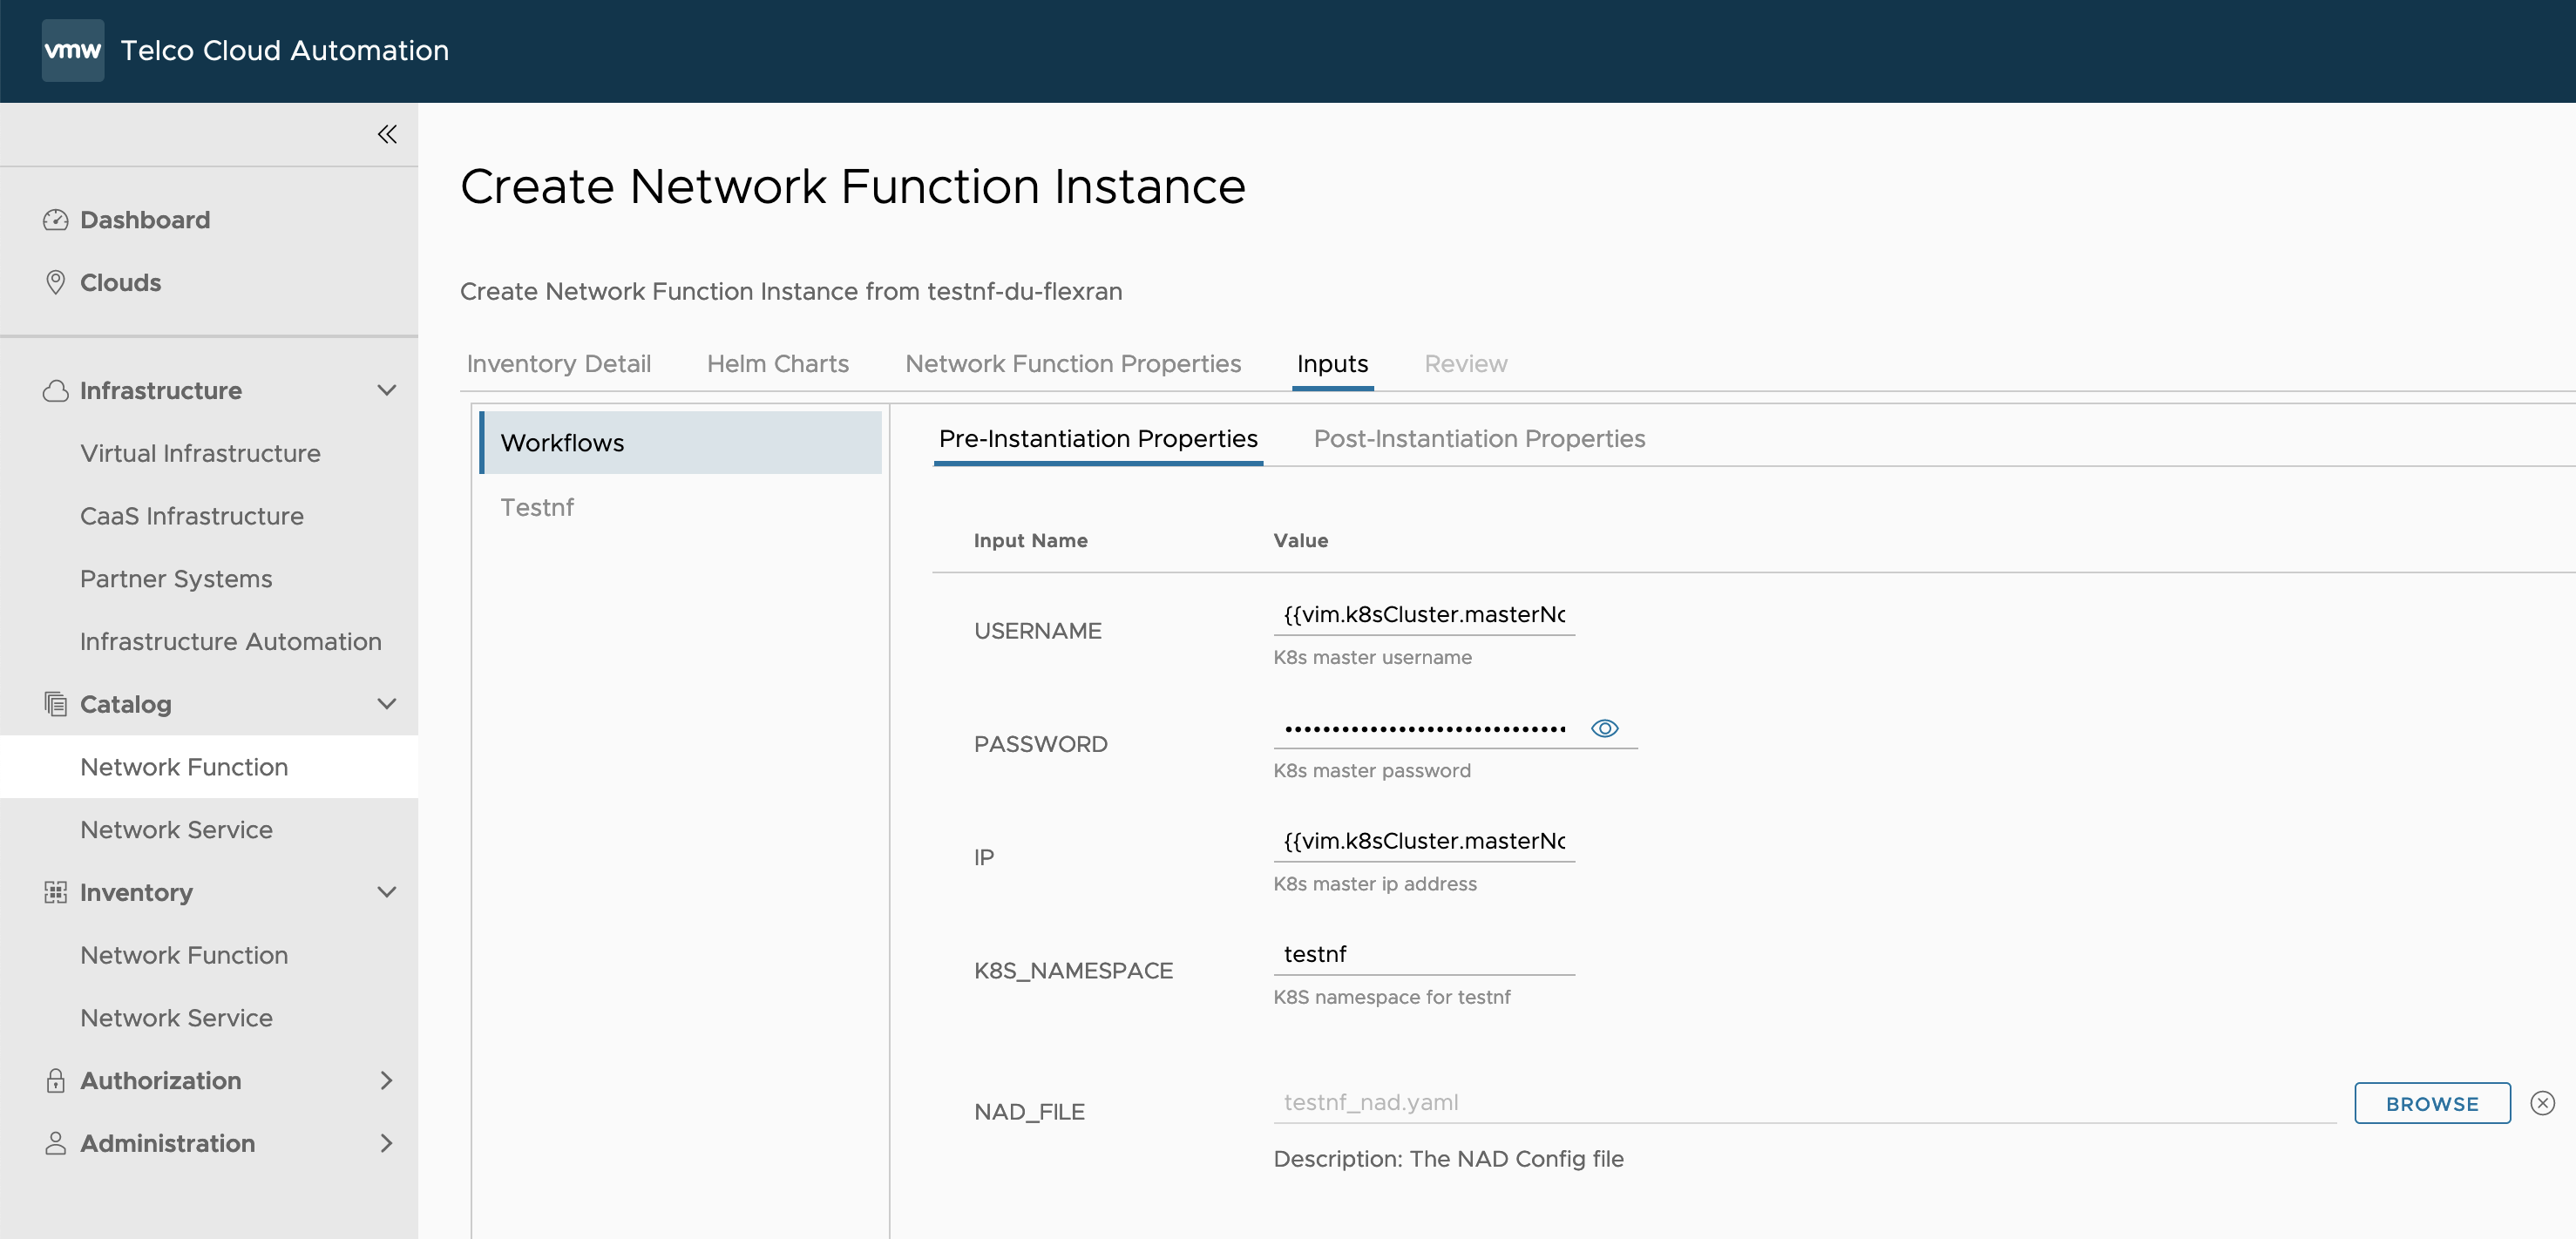
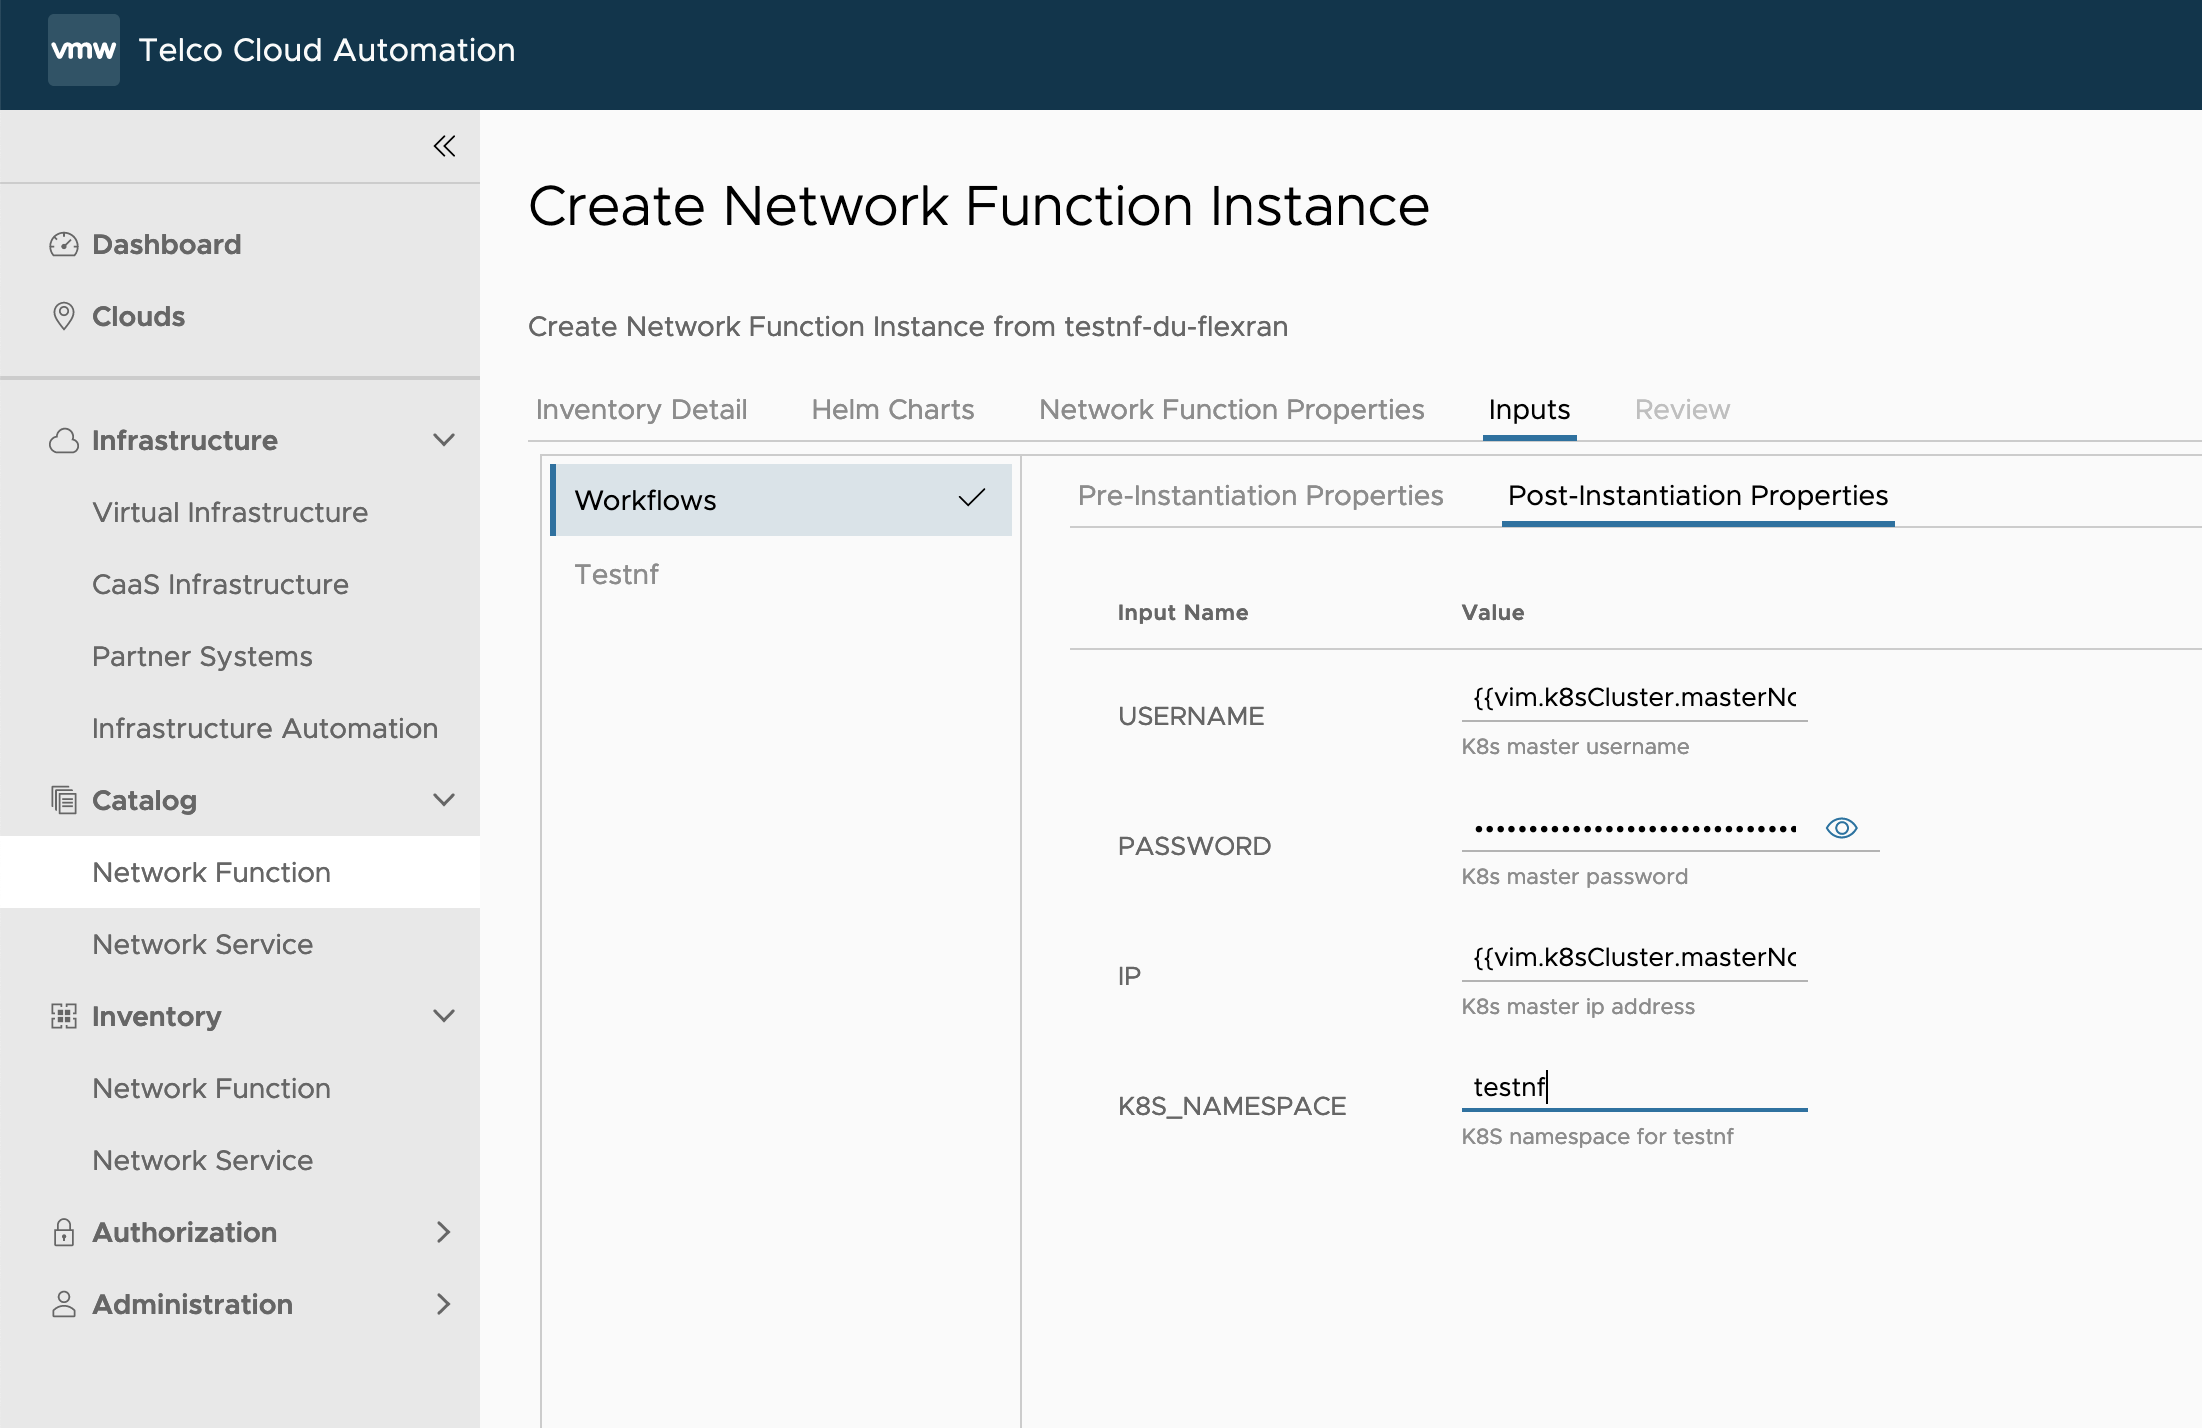
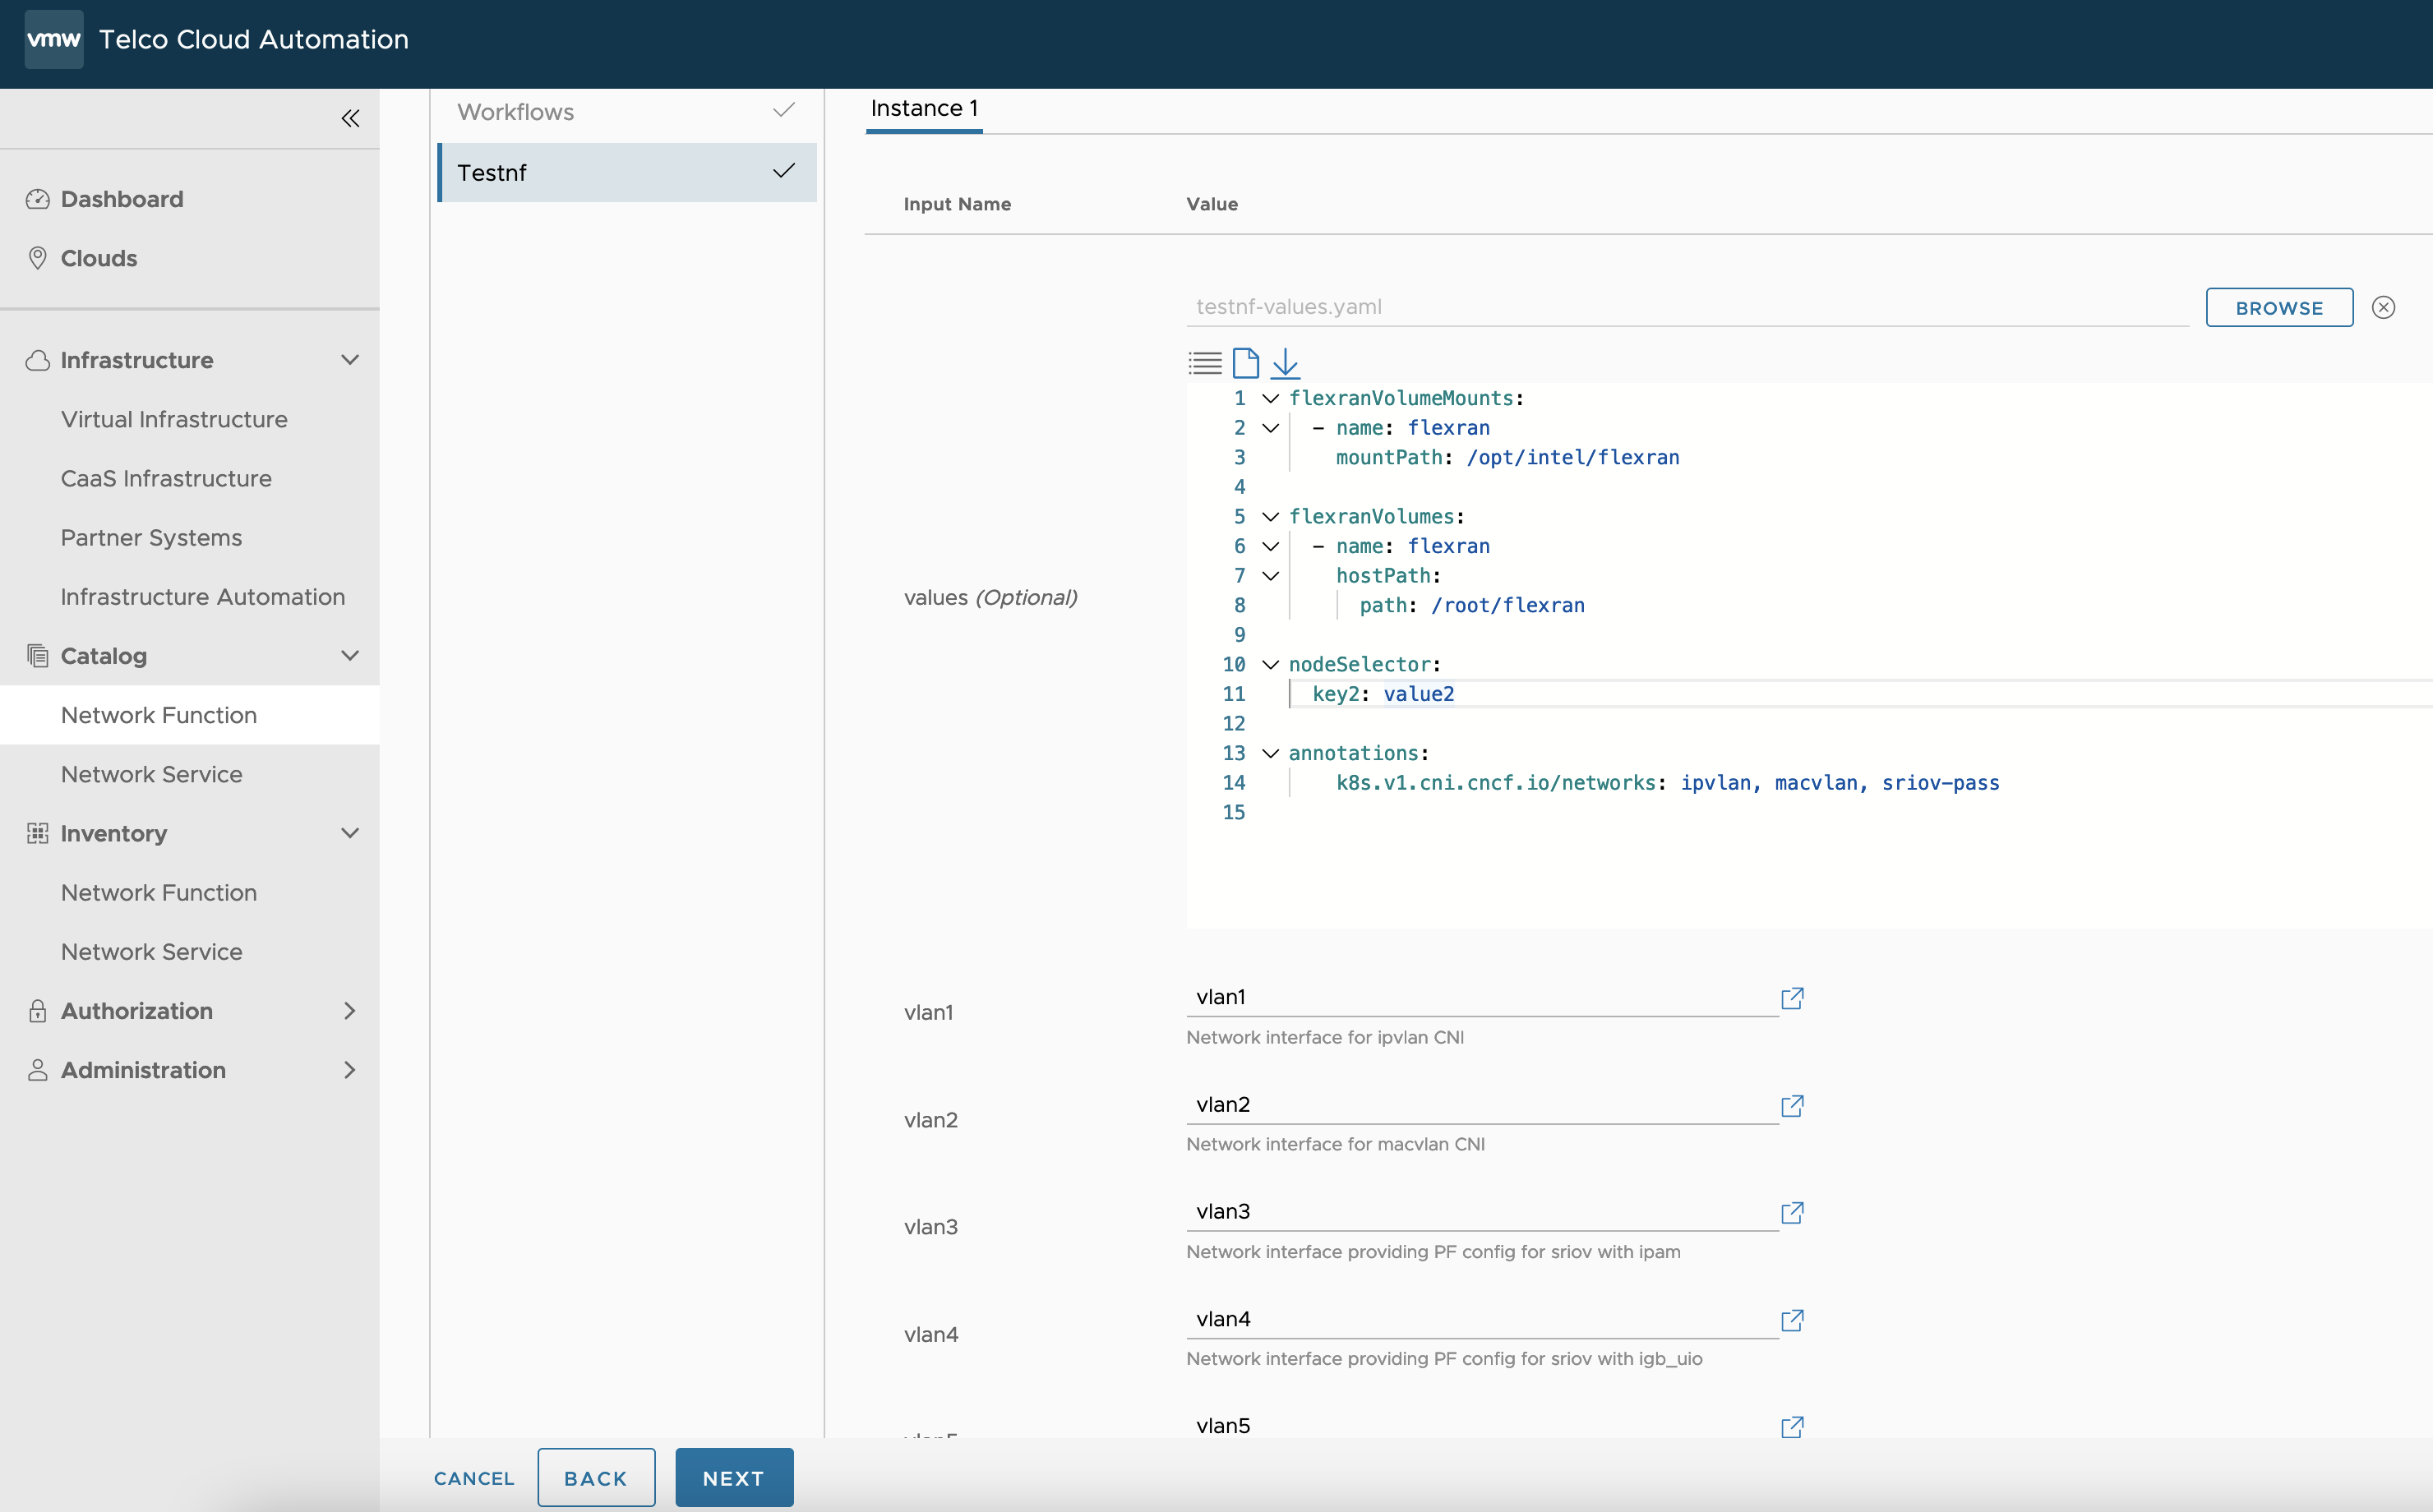
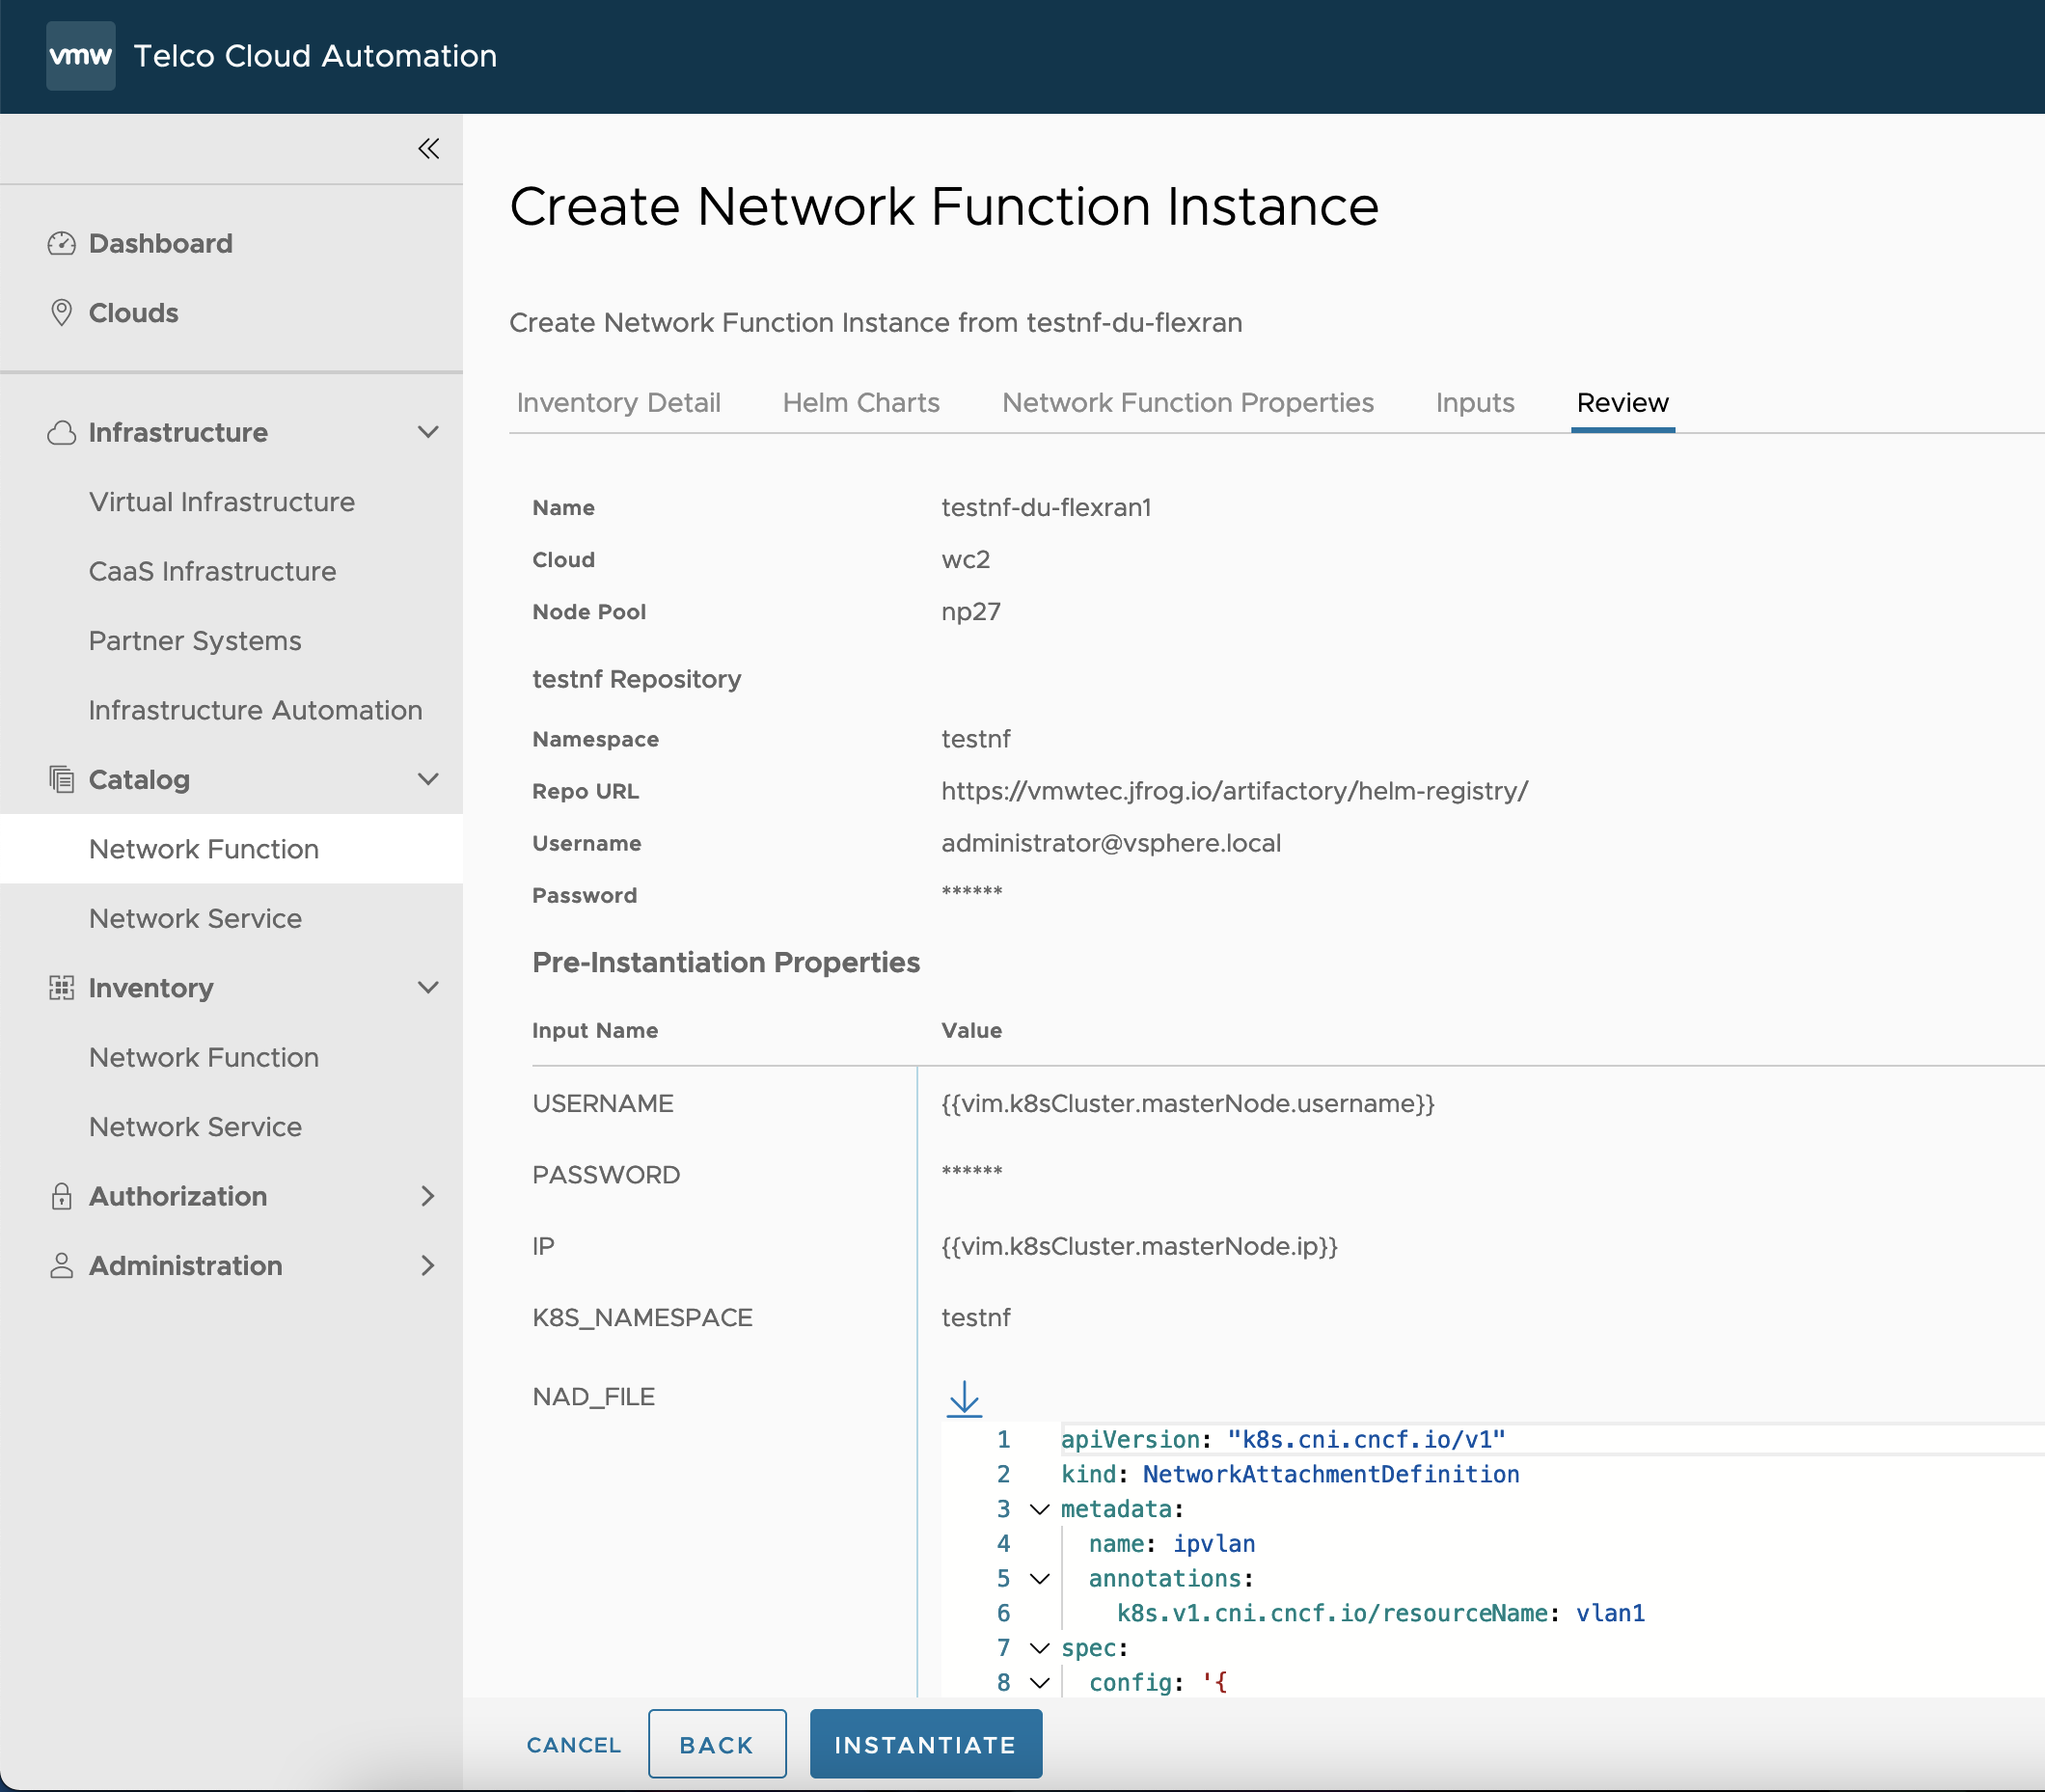
This topic documents steps for how to instantiate testnf-du-flexran CNF.
Once the prerequisites are satisified, you can login to the TCA GUI and follow the steps below to instantiate testnf-du-flexran CNF.
Prerequisites
Prepare NAD file for multus networks.
A sample NAD yaml file "testnf_nad.yaml" is as following.
apiVersion: "k8s.cni.cncf.io/v1"
kind: NetworkAttachmentDefinition
metadata:
  name: ipvlan
  annotations:
    k8s.v1.cni.cncf.io/resourceName: vlan1
spec:
  config: '{
      "cniVersion": "0.3.0",
      "name": "ipvlan",
      "plugins": [
        {

          "type": "ipvlan",
          "master": "vlan1",
          "ipam": {
            "type": "whereabouts",
            "datastore": "kubernetes",
            "kubernetes": { "kubeconfig": "/etc/cni/net.d/whereabouts.d/whereabouts.kubeconfig" },
            "range": "192.167.1.0/24",
            "exclude": [
              "192.167.1.0/28"
            ]
          }
        }
      ]
    }'
---
apiVersion: "k8s.cni.cncf.io/v1"
kind: NetworkAttachmentDefinition
metadata:
  name: macvlan
  annotations:
    k8s.v1.cni.cncf.io/resourceName: vlan2
spec:
  config: '{
      "cniVersion": "0.3.0",
      "name": "macvlan",
      "plugins": [
        {
          "type": "macvlan",
          "master": "vlan2",
          "ipam": {
            "type": "whereabouts",
            "datastore": "kubernetes",
            "kubernetes": { "kubeconfig": "/etc/cni/net.d/whereabouts.d/whereabouts.kubeconfig" },
            "range": "192.167.2.0/24",
            "exclude": [
              "192.167.2.0/28"
            ]
          }
        }
      ]
    }'
---
apiVersion: "k8s.cni.cncf.io/v1"
kind: NetworkAttachmentDefinition
metadata:
  name: sriov-pass
  annotations:
    k8s.v1.cni.cncf.io/resourceName: intel.com/sriovpass
spec:
  config: '{
      "cniVersion": "0.3.0",
      "name": "sriov-pass-network",
      "plugins": [
        {
          "type": "sriov",
          "ipam": {
            "type": "whereabouts",
            "datastore": "kubernetes",
            "kubernetes": { "kubeconfig": "/etc/cni/net.d/whereabouts.d/whereabouts.kubeconfig" },
            "range": "192.167.3.0/24",
            "exclude": [
              "192.167.3.0/28"
            ]
          }
        },
        {
          "type": "sbr"
        },
        {
           "type": "tuning",
           "sysctl": {
             "net.core.somaxconn": "500"
           },
           "promisc": true
        }
      ]
    }'
(Optional) Prepare values.yaml
If you want to enable ipvlan and macvlan for the testnf pod, the following multus annotation needs to be specified. Notice that multus annotations section is optional, it is only required when extra multus networks are required.
annotations:
  k8s.v1.cni.cncf.io/networks:ipvlan,macvlan,sriov-pass
If there are multiple node pools which have the same configuration, you might need to specify nodeSelector explicitly as following:
nodeSelector:
  key2:value2
If flexran bits have been uploaded to k8s node, for example, the bits are under "/home/capv/flexran", the volume mount could be specified in values.yaml so that the flexran bits are mounted to the testnf container.
flexranVolumeMounts:
  - name: flexran
    mountPath: /opt/intel/flexran

flexranVolumes:
  - name: flexran
    hostPath:
      path: /home/capv/flexran
To run FlexRAN timer mode test case successfully, the memory and CPU size might be tuned as following:
resources:
  limits:
    hugepages-1Gi: 16Gi
    memory: 32Gi
  requests:
    cpu: "12"
    hugepages-1Gi: 16Gi
    memory: 32Gi
(Optional) Prepare harbor
There are two ways to specify the helm chart locations. To simplify the configuration, you can use https://vmwtec.jfrog.io/artifactory/helm-registry/ as the default URL. However, if you want to upload the testnf-du helm chart to your own harbor for airgap or some other cases, you might need to prepare harbor, upload testnf-du helm chart to harbor, associatiate harbor to workload cluster and consume harbo repo during network function instantiation.
Prepare ptp4l.conf
To save your time, you can directly click "Network Functions" - "Catelog" - Expand "Artifacts-scripts" - Copy the file content of the sample ptp4l.conf file from CSAR /Artifacts/scripts/ptp4l.conf
[global]
#
# Default Data Set
#
twoStepFlag 1
slaveOnly 1
priority1 128
priority2 128
clockClass 248
clockAccuracy 0xFE
offsetScaledLogVariance 0xFFFF
free_running 0
freq_est_interval 1
dscp_event 0
dscp_general 0
#dataset_comparison G.8275.x
#G.8275.defaultDS.localPriority 128
#G.8275.portDS.localPriority 128
#
# Port Data Set
#
logAnnounceInterval -3
logSyncInterval -4
logMinDelayReqInterval -4
logMinPdelayReqInterval 0
announceReceiptTimeout 3
syncReceiptTimeout 100
delayAsymmetry 0
fault_reset_interval ASAP
#fault_reset_interval 4
neighborPropDelayThresh 20000000
#
# Run time options
#
assume_two_step 0
logging_level 6
path_trace_enabled 0
follow_up_info 0
hybrid_e2e 0
tx_timestamp_timeout 100
use_syslog 1
verbose 0
summary_interval 0
kernel_leap 1
check_fup_sync 0
#
# Servo Options
#
pi_proportional_const 0.0
pi_integral_const 0.0
pi_proportional_scale 0.0
pi_proportional_exponent -0.3
pi_proportional_norm_max 1
pi_integral_scale 0.5
pi_integral_exponent 1
pi_integral_norm_max 0.3
step_threshold 0.0
first_step_threshold 0.00002
max_frequency 900000000
clock_servo pi
sanity_freq_limit 200000000
ntpshm_segment 0
#
# Transport Options
#
transportSpecific 0x0
ptp_dst_mac 01:1B:19:00:00:00
p2p_dst_mac 01:80:C2:00:00:0E
udp_ttl 1
udp6_scope 0x0E
uds_address /var/run/ptp4l
#uds_address /var/run/ptp4l
#
# Default Interface Options
#
# clock_type OC
network_transport L2
delay_mechanism E2E
time_stamping hardware
tsproc_mode filter
delay_filter moving_median
delay_filter_length 50
egressLatency 0
ingressLatency 0
boundary_clock_jbod 0
#
# Clock Description

#productDescription ;;
revisionData ;;
manufacturerIdentity 00:00:00
userDescription ;
timeSource 0xA0
domainNumber 24

[ptp]
(Optional) Upload the flexran bits to the target k8s node
For the testnf consumers such as intel who has the flexran license, the flexran bit could be uploaded to k8s node so that TestNF pod can consume it. The FlexRAN directory should be compiled first since TestNF does not contain a compiler. See Intel documentation on how to compile FlexRAN. Also, the directory should contain lib/icc with ICC runtime libs in it. https://software.intel.com/content/www/us/en/develop/articles/intel-c-compiler-runtime-libraries-in-intel-system-studio.html TestNF will detect this directory and pick up the libs. Because by default, FlexRAN will try to obtain ICC runtime libs from ICC directory. Since TestNF does not ship with ICC, they won't be there and we have to supply the runtime through lib/icc.
Procedure
Results
Once the above steps were executed, the testnf-du-flexran can be instantiatied successfully with some post-instantiation workflows to ensure that the pod, node, vm customizations are realized.
What to do next
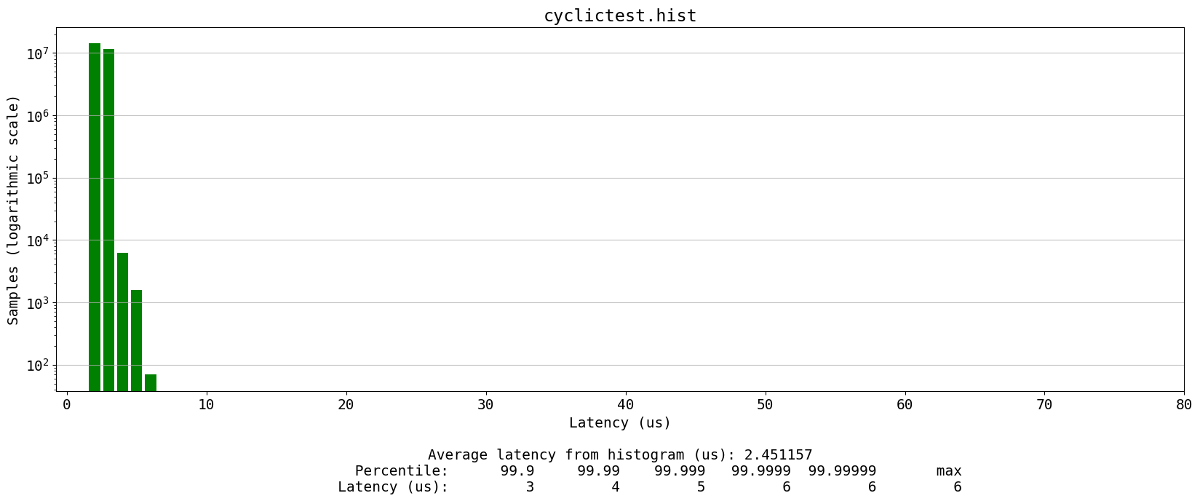
When testnf-du-flexran CNF is ready, you can bash to the testnf-du-flexran pod to run cyclic test tool, FlexRAN l1app, l2app, some dpdk apps such as testpmd, pktgen, performance tools such as iperf, for example:
capv@wc0-master-control-plane-xlwrz [ ~ ]$ POD_NS=testnf
capv@wc0-master-control-plane-xlwrz [ ~ ]$ POD_NAME=$(kubectl get pods --namespace $POD_NS -l "app.kubernetes.io/name=testnf-du-flexran" -o jsonpath="{.items[0].metadata.name}")
capv@wc0-master-control-plane-xlwrz [ ~ ]$ kubectl -n $POD_NS exec -it $POD_NAME -- bash

====================================================================================
Environment Variables:
====================================================================================
RTE_SDK=
RTE_TARGET=
WIRELESS_SDK_TARGET_ISA=avx512
RPE_DIR=/opt/intel/flexran/dpdk/libs/ferrybridge
CPA_DIR=/opt/intel/flexran/dpdk/libs/cpa
ROE_DIR=/opt/intel/flexran/dpdk/libs/roe
XRAN_DIR=/opt/intel/flexran/dpdk/xran
DIR_WIRELESS_SDK_ROOT=/opt/intel/flexran/dpdk/sdk
SDK_BUILD=build-avx512-icc
DIR_WIRELESS_SDK=/opt/intel/flexran/dpdk/sdk/build-avx512-icc
FLEXRAN_SDK=/opt/intel/flexran/dpdk/sdk/build-avx512-icc/install
DIR_WIRELESS_FW=/opt/intel/flexran/dpdk/framework
DIR_WIRELESS_TEST_4G=/opt/intel/flexran/dpdk/tests/lte
DIR_WIRELESS_TEST_5G=/opt/intel/flexran/dpdk/tests/nr5g
DIR_WIRELESS_TABLE_5G=/opt/intel/flexran/dpdk/bin/nr5g/gnb/l1/table
====================================================================================
root [ /opt/intel/flexran/dpdk ]# cyclic-test-auto -h

Usage: /opt/vmwaretools/cyclic-test-auto [OPTIONS] [VALUE]
OPTIONS:
  -D | --Duration       Run time duration. Format: 1s, 1m, 1h. Default: 1m
  -E | --Expect-max     Expected max threshold. Format: number in usec. Default: 25
  -l | --log-off        Do not keep log file to save space
  -o | --output         Output folder. Default: /tmp
  -h | --help           print help
root [ /opt/intel/flexran/dpdk ]# cyclic-test-auto -o /tmp/cyclic/

root [ /opt/intel/flexran/dpdk ]# ls /tmp/cyclic/
cyclictest.hist-plot.png  cyclictest.result
