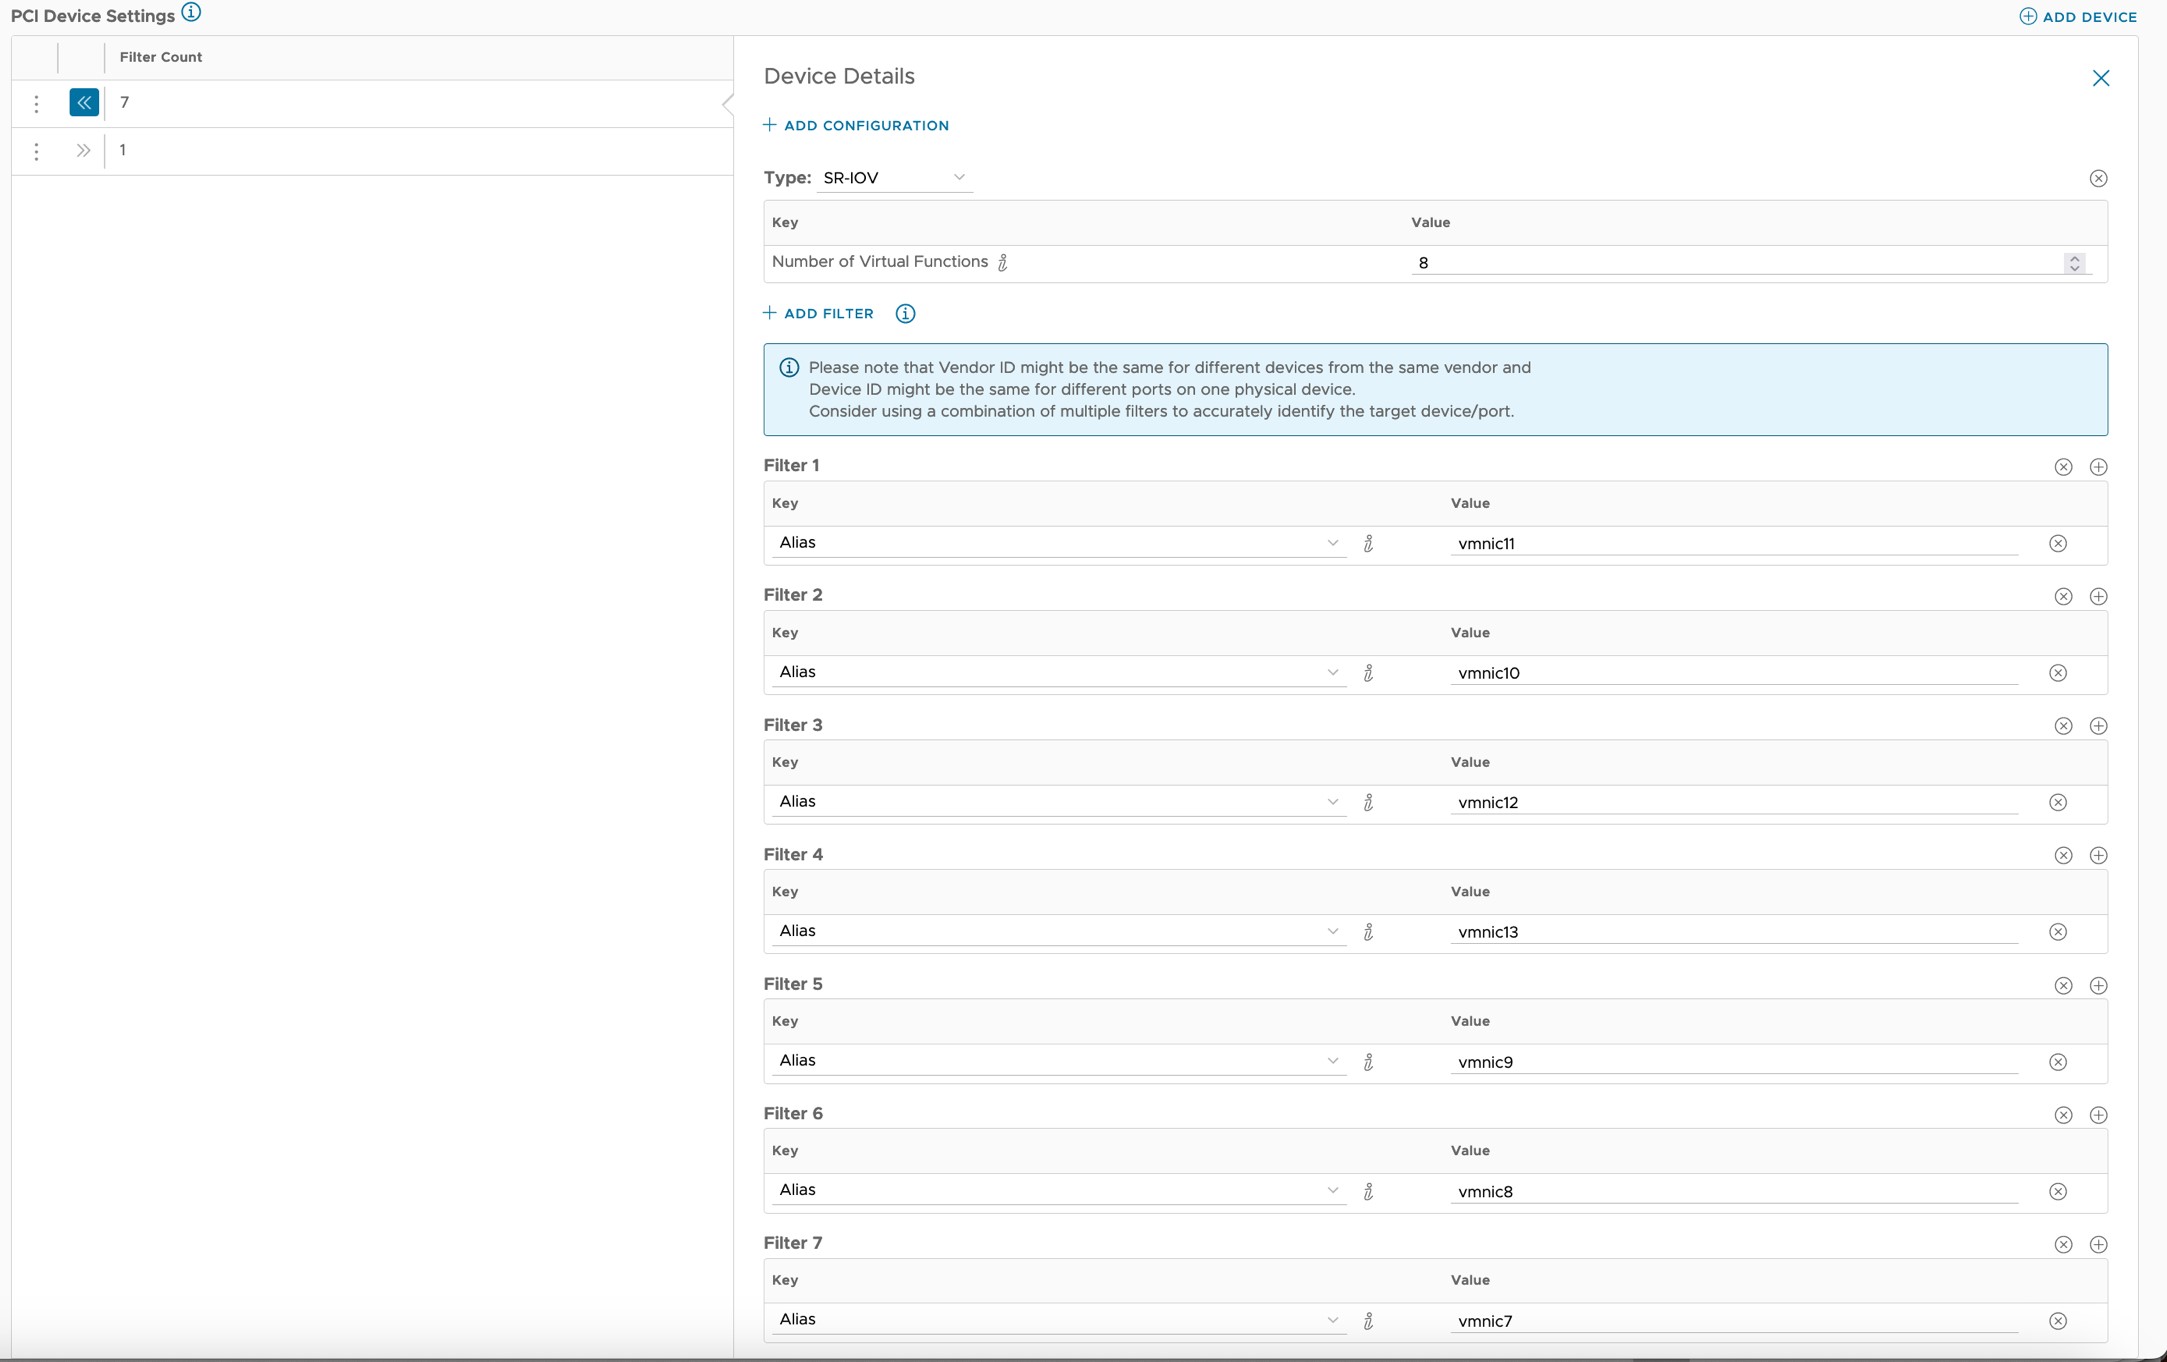
Create a Host Profile with Passthrough enabled on PF0 and SR-IOV enabled on other Physical Functions (PFs) of the STS card. After creating the host profile, apply it to a cell site group and add the ESXi host with the STS card to the cell site group.
Procedure
- Navigate to Infrastructure > Infrastructure Automation > Configuration > Host Profile in the TCA Manager.
- Add a host profile, and configure the host profile as follows:
- Add a PCI device of the PASSTHROUGH type to enable Passthrough on PF0 of the STS card.

- Add PCI devices of the SR-IOV type to enable SR-IOV on the remaining PFs of the STS card.
Note: The maximum number of PFs is 8 for STS2 and 12 for STS4. Specify only the PFs you want to use while creating a Host Profile and leave some of the PFs unused.
In this example, an STS4 card with a total of 12 PFs is used. Out of 12 PFs, 8 PFs are used in the Host Profile (1 Passthrough and 7 SRIOV).

- Create a PCI Group for PF0.

- Create PCI Groups for the remaining PFs. In this example, the PCI group ‘ptp4’ is created for PF ‘vmnic9’.

Example: Sample JSON of a Host Profile with a total of 8 PFs
{ "name": "hp-sts-ptp", "pciDevices": [ { "filters": [ { "alias": "vmnic13" }, { "alias": "vmnic12" }, { "alias": "vmnic11" }, { "alias": "vmnic10" }, { "alias": "vmnic9" }, { "alias": "vmnic8" }, { "alias": "vmnic7" } ], "actions": [ { "type": "SRIOV", "maxVfs": 8 } ] }, { "filters": [ { "vendorId": "0x8086", "deviceIds": [ "0x1591" ], "indices": [ 0 ] } ], "actions": [ { "type": "PASSTHROUGH", "passthroughEnabled": true } ] } ], "pciGroups": [ { "name": "ptp8", "filters": [ { "sriovEnabled": true, "alias": "vmnic13" } ] }, { "name": "ptp7", "filters": [ { "sriovEnabled": true, "alias": "vmnic12" } ] }, { "name": "ptp6", "filters": [ { "sriovEnabled": true, "alias": "vmnic11" } ] }, { "name": "ptp5", "filters": [ { "sriovEnabled": true, "alias": "vmnic10" } ] }, { "name": "ptp1", "filters": [ { "deviceIds": [ "0x1591" ], "vendorId": "0x8086", "indices": [ 0 ] } ] }, { "name": "ptp4", "filters": [ { "sriovEnabled": true, "alias": "vmnic9" } ] }, { "name": "ptp3", "filters": [ { "sriovEnabled": true, "alias": "vmnic8" } ] }, { "name": "ptp2", "filters": [ { "sriovEnabled": true, "alias": "vmnic7" } ] } ], "reservation": { "reservedCoresPerNumaNode": 1, "reservedMemoryPerNumaNode": 512, "minCoresForCPUReservationPerNumaNode": 3 }, "apiVersion": "telco.vmware.com/v1alpha1" } - Add a PCI device of the PASSTHROUGH type to enable Passthrough on PF0 of the STS card.
- Navigate to Infrastructure Automation > Domains.
- Create a cell site group using the host profile.
- Under Cell Site Groups, select the newly created cell site group and add the ESXi host with the STS card to the cell site group.