


You can rollback the VMware Telco Cloud Service Assurance patch to the base version or the previous version of the patch using the helm rollback command.
Procedure
You can perform rollback by executing the following commands inside the Deployment Container.
- Determine the Helm release name.
helm list
- Rollback to the immediately previous version.
helm rollback <helm release name>
- If you want to rollback to a specific version:
- Determine the version number by checking the Helm history.
helm history <helm release name>
- If required, check the configuration of your desired version using the following command:
helm get all <helm release name> --revision <desired version>
- Rollback to the required version.
helm rollback <helm release name> --revision <desired version>
- Determine the version number by checking the Helm history.
Patch Rollback using CLI Mode of Deployment
For example, in CLI based patch rollback, Revision number 1 refers to
VMware Telco Cloud Service Assurance 2.1 GA, Revision number 2 refers to
VMware Telco Cloud Service Assurance 2.1 Patch x, and Revision 3 refers to
VMware Telco Cloud Service Assurance 2.1 Patch y.
root [ ~/.kube ]# helm list
NAME    NAMESPACE       REVISION        UPDATED                                   STATUS     CHART          APP VERSION
tcsa    default         1               2022-12-01 10:14:03.020551529 +0000 UTC   deployed   tcsa-2.1.0   0.0.0
[root [ ~/.kube ]# helm history tcsa
REVISION        UPDATED                         STATUS          CHART           APP VERSION     DESCRIPTION
1               Tue Nov 29 20:33:56 2022        superseded      tcsa-2.1.0      0.0.0           Install complete
2               Thu Dec  1 09:24:11 2022        deployed        tcsa-2.1.0-1    0.0.0           Upgrade complete
- If you want to rollback to the base version, you must select Revision number 1. For example:
root [ ~/tcx-deployer/scripts ]# helm rollback tcsa 1
- If you want to rollback to the previously installed patch version, you must select Revision number 2. For example:
root [ ~/tcx-deployer/scripts ]# helm rollback tcsa 2
Patch Rollback on VMware Telco Cloud Automation Based Deployment using UI
To rollback, perform the following steps:
- To rollback the changes, navigate to , click the three dots against the CNF to rollback as part of the patch. Select the older CSAR file (for example,
tcsa.csar)that you onboarded and update the parameters same as the initial VMware Telco Cloud Service Assurance deployment. - Select Upgrade.
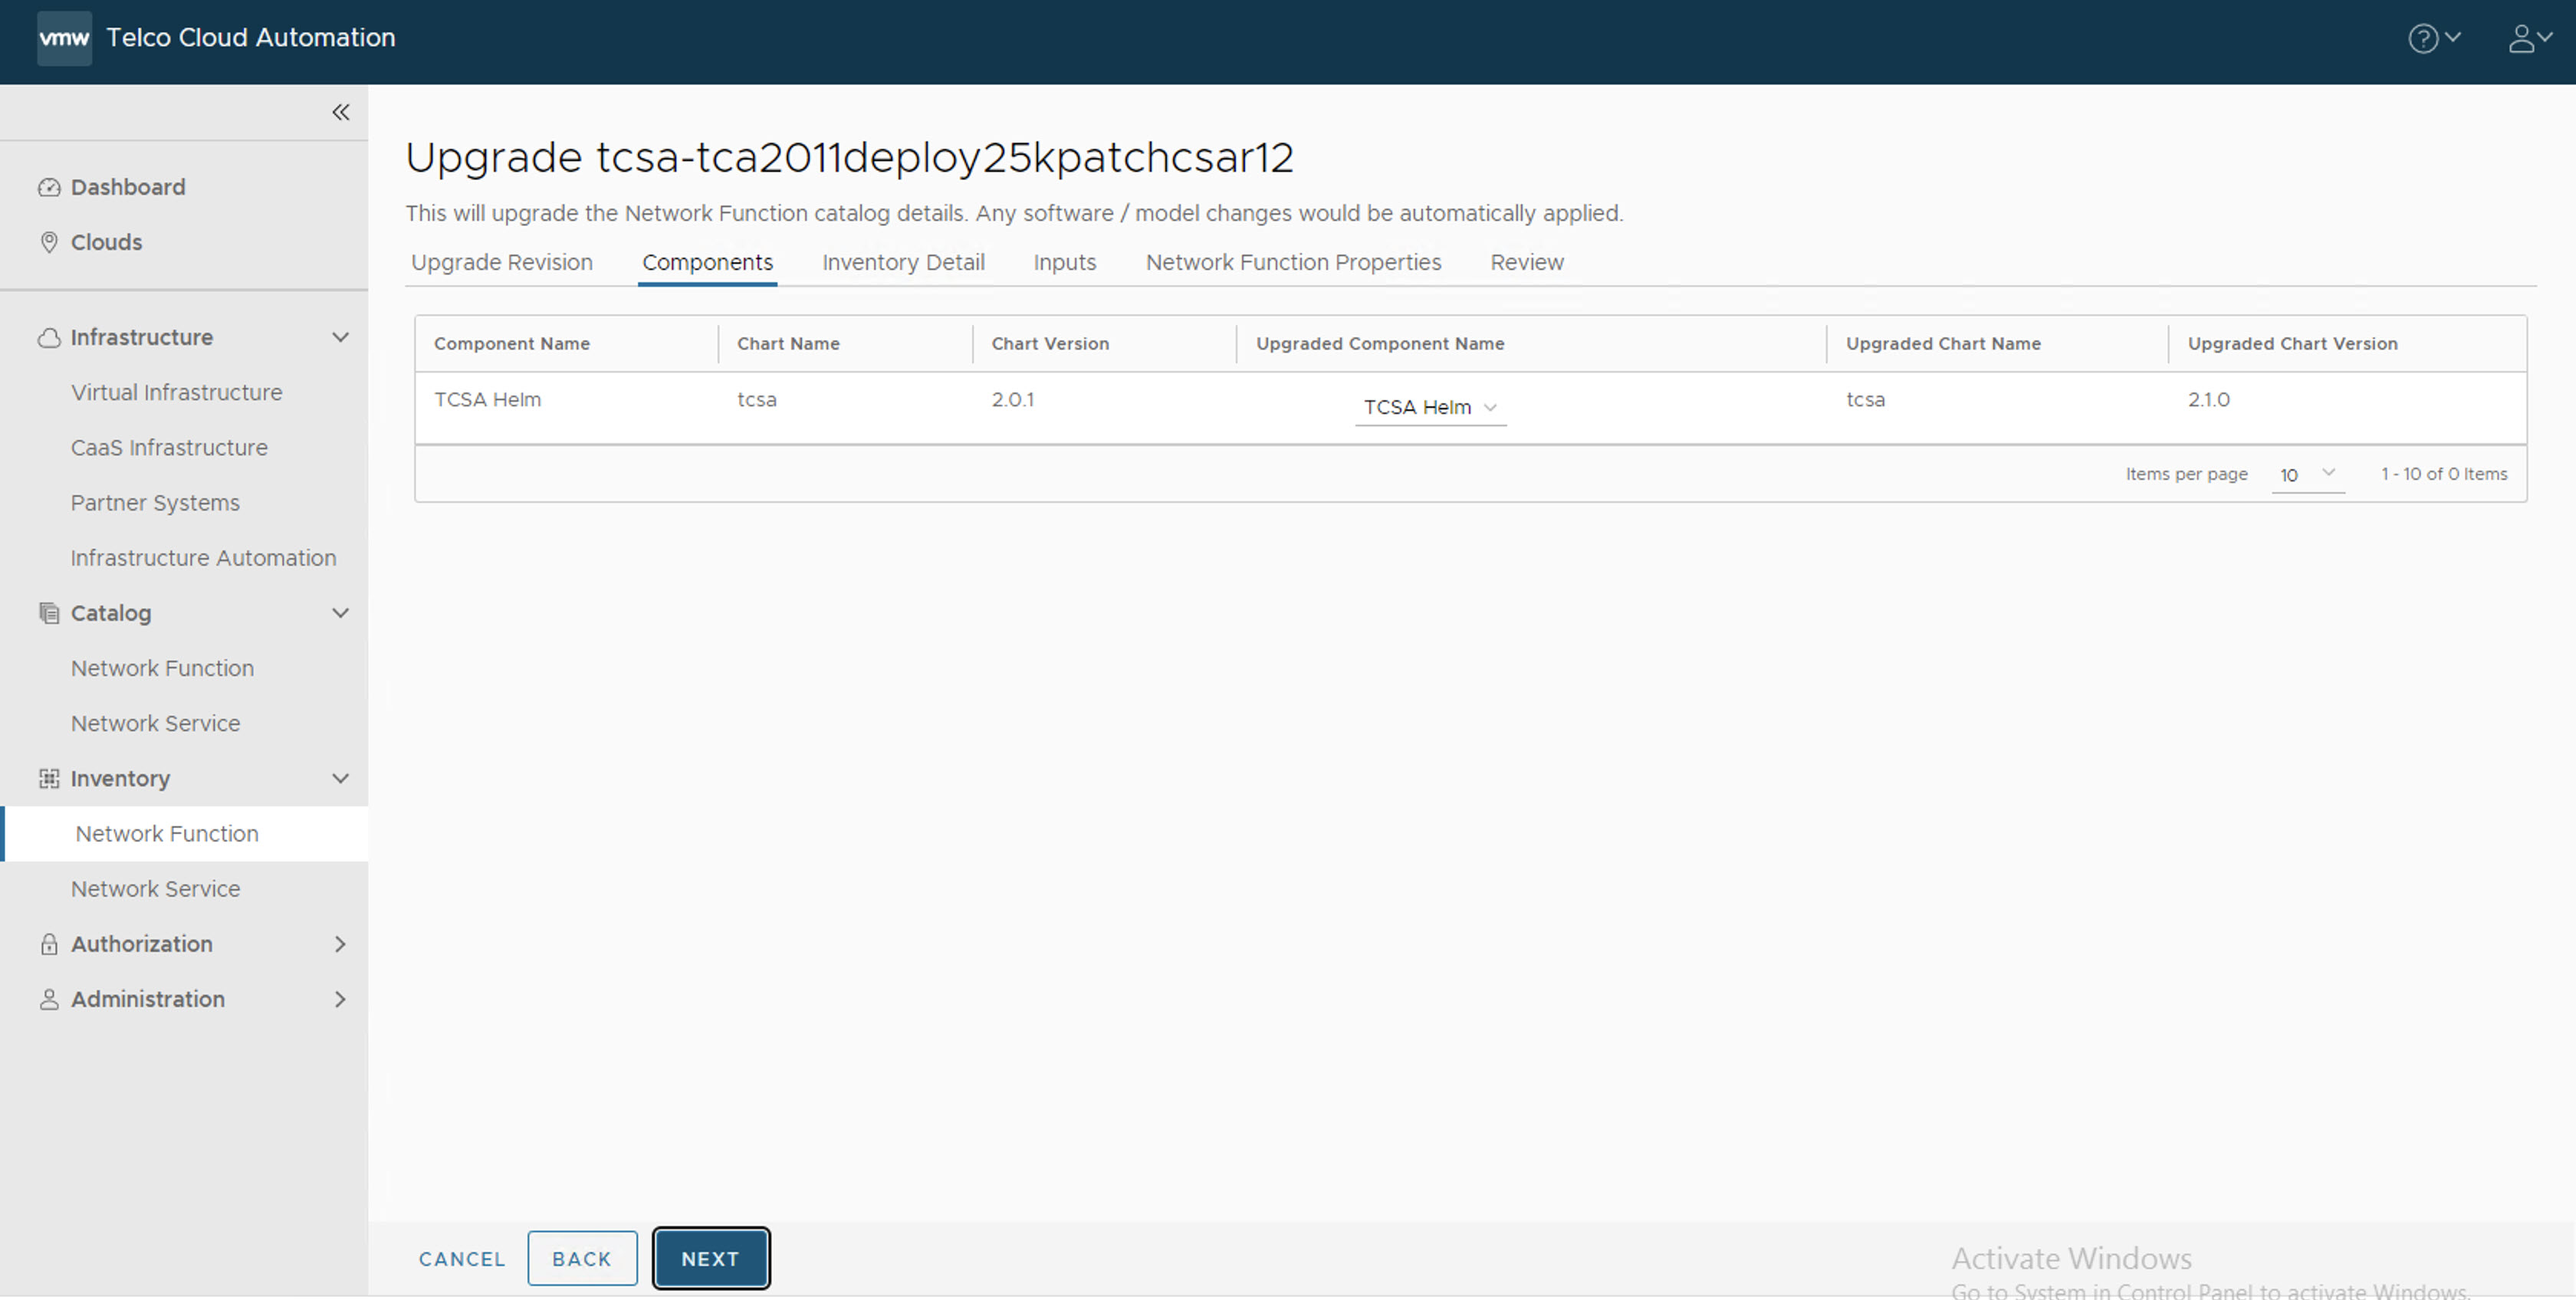
- In the Upgrade Revision section, select the old CSAR file that you onboarded. For example,
tcsa.csar. Click Next. - In the Components section, click Next.
- In the Inventory Detail section, set the Namespace to default and select the default library chart repository, that is, the /chartrepo/library endpoint of the associated registry, and click Next.

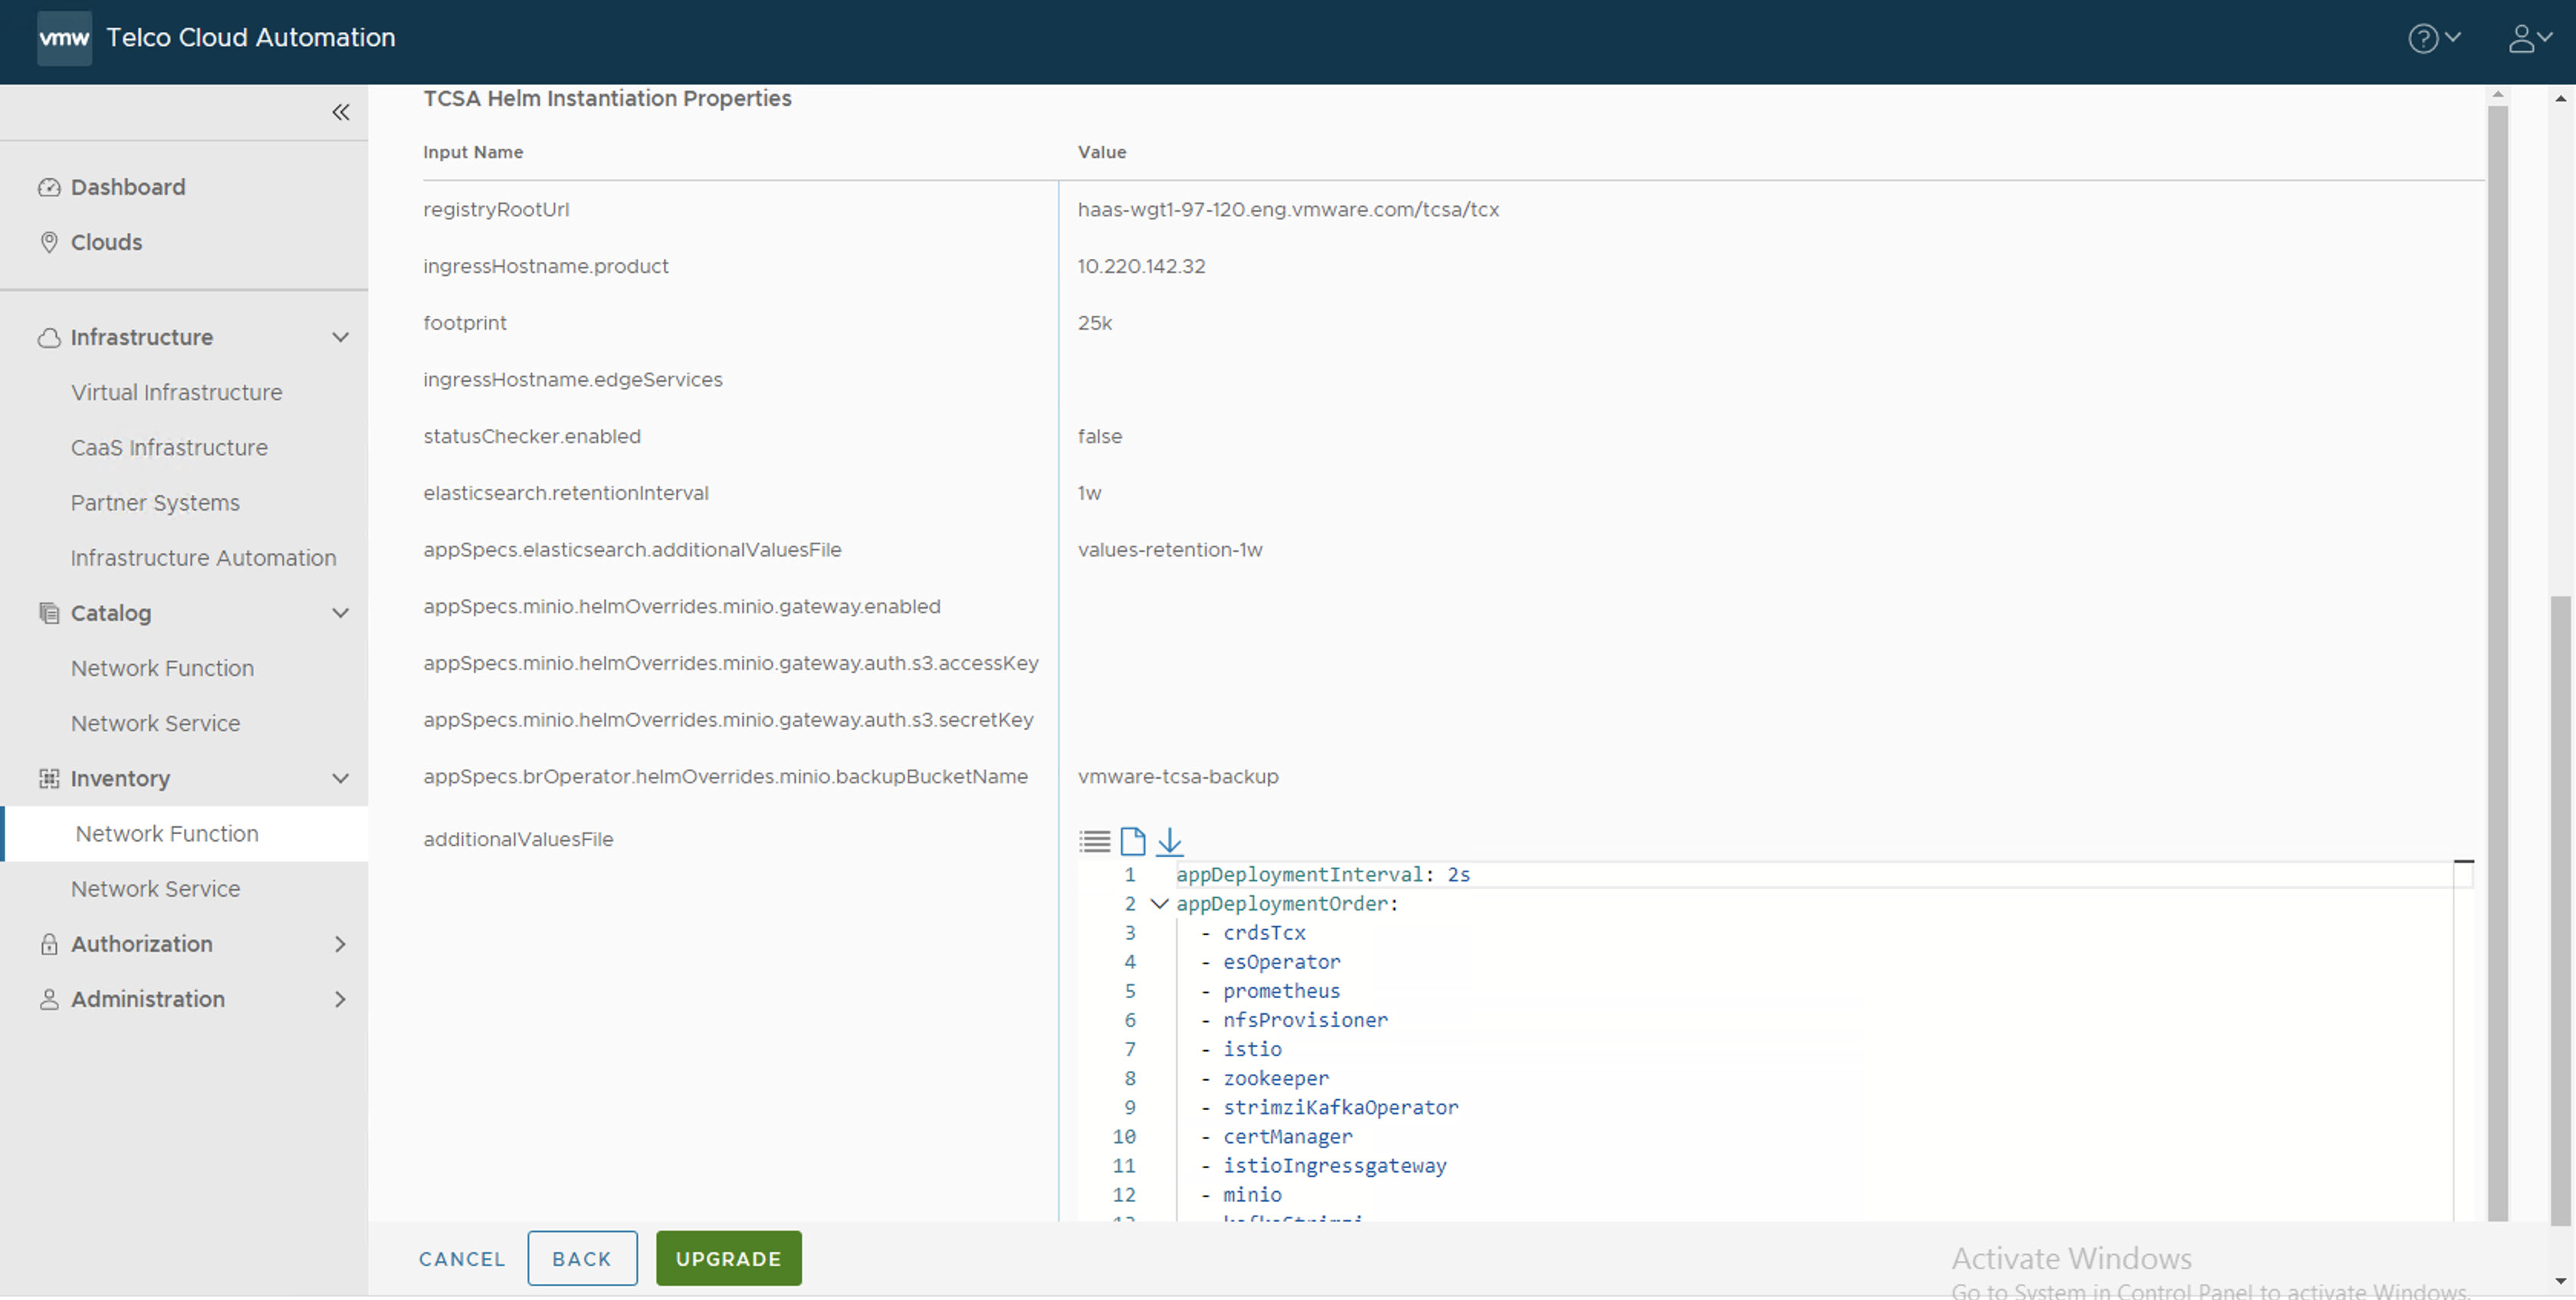
- In the Inputs section, update the following parameters:
- Set registryRootUrl to the same value as the base version.
- Set ingressHostname.product to the same value as the base version.
- Set footprint to the base footprint that you are deploying. For example, demo, 25 K, 50 K, 75 K, 100K, and so on.
- (Optional) Set ingressHostname.edgeServices to the IP address of the base version in case you want to access external Kafka.
- Set statusChecker.enabled to check the status of the
tcsaCNF. The default value istrue. Set the value asfalse.Note: The statusChecker.enabled parameter is disabled in VMware Telco Cloud Service Assurance because VMware Telco Cloud Automation does not support CNF timeouts. - Set elasticsearch.retentionInterval to the desired retention period of metrics in Elasticsearch.
Note: By default, the retention interval is 1w. The retention interval values can be 1w, 2w, 3w, 4w, 5w, 4w, or 7w.
- Set appSpecs.elasticsearch.additionalValuesFile to one of the values like values-retention-1w, values-retention-2w, values-retention-3w, values-retention-4w, values-retention-5w, values-retention-6w, or values-retention-7w.
Select the same retention period as elasticsearch.retentioninterval. For example, values-retention-1w for 1 week. This is an additional configuration required to properly configure the retention of metrics in Elasticsearch.Note: Setting the Elasticsearch retention parameters is optional. By default, the retention interval is 1w for elasticsearch.retentioninterval and values-retention-1w for appSpecs.elasticsearch.additionalValuesFile.If you want to store the backup and restore in a AWS cloud, you must enable the following parameters in the VMware Telco Cloud Automation UI:
- appSpecs.minio.helmOverrides.minio.gateway.enabled
- appSpecs.minio.helmOverrides.minio.gateway.auth.s3.accessKey
- appSpecs.minio.helmOverrides.minio.gateway.auth.s3.secretKey
- appSpecs.brOperator.helmOverrides.minio.backupBucketName
- For additionalValuesFiles, select the older merged_yamls.yaml file that you have created from the base VMware Telco Cloud Service Assurance bundle.
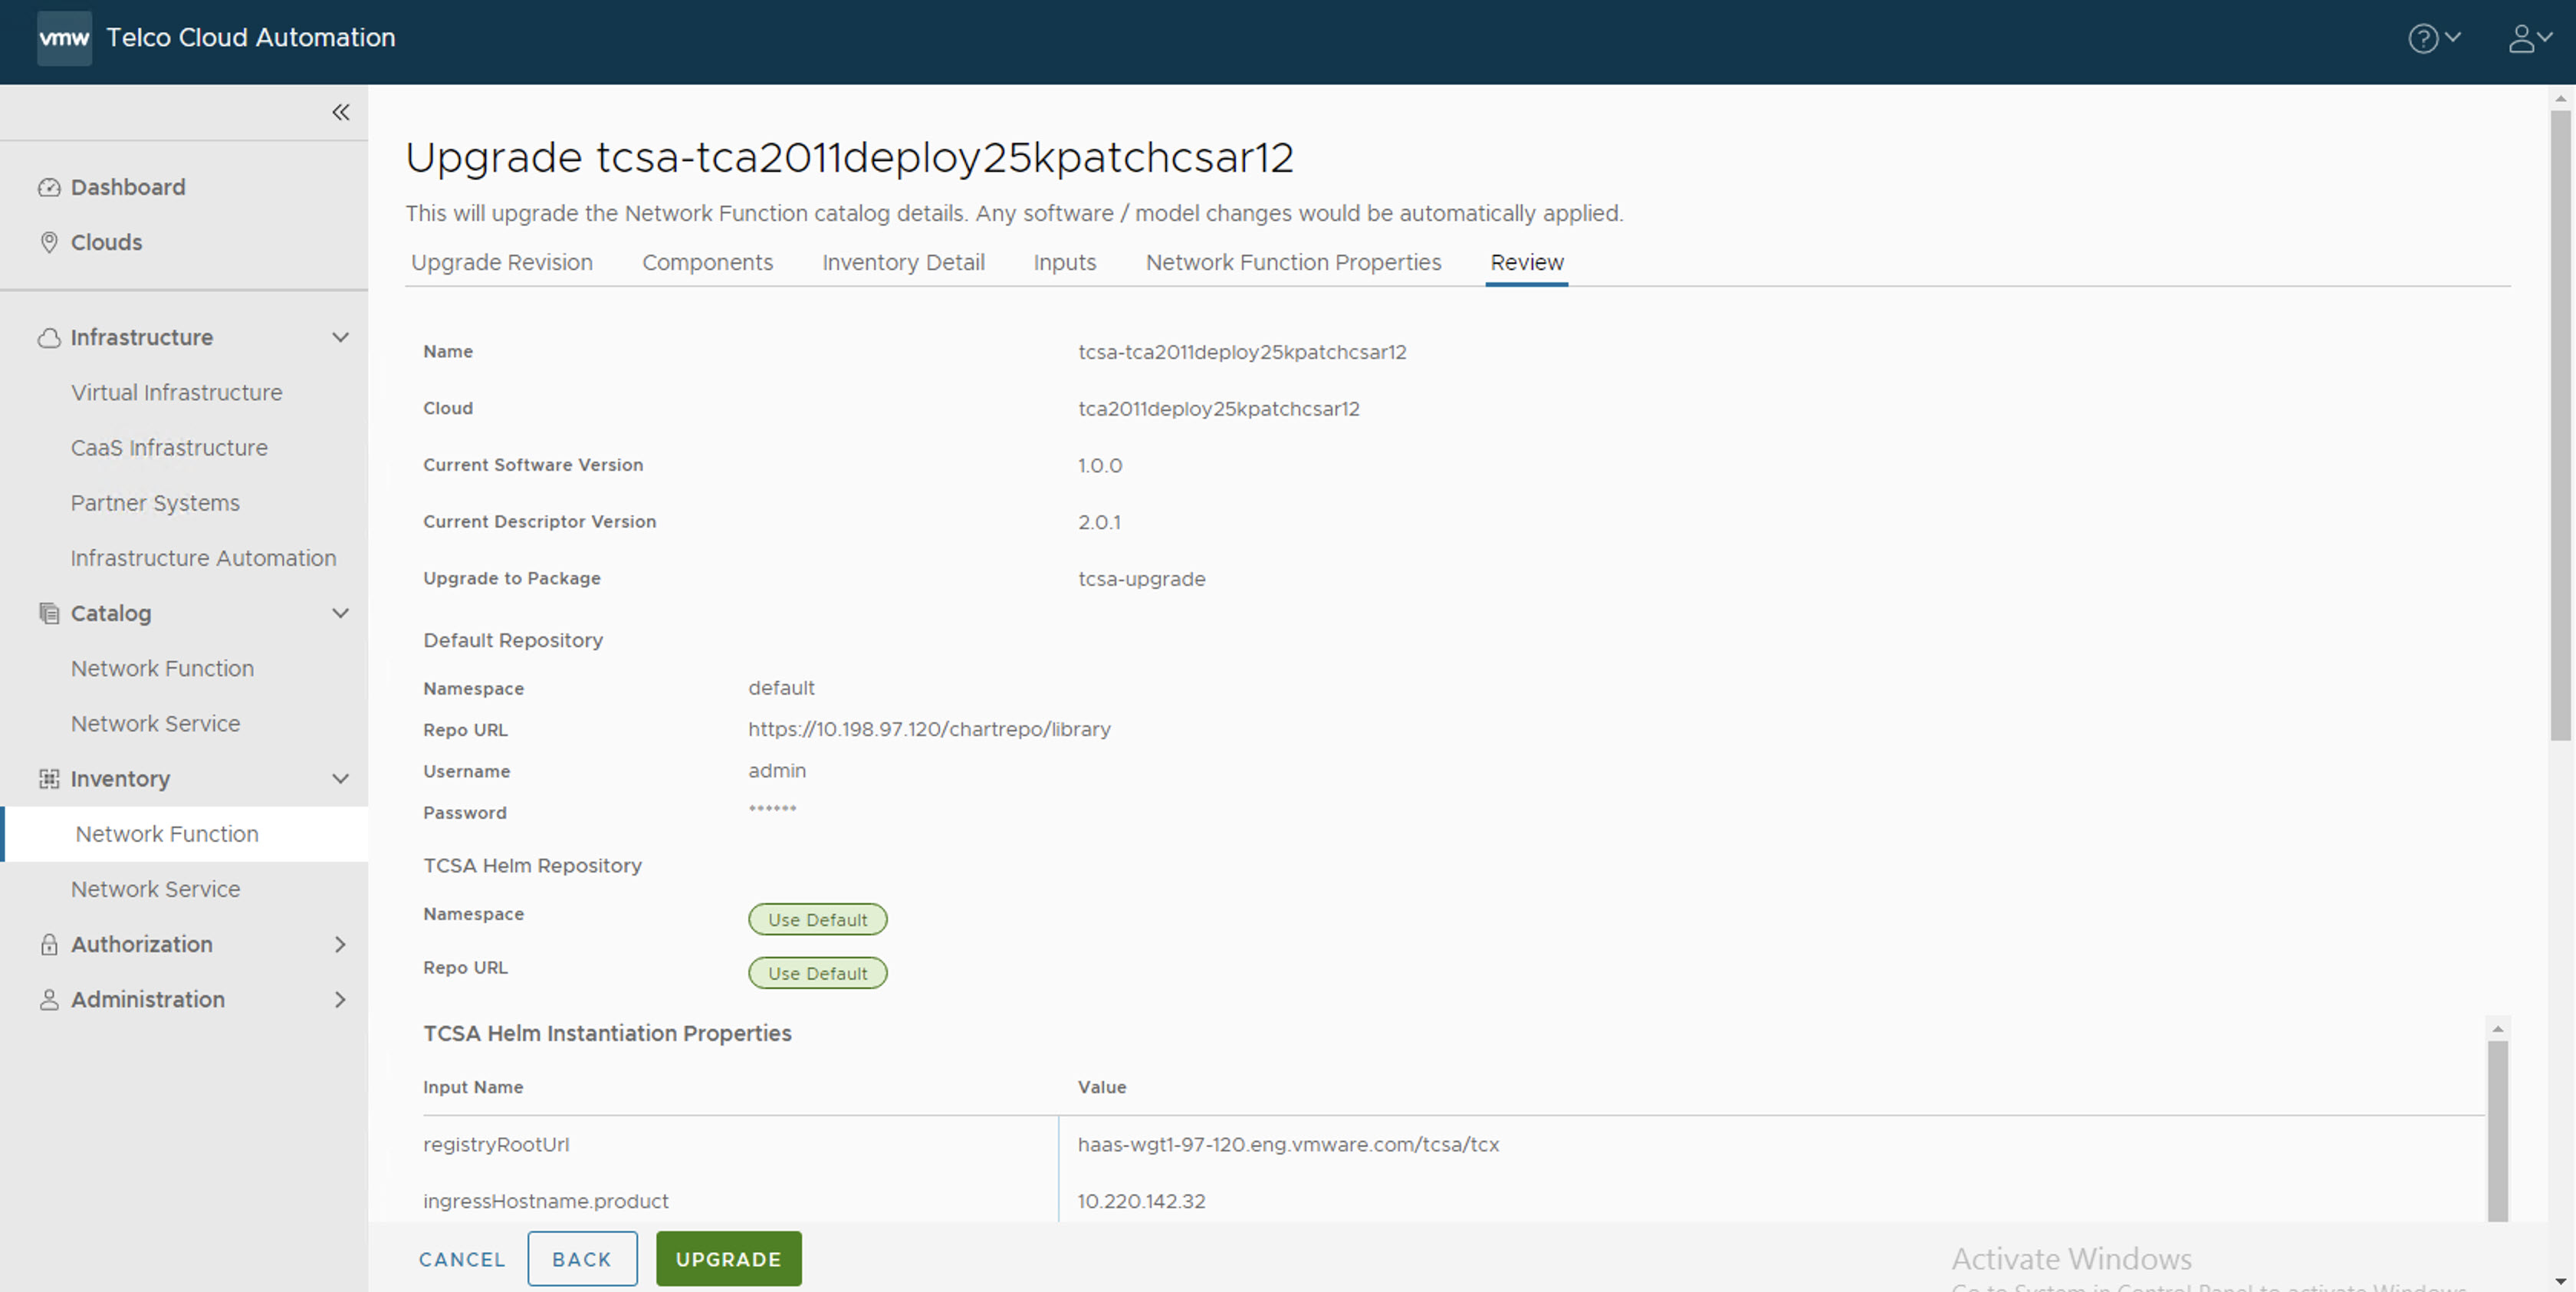
- In the Review section, click Upgrade.
After the upgrade is successful, you can see the CNF rolled back to the original state. For example, thetcsaCNF.root [ ~/tcx-deployer/scripts ]# helm list WARNING: Kubernetes configuration file is group-readable. This is insecure. Location: /root/<your-kubeconfig-file> WARNING: Kubernetes configuration file is world-readable. This is insecure. Location: /root/<your-kubeconfig-file> NAME NAMESPACE REVISION UPDATED STATUS CHART APP VERSION admin-opera-779c2-l61eo default 1 2022-11-16 23:34:24.866798654 +0000 UTC deployed admin-operator-3.0.0 3.0.0 tcsa-210-fd171-vazz4 default 4 2022-11-23 09:32:21.931494949 +0000 UTC deployed tcsa-2.1.0 0.0.0 tcsa-init-2-9b548-nokze default 1 2022-11-16 10:46:05.325296712 +0000 UTC deployed tcsa-init-2.1.0 1.0.0 1.0.0
Manually check the VMware Telco Cloud Service Assurance patch rollback status by running the following command from deployment VM:
root [ ~/tcx-deployer/scripts ]# kubectl get tcxproduct
 OR
root [ ~/tcx-deployer/scripts ]# kubectl get apps
For all the apps, the reconcilation status must be successful.
Note: After the patch is deployed, you can view the patch versions in the
About page of VMware Telco Cloud Service Assurance UI.
