In this section, you can find information on how to upgrade the tcsa CNF.
Procedure
- Launch VMware Telco Cloud Automation and navigate to Inventory > Network Function.
- To upgrade, select the base version of the
tcsaCNF and click against the vertical ellipsis (⋮) and click Upgrade. - In the Upgrade Revision section, select the version of the
tcsaCNF that you want to upgrade to and click Next.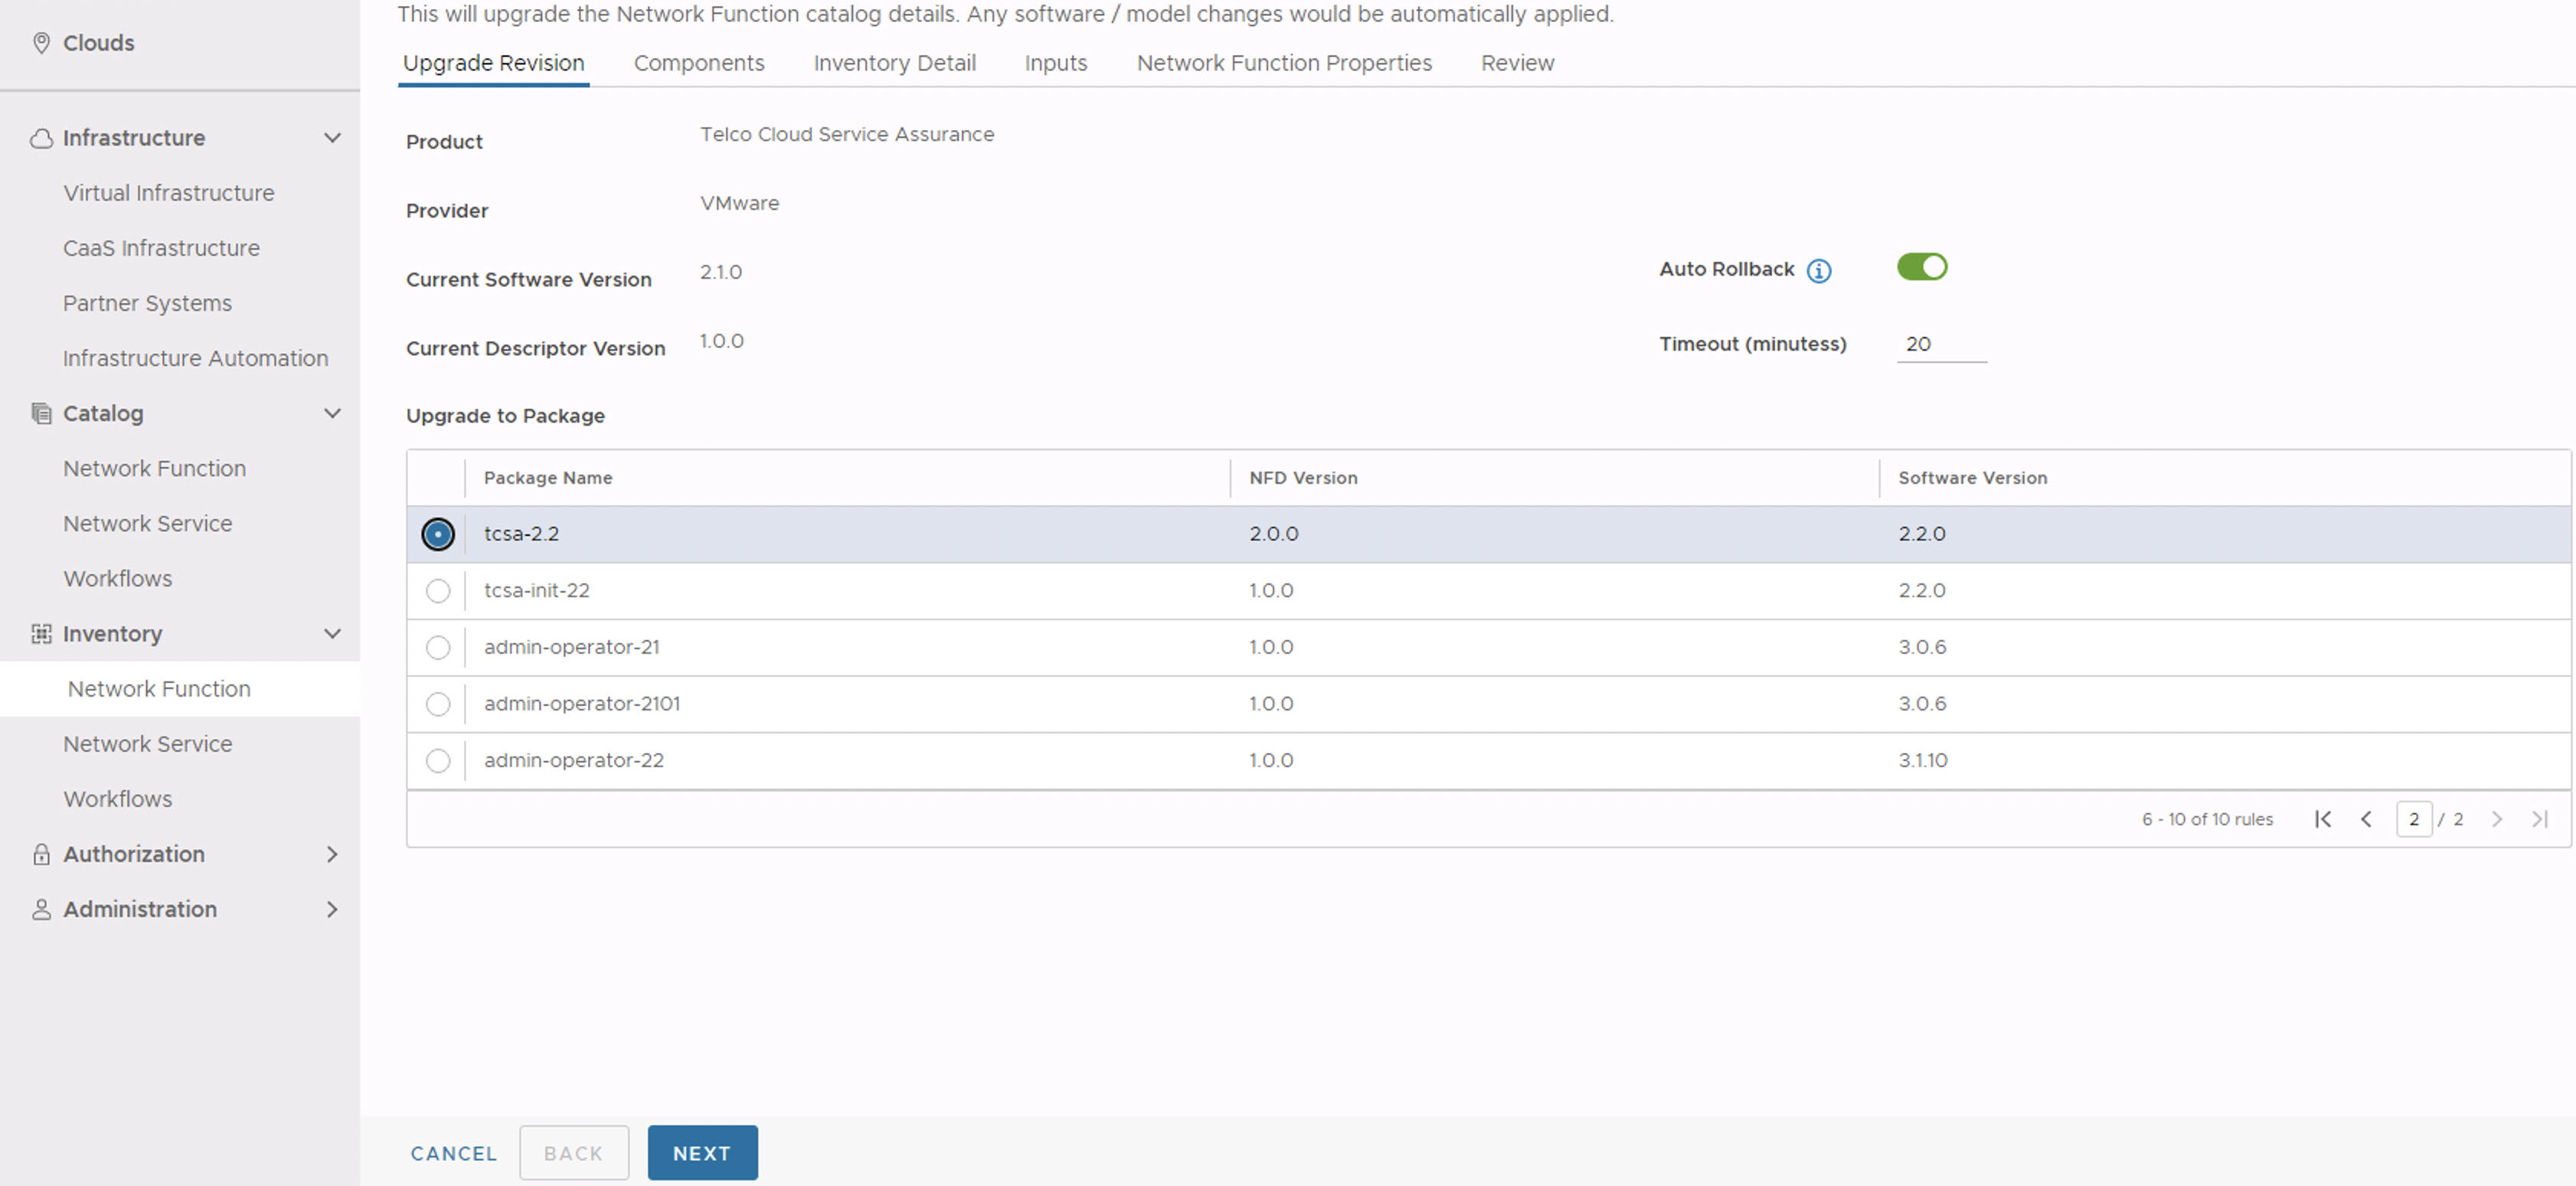
- In the Components section, click Next.
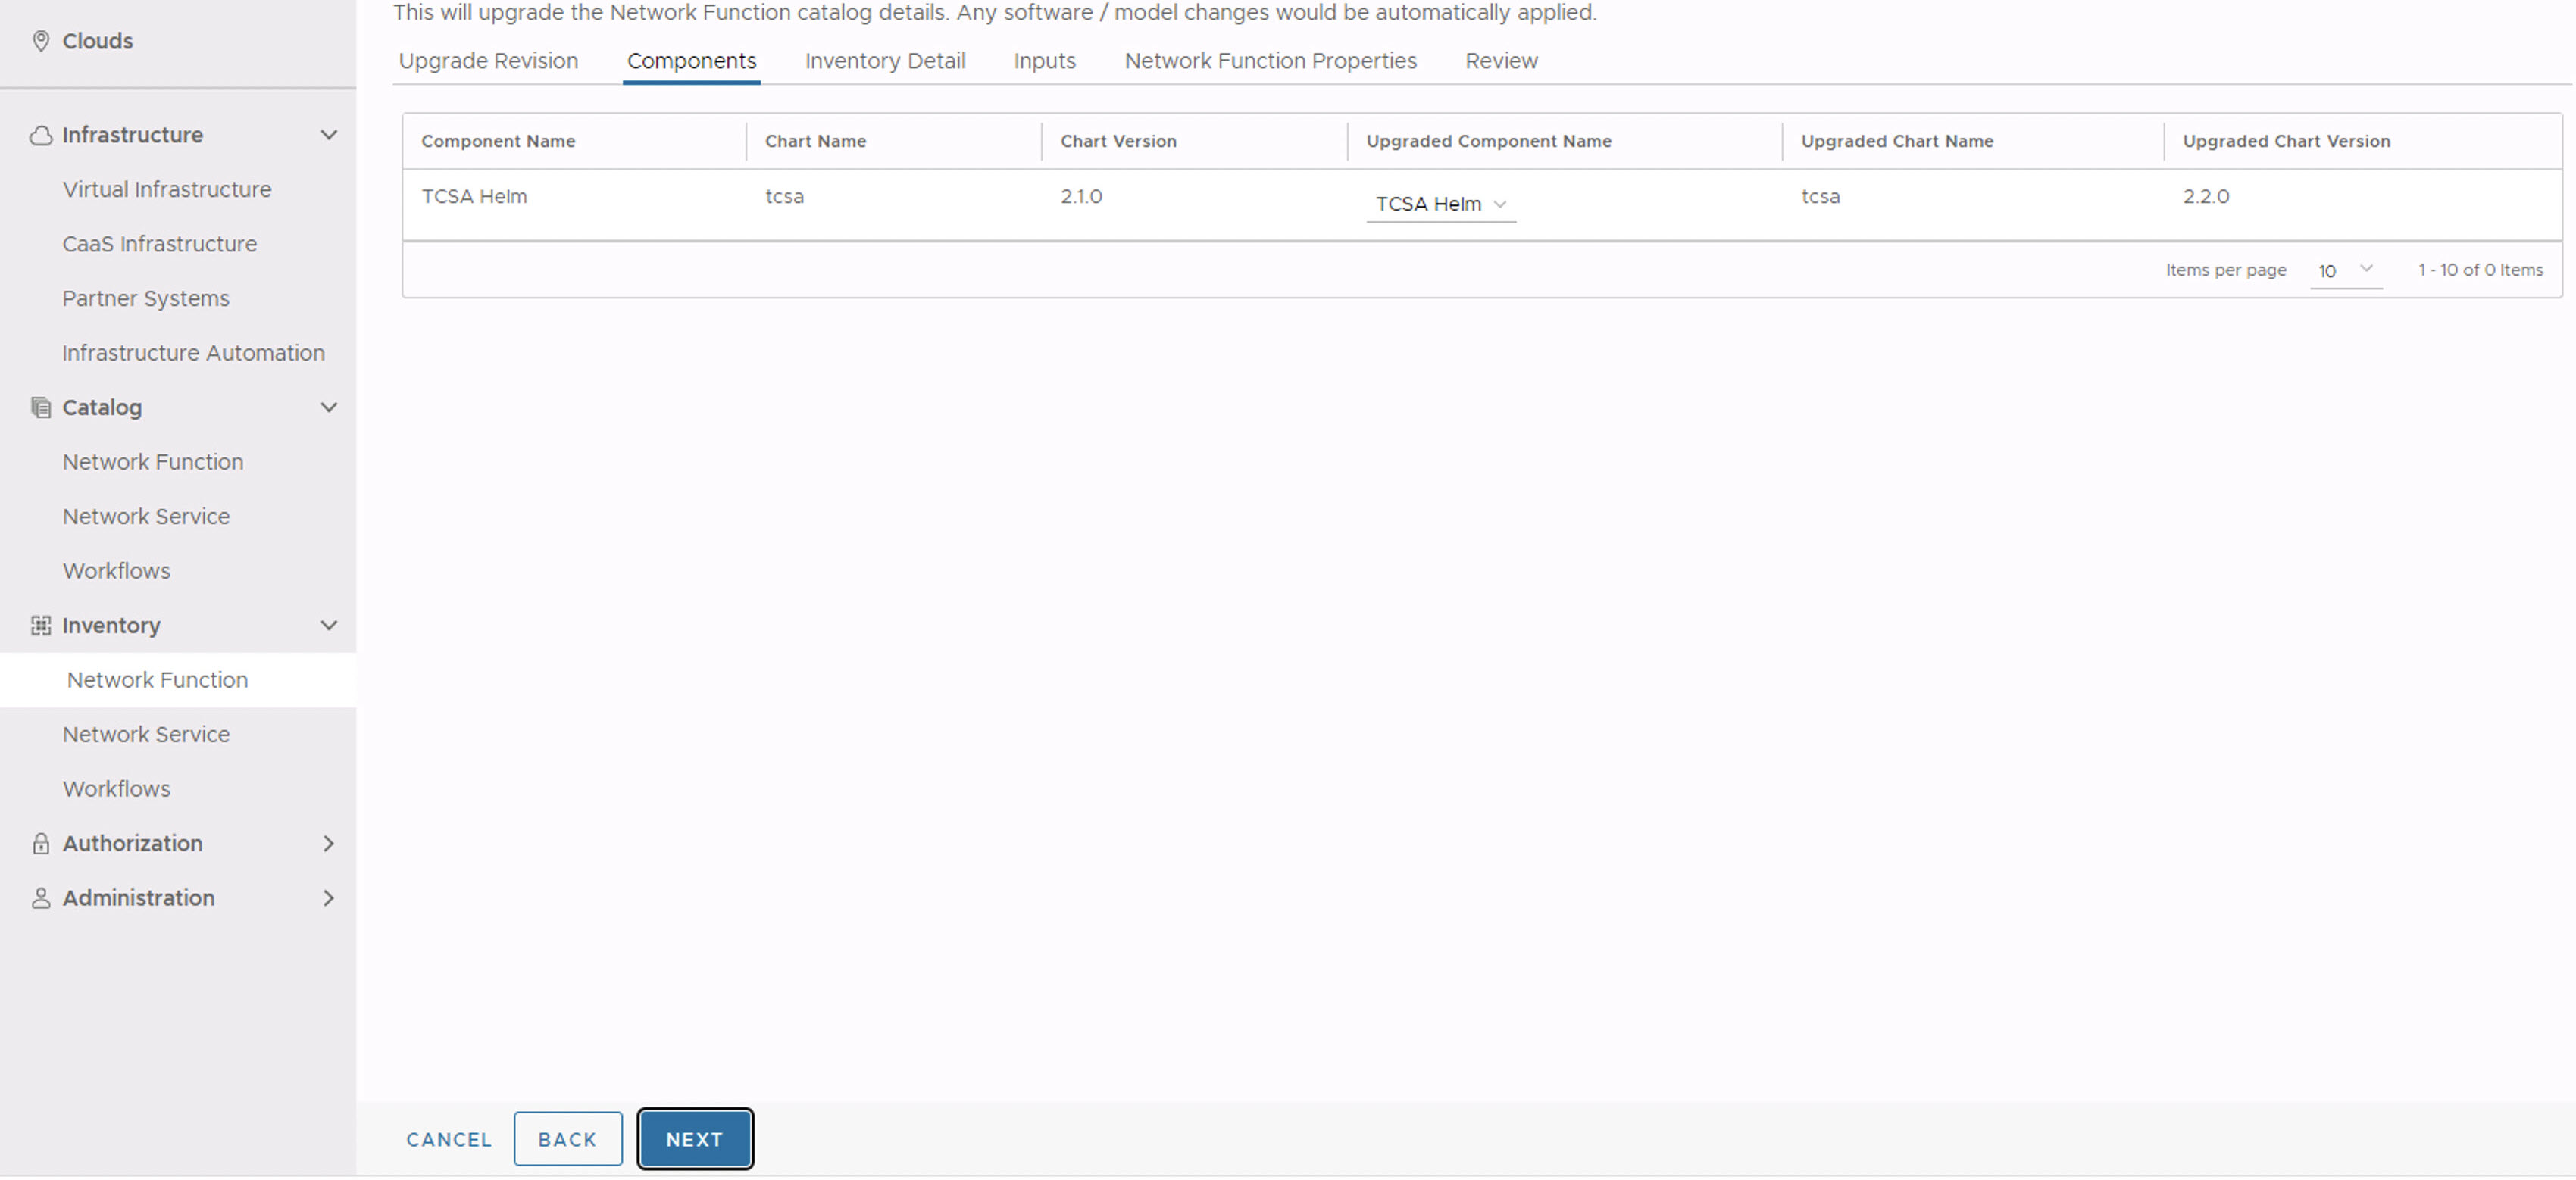
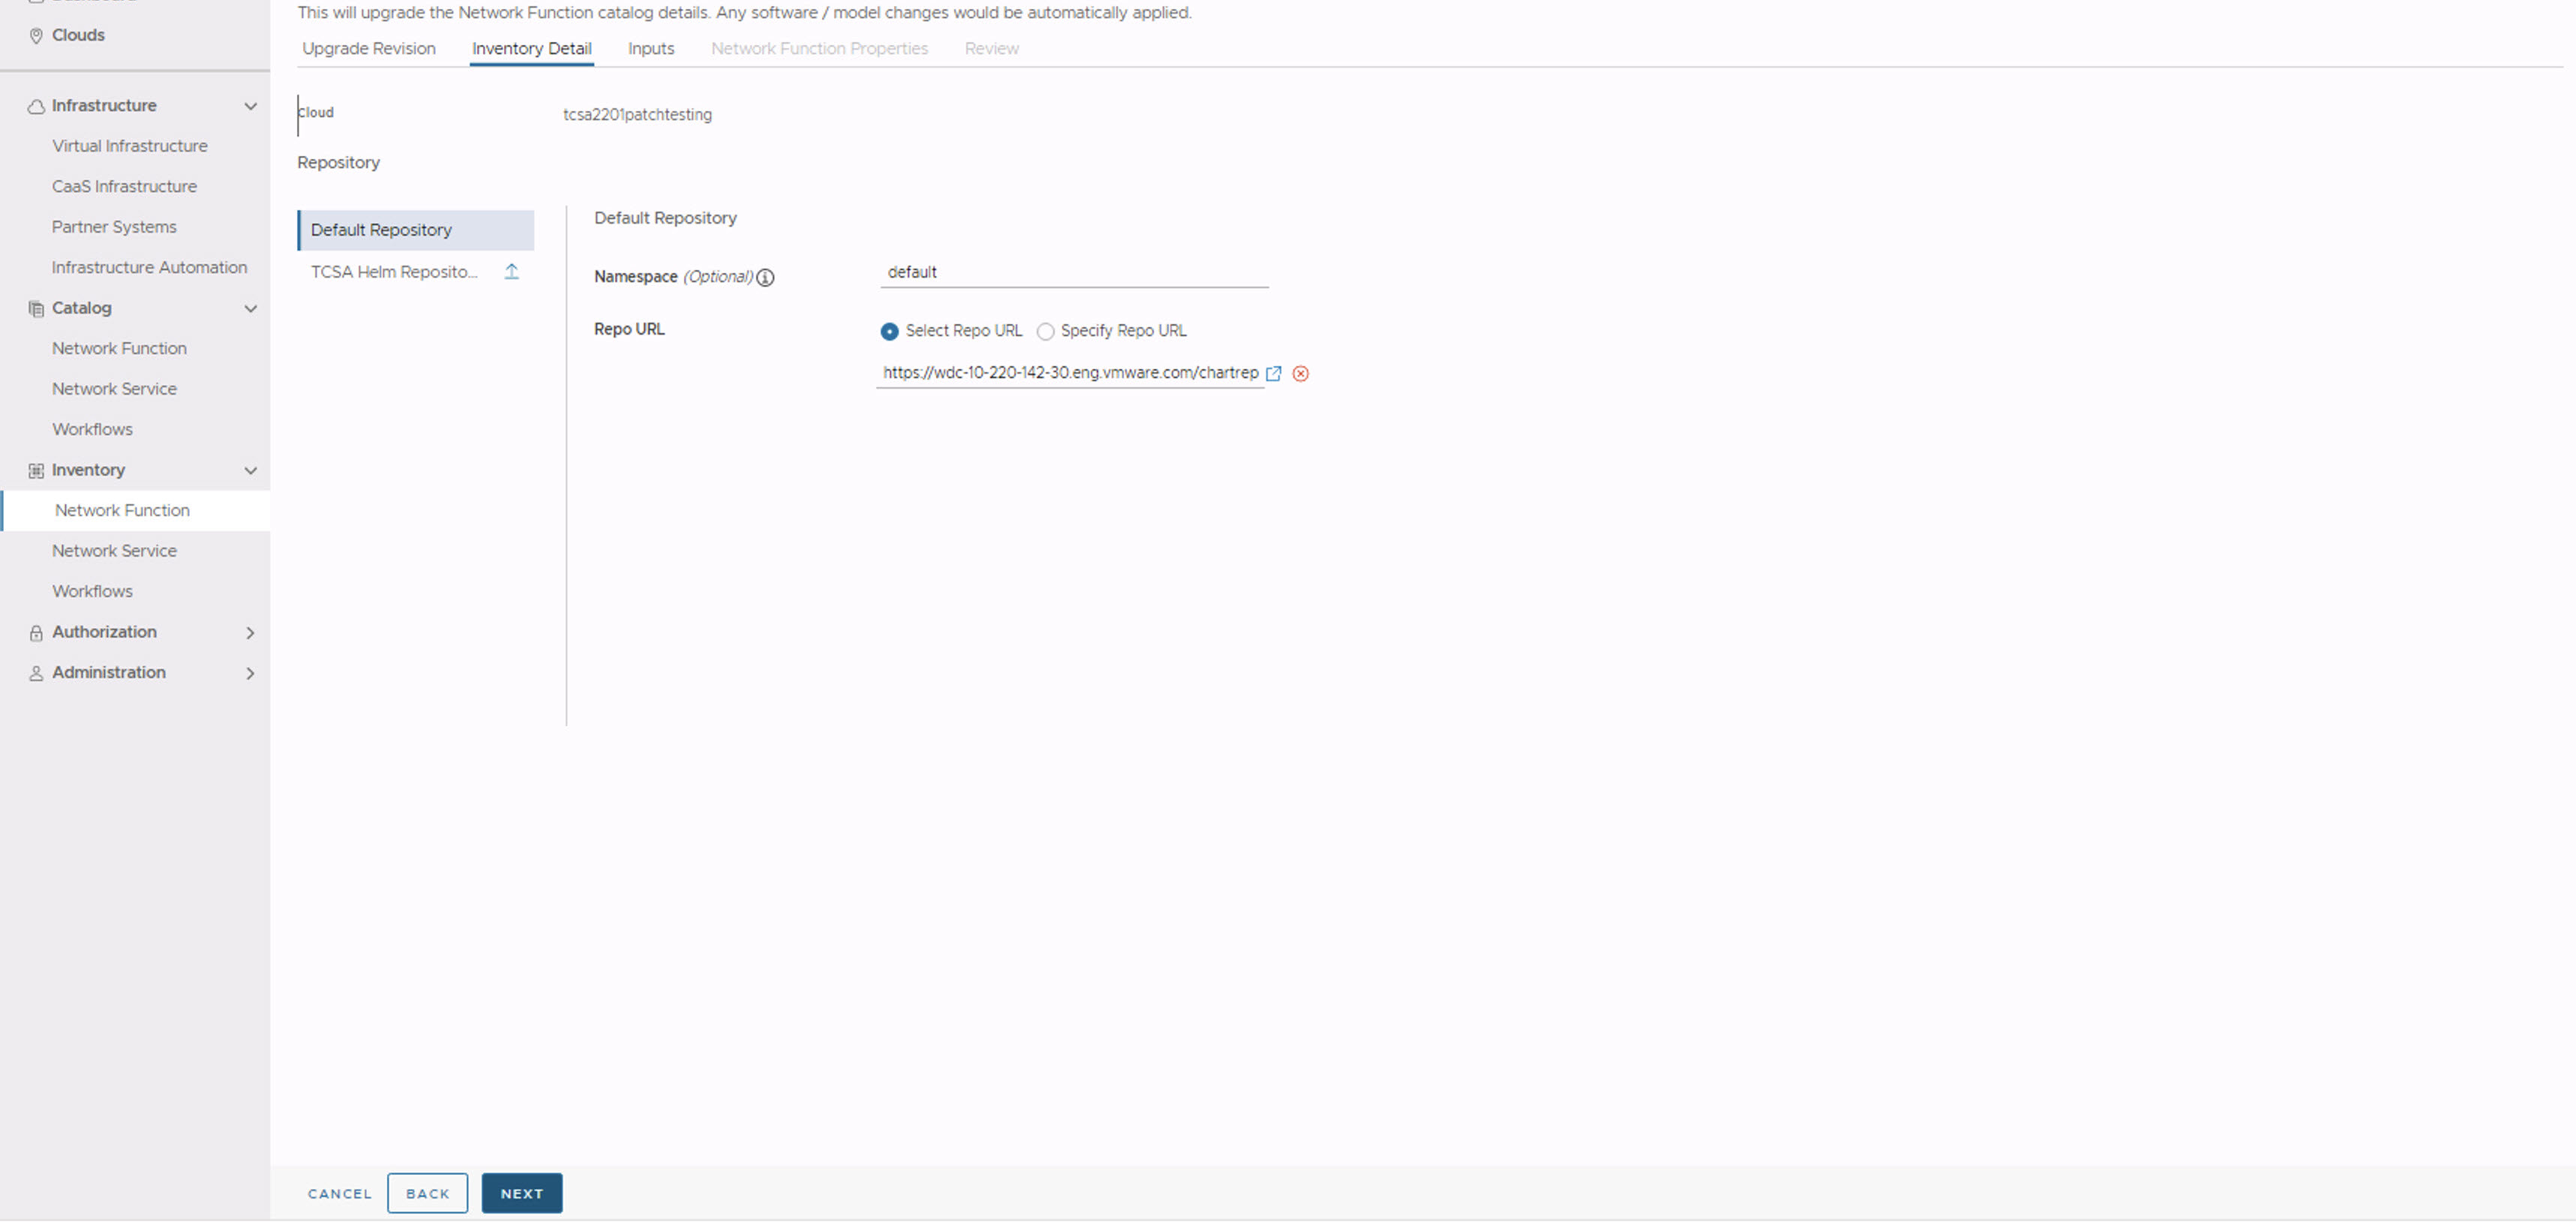
- In the Inventory Detail section, set the Namespace to default and select the default library chart repository, that is, the https://<harbor-registry-fqdn>/chartrepo/library endpoint of the associated registry, and click Next.
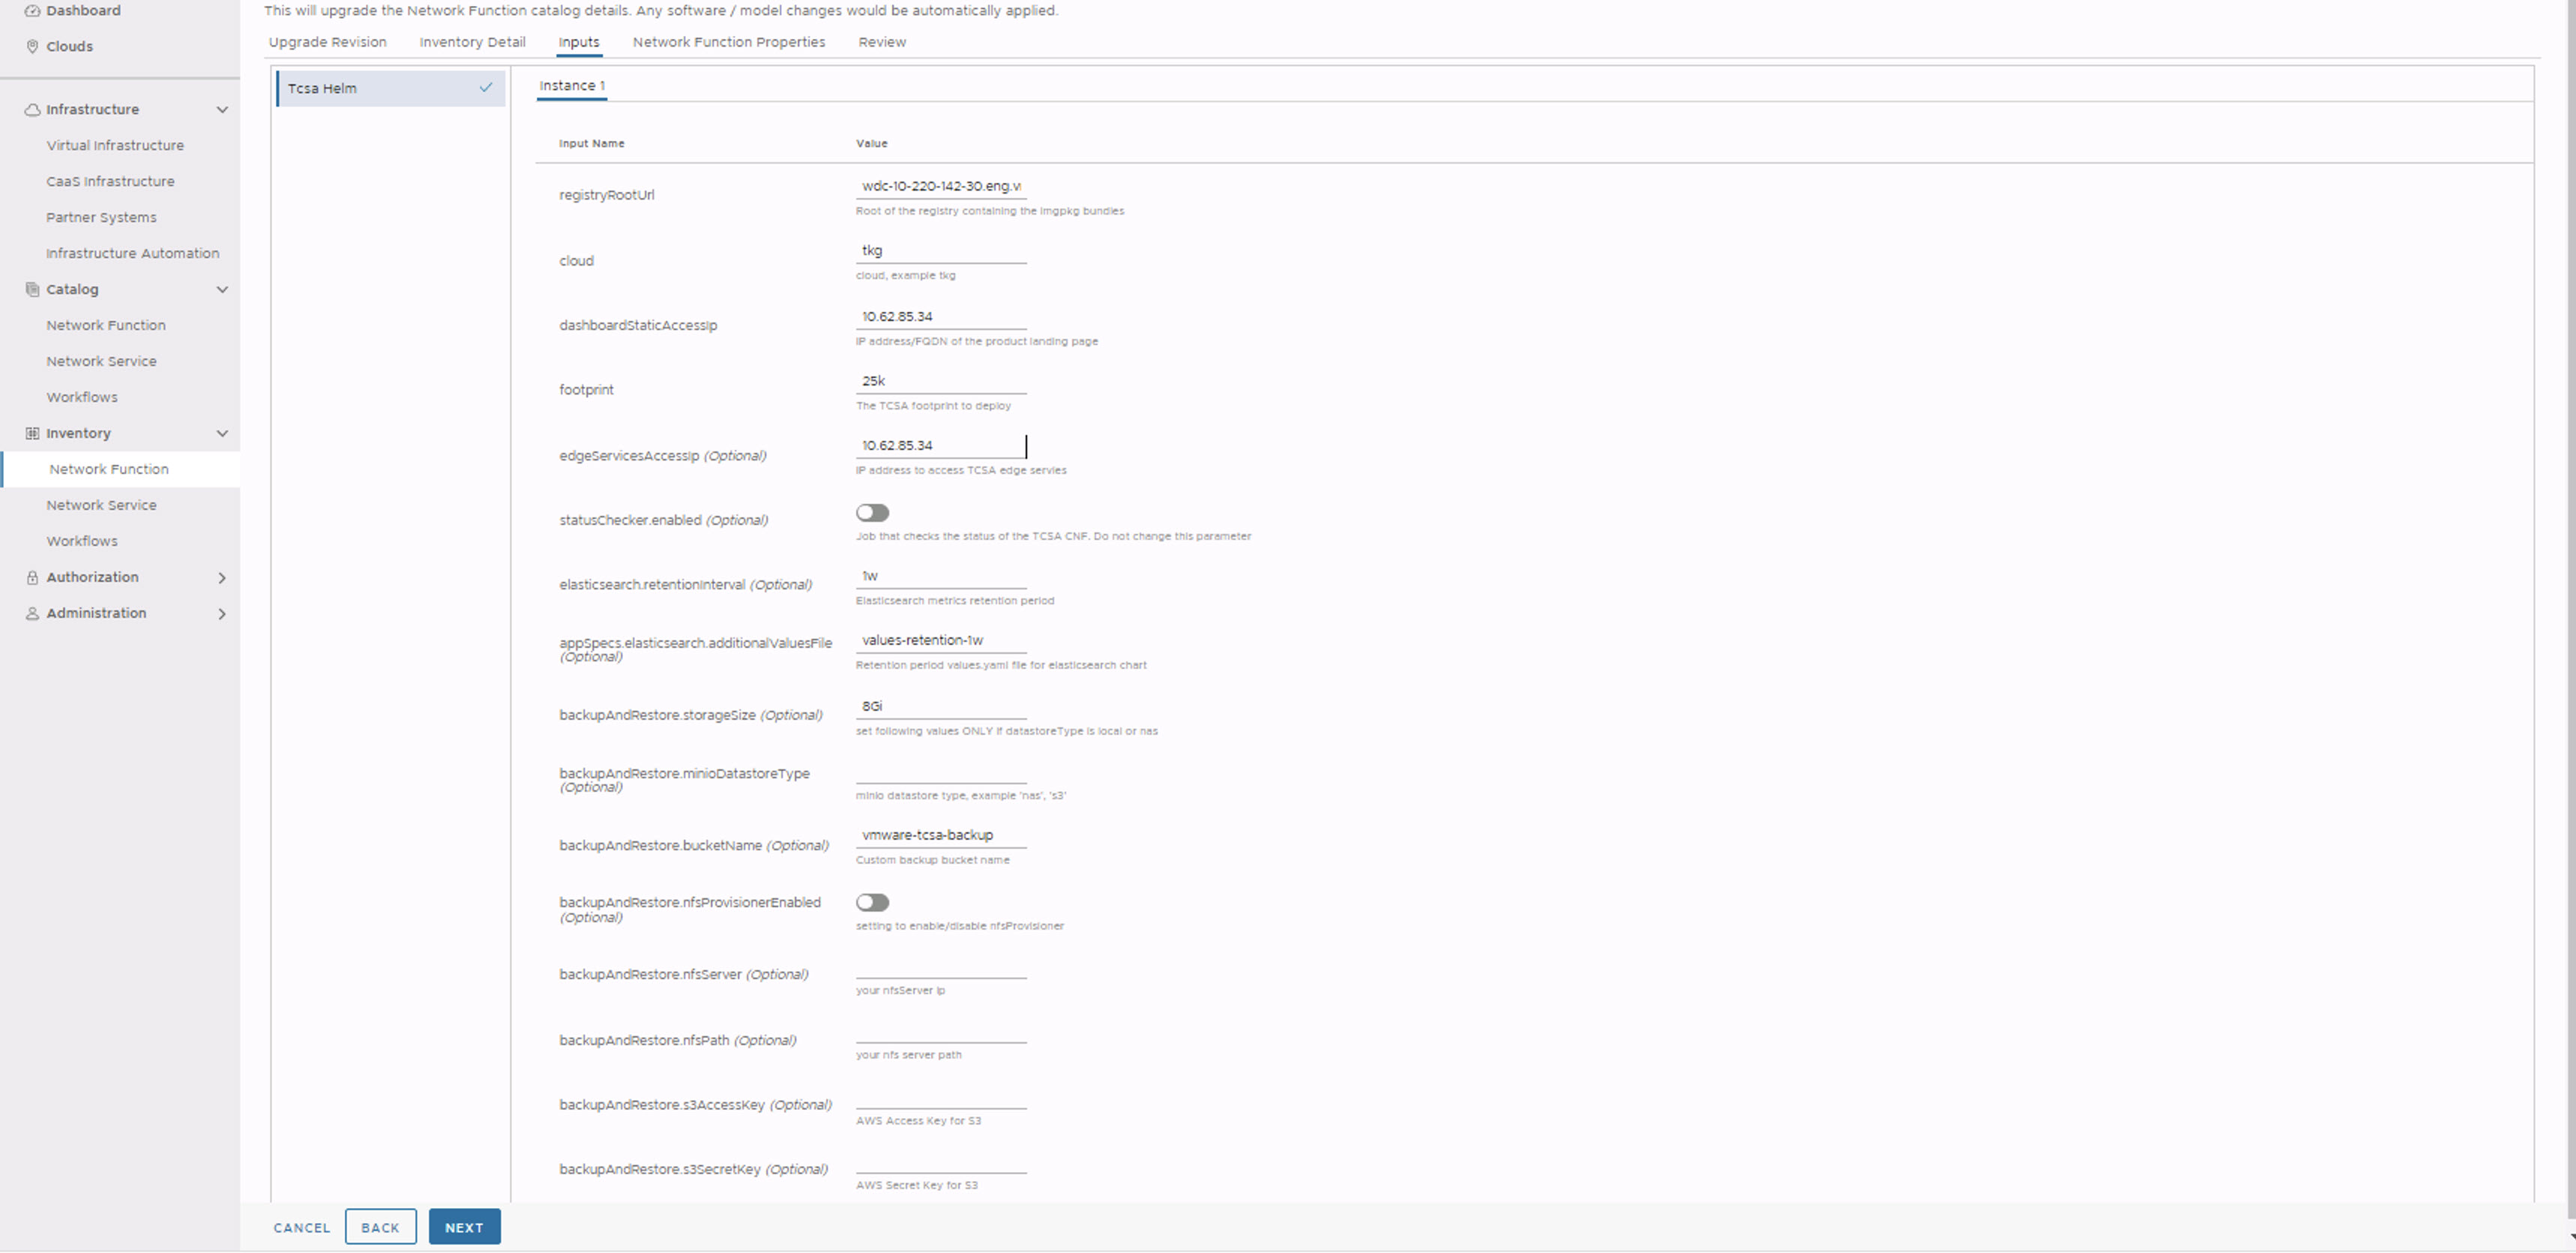
- In the Inputs section, update the following parameters:
- Set registryRootUrl to the regsitry URL used while pushing the artifacts.
- Set dashboardStaticAccessIp to the same value as specified during the earlier VMware Telco Cloud Service Assurance deployment.
- Set footprint same as the base version. For example, demo, 25k, 50k, 75k, 100k, and so on.
- (Optional) Set edgeServicesAccessIp to the same value as specified during the earlier VMware Telco Cloud Service Assurance deployment.
- Set statusChecker.enabled to disabled state if it is enabled. The default value is
disabled.Note: The statusChecker.enabled parameter is disabled in VMware Telco Cloud Service Assurance because VMware Telco Cloud Automation does not support CNF timeouts. - Set elasticsearch.retentionInterval to the same value as specified during the earlier VMware Telco Cloud Service Assurance deployment.
- Set appSpecs.elasticsearch.additionalValuesFile to the same value as specified during the earlier VMware Telco Cloud Service Assurance deployment.
- All the Back and Restore values must be same as specified during the earlier VMware Telco Cloud Service Assurance deployment.
- Click Next.
- The Network Function Properties page appears. Click Next.
- In the Review section, click Upgrade.
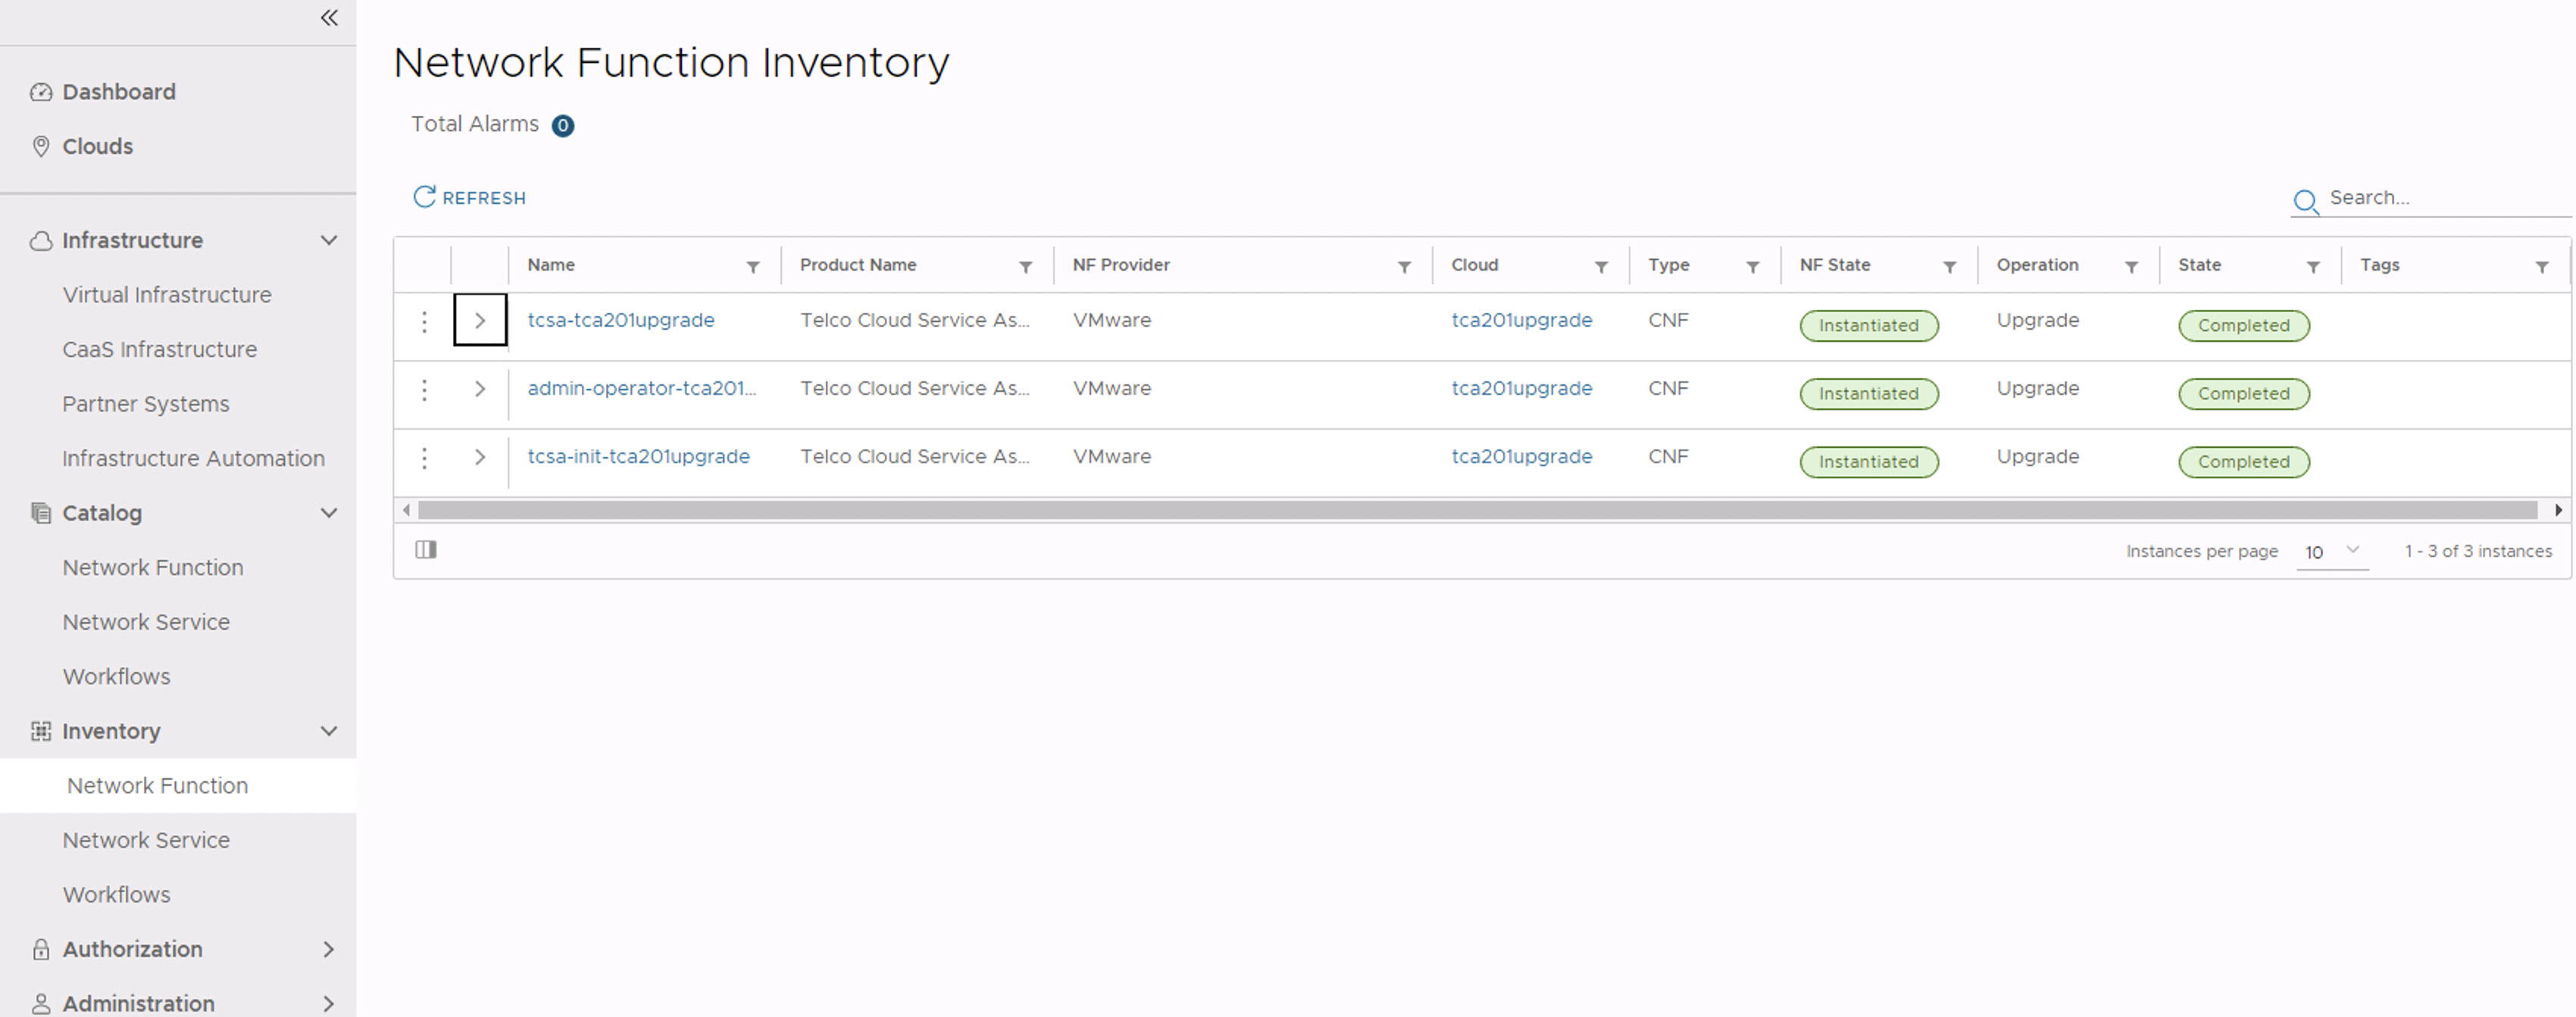
- After the upgrade is complete, you can see the state as completed as shown in the following screenshot.
 Manually check the VMware Telco Cloud Service Assurance deployment status by running the following command from deployment VM.
root [ ~/upgrade/tcx-deployer/scripts ]# kubectl get tcxproduct
 OR
root [ ~/upgrade/tcx-deployer/scripts ]# kubectl get apps
For all the apps, the reconciliation status must be successful.root [ ~/upgrade/tcx-deployer/scripts ]# kubectl get tcxproduct NAME STATUS READY MESSAGE AGE tcsa updateCompleted True All App CRs reconciled successfully 30h
Note: After successful deployment, you can launch the VMware Telco Cloud Service Assurance UI. For more information, see Accessing VMware Telco Cloud Service Assurance UI topic. Ensure that the About page in VMware Telco Cloud Service Assurance UI reflects the upgraded version of VMware Telco Cloud Service Assurance.If all the apps are not reconciled, the deployment fails. For more information, see VMware Telco Cloud Automation Installation Issue in the VMware Telco Cloud Service Assurance Troubleshooting Guide.
After the upgrade, perform the actions listed in Post VMware Telco Cloud Service Assurance Upgrade topic.